May 17, 2024
Review RecipeFried Cheese Balls
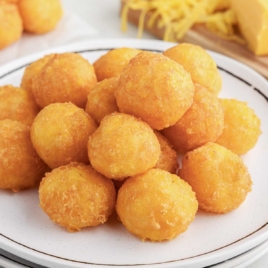
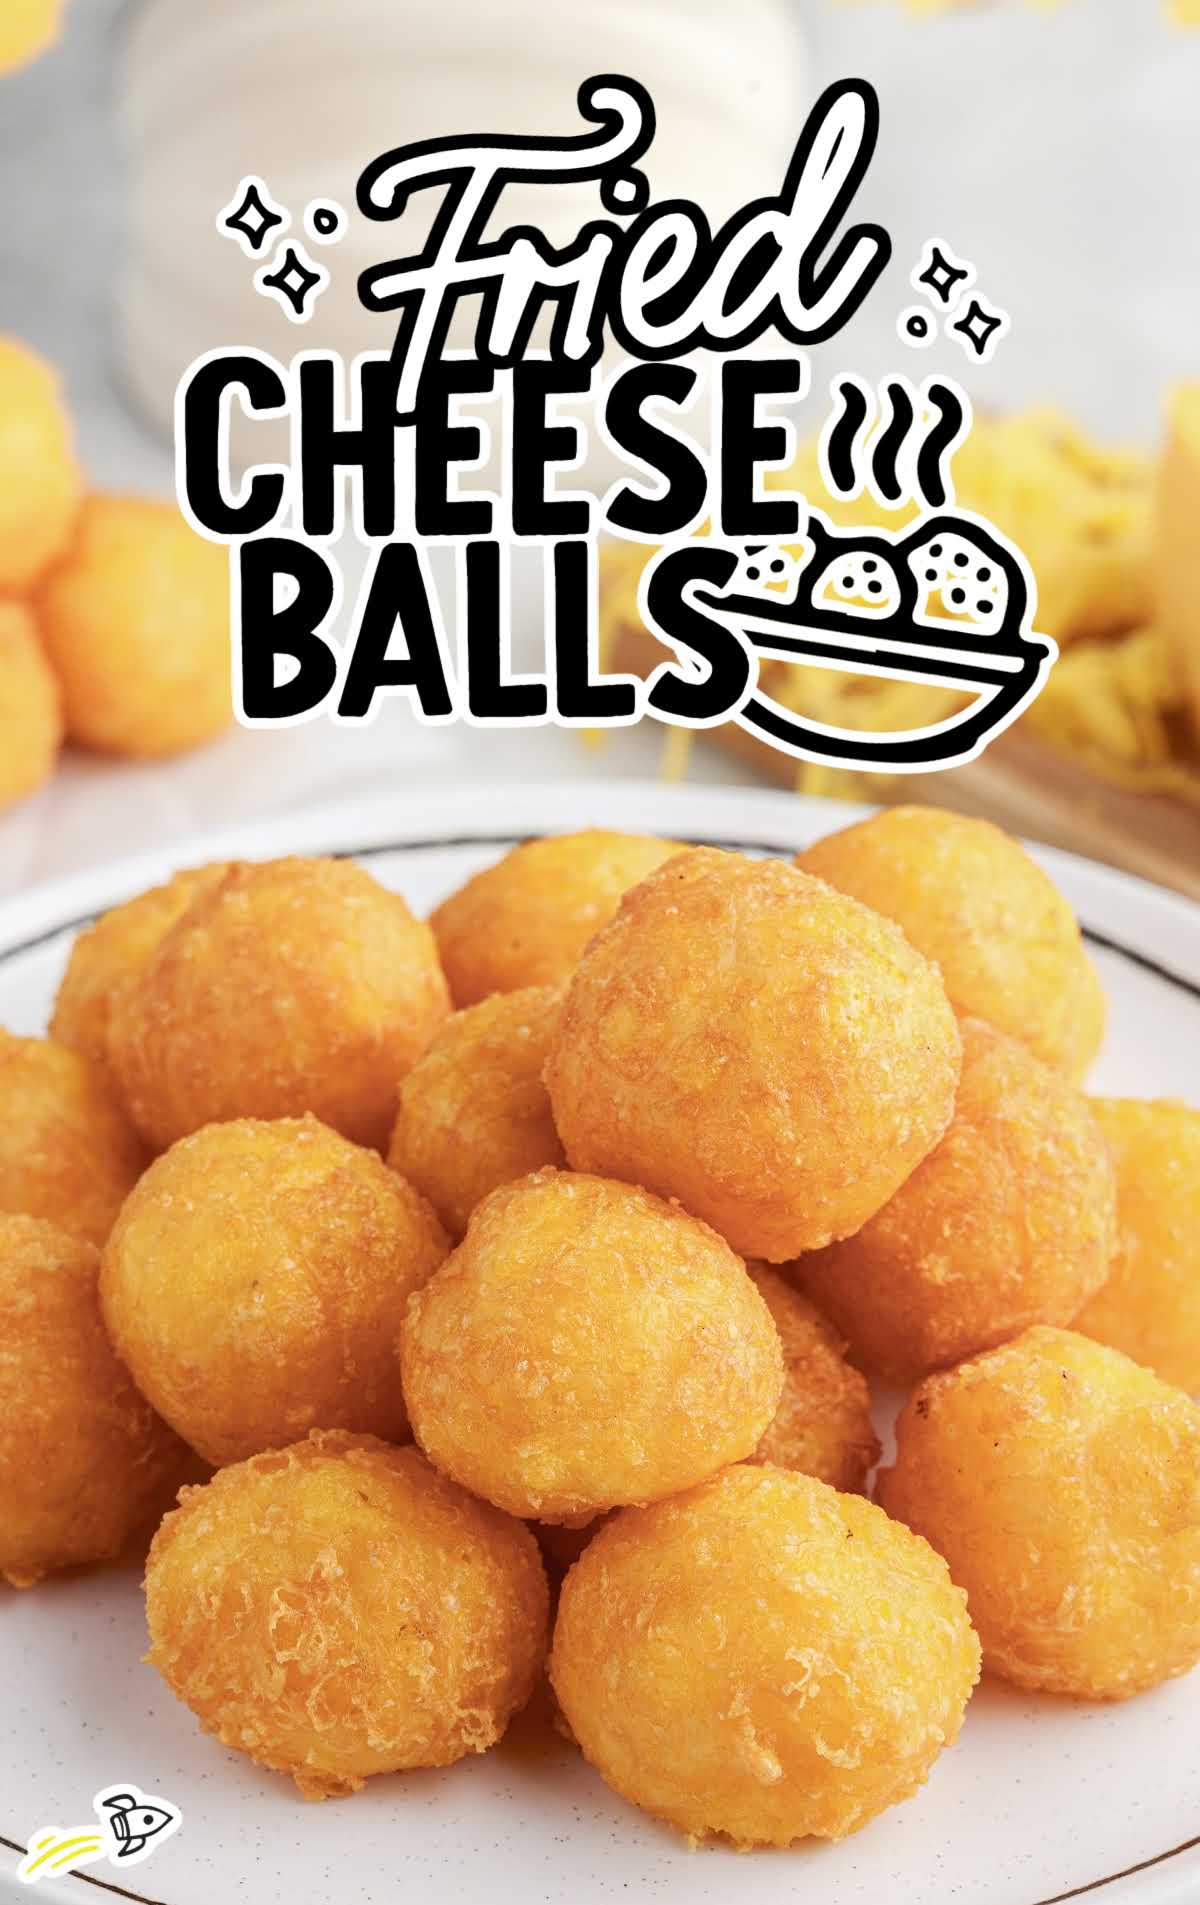
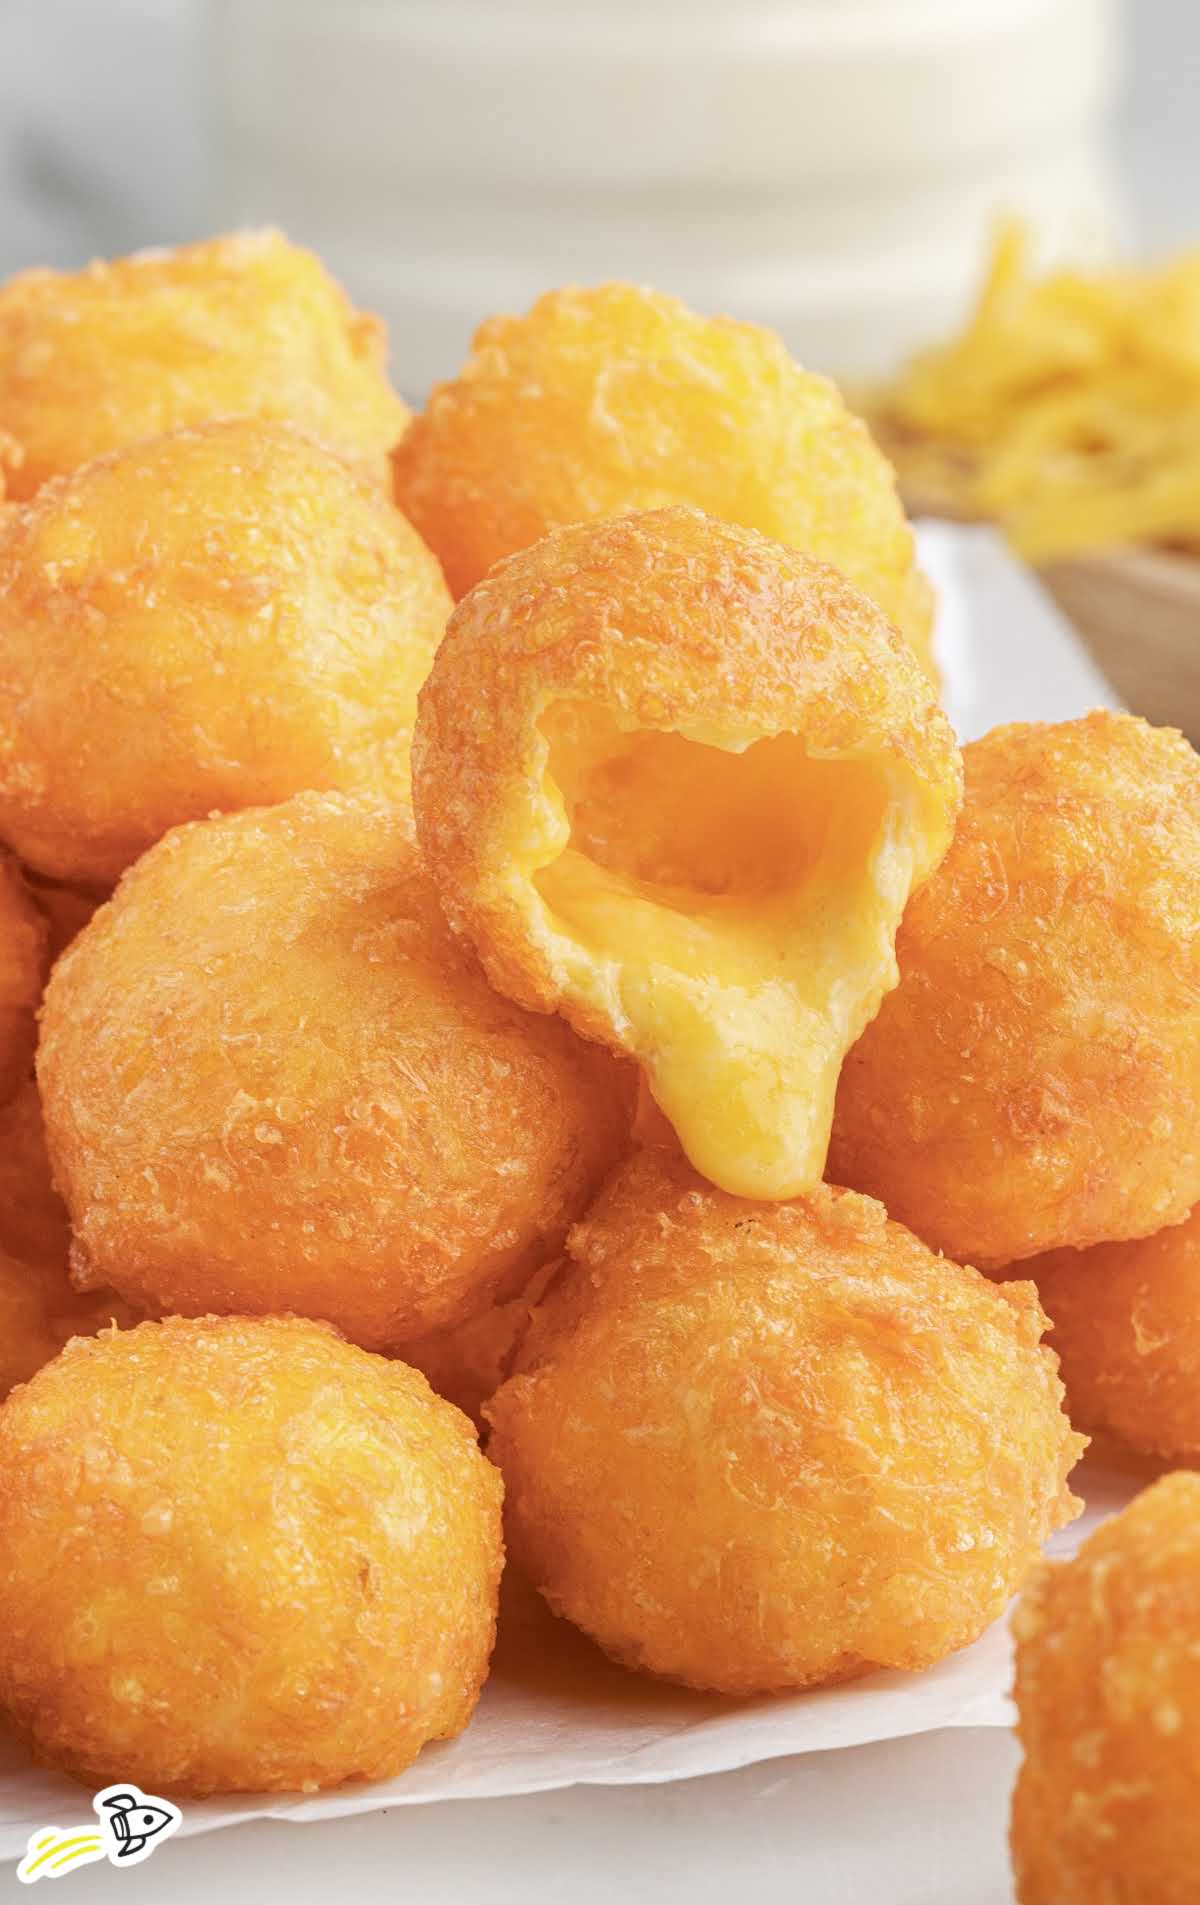
Get ready to enjoy crispy Fried Cheese Balls, with a golden-brown exterior and a molten cheese center. Quick and easy to make, this recipe is perfect for gatherings or as a tasty snack anytime.
Jump to Recipe

Table of Contents
- Fried Cheese Balls Ingredients
- Deep Fried Cheese Balls Substitutions and Additions
- How To Make Fried Cheese Balls
- How To Serve Fried Cheese Balls
- When To Serve Deep Fried Cheese Balls
- How To Store Leftover Fried Cheese Balls
- Why These Fried Cheese Balls Are The Best
- Frequently Asked Questions
- More Recipes You’ll Love
- JUMP TO RECIPE
- More Recipes You’ll Love
- Even More Recipes You’ll Love
Fried cheese balls are an addictive, ooey-gooey snack that is perfect for any occasion. Whether you’re having a party or just looking for something to munch on during the day, these breaded and fried, melty, cheesy treats are sure to please.
Fried Cheese Balls Ingredients
Fried cheese balls are a savory snack that we just can’t get enough of. They have a crunchy exterior that gives way to an ooey, gooey cheesy center.
The cheese is melted and flavorful, and the texture is creamy and irresistible. When you sink your teeth into these delicious treats, you’ll get a burst of flavor in every bite.
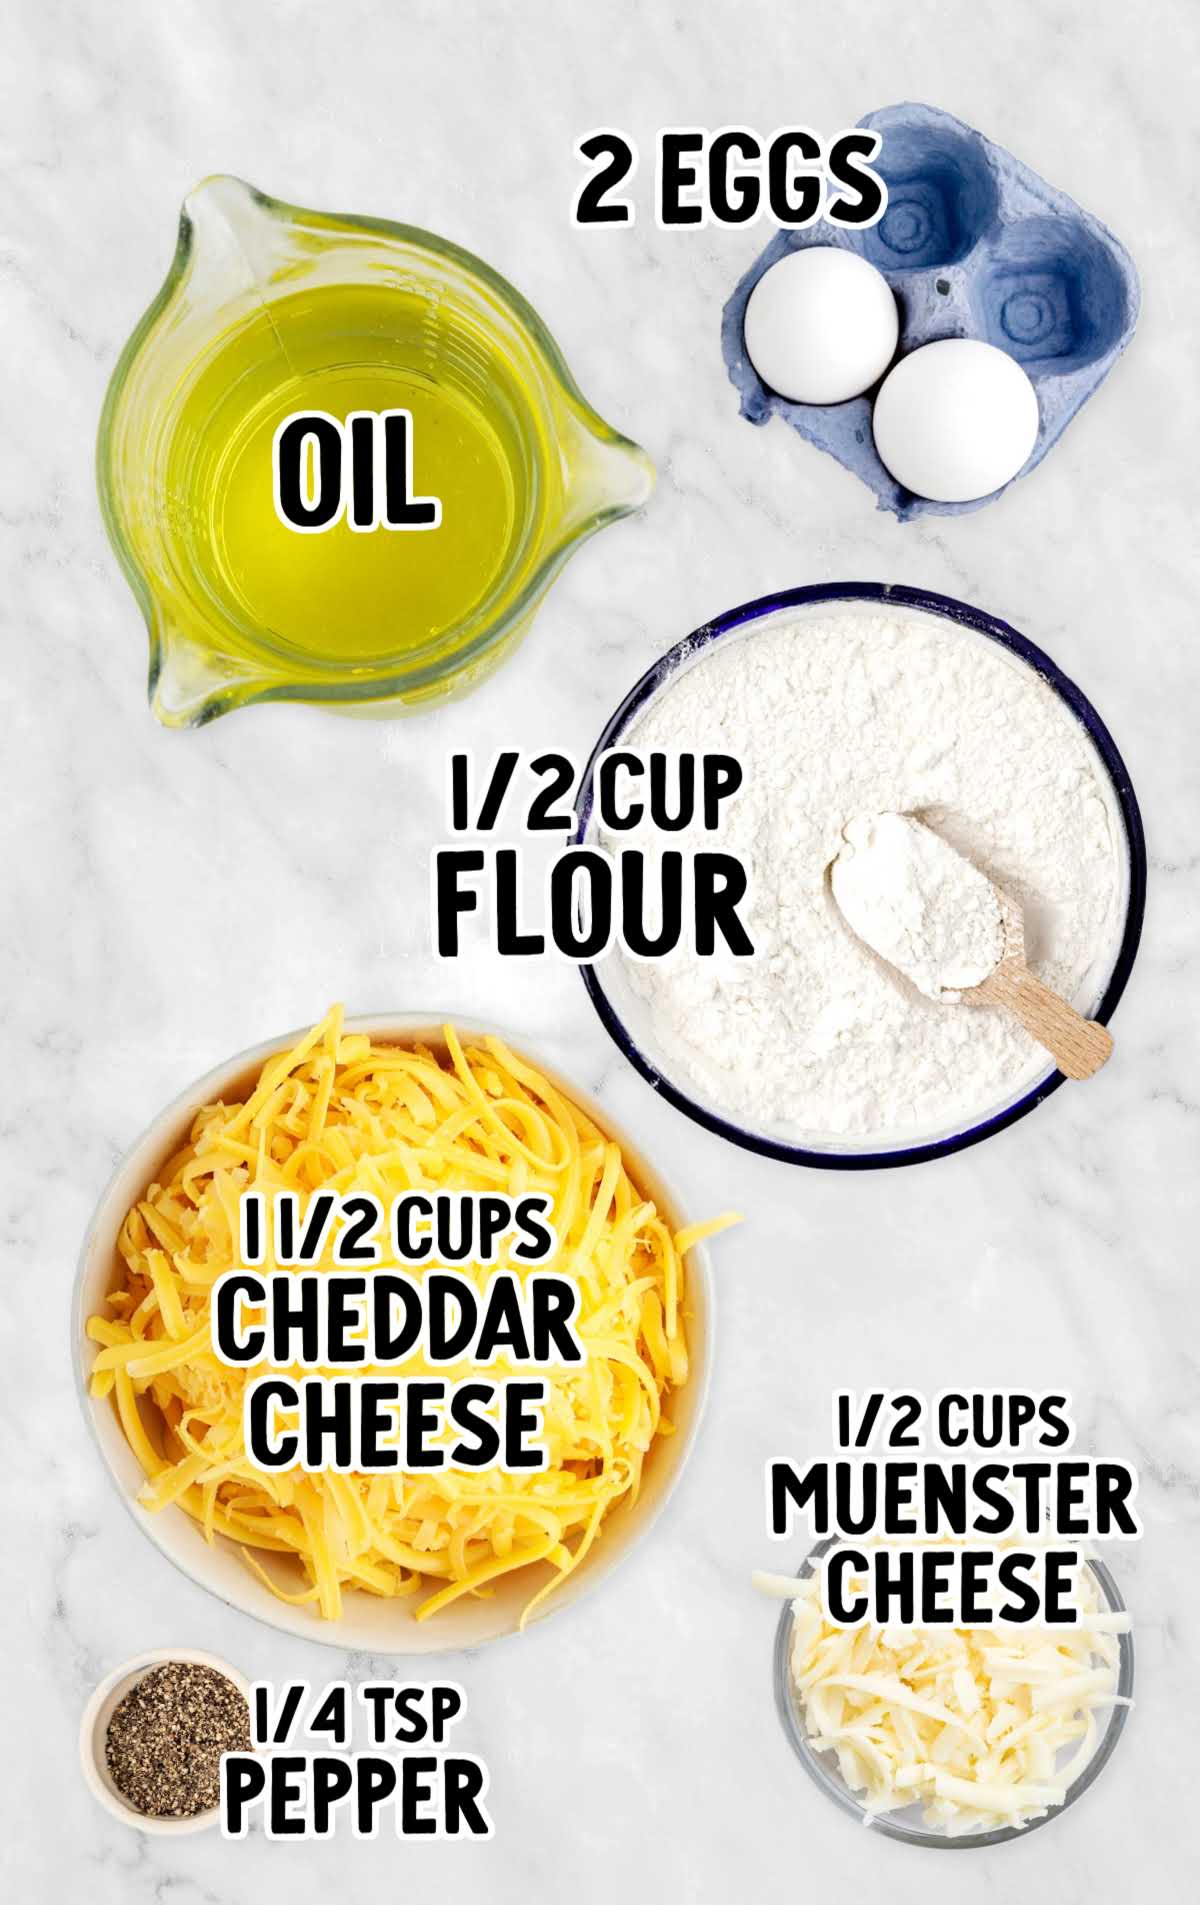
You’ll Need:
- 2 large egg whites, room temperature
- 1 ½ cups shredded muenster cheese
- 1 ½ cups mild cheddar cheese
- ½ cup all-purpose flour, divided (¼ cup to mix with the cheese and ¼ to coat the cheese balls once rolled)
- ¼ teaspoon black pepper
- Canola oil for frying
Deep Fried Cheese Balls Substitutions and Additions
These yummy, melty cheese balls are so simple to make. If you need to substitute an ingredient, here are some ideas:
Cheddar Cheese: You can try to experiment with different types of cheese to create different flavors. Try using pepper jack cheese for a spicy kick, gouda for a milder flavor, or a blend of your favorite cheeses! Or, make homemade mozzarella sticks by using grated mozzarella instead.
Muenster Cheese: While muenster cheese adds a creamy texture and mild tanginess, you can experiment with other melting cheeses such as provolone, mozzarella, or gruyere for different flavor profiles. Be sure to finely grate the cheese to ensure smooth rolling.
Canola Oil: While canola oil is commonly used for frying, you can substitute it with other high-smoke-point oils such as vegetable oil, peanut oil, or sunflower oil. Each oil will add its own subtle flavor to the cheese balls.
All-Purpose Flour: To make the recipe gluten-free, you can use gluten-free all-purpose flour or almond flour as a substitute. Keep in mind that the texture may vary slightly, so adjust accordingly.
Black Pepper: Feel free to get creative with your seasoning! Try adding a pinch of cayenne pepper for some heat, or smoked paprika for a smoky flavor. Italian seasoning, pizza seasoning, or even a touch of garlic powder can add a unique flavor to the cheese balls.
How To Make Fried Cheese Balls
If you’ve ever wondered how to fry cheese balls, you won’t believe how simple it is to make this recipe. You’ll need a deep fryer or a Dutch oven with a thermometer. Get your equipment ready and let’s dive into how to make this great appetizer recipe.
STEP ONE: Before you jump into the cooking your fried cheese ball recipe, make sure you gather all your ingredients. Make sure your egg whites are at room temperature. This helps to make them as frothy as possible. Finely grate your cheeses and measure out the remaining ingredients. The finer you grate your muenster and mild cheddar cheese, the smoother you will be able to roll your cheese balls.
PRO TIP: If you’re using a Dutch oven to fry these cheese balls, you may want to start heating your oil while you are rolling and coating the balls as it may take a little longer to heat then if using an electric deep fryer. See Step Seven for more information.
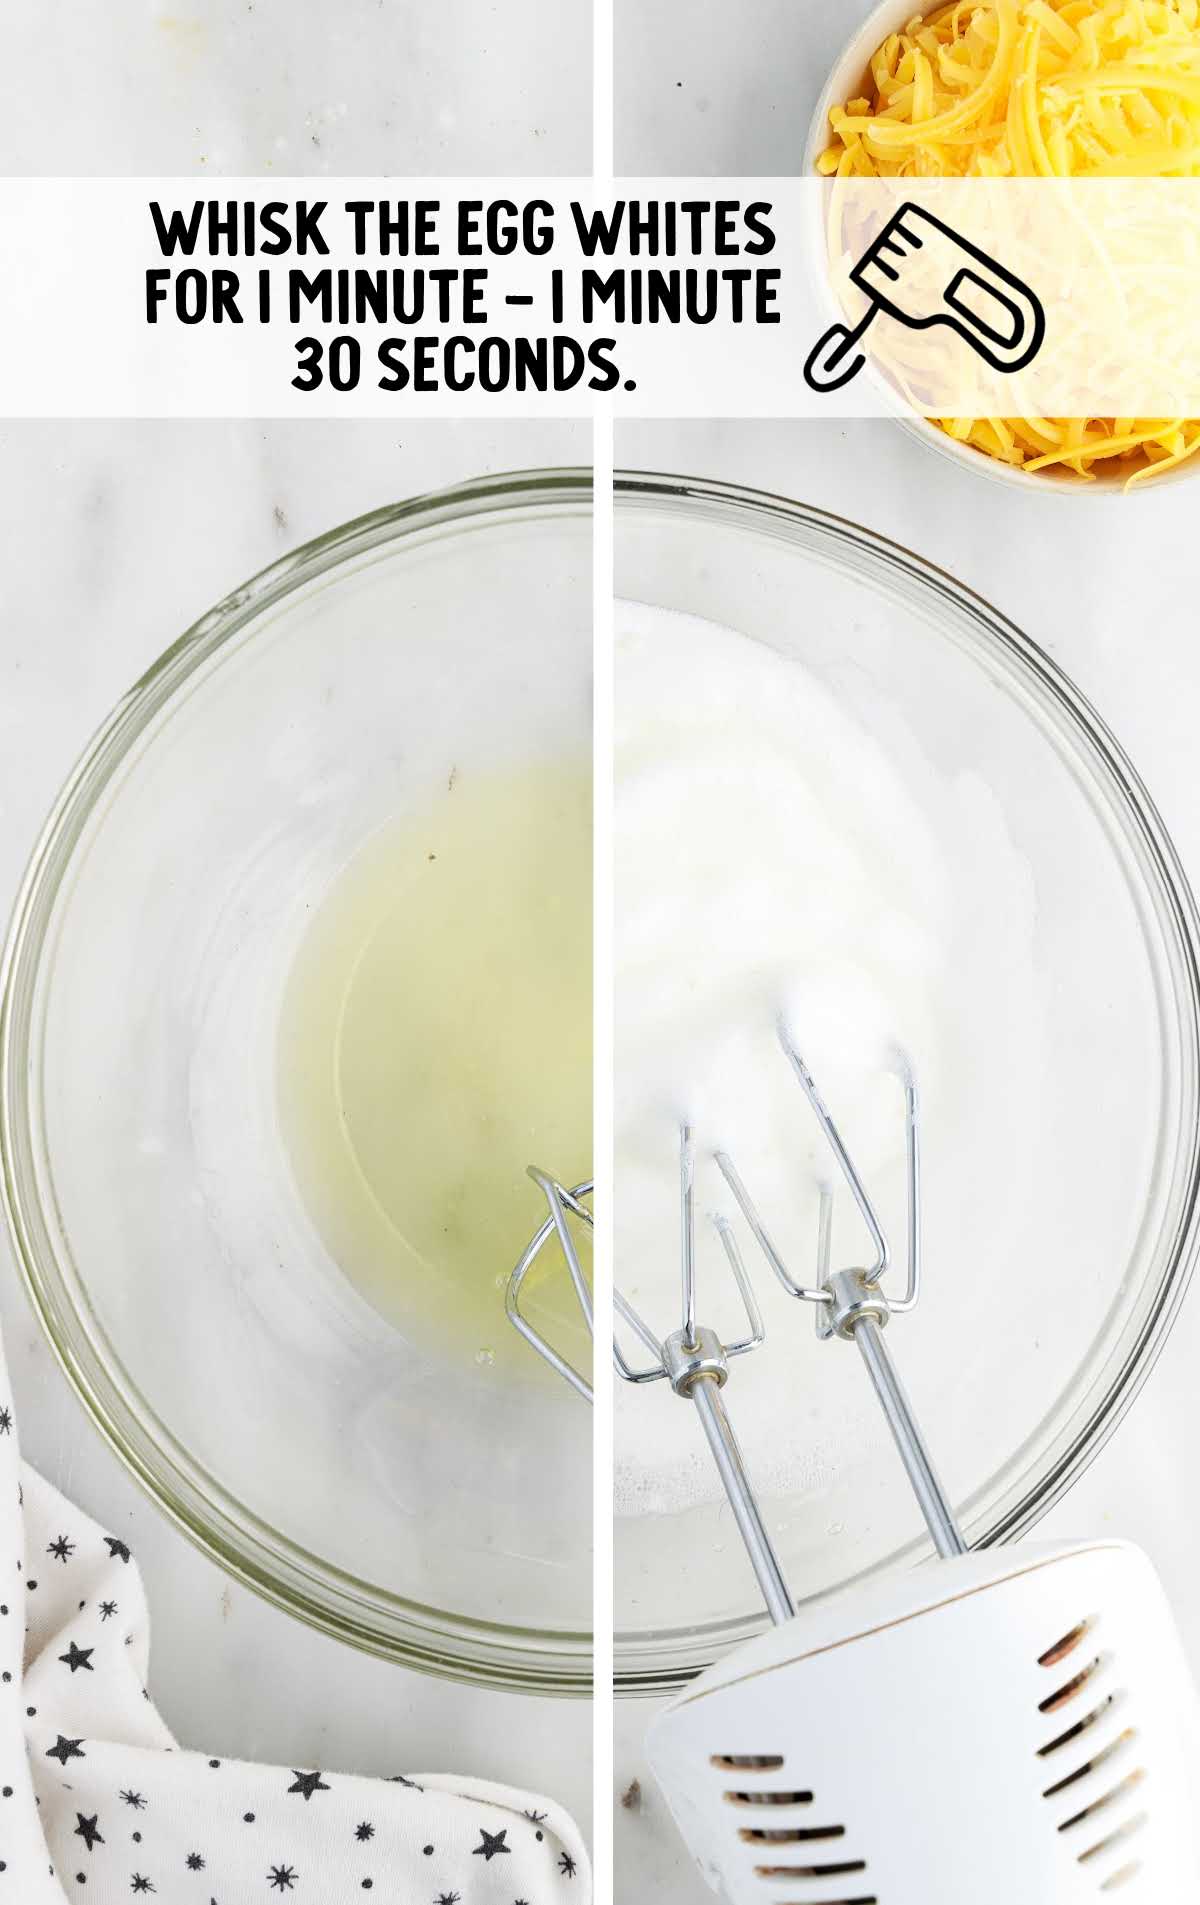
STEP TWO: In a medium-sized mixing bowl, use an electric mixer to whisk the egg whites for 1 minute – 1 minute 30 seconds or until the egg whites are light and frothy.
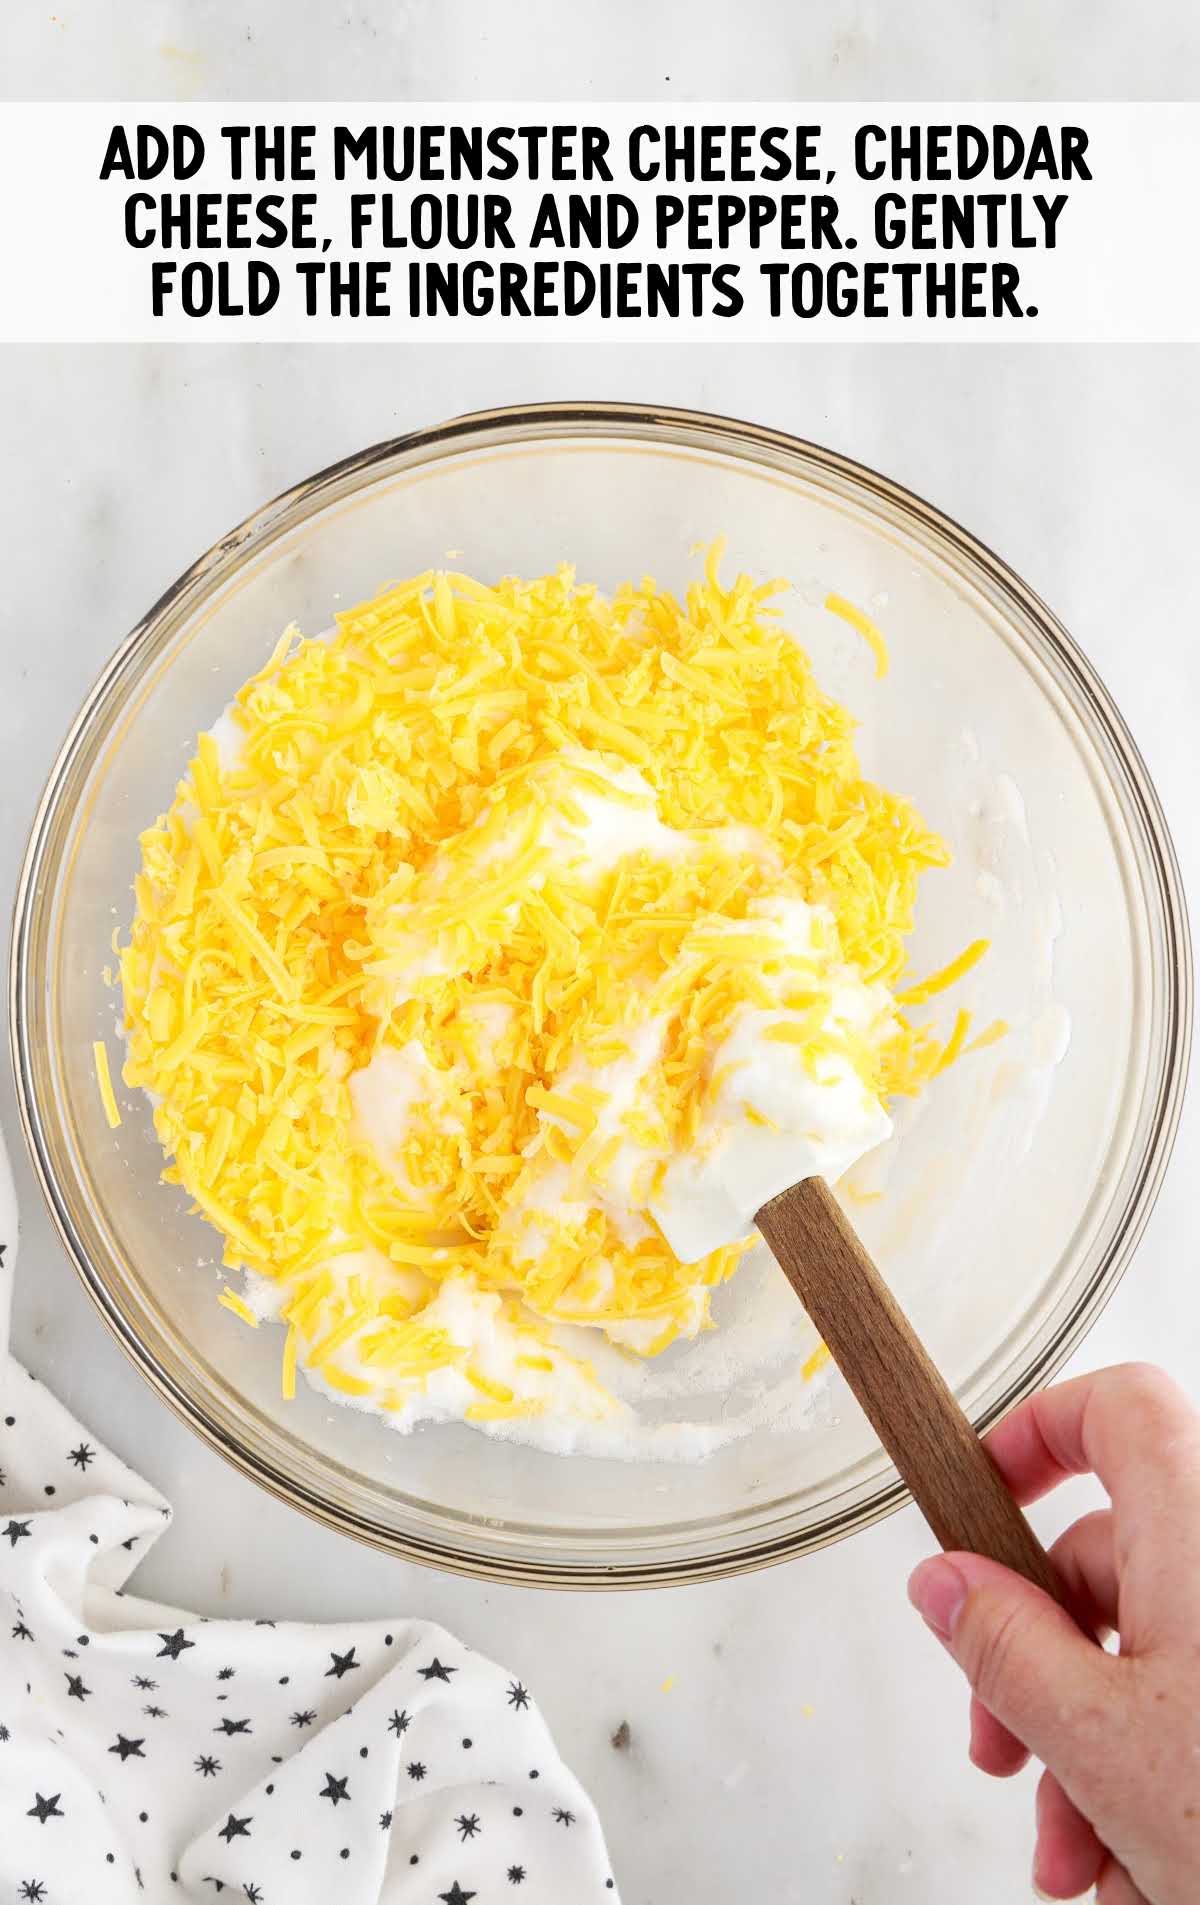
STEP THREE: Add the shredded muenster and shredded mild cheddar to the egg whites along with ¼ cup of all-purpose flour and the black pepper. Use a spatula to gently fold the ingredients together until all the cheese is fully coated with the egg whites and flour.
STEP FOUR: Cover the bowl of cheese mixture with plastic wrap and chill in the refrigerator for 1- 2 hours.
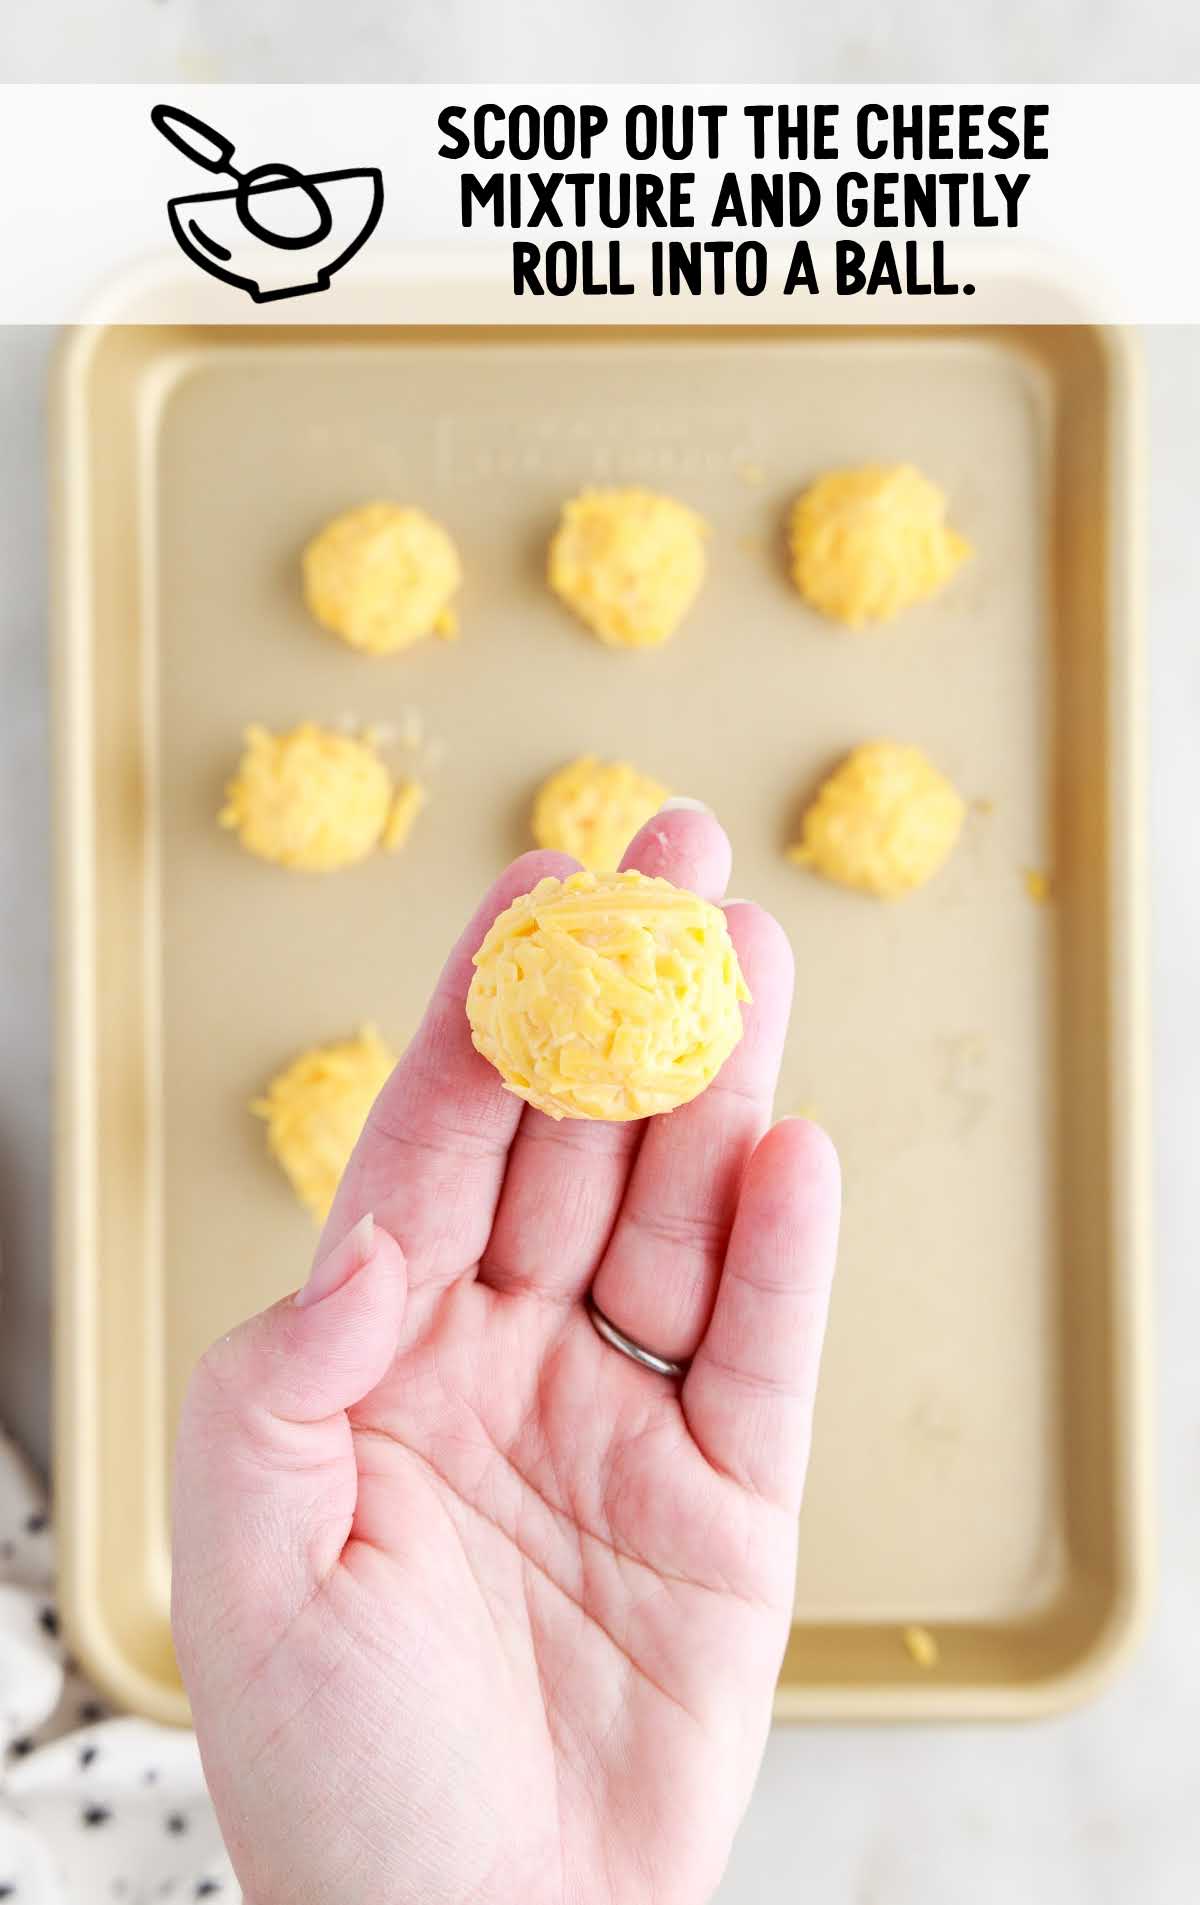
STEP FIVE: Place the remaining ¼ cup of flour in a small, shallow bowl. Use a 1-inch cookie scoop to scoop the chilled mixture into a packed and leveled ball. Gently roll one cheese ball in the palm of your hand until smooth.
STEP SIX: Place the rolled cheese ball into the flour and roll to lightly coat the outside. Shake off any excess flour and set the cheese ball on a clean plate. Repeat until all of the cheese mixture has been rolled and coated with flour.

STEP SEVEN: To an electric deep fryer (or 4-5 quart dutch oven), add enough vegetable oil to fill the pot with 4-5 inches of oil. Heat the oil to 375°F. You should still have plenty of room to prevent the oil from coming close to the top when cheese balls are added as the oil will bubble rapidly and expand. It is also important that the cheese balls have plenty of room in the pot when frying.
PRO TIP: If you’re using a Dutch oven to fry, you will want to use a candy thermometer to keep an eye on the temperature of the oil. You will need to adjust the heat to your Dutch oven as you’re frying to ensure that your oil stays at a steady temperature throughout the entire process. If your oil is too cold, your cheese balls will absorb too much oil as they fry to golden brown and if too hot the exterior will burn before the cheese has melted.
STEP EIGHT: Using a wire spider or metal slotted spoon, carefully lower down three or four cheese balls into the hot oil one at a time. Don’t overcrowd the oil or the cheese balls will stick together as they fry. Be sure to use the spider or slotted metal spoon to carefully roll the cheese balls in the hot oil. This helps to ensure that they’re frying evenly and not sticking to each other.
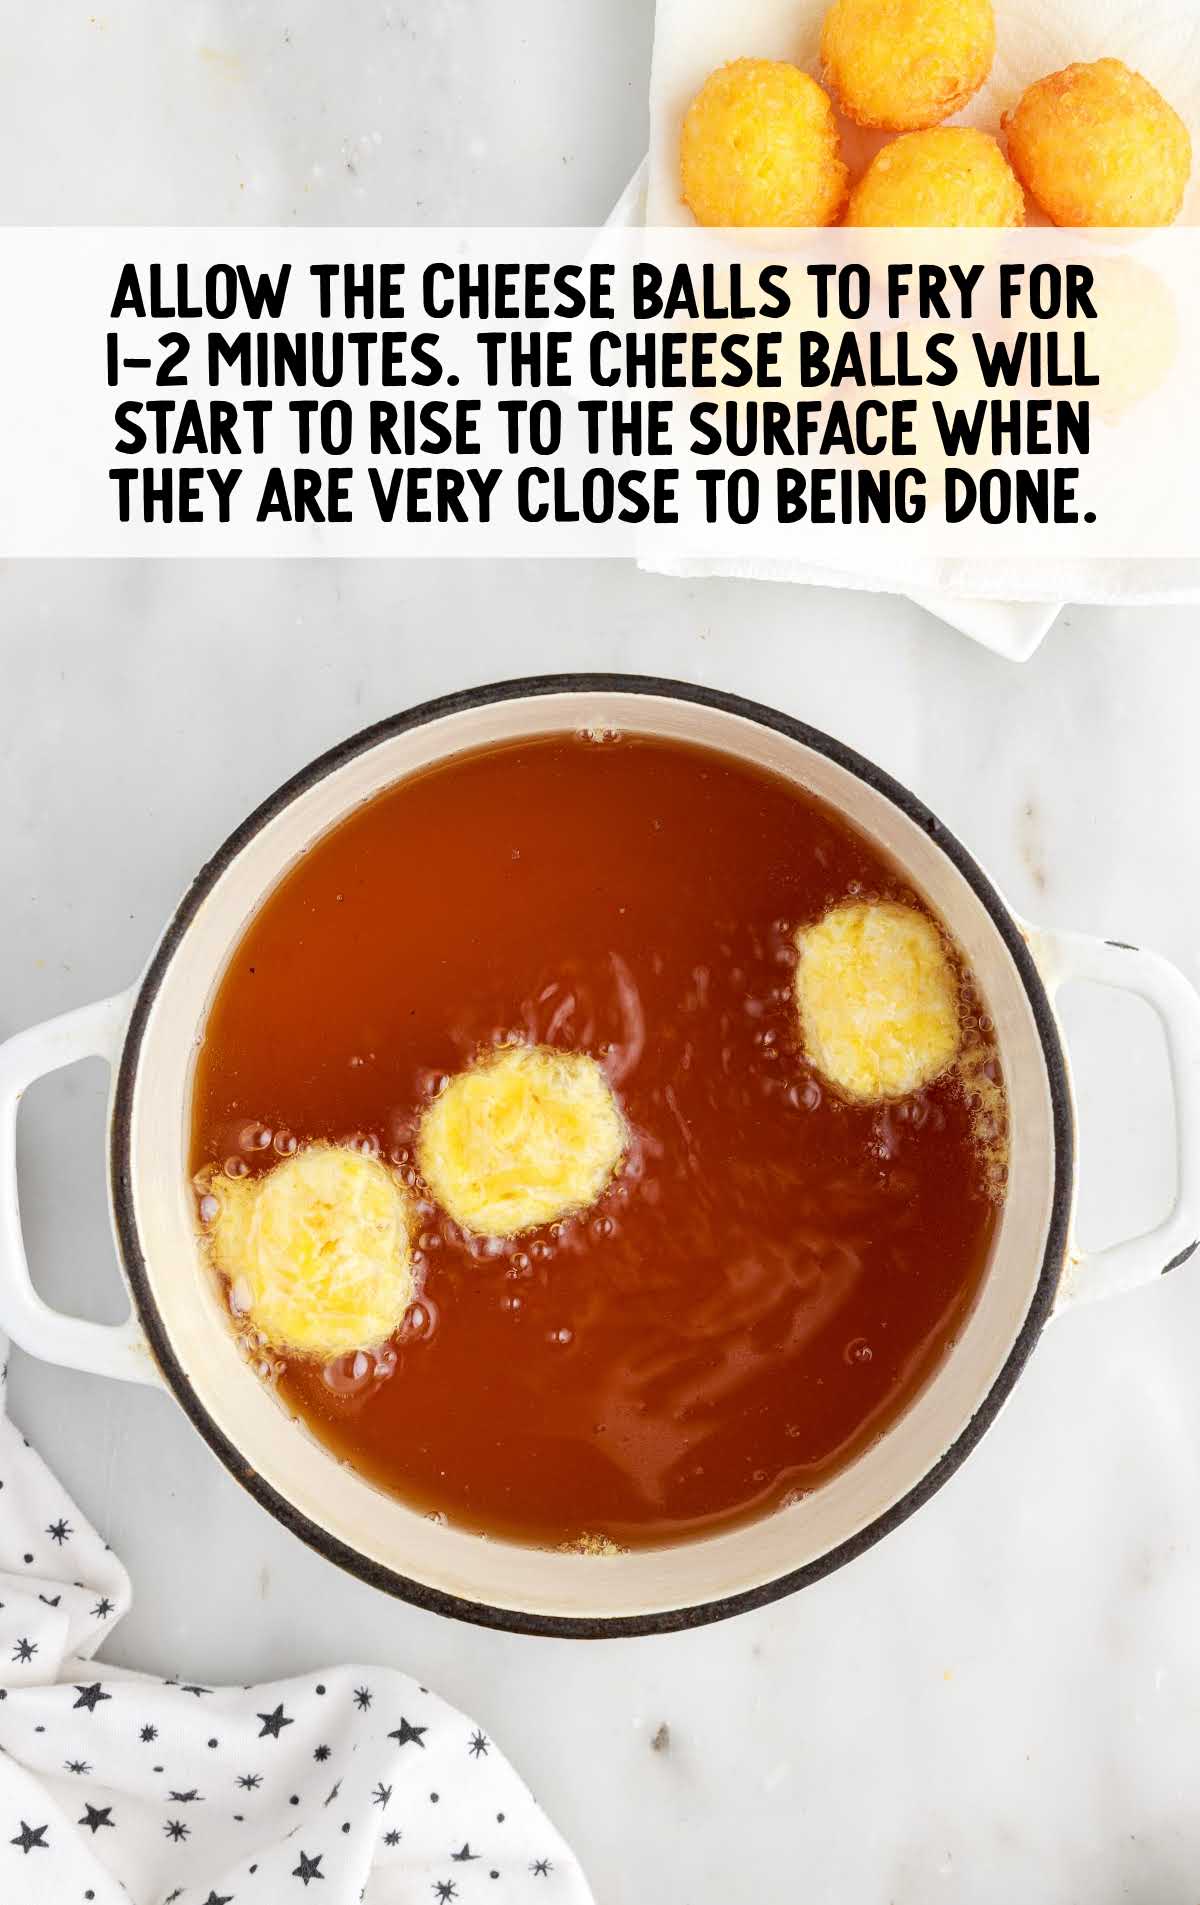
STEP NINE: Allow the cheese balls to fry for a few minutes until they’re golden brown. When they’re close to being done, you’ll notice that your deep-fried cheese balls will begin to rise to the surface of the oil.
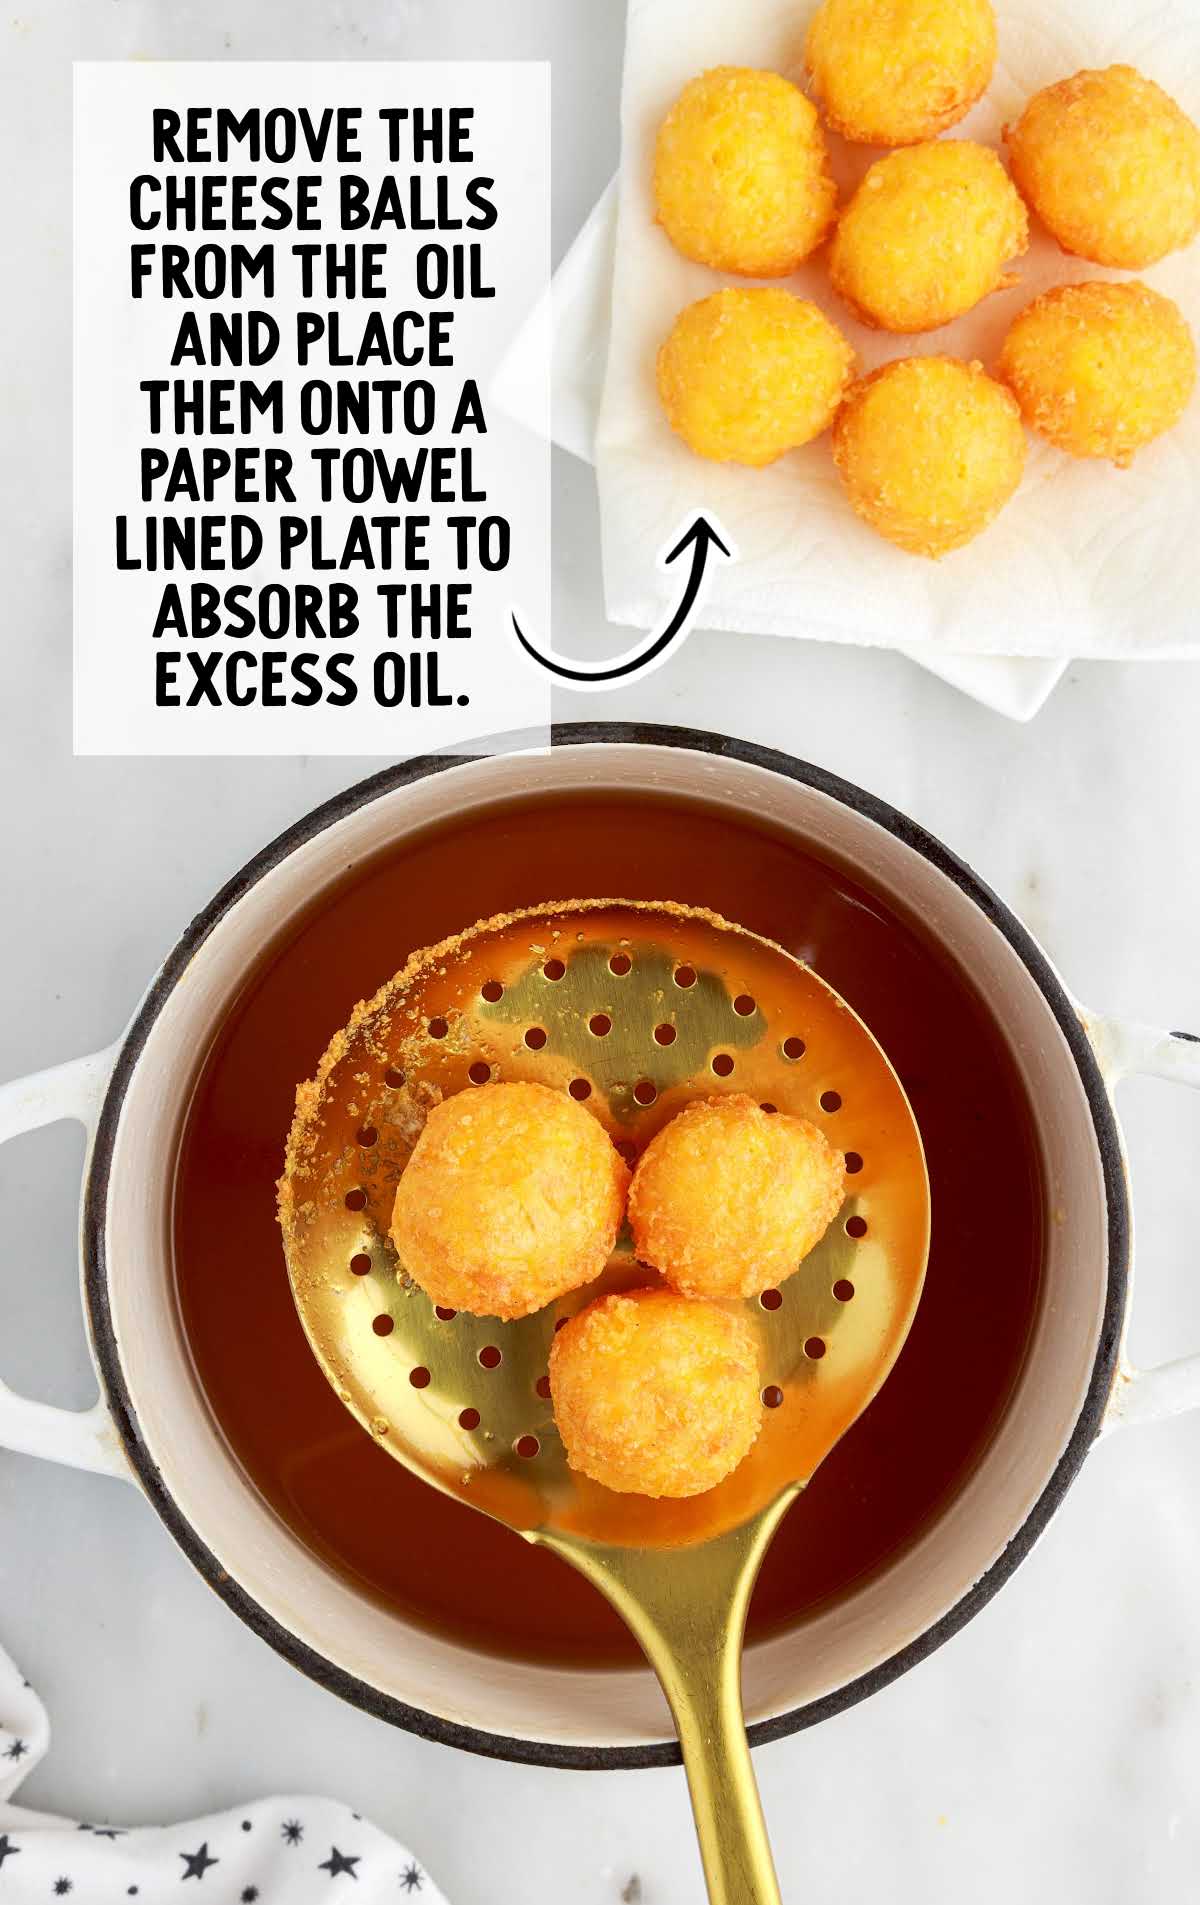
STEP TEN: Using the same wire spider or slotten spoon, carefully remove the fried cheese balls from the hot oil. Set them on a plate or tray lines with paper towels to absorb any excess oil.
STEP ELEVEN: Repeat steps 7-9 until all the cheese balls have been fried. Allow the fried cheese balls to cool slightly before serving as the cheese inside will be very hot. These fried cheese bites are best when served hot and freshly fried.
How To Serve Fried Cheese Balls
Whether you’re hosting a casual get-together or a celebratory gathering, there are endless ways to present and enjoy these crispy fried balls of cheese.
Classic Presentation: Arrange your golden-brown cheese balls on a platter and garnish with a sprinkle of freshly chopped herbs, such as parsley or chives, for a pop of color and freshness. Serve alongside a selection of dipping sauces, such as pizza sauce, sour cream, tomato sauce, or garlic aioli.
Cheese Platter Addition: Incorporate your fried cheese into a cheese platter for a unique twist. Pair them with an assortment of cheeses, crackers, cured meats, and fruits for a mouthwatering charcuterie spread.
Sandwich Filling: Slice fried cheese balls in half and use them as a filling for sandwiches or sliders, like Philly cheesesteaks or sloppy joes.
Refreshing Beverages: Serve fried cheese balls with refreshing beverages like sparkling Shirley Temple or crisp white wine.
Appetizer Platter: Make an appetizer platter with other finger foods such as pretzel bites, crab rangoon, and a giant cheese ball with crackers.
MORE SIDE DISH RECIPES

When To Serve Deep Fried Cheese Balls
From casual gatherings to formal events, Fried Cheese Balls are a versatile and crowd-pleasing snack that makes everyone smile. Whether you’re hosting a laid-back get-together with friends or planning a special celebration, this is a great recipe to include on the menu.
Game Day Gathering:
- Cheer on your team while snacking on these fried cheddar cheese balls. Pair them with cocktails and dipping sauces for an unbeatable game night spread.
Cocktail Party Appetizer:
- Impress your guests at your next cocktail party with a homemade appetizer spread that includes Fried Cheese Balls. As guests mingle and sip on cocktails, they’ll delight in the crunchy exterior and gooey center of these bite-sized treats. Serve them on elegant platters alongside other hors d’oeuvres for a stylish and delicious start to the evening.
Holiday Appetizer Spread:
- Add a festive touch to your holiday gatherings by including Fried Cheese Balls on your appetizer menu. Whether you’re hosting a Thanksgiving dinner or a New Year’s Eve party, these cheesy bites are sure to be a hit with guests of all ages.
No matter the occasion, Fried Cheese Balls are sure to be a crowd-pleaser!
How To Store Leftover Fried Cheese Balls
We recommend you eat your fried cheese while it’s hot and fresh, but if you have leftovers, you can store them and reheat them. Keep in mind, the taste and texture won’t be quite the same as when you first made them.
MAKE AHEAD: If you’d like to get a head start on your fried cheese balls, you can prepare the cheese mixture in advance and store it in the refrigerator until you’re ready to fry. Simply follow the recipe up to the point of chilling the cheese mixture. Once chilled, cover the bowl with plastic wrap and store it in the refrigerator for up to 24 hours. When you’re ready to fry, proceed with rolling and coating the cheese balls as directed.
IN THE FRIDGE: To store leftover fried cheese balls, allow them to cool completely before transferring them to an airtight container. Place a piece of parchment paper between layers to prevent sticking. Store the cheese balls in the refrigerator for up to three to four days. When ready to enjoy, reheat them using your preferred method (see below).
IN THE FREEZER: We don’t recommend freezing these cheese balls as they won’t thaw very well.
HOW TO REHEAT: When you’re ready to enjoy your frozen or refrigerated fried cheese balls, there are several reheating options available:
- Oven: Preheat your oven to 350°F and place the cheese balls on a baking sheet. Bake for 10-12 minutes, or until heated through and crispy.
- Air Fryer: Preheat your air fryer to 350°F and cook the cheese balls for five to seven minutes, or until heated through and crispy.
- Skillet: Heat a skillet over medium heat and add a small amount of oil. Place the cheese balls in the skillet and cook for three to five minutes on each side, or until heated through and crispy.
- Microwave: While not the optimal method for reheating fried foods, you can use the microwave if you’re short on time. Place the cheese balls on a microwave-safe plate and heat on high for 30-60 seconds, or until heated through.
No matter which method you choose, be sure to keep an eye on the cheese balls to prevent overheating and maintain their crispy texture.
Why These Fried Cheese Balls Are The Best
From their crispy exterior to their gooey cheese center, this snack is a true delight that will have you coming back for more.
Here’s why we love this recipe:
- Irresistible Crunch: The golden brown, crispy exterior gives you a satisfying crunch as you bite into it. Of course, it’s followed by stretchy, gooey cheese.
- Easy Preparation: With just a handful of simple ingredients and straightforward steps, this recipe is a breeze to prepare, and cook!
- Family-Friendly Fun: Whether you’re cooking with kids or hosting a family get-together, making Fried Cheese Balls is a cooking activity that everyone can enjoy, and they’re even more fun to eat!
With its delicious flavor, easy preparation, and endless versatility, it’s no wonder we can’t get enough of this Fried Cheese Balls recipe. Once you try it, you’ll understand why it’s a favorite in our household!
Frequently Asked Questions
Can I use different types of cheese for this recipe?
Yes, absolutely! Feel free to experiment with different cheese varieties such as mozzarella, gouda, or pepper jack to customize the flavor of your Fried Cheese Balls.
Can I make the cheese balls ahead of time and fry them later?
Yes, you can prepare the cheese balls in advance and refrigerate them for up to 24 hours before frying. Just be sure to cover them tightly with plastic wrap to prevent them from drying out.
Can I substitute egg whites with something else?
While egg whites provide structure and help achieve a light and airy texture, you can try using aquafaba (the liquid from canned chickpeas) as a vegan alternative. However, the texture may vary slightly.
How do I prevent the cheese balls from deflating while frying?
To prevent the cheese balls from deflating, be sure to maintain a consistent oil temperature and avoid overcrowding the pan. Additionally, rolling the cheese balls gently and not pressing them too tightly will help retain their shape.
Can I make these crispy cheese balls gluten-free?
Yes, you can use gluten-free breadcrumbs or crushed gluten-free crackers instead of regular breadcrumbs to coat the cheese balls for a gluten-free version of this recipe.
How long does the fried cheese recipe stay crispy?
While they are best enjoyed fresh out of the fryer, you can keep the Fried Cheese Balls crispy for up to an hour by placing them on a wire rack in a warm oven (around 200°F).
Can I bake the cheese balls instead of frying them?
While frying gives the cheese balls their characteristic crispy exterior, you can try baking them in a preheated oven at 400°F for 15-20 minutes until golden brown. However, the texture may be slightly different.
More Recipes You’ll Love
- Cabbage Rolls
- Tobacco Onions
- Stuffed Mushrooms
- Pizza Zucchini Boats
- Mini Cheeseball Bites
- Crack Chicken Sliders
- Dill Pickle Cheese Balls
- Air Fryer Potato Wedges
- Bacon Wrapped Pineapple
- Sausage Stuffed Jalapenos


Fried Cheese Balls
Get ready to enjoy crispy Fried Cheese Balls, with a golden-brown exterior and a molten cheese center. Quick and easy to make, this recipe is perfect for gatherings or as a tasty snack anytime.
Prep Time 10 minutes
Cook Time 2 minutes
Total Time 1 hour 12 minutes
Servings 12
Ingredients
- 2 large egg whites, room temperature
- 1 ½ cups shredded muenster cheese
- 1 ½ cups mild cheddar cheese
- ½ cup all-purpose flour, divided (¼ cup to mix with the cheese and ¼ to coat the cheese balls once rolled)
- ¼ teaspoon black pepper
- Canola oil for frying
Instructions
- To a medium mixing bowl, whisk the egg whites for 1 minute – 1 minute 30 seconds or until the egg whites are light and frothy.
- Add the shredded muenster cheese, shredded mild cheddar cheese, ¼ cup all-purpose flour and black pepper. Gently fold the ingredients together until all the cheese is fully coated with the egg whites and flour.
- Cover the bowl of cheese mixture with plastic wrap and refrigerate for 1- 2 hours.
- Once the cheese mixture has chilled, use a 1 inch cookie scoop and scoop out a packed, and leveled portion. In the palm of your hand, gently roll the cheese ball until smooth.
- Place the rolled cheese ball into a small bowl with the remaining ¼ cup all-purpose flour to lightly coat the outside of the ball. Shake off any excess flour, then place the cheese ball onto a plate. Repeat until all the cheese balls have been rolled and coated.
- To an electric deep fryer, or 4-5 quart dutch oven, add enough vegetable oil to fill the pot with 4-5 inches of oil. Heat the oil to 375* F. You should still have plenty of room in the electric fryer, or dutch oven, to prevent the oil from coming close to the top when cheese balls are added as the oil will bubble rapidly and expand. It is also important that the cheese balls have plenty of room in the pot when frying.
- Using a wire spider, or metal slotted spoon, carefully lower down 3-4 cheese balls into the hot oil one at a time. Do not over crowd the oil or the cheese balls will stick together as they fry. Be sure to use the spider, or slotted metal spoon, to carefully roll the cheese balls in the hot oil to ensure that they are frying evenly and not sticking to each other.
- Allow the cheese balls to fry for 1-2 minutes or until golden. The cheese balls will start to rise to the surface when they are very close to being done.
- Using the wire spider, or slotted metal spoon, carefully remove the fried cheese balls from the hot oil and place them onto a paper towel lined plate to absorb the excess oil.
- Repeat steps 7-9 until all the cheese balls have been fried. Allow the fried cheese balls to cool slightly before serving as the cheese inside will be very hot.
Notes
- If using a dutch oven to fry these cheese balls, you may want to start heating your oil while you are rolling, and coating the cheese balls as it may take a little longer to heat then if using an electric deep fryer.
- If using a dutch oven to fry, you will want to use a candy thermometer to keep an eye on the temperature of the oil. You will need to adjust the heat to your dutch oven as you are frying to ensure that your oil stays at a steady temperature throughout the entire process. If your oil is too cold, your cheese balls will absorb too much oil as they fry to golden brown and if too hot the exterior will burn before the cheese has melted.
- The finer you grate your muenster and mild cheddar cheese, the smoother you will be able to roll your cheese balls.
- I prefer using mild cheddar cheese for melting as it is softer and melts smoother than a harder, sharper, aged cheddar cheese.
- Muenster cheese is a mild, soft, cheese that melts really well and pairs wonderfully in flavor with cheddar cheese. You can substitute your favorite types of melting cheeses such as provolone, mozzarella or gruyere in this recipe.
Nutrition
Calories: 132kcal | Carbohydrates: 5g | Protein: 8g | Fat: 9g | Saturated Fat: 5g | Polyunsaturated Fat: 0.3g | Monounsaturated Fat: 2g | Cholesterol: 28mg | Sodium: 190mg | Potassium: 45mg | Fiber: 0.2g | Sugar: 0.3g | Vitamin A: 285IU | Calcium: 202mg | Iron: 0.3mg
Have You Tried This Recipe?Follow me on Pinterest @spaceshipslb

More Recipes You’ll Love
- Stuffed Celery
- Zucchini Boats
- Roasted Vegetables
- Fried Green Tomatoes
- Cheese Sticks
- Air Fryer Pizzas
- Pretzel Bites with Cheese Dip
- Bacon-Wrapped Jalapeno Poppers
- Pull Apart Pigs in a Blanket
- Easy Baked Brie with Jam
- Puppy Chow Recipe
- Air Fryer Mozzarella Sticks
- Cucumber Bites
- Air Fryer Beef Jerky
- Pickled Mushrooms
- Crescent Roll Garlic Knots
Even More Recipes You’ll Love
More Dinner Recipes
- Crockpot Apple Pork Tenderloin
- Honey Walnut Shrimp
- Teriyaki Steak Bites
- Crock Pot Cube Steak
- Asian Steak Bites
- Meatballs
- Puffy Tacos
- Salsa
- Pizza Pockets
- Pumpkin Soup
- Baked Mac and Cheese
- Korean Noodles
- Mexican Coleslaw
- Slow Cooker Beef Tips
- Vegetable Sauté
- Tuna Pasta
- Instant Pot Mac and Cheese
- Air Fryer Carrots
More Chicken Dinner Recipes
- Cream of Mushroom Chicken
- Pan-Seared Chicken
- BBQ Pulled Chicken Slow Cooker
- Shake and Bake Chicken
- Slow Cooker Teriyaki Chicken
More Dessert Recipes
- Cookie Monster Cupcakes
- Pumpkin Cheesecake Balls
- Christmas Mints
- Kool-Aid Ice Cream
- Frozen Oreo Dessert
- Strawberry Cream Cheese Pie
- Blondies
- Berry Cheesecake Salad
- Edible Cookie Dough
- One Pan Cobbler
- Rum Balls
- Magic Cookie Bars
- Blueberry Chocolate Chip Muffins
- Air Fried Oreos
- Millionaire Shortbread
- Milky Way Brownies
- Pumpkin Banana Bread
- Triple Chocolate Brownies
- Take 5 Pretzel Bites
- Tropical Cheesecake Fruit Salad
- Peach Fluff
- Salted Caramel Cupcakes
- Chocolate Lasagna
- Carrot Bread Recipe
- Cotton Candy Fudge
- Buckeye Bars
- Caramelized Bananas
- Reese’s Peanut Butter Cup Pie
- Strawberry Cream Cheese Frosting
- 7UP Cherry Cobbler
- Pumpkin Cream Cheese Muffins
More Cookies Recipes
- Blueberry Cookies
- Edible Cookie Dough
- Shortbread Cookies
- Peanut Butter Thumbprint Cookies
- Pumpkin Roll Cookies
More Cake Recipes
- Strawberry Shortcake Cheesecake
- Eggnog Poke Cake
- Hawaiian Wedding Cake
- Cookie Dough Ice Cream Cake
- Mayonnaise Cake
- Million Dollar Cake
- Pumpkin Crunch Cake
- Blueberry Pound Cake
- Butterfinger Cake
- Lemon Sponge Cake
More Christmas Dessert Recipes
- Christmas Crunch
- Peppermint Cheesecakes
- Christmas Shortbread Cookies
- Candy Cane Cupcakes
- Christmas Trifle
- Mint Hot Chocolate
More Drink Recipes
- Fish Bowl Drink
- Pina Colada Mocktail
- Blue Ocean Drink
- Butterbeer Jello Shots
- Boozy Creamsicle Float
- Strawberry Sweet Tea
- Root Beer Popsicles
- Alexander Cocktail
- Raspberry Lemonade
- Limoncello Spritz


Leave a Comment