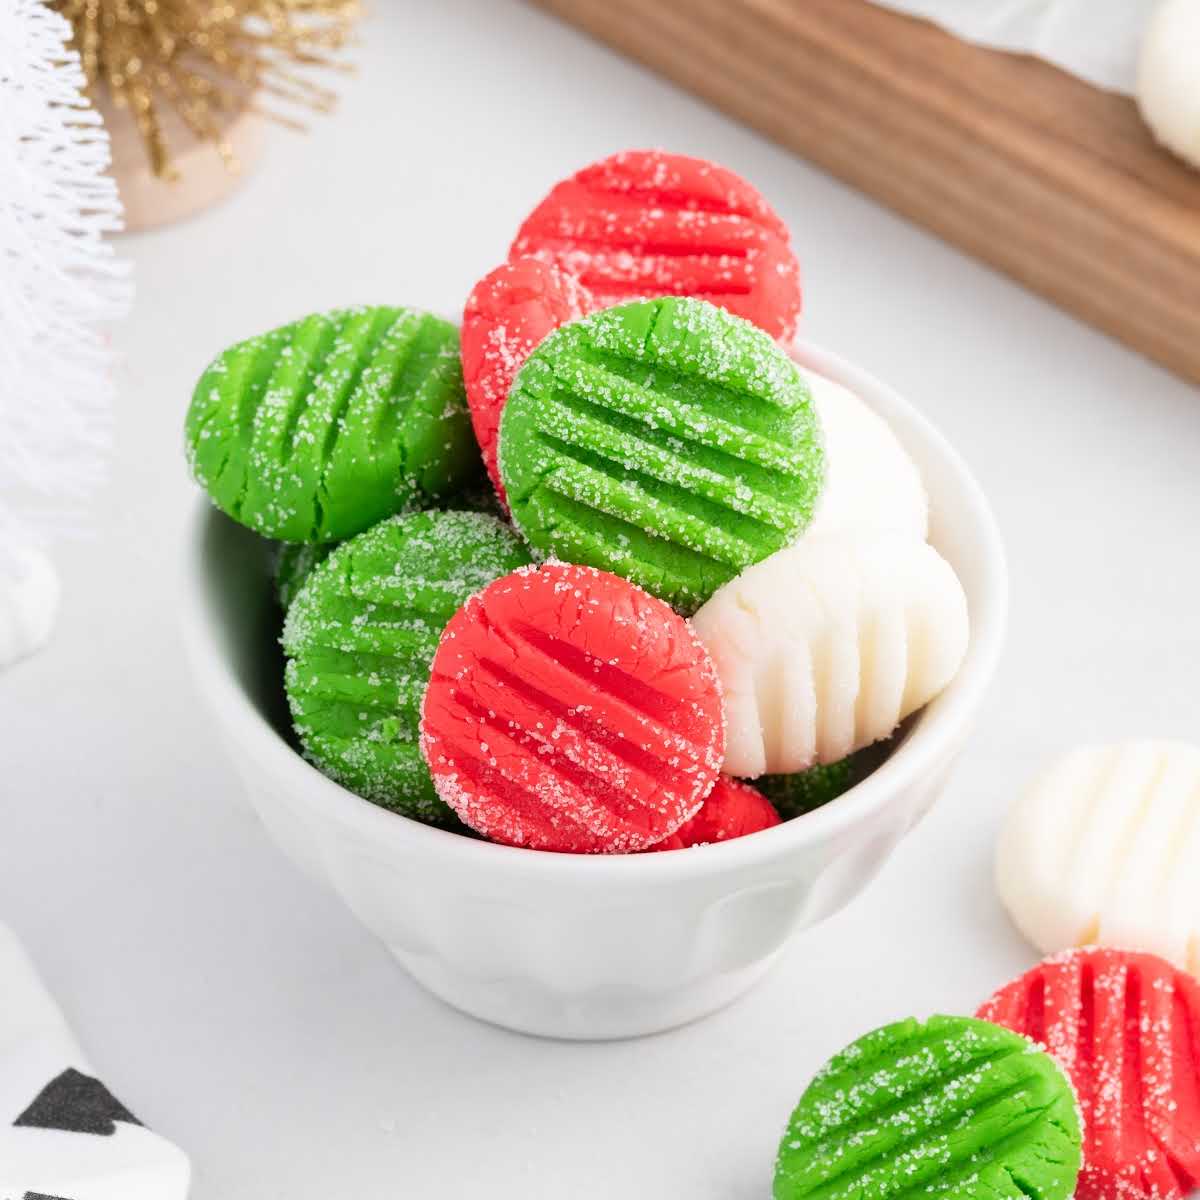


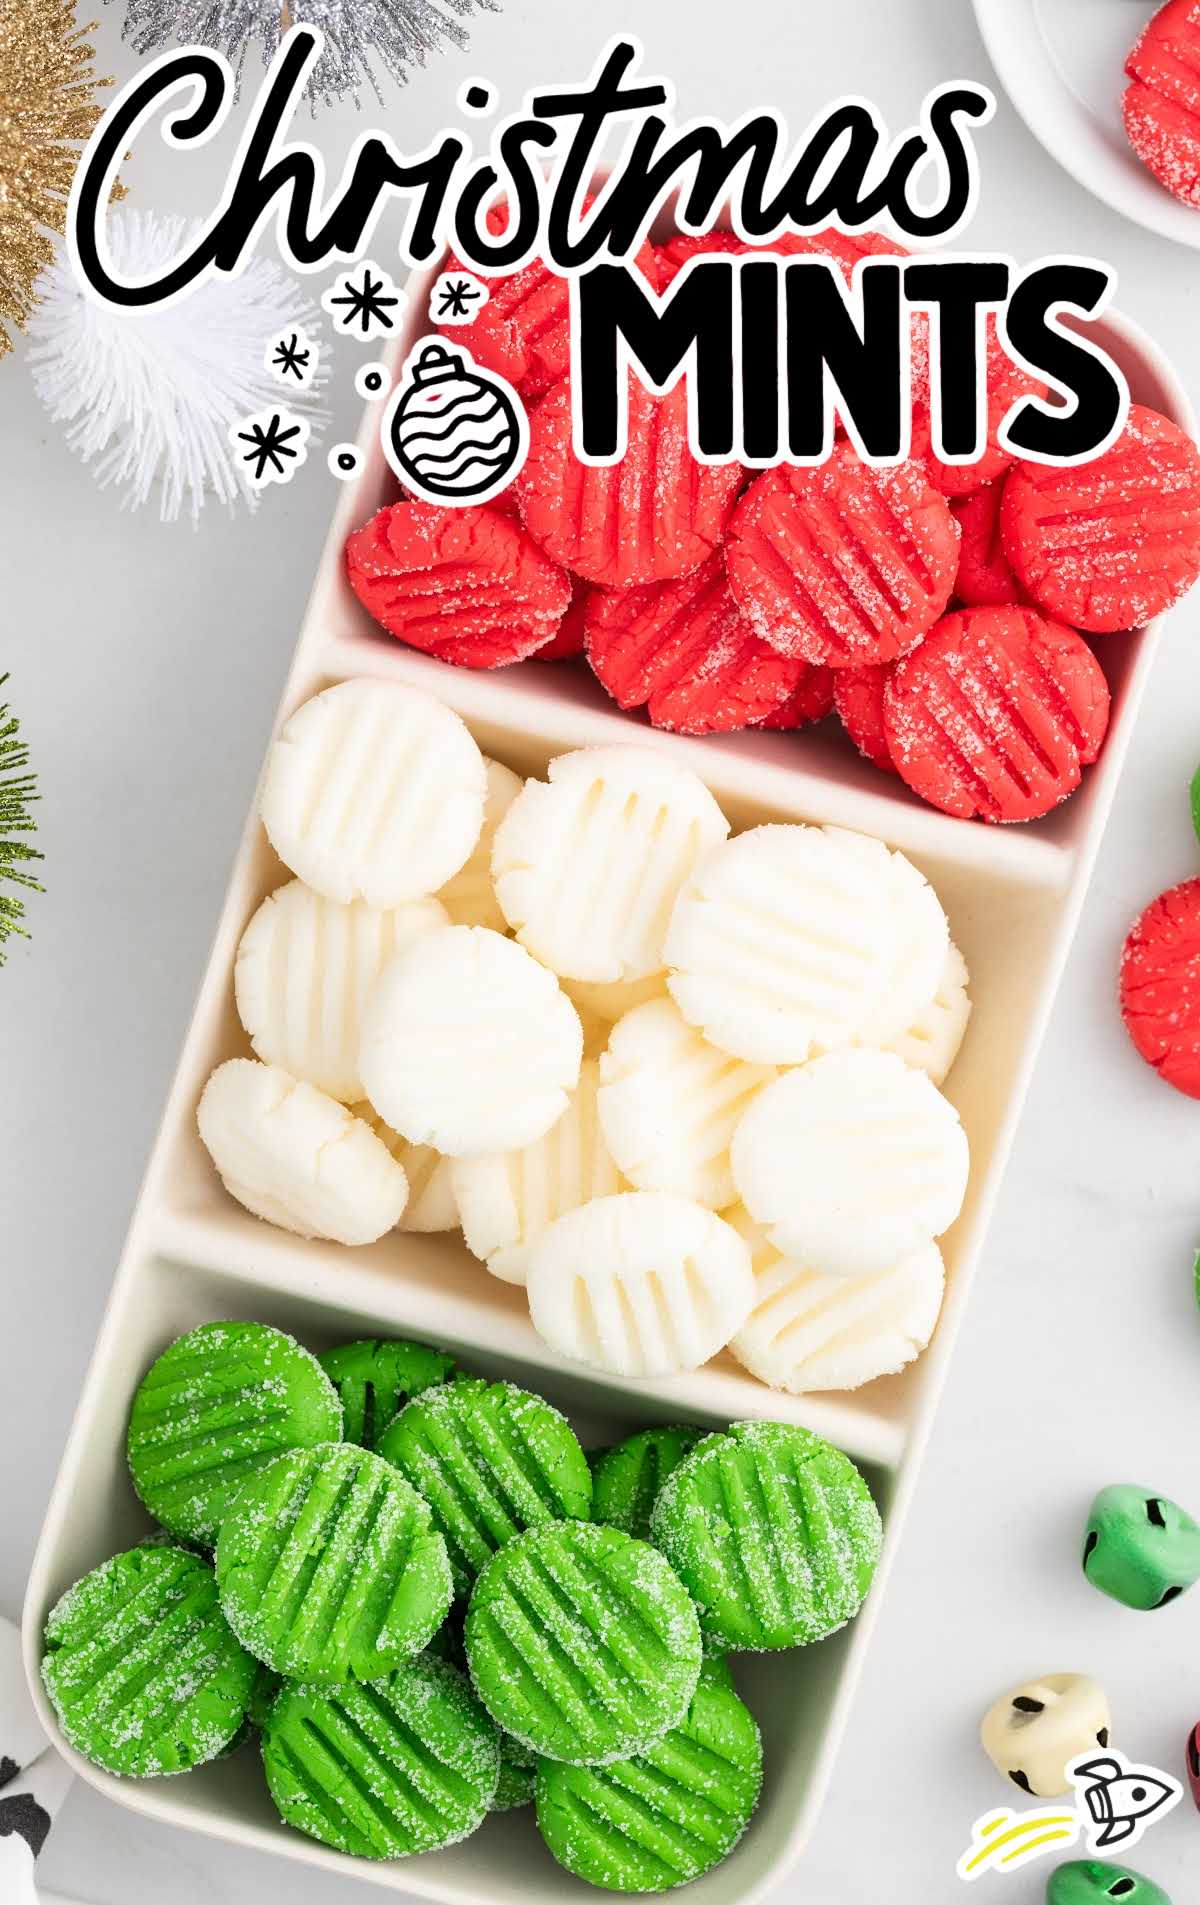
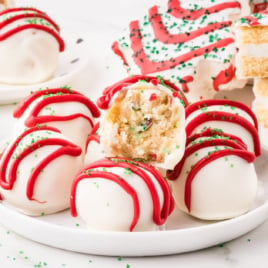
There’s something timeless about a tray of christmas mints that brings instant cheer to any holiday table. With their bright, festive colors and smooth peppermint taste, these little treats offer a nostalgic, refreshing sweetness that’s hard to resist. Soft and melt-in-your-mouth on the inside, with a delicate crunch from the sugar coating on the outside, each mint is crafted to perfection. This recipe has been thoughtfully tested to make sure every step is easy to follow, giving you mints that are a joy to make and share.
Let’s Dish: About These Cream Cheese Peppermints
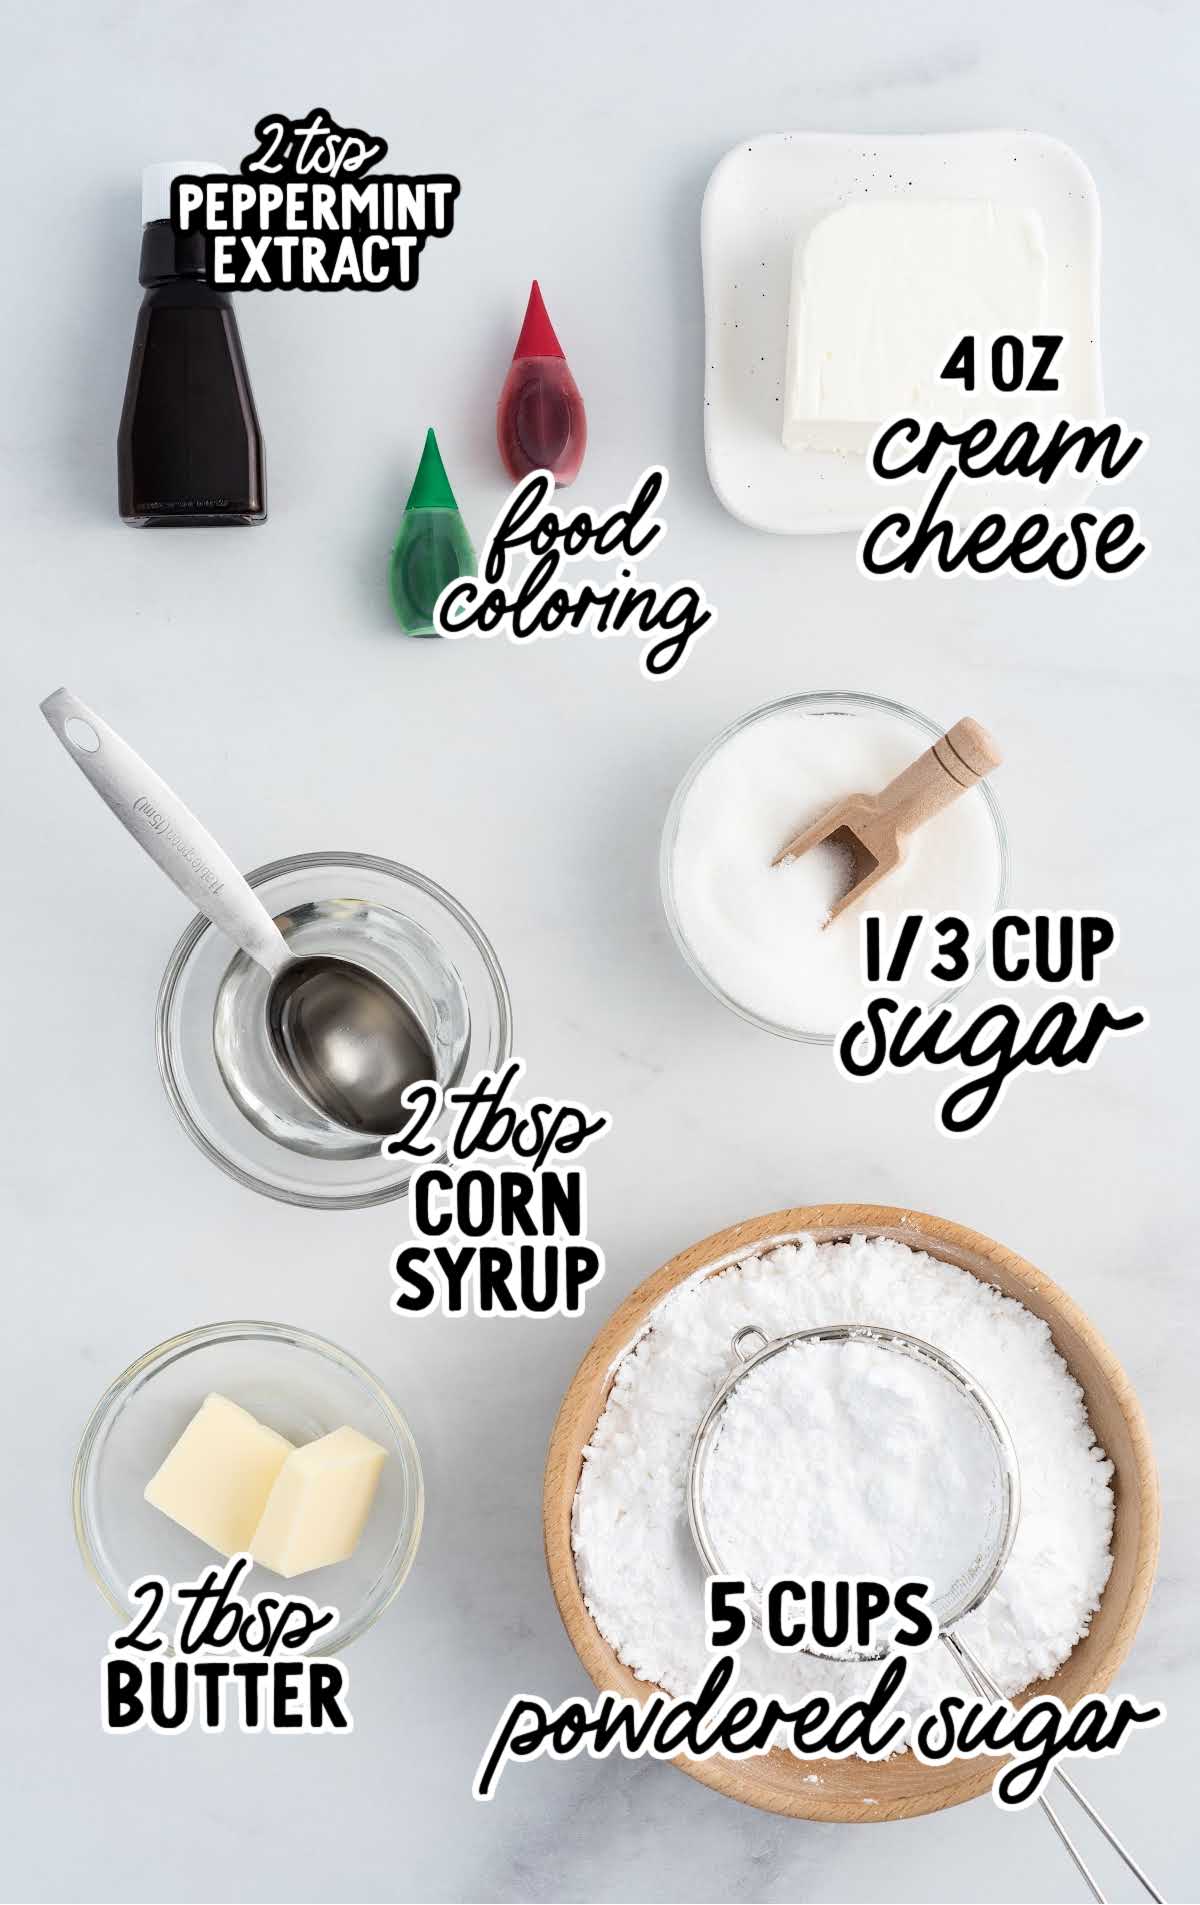
MAIN INGREDIENTS: cream cheese, unsalted butter, light corn syrup, peppermint extract, powdered sugar, granulated sugar, red and green liquid food coloring
QUICK STEPS: Prepare dough by mixing cream cheese, butter, corn syrup, and peppermint extract; gradually add powdered sugar; divide and color dough; roll into ropes, slice, and shape into balls; coat in sugar and flatten; allow to dry for 24 hours
TOTAL TIME AND YIELD: 24 hours + 15 minutes; approximately 100 peppermint candies
Why This Recipe
- Balanced Mint Flavor: We use just the right amount of peppermint extract to keep the mints fresh and not overly strong. This balance was carefully tested by our team to make sure each bite is refreshing without being overpowering.
- No Need for Special Equipment: This recipe is crafted to be straightforward. You won’t need molds or special tools—just mix, roll, slice, and shape by hand for a simple, fun process.
Christmas Mints Ingredients
Christmas mints have a rich, creamy taste with a texture that is pillowy and soft. Adding cream cheese provides a tanginess to these mints that balances the sweetness.
The peppermint flavoring gives the mints an irresistible burst of flavor that tastes just like Christmas.
To make these little treats, you’ll need:
- ⅓ cup of granulated sugar
- 4 ounces of cream cheese, room temperature
- 2 tablespoons of unsalted butter, room temperature
- 2 tablespoons of light/clear corn syrup (I used Karo brand)
- 1 teaspoon of peppermint extract
- 4¼ to 5 cups of powdered sugar, divided into 4¼ cups and the remainder
- 6 drops of green liquid food coloring
- 6 drops of red liquid food coloring
Christmas Mint Candy Substitutions And Additions
FLAVOR: You can substitute other flavors for the peppermint flavoring, such as pomegranate or raspberry for the red, green apple for the green, or vanilla or coconut for the white.
COLOR: These delicious cream cheese mints can be colored to match any party theme or other holiday. They are great to serve at baby showers or other parties.
VANILLA EXTRACT: While vanilla extract is a common choice, you can experiment with other extracts like mint, almond, or coconut for a unique flavor twist.
Mint extract will intensify the minty goodness, almond extract will add a nutty undertone, and coconut extract will infuse a tropical flair into your mints.
How To Make This Christmas Mints Recipe
These colorful mints are surprisingly easy to make, and the colors can be changed to suit the occasion.
Once the dough is made, you will tint each dough ball with food coloring and roll it into a long rope. Slice the dough into rounds and add decorative patterns on top.
You’ll let the mints sit at room temperature to dry overnight, and voilà, the mints are ready to be enjoyed!
OUR RECIPE DEVELOPER SAYS
You can use small silicone candy molds for cute, shaped mints. Dry the same as directed below.
STEP ONE: Line a large rimmed baking sheet with parchment paper. Place the granulated sugar into a small bowl. Set aside.
STEP TWO: In a large mixing bowl with a hand mixer on low speed, beat the cream cheese, unsalted butter, light corn syrup, and peppermint extract for one minute or until smooth.
PRO TIP:
Make sure your cream cheese is at room temperature to ensure the mint mixture doesn’t have any lumps in it.
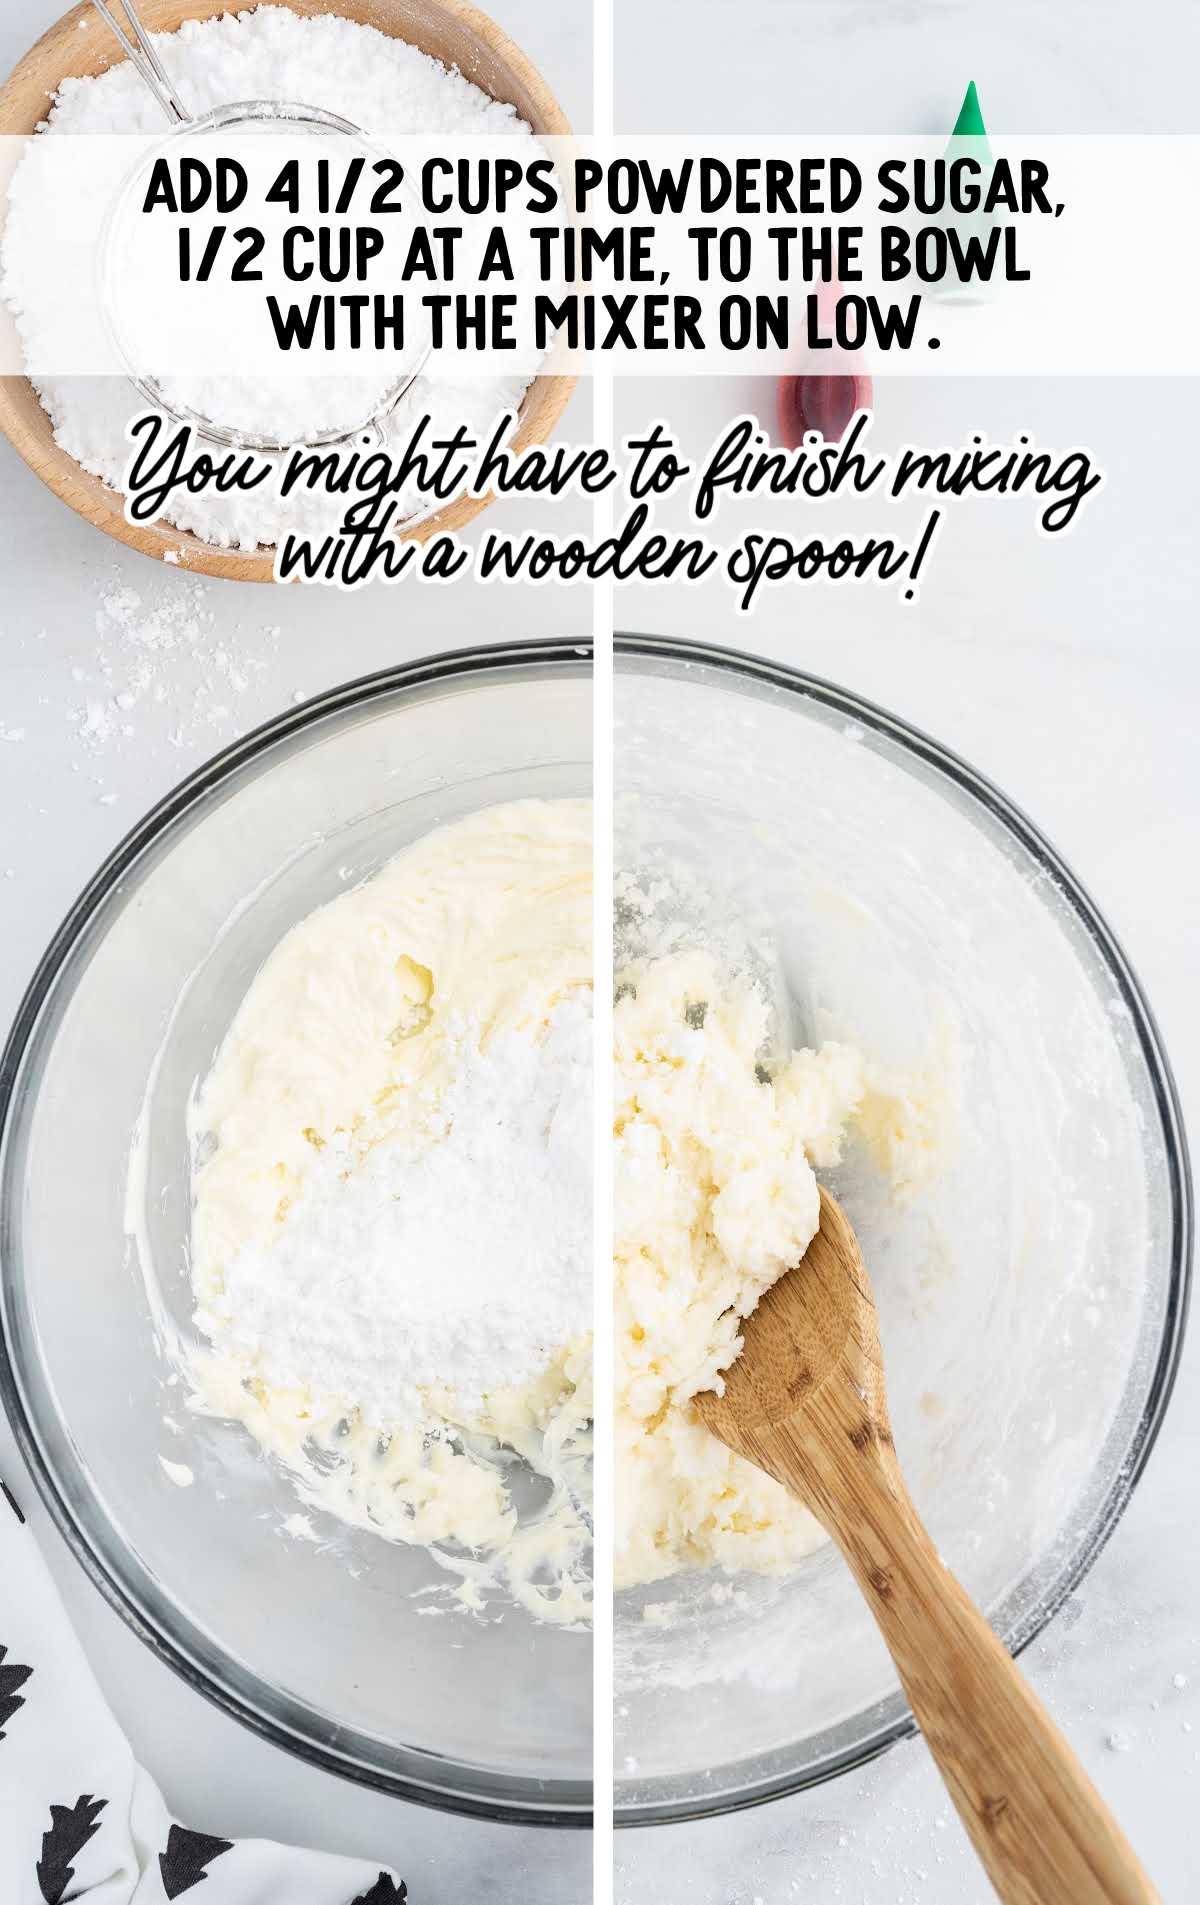
STEP THREE: Slowly add 4¼ cups powdered sugar, ½ cup at a time, to the bowl with the mixer on low speed.
Once you get close to incorporating all of the powdered sugar, your dough will be so thick that you may need to switch to a spatula or wooden spoon and finish mixing the dough by hand.
STEP FOUR: Lay out a piece of parchment paper onto a clean counter and sprinkle a quarter cup of the remaining powdered sugar onto the parchment paper.
Turn out your dough onto the parchment paper.
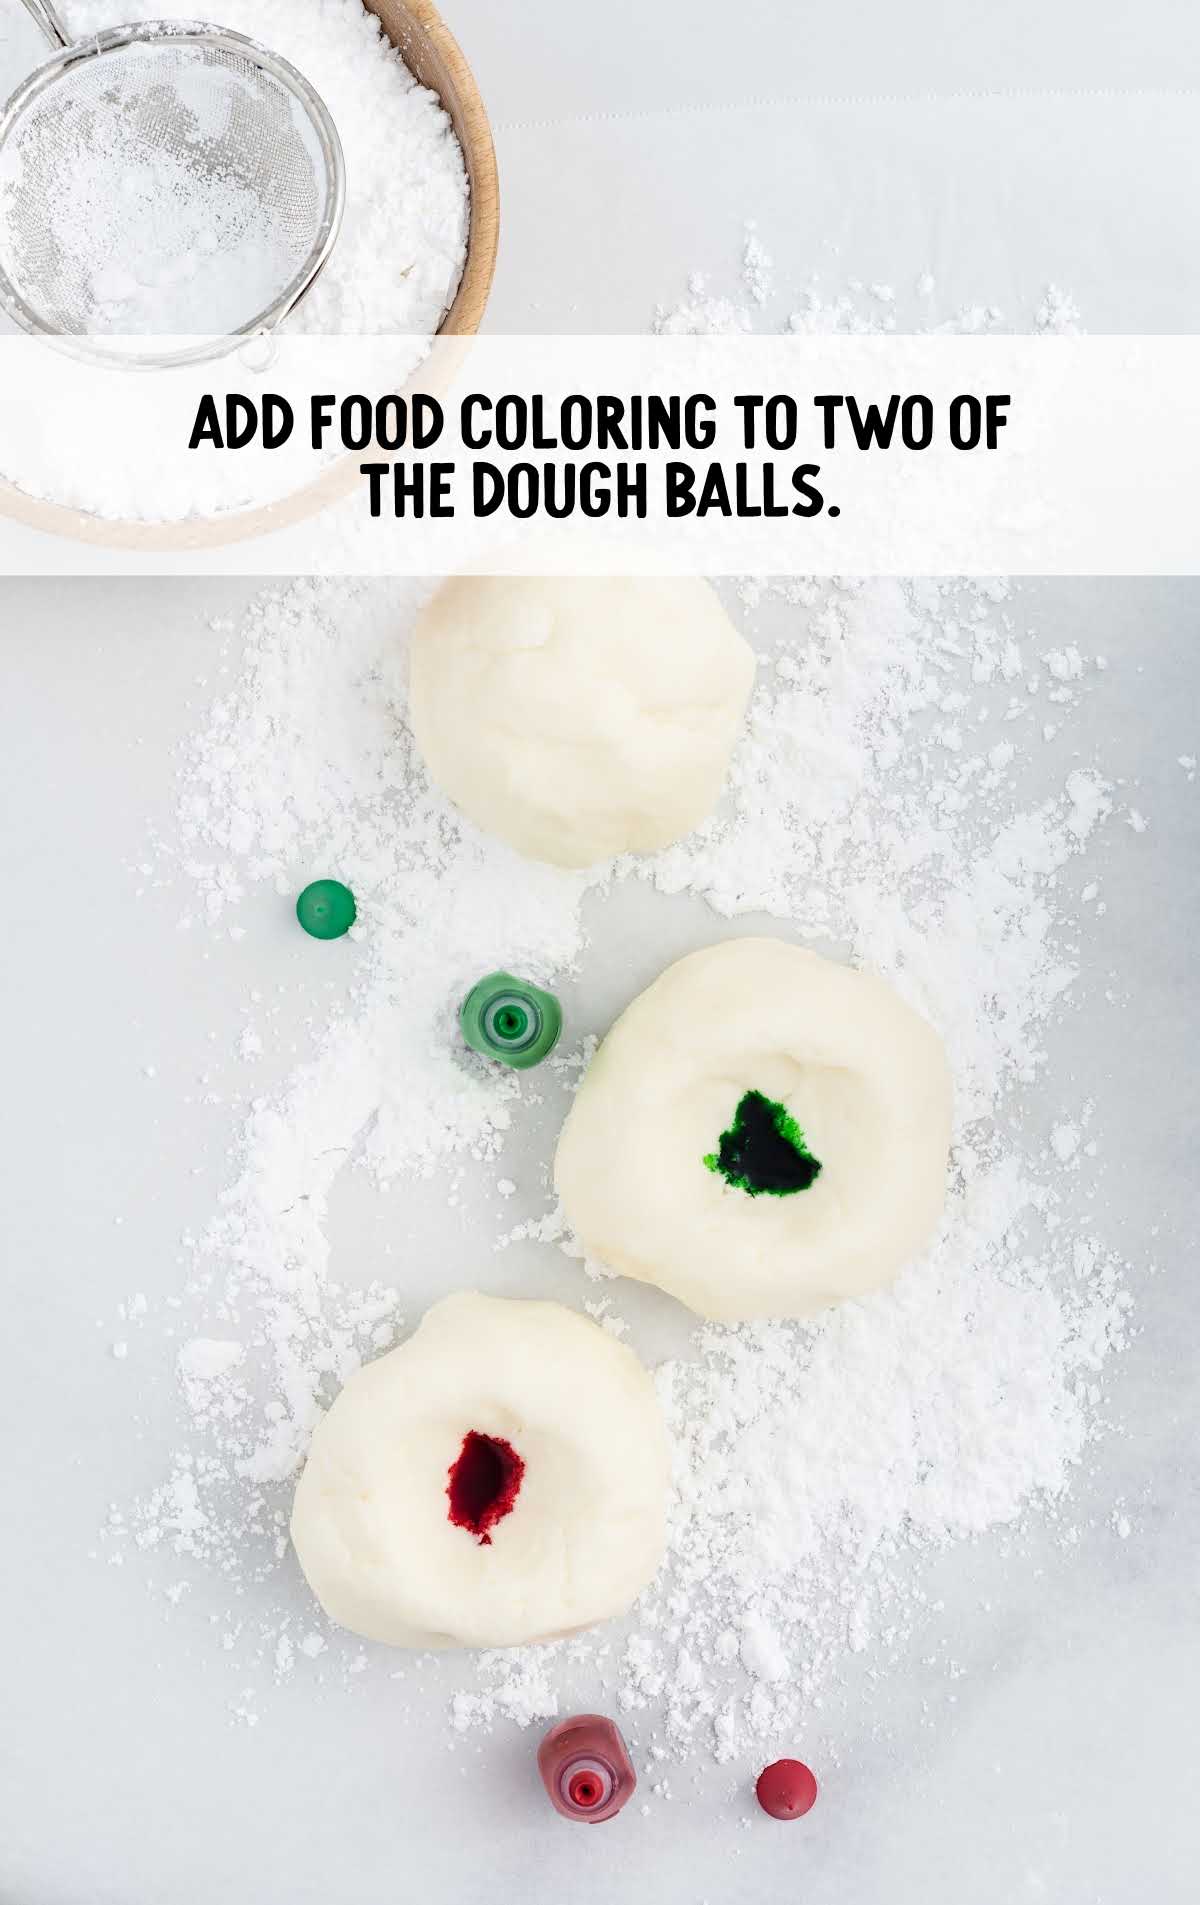
STEP FIVE: Divide the dough into three equal parts. Create a shallow well in the center of two of the dough balls.
In the first dough ball, add the red food coloring. Add the green food coloring to the second dough ball, and your last ball of dough will remain white.
PRO TIP:
If you want a deeper color, you can add up to ½ teaspoon of liquid food coloring. You may even need more of the extra powdered sugar to get your peppermint patty dough to be the right consistency. You do not want it too stiff, but it should not be sticky.
Gel food coloring is also a great option because its colors can be a little more vibrant and intense without adding too much moisture to the dough.
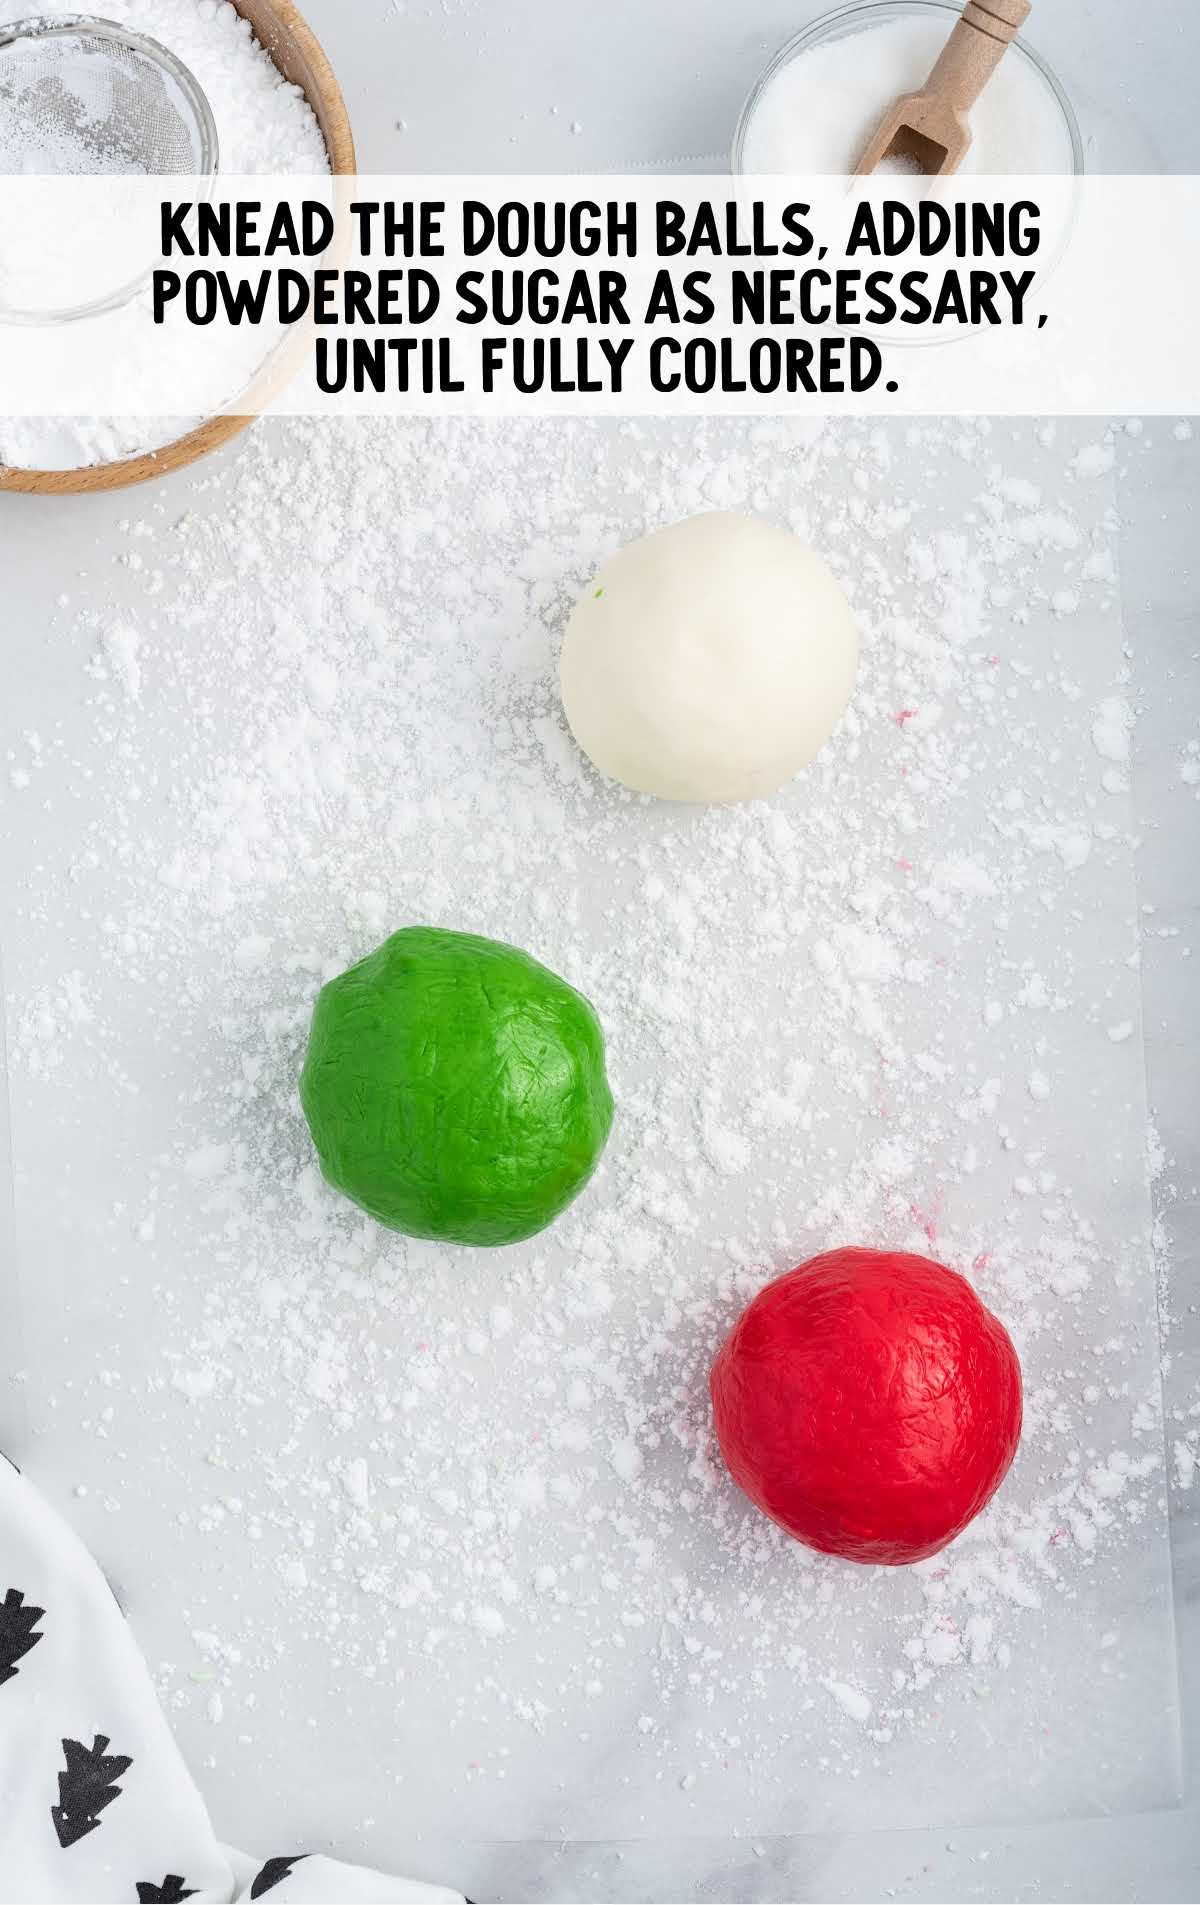
STEP SIX: Carefully knead your red dough ball to distribute the food coloring evenly.
You will need to add up to an additional ¼ cup of powdered sugar as you knead because the liquid food coloring will make your dough sticky.
Repeat with the green dough ball. You may need to knead your white dough portion just a little with a tablespoon or two of additional powdered sugar.
PRO TIP:
The amount of extra powdered sugar you need for kneading depends on how wet/sticky your dough is. If the temperature is very warm, you may need more, or if very cold, you may need less.
Don’t add too much powdered sugar at once. Remember, you can always add more, but you can’t take it away.
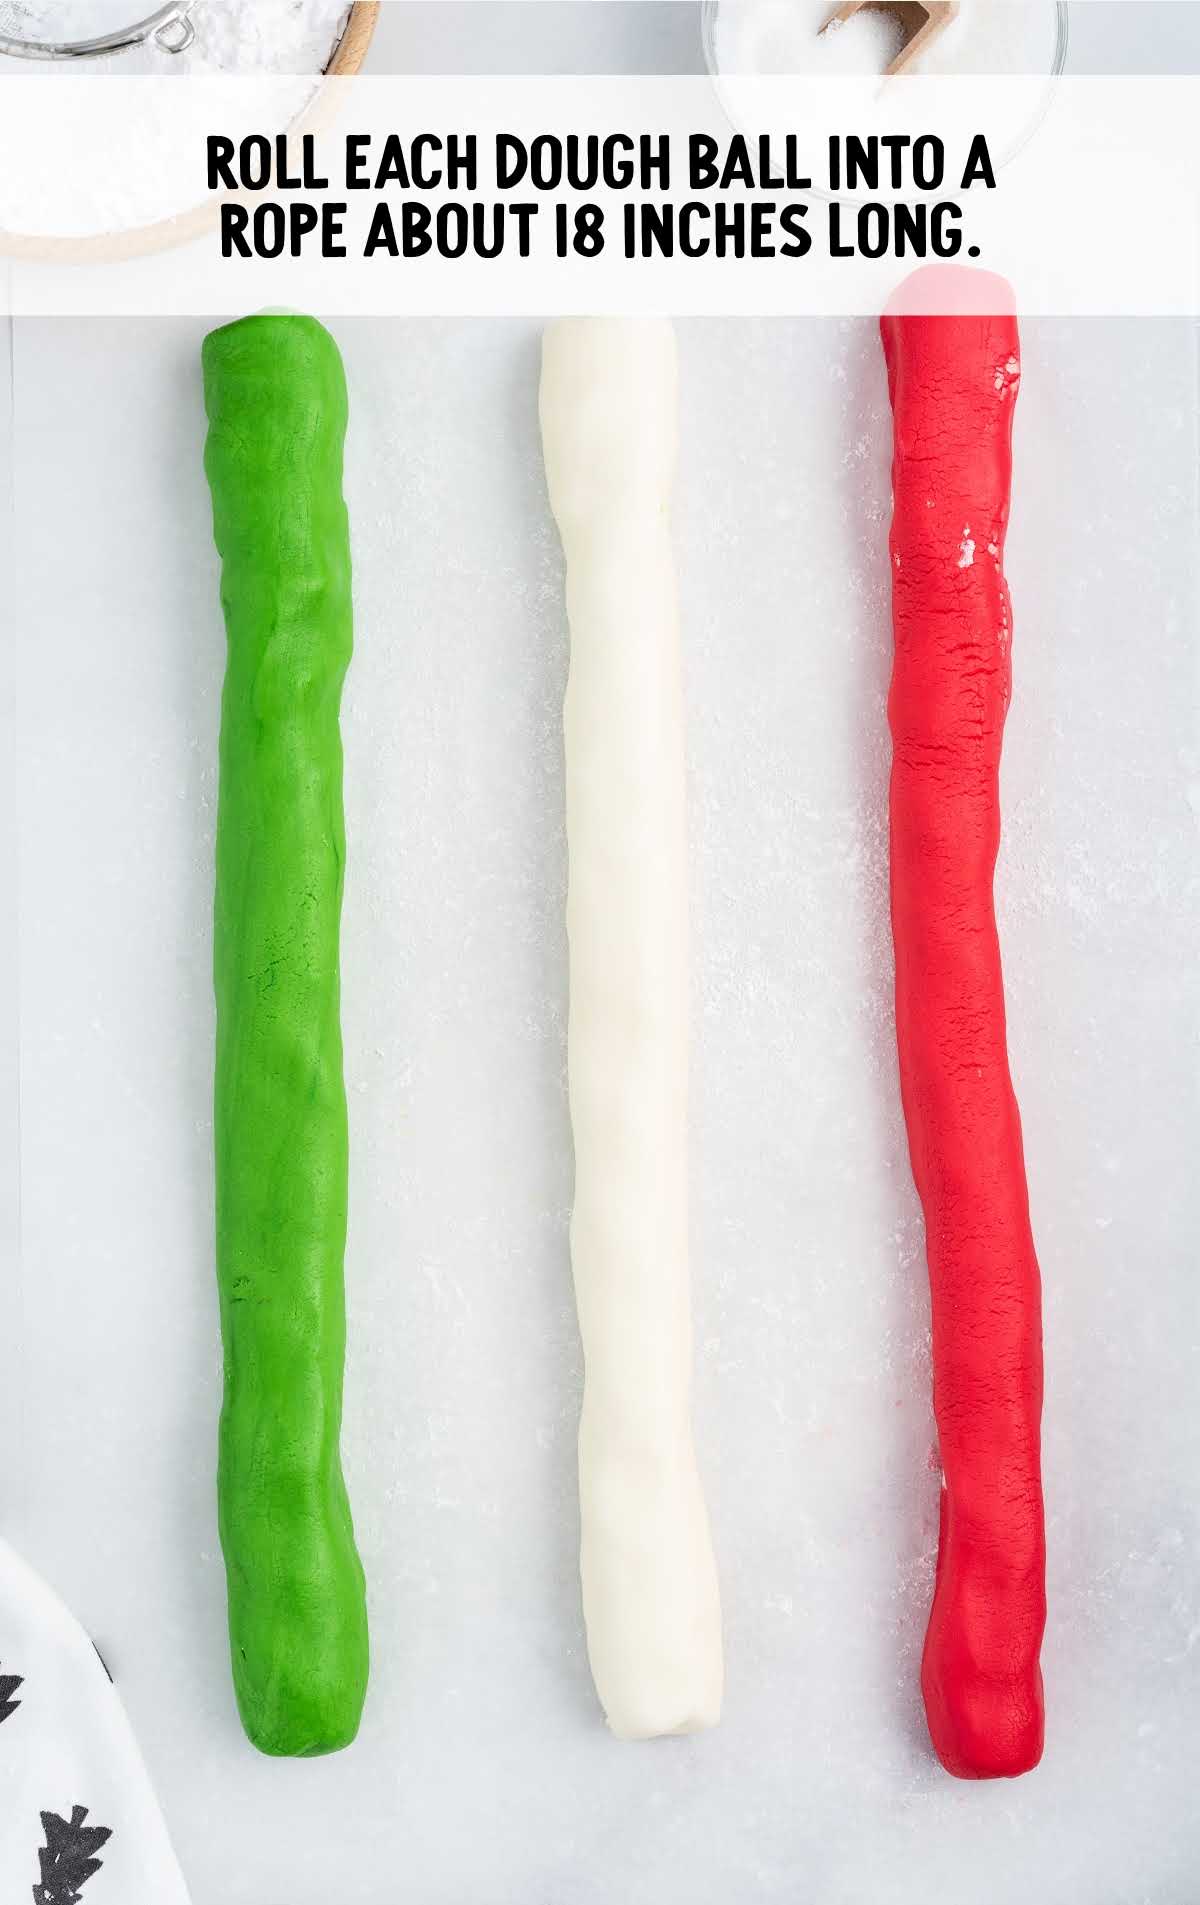
STEP SEVEN: Once all your Christmas peppermint patty dough balls have been colored and kneaded, roll each dough ball into a rope about 18 inches long (it should be about one inch thick).
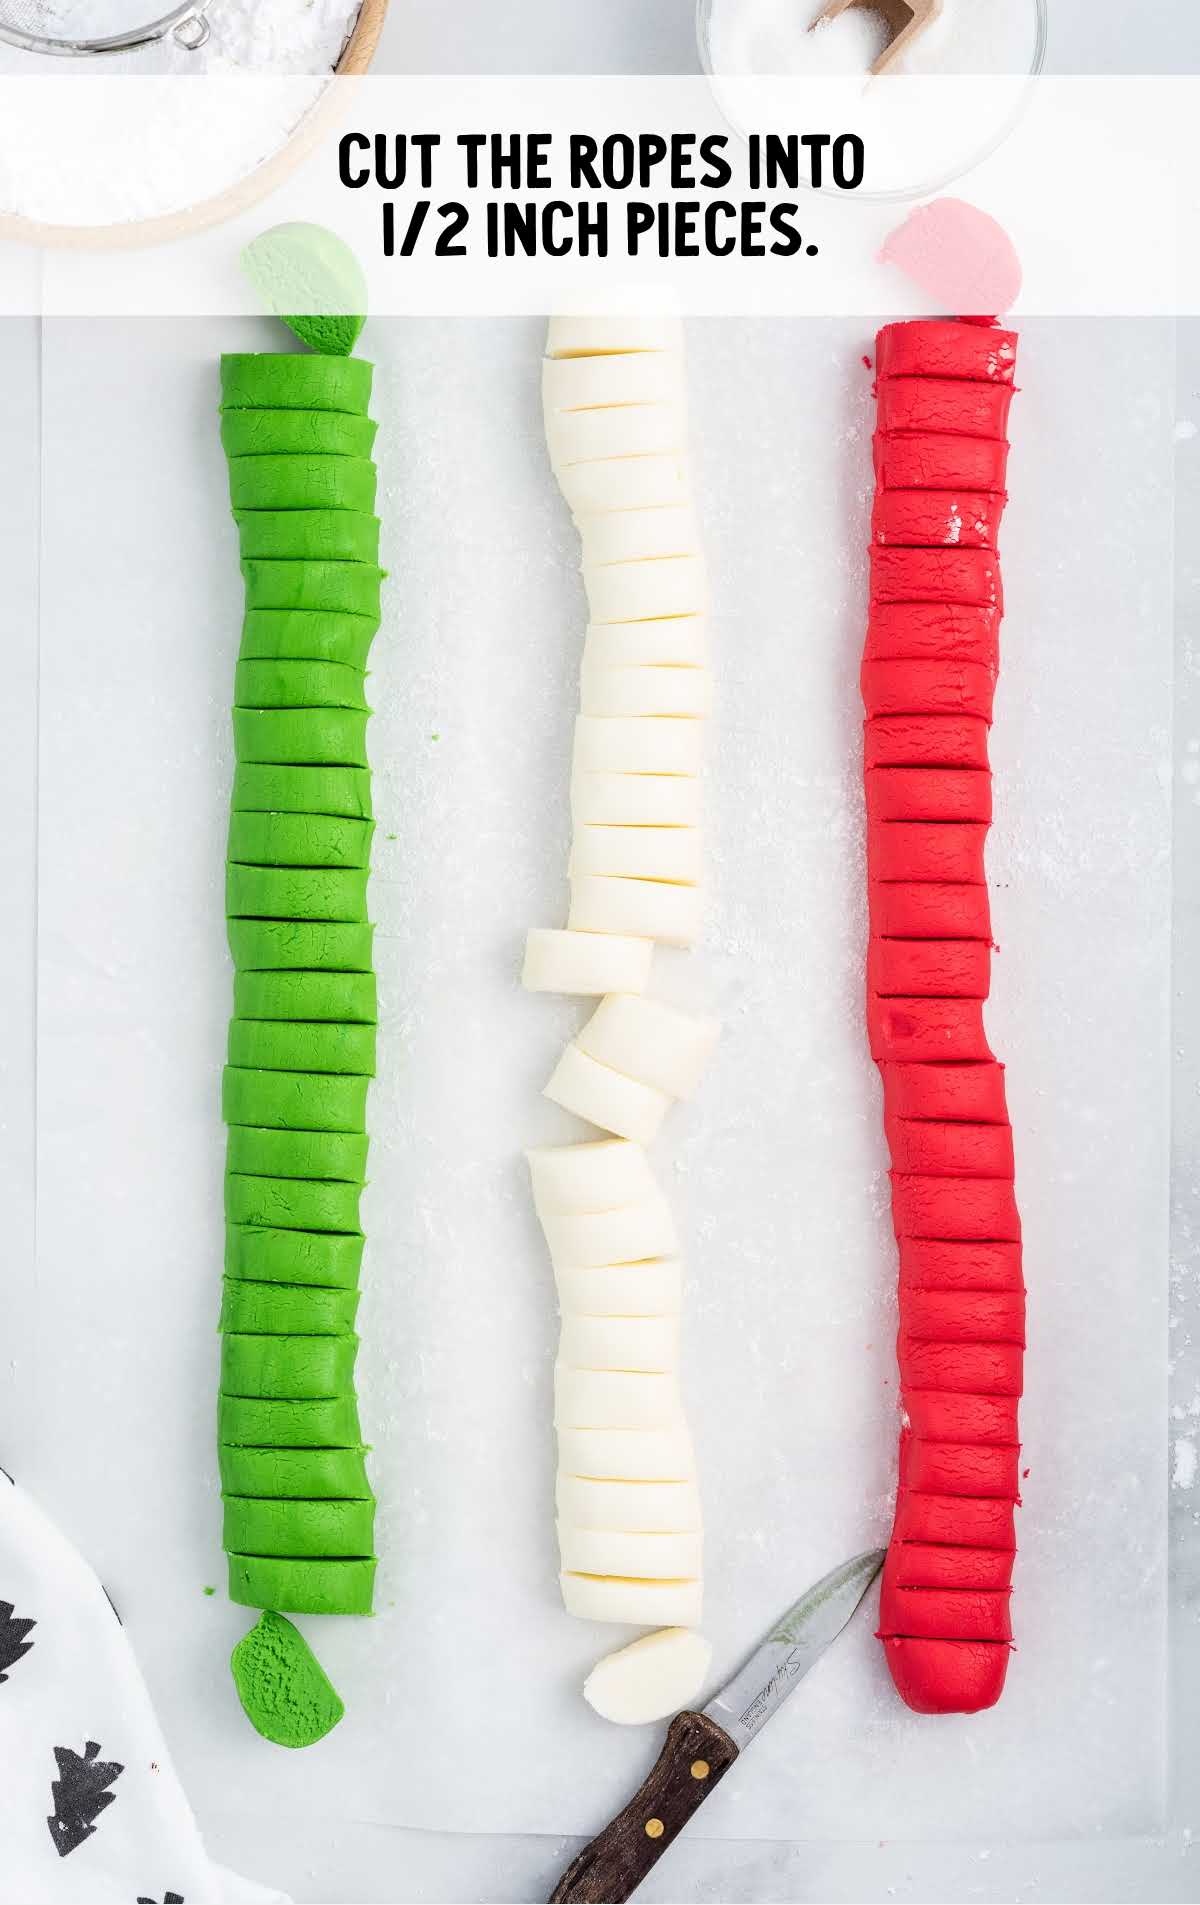
STEP EIGHT: Make ½-inch slices with a sharp knife, starting at one end, until you have cut the entire rope into ½-inch pieces. Repeat with the remaining dough ropes.
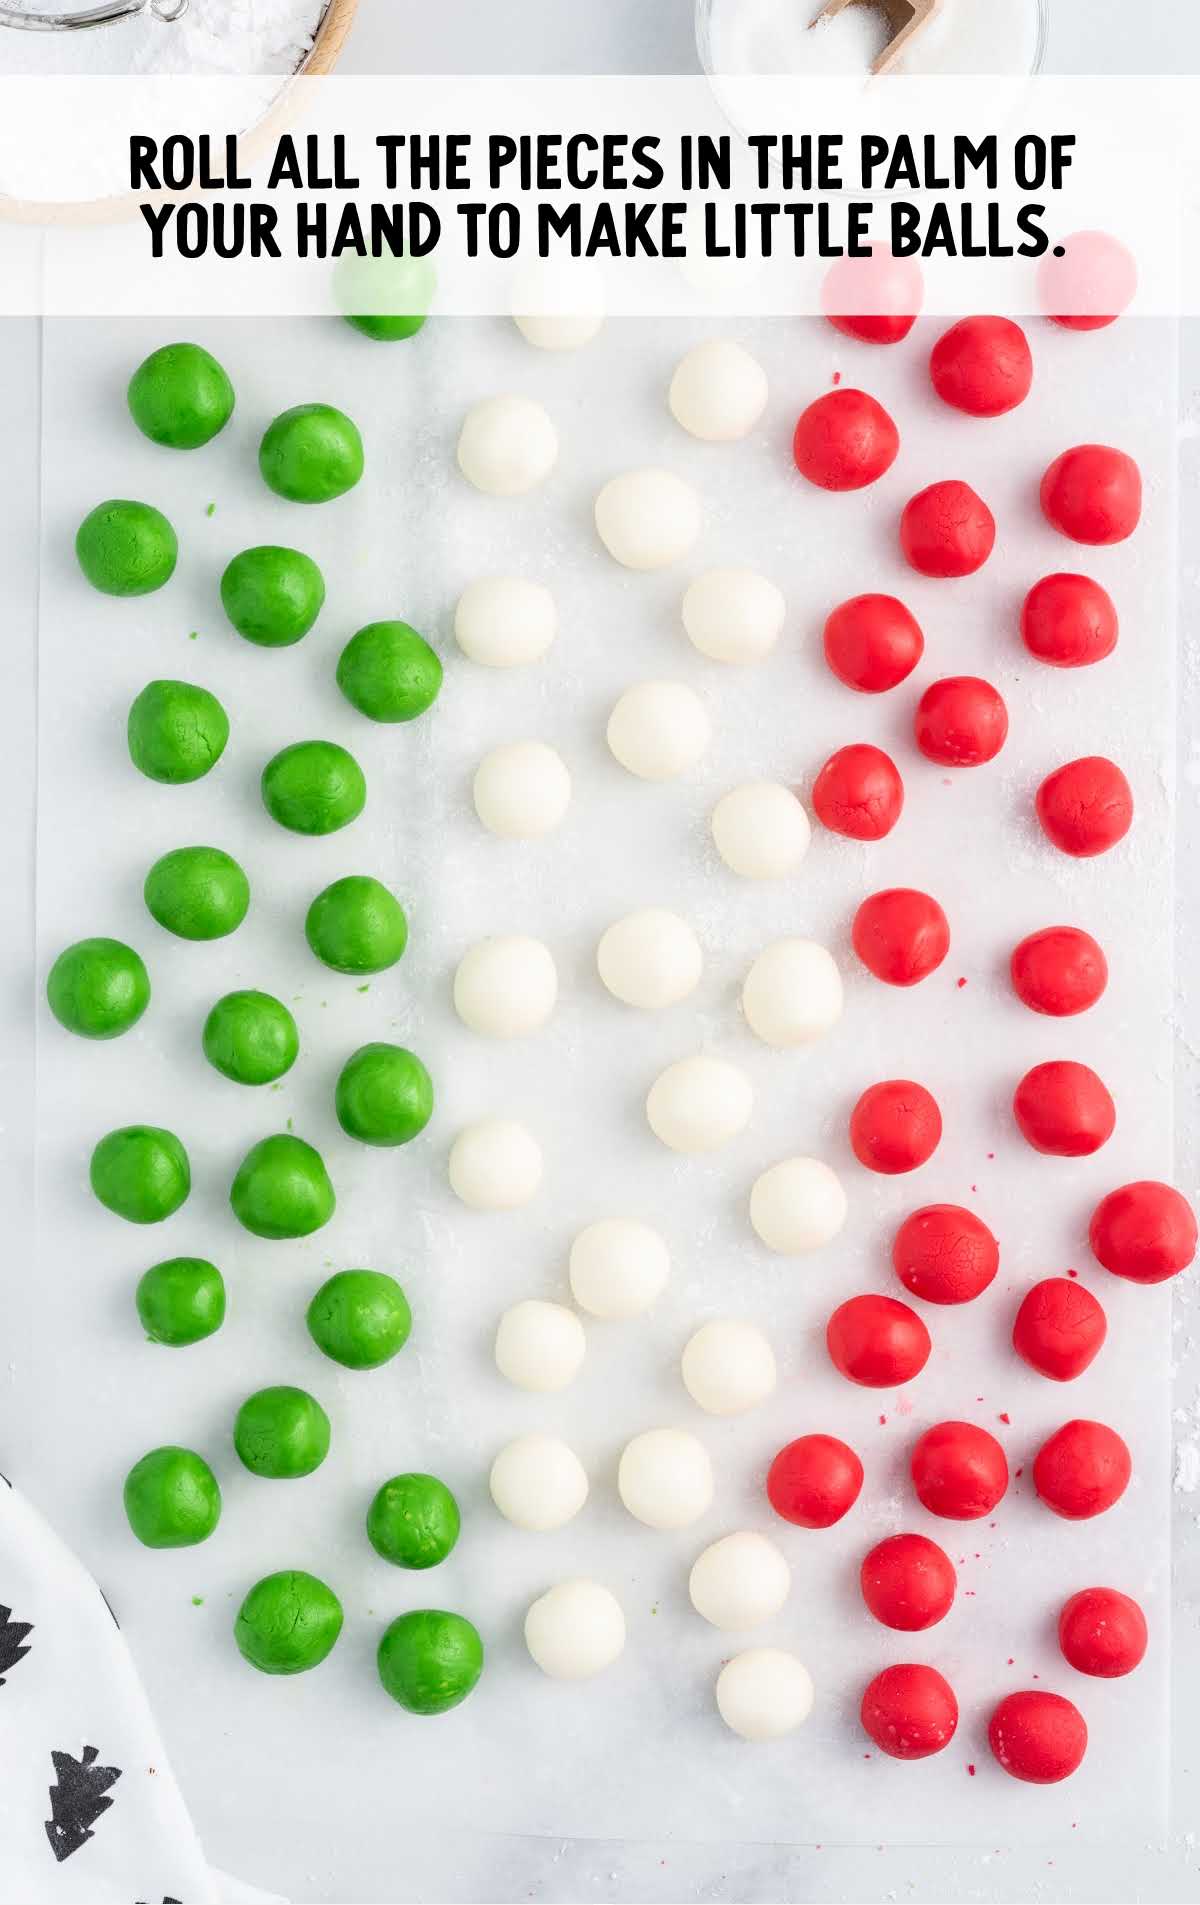
STEP NINE: Roll all the pieces of peppermint dough in the palm of your hand to make small balls. Set aside.
PRO TIP:
You could also swirl the mint colors together when rolling the mints into the balls.
STEP TEN: Drop two to three dough balls into the small bowl of granulated sugar and toss to coat.
Place them onto the prepared baking tray. Repeat until all the dough balls are coated and on the baking tray.
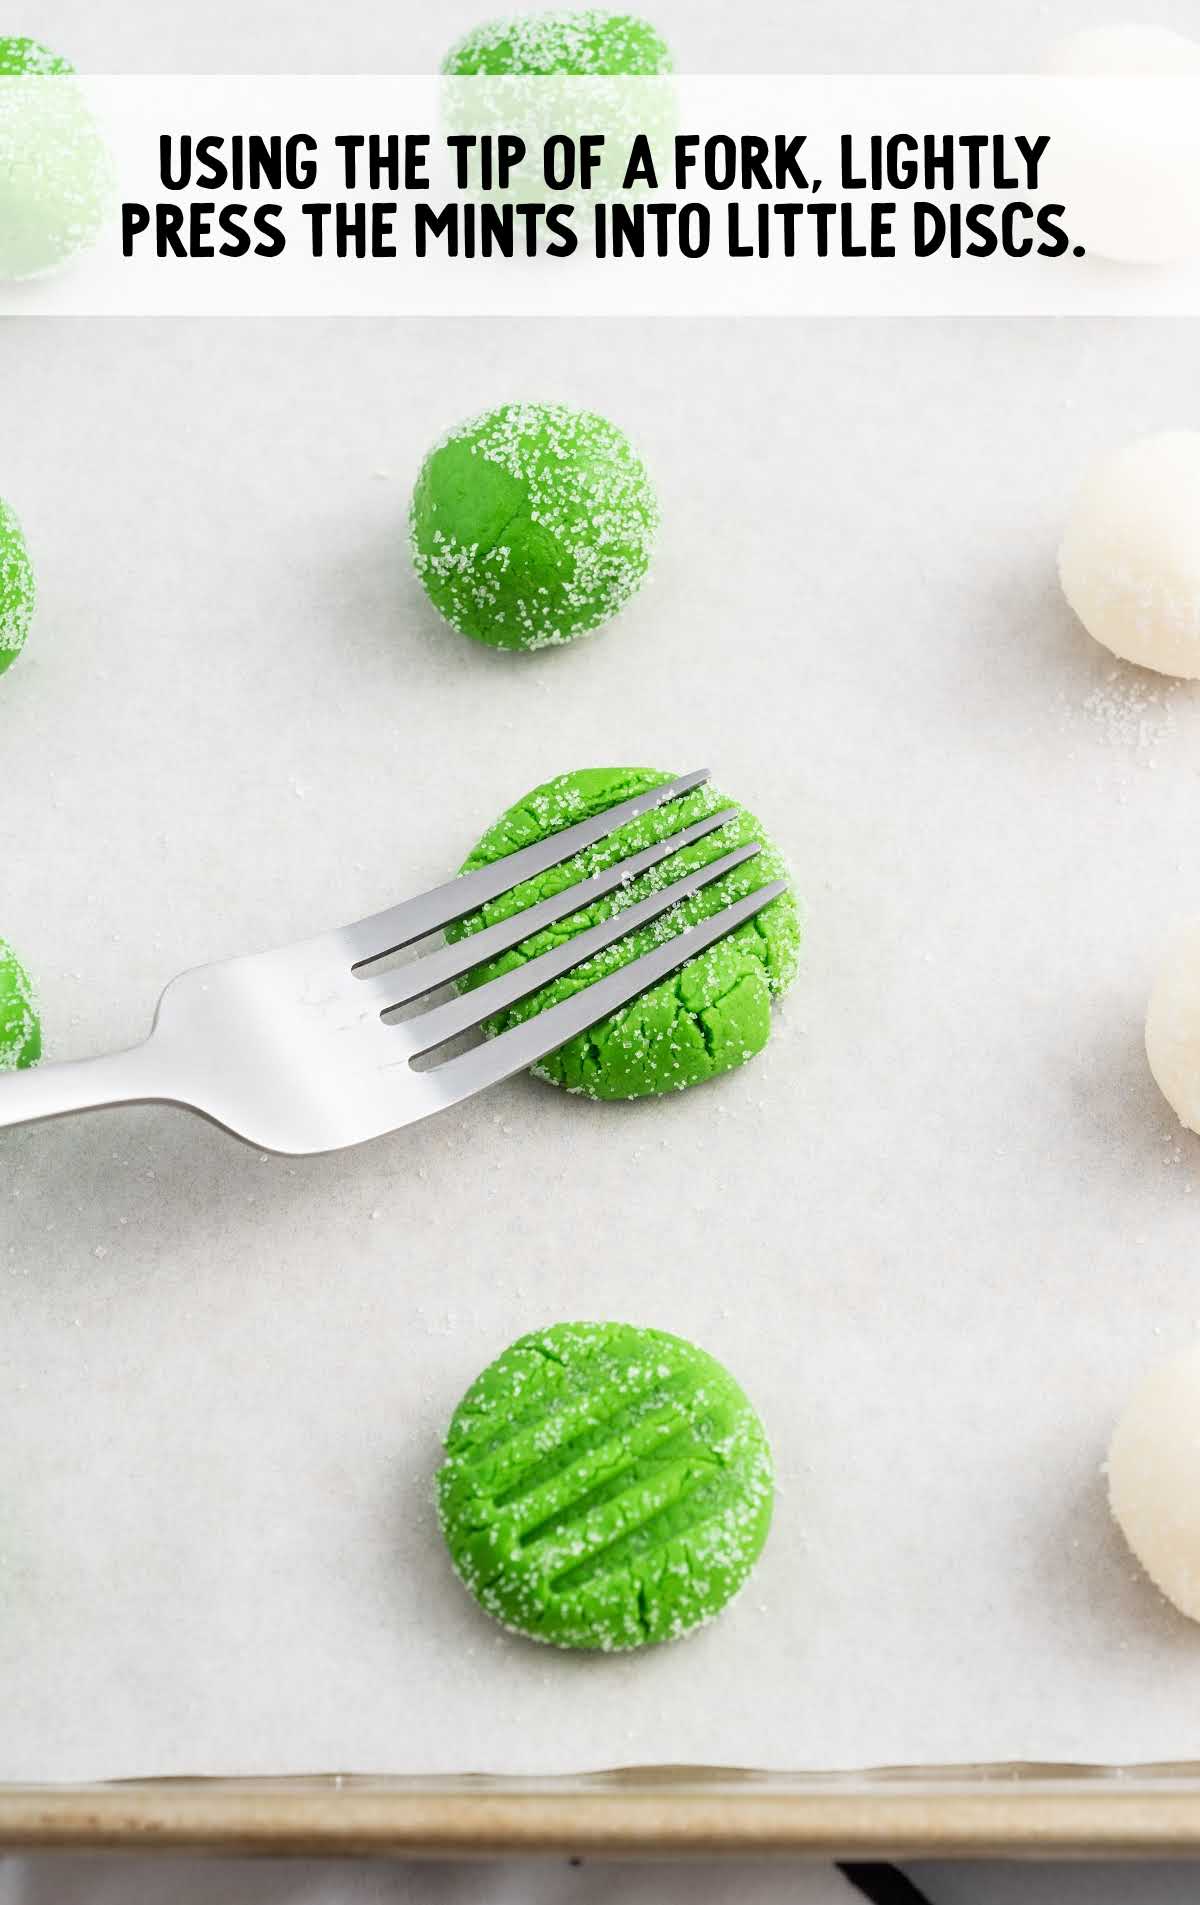
STEP ELEVEN: Using the tip of a fork, lightly press the Christmas peppermint patties into little discs.
The tines of the fork will leave a pretty striped pattern on the tops of each peppermint patty.
STEP TWELVE: Allow the Christmas peppermint patties to sit out at room temperature on the tray for up to 24 hours before you place them onto a platter to serve. This allows them to dry and set up.
How To Serve These Homemade Mints
Christmas butter mints provide a festive flavor to any holiday feast. Paired with a delicious dessert or enjoyed solo, these buttery, peppermint-flavored treats are always a crowd-pleaser.
A platter of freshly baked shortbread cookies is an ideal accompaniment for luxury Christmas mints, guaranteed to satisfy the most discerning holiday sweet tooth.
These dreamy little mints are a great treat to add to your holiday cookie trays, scattered amongst the cookies, such as our Christmas pinwheel cookies or gingerbread kiss cookies. They are so pretty that they can almost pass for decoration.
For more delightful candy ideas, our Martha Washington candy and homemade peanut butter cups are two favorites.
Troubleshooting Tips for Christmas Mints Recipe
Dough Too Sticky to Handle: If the dough is sticking to your hands or work surface, try adding powdered sugar gradually as you knead. Avoid adding too much at once; it’s best to add a tablespoon at a time to keep the texture soft but manageable.
Food Coloring Not Evenly Distributed: If the color isn’t spreading evenly through the dough, knead a little longer to incorporate it fully. You may also want to add a few extra drops if the color is too light, but avoid adding too much, as it could make the dough too wet.
Dough Cracking When Forming Balls: If your dough is cracking, it may be too dry. Add a small amount of softened cream cheese or a few drops of water and knead until smooth. Be cautious not to overdo it—just a touch should help restore flexibility.
Mints Not Setting Properly After 24 Hours: If your mints are still too soft after 24 hours, the room may be too humid. Try placing them in a less humid area to help them firm up. If they’re still not setting, place them in the refrigerator for a few hours, but be careful not to store them too long in the fridge, as they can become too hard.
Granulated Sugar Not Sticking to the Mints: If you find that the granulated sugar isn’t coating the mints well, try rolling the dough balls between your hands for a few extra seconds to warm them slightly before rolling in sugar. This can help the sugar adhere better.
Mints Too Hard or Too Soft in Texture: If your mints turn out too hard, they may have set too long or had too much powdered sugar added. For overly soft mints, ensure that you’re letting them dry fully for the recommended 24 hours in a cool, dry place.
MORE MINT FLAVOR RECIPES

Christmas Peppermint Patties Storage Tips
MAKE AHEAD: You can definitely make these Christmas mints ahead of time to save yourself some last-minute holiday stress.
After shaping and cutting them into your desired shapes, place the mints on a baking sheet and freeze them until they’re firm.
Once they’re solid, transfer them to an airtight container or a freezer-safe bag, separating layers with parchment paper to prevent sticking.
IN THE FRIDGE: This is a great make-ahead treat for any holiday treat platter.
These easy Christmas peppermint patties can be stored in an airtight container in the refrigerator for up to four days.
IN THE FREEZER: You can freeze cream cheese butter mints in an airtight container for up to two months.
Be sure to separate the layers with a piece of wax paper. Label the container so that you know the use-by date.
Why These Christmas Mints are the Best
SIMPLICITY: This recipe is incredibly easy to follow, making it perfect for both beginner and experienced cooks. The step-by-step instructions ensure that you’ll achieve beautiful, tasty mints every time.
PERFECT FOR GIFTING: These homemade Christmas mints make wonderful gifts. Whether you’re giving them as presents or bringing them to holiday parties they’ll be a hit. You can even package them in festive containers for that extra special touch.
IRRESISTIBLE FLAVOR: The combination of peppermint and sweetened condensed milk results in a deliciously creamy, minty flavor that’s both refreshing and satisfying.
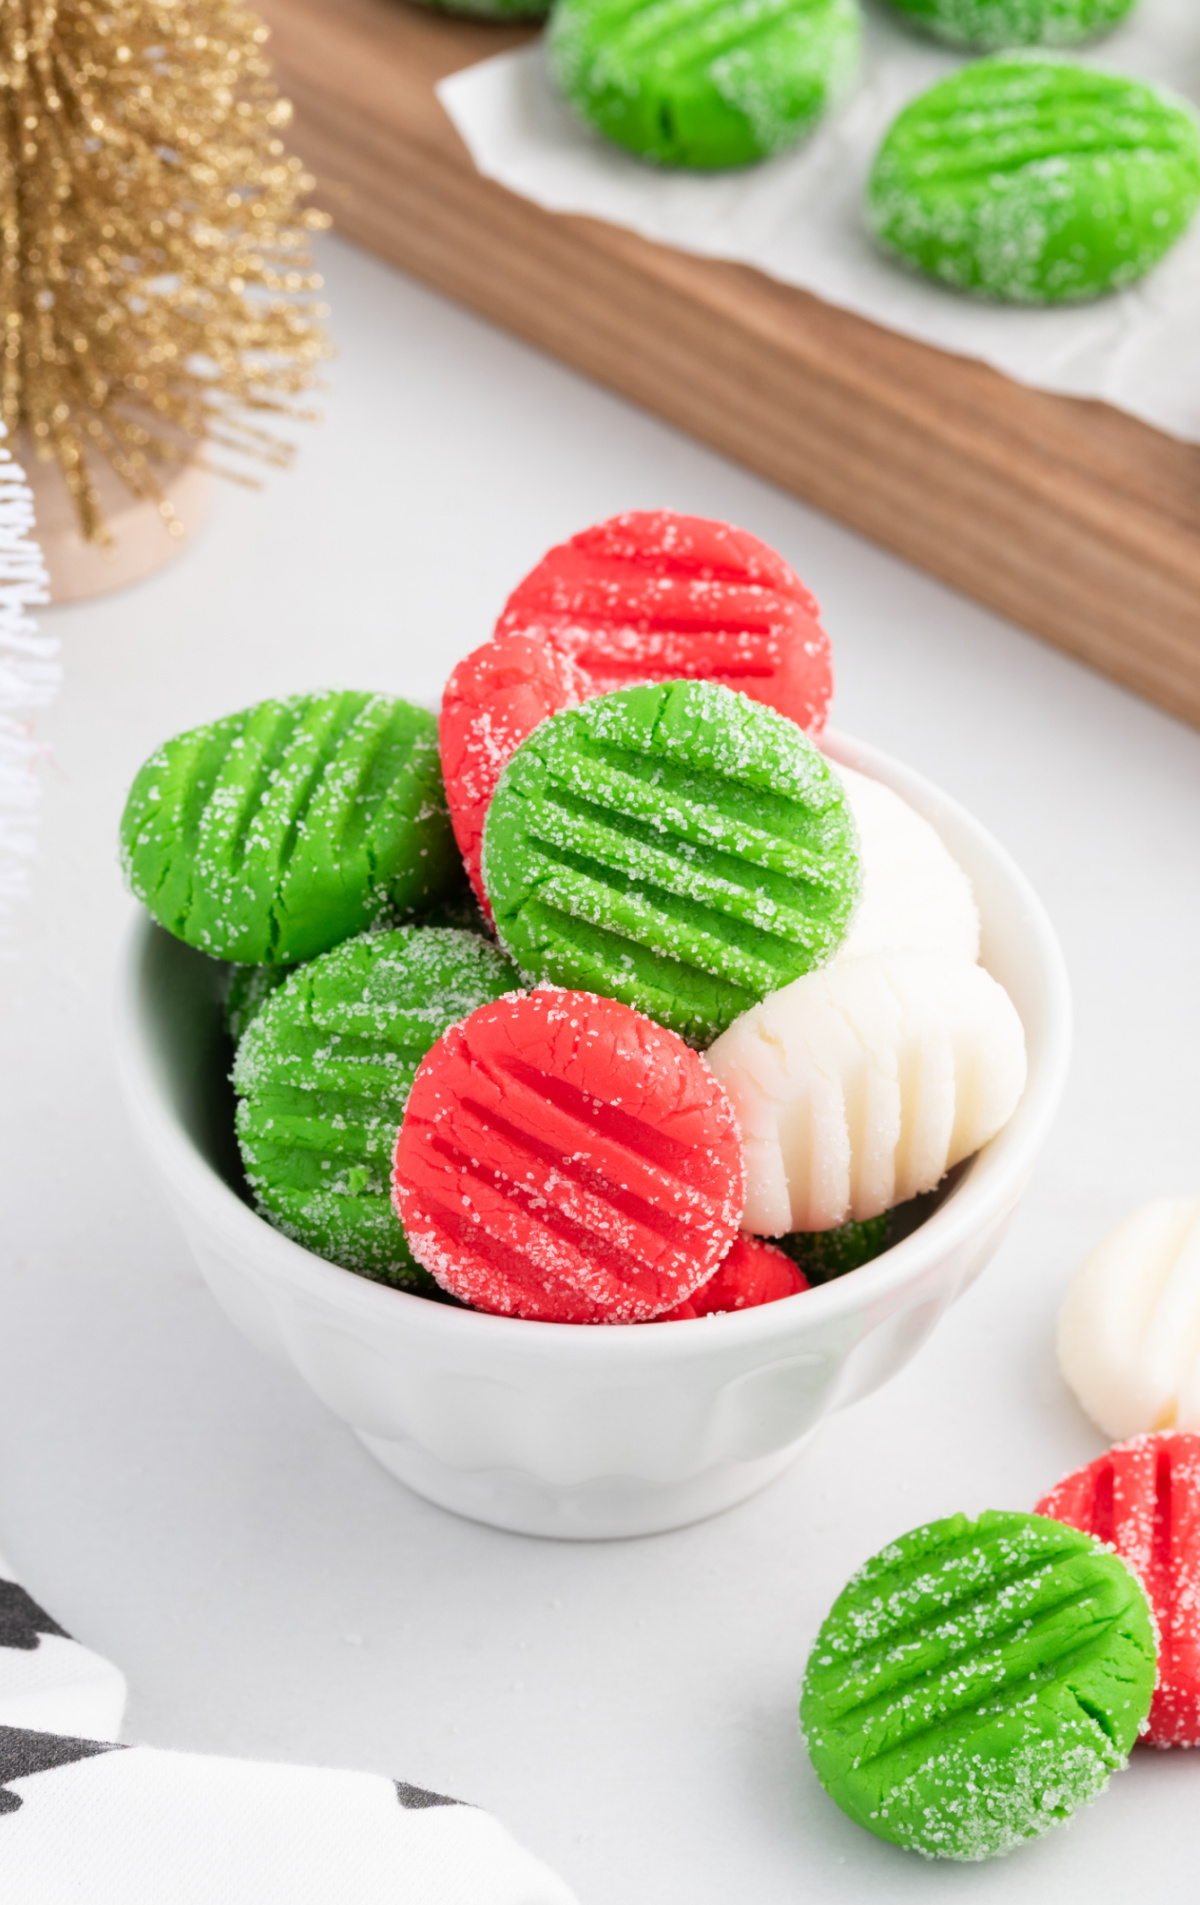
These easy cream cheese mints will be the stars of the holiday season. With a delicious peppermint flavor and festive red and green colors, they’re the perfect treat to enjoy while you celebrate.
Soft on the inside with a light sugar coating on the outside, these bring a fresh, minty finish. Check out more of our best Christmas candy recipes.
Christmas Mints Frequently Asked Questions
This simple recipe can be stored in the fridge for up to four days in an airtight container.
This easy cream cheese mint recipe could also be made in silicone molds to create fun shapes if you prefer.
The sky’s the limit for these mints. Any flavor of extract you can think of would be a great idea to try out for these creamy mints.
More Recipes You’ll Love
- Easy Christmas Cookies
- Carmelitas
- Christmas Roll
- Christmas Crunch
- Reindeer Food
- Peppermint Patty Cookies
- Cinnamon Ornaments
- Peppermint Cheesecakes
- Chocolate Peppermint Cookies


Christmas Mints
Ingredients
- ⅓ cup granulated sugar
- 4 ounces cream cheese, room temperature
- 2 tablespoons unsalted butter, room temperature
- 2 tablespoons light/clear corn syrup, I used Karo brand
- 1 teaspoon peppermint extract
- 4¼ to 5 cups powdered sugar, divided
- 6 drops green liquid food coloring
- 6 drops red liquid food coloring
Instructions
- Line a large rimmed baking tray with parchment paper. Place the granulated sugar into a small bowl. Set aside.
- In a large mixing bowl with a handheld mixer on low speed, beat the cream cheese, unsalted butter, light corn syrup, and peppermint extract for 1 minute or until smooth.
- Slowly add 4¼ cups powdered sugar, ½ cup at a time, to the bowl with the mixer on low. Once you get close to incorporating all of the powdered sugar, your dough will be so thick that you may need to switch to a spatula or wooden spoon and finish mixing the dough by hand.
- Lay out a piece of parchment paper onto a clean counter and sprinkle ¼ cup of the remaining powdered sugar onto the parchment paper, then turn out your dough onto the parchment paper.
- Divide the dough into three equal parts. Create a shallow well in the center of two of the dough balls. In the first dough ball, add the red food coloring. Add the green food coloring to the second dough ball, and your last dough ball will remain white.
- Carefully knead your red dough ball to evenly distribute the food coloring. You will need to add up to an additional ¼ cup of powdered sugar as you knead because the liquid food coloring will make your dough sticky. Repeat with the green dough ball. You may need to knead your white dough just a little with a tablespoon or 2 of additional powdered sugar. Note: The amount of extra powdered sugar you need for kneading depends on how wet/sticky your dough is. If the temperature is very warm, you may need more, or if very cold, you may need less. Don’t add too much powdered sugar at once. Remember, you can always add more, but you can’t take it away.
- Once all your Christmas peppermint patty dough balls have been colored and kneaded, roll each dough ball into a rope about 18 inches long (it should be about 1 inch thick).
- Make ½-inch slices, starting at one end, until you have cut the entire rope into ½-inch pieces. Repeat with the remaining dough ropes.
- Roll all the pieces of peppermint dough in the palm of your hand to make little balls. Set aside.
- Drop 2 to 3 dough balls into the small bowl of granulated sugar and toss to coat. Place them onto the prepared baking tray. Repeat until all the dough balls are coated and on the baking tray.
- Using the tip of a fork, lightly press the Christmas peppermint patties into little discs. The tines of the fork will leave a pretty striped pattern on the tops of each peppermint patty.
- Allow the Christmas peppermint patties to sit out at room temperature, on the tray, for up to 24 hours before you place them onto a platter to serve. This allows them to dry and set up.
Video
Notes
- You can use small silicone candy molds for cute, shaped mints. Dry the same as directed below.
- Make sure your cream cheese is at room temperature to ensure the mint mixture doesn’t have any lumps in it.
- If you want a deeper color, you can add up to ½ teaspoon of liquid food coloring. You may even need more of the extra powdered sugar to get your peppermint patty dough to be the right consistency. You do not want it too stiff, but it should not be sticky. Gel food coloring is also a great option because its colors can be a little more vibrant and intense without adding too much moisture to the dough.
- The amount of extra powdered sugar you need for kneading depends on how wet/sticky your dough is. If the temperature is very warm, you may need more, or if very cold, you may need less. Don’t add too much powdered sugar at once. Remember, you can always add more, but you can’t take it away.
- You could also swirl the mint colors together when rolling the mints into the balls.
Nutrition


Comments
Dollie says
These are refreshing and minty
Becky says
Yummy! I would make these orange/yellow swirled.
Helen H says
My mother made these for years. She used various food colors depending on the party. For Easter they were blue. For St. Patricks day they were green. Halloween, orange.. and Valentines red. They are so easy to make and everyone loves them.
Racheal says
This is an amazing recipe. I would definitely try other flavors such as the pomegranate or coconut.
Sara says
Love to make these in all colors, including pink and blue.
Dia says
Would you substitute the peppermint flavor of the Christmas mints with raspberry or pomegranate flavoring? No! Peppermint is best!
Karen says
I would swirl all 3 colors together!
Karen Garner says
Can’t wait to make these!!! My answer to the question about changing the flavor is no, I would not. If you would use raspberry flavoring they would not be mints.
Robin says
I think they would be good with raspberry flavoring.