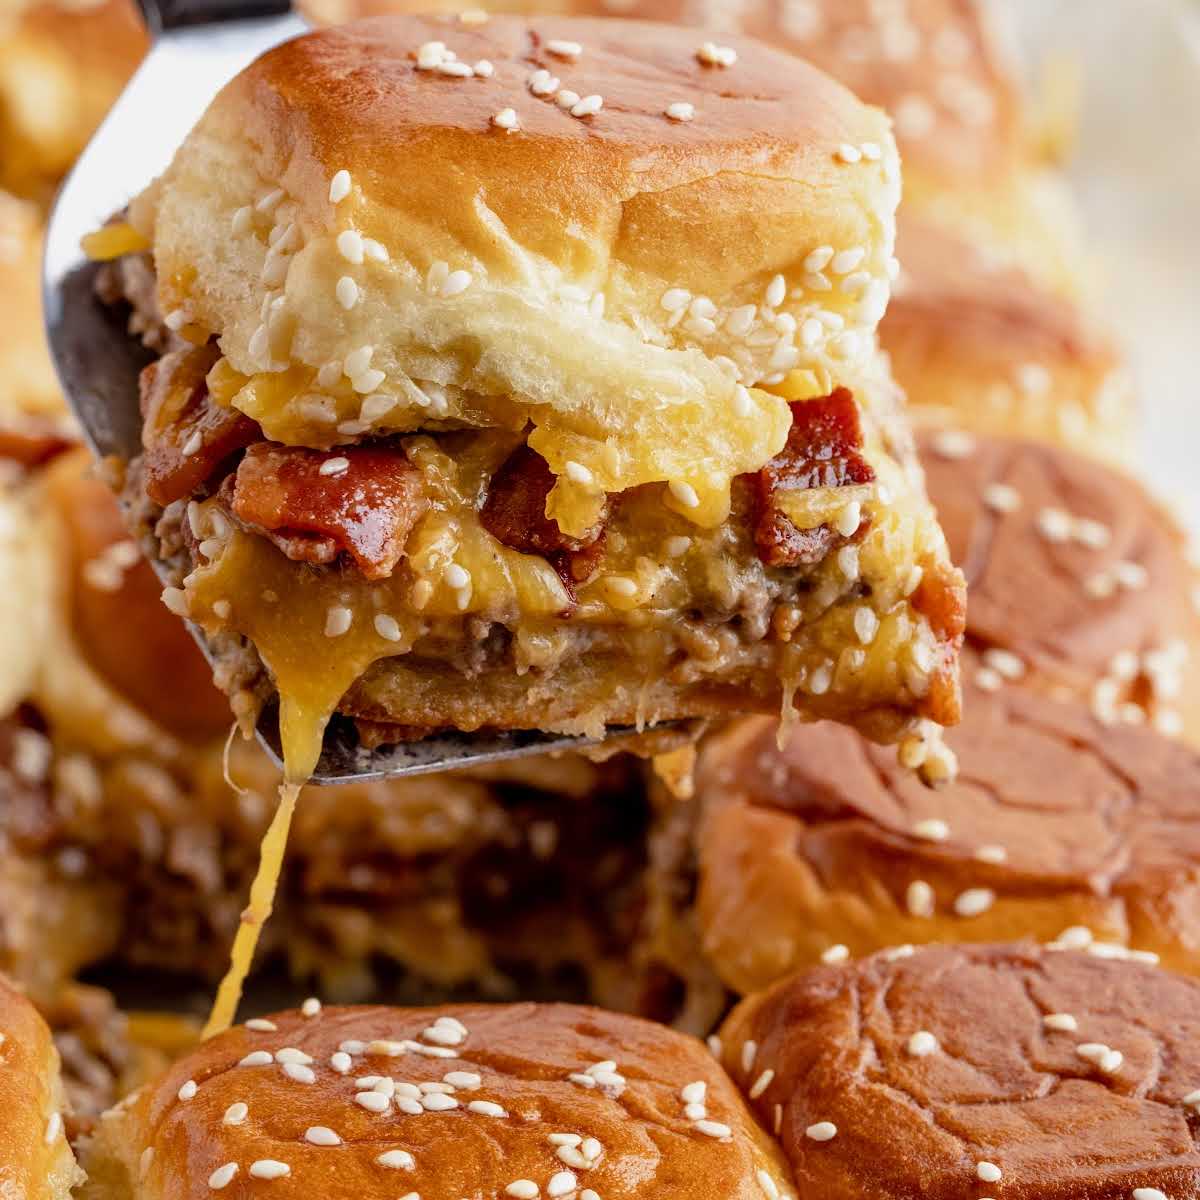


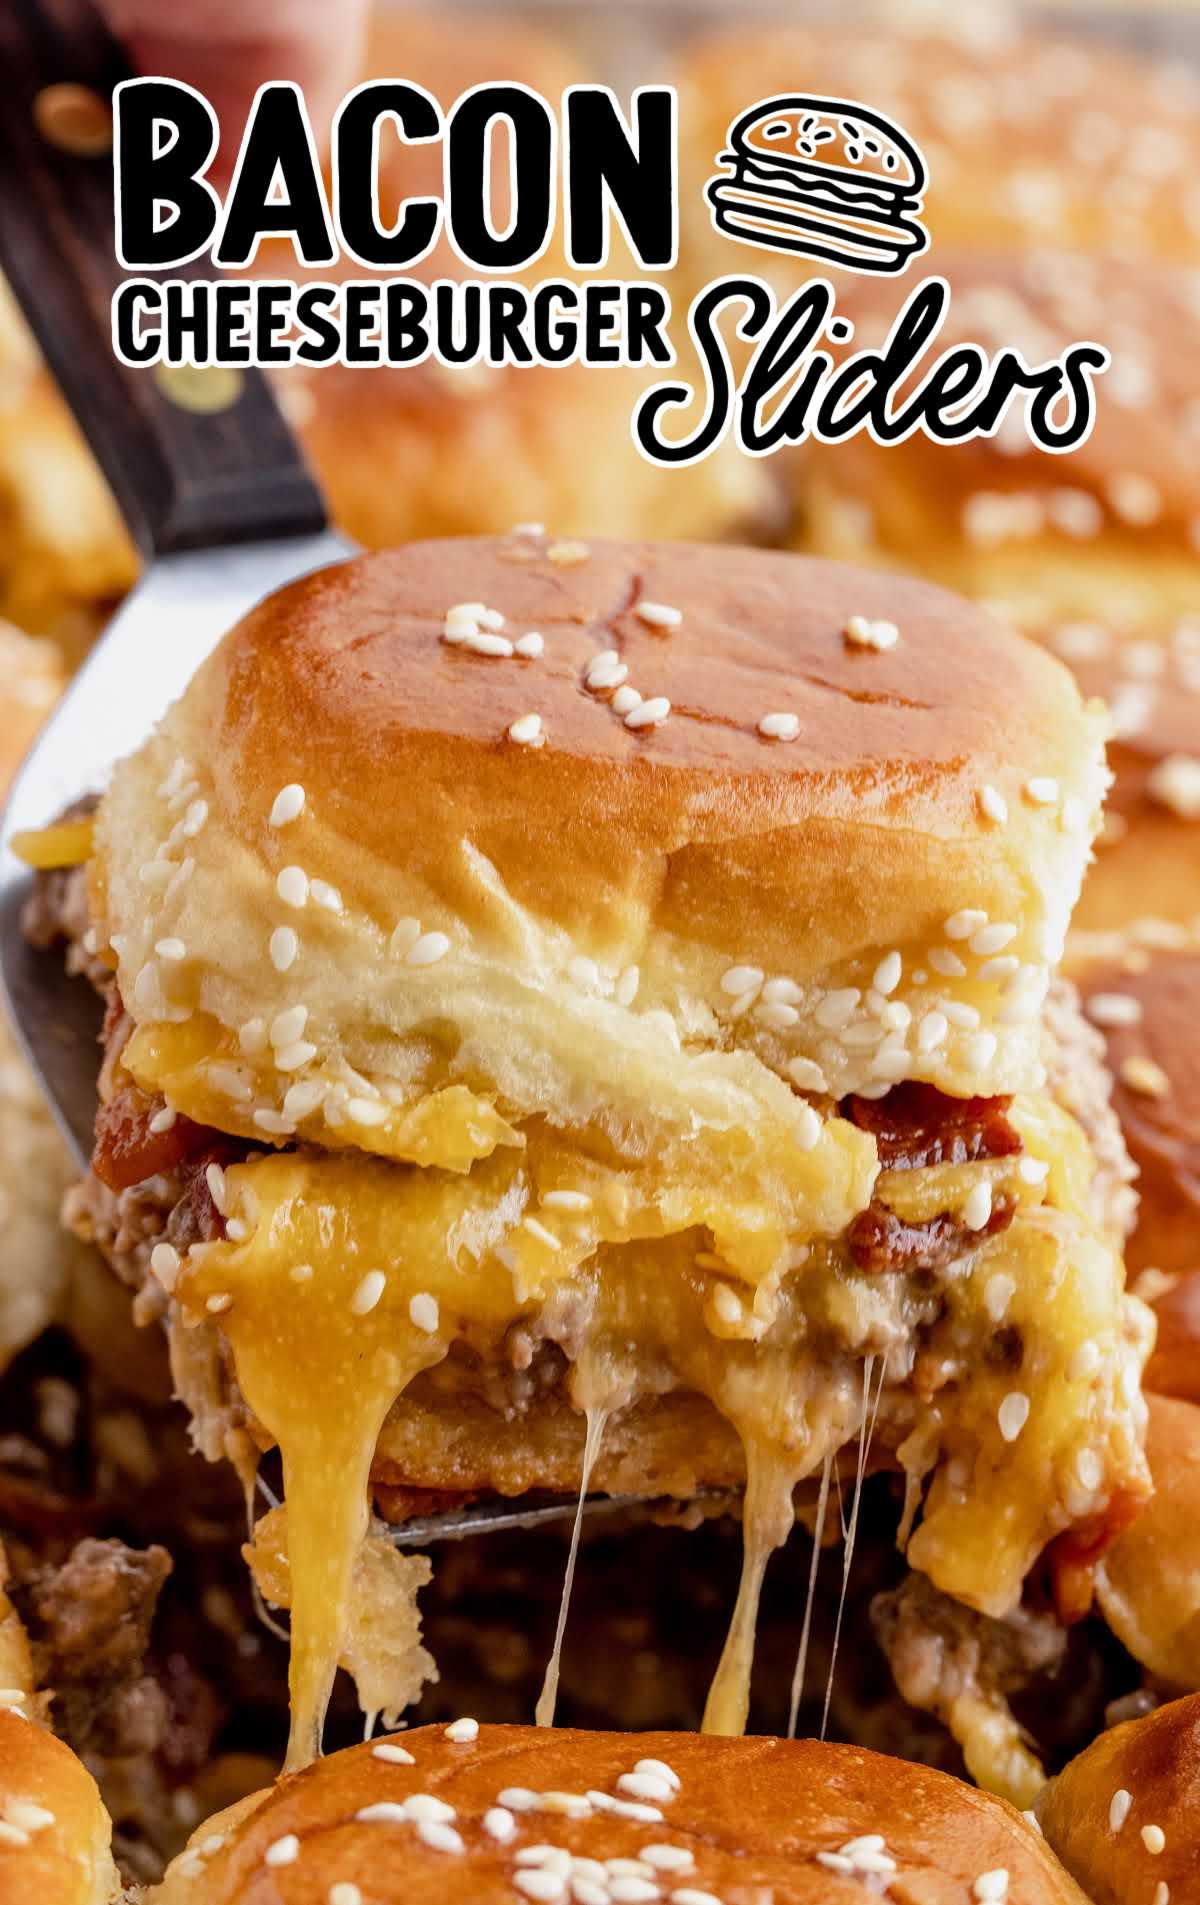
I think we can all agree that bacon makes the world better, and these bacon cheeseburger sliders support that theory. Soft sweet rolls topped with creamy beef, crisp bacon, and melty cheese make these a fun and delicious treat.
Bacon Cheeseburger Sliders Ingredients
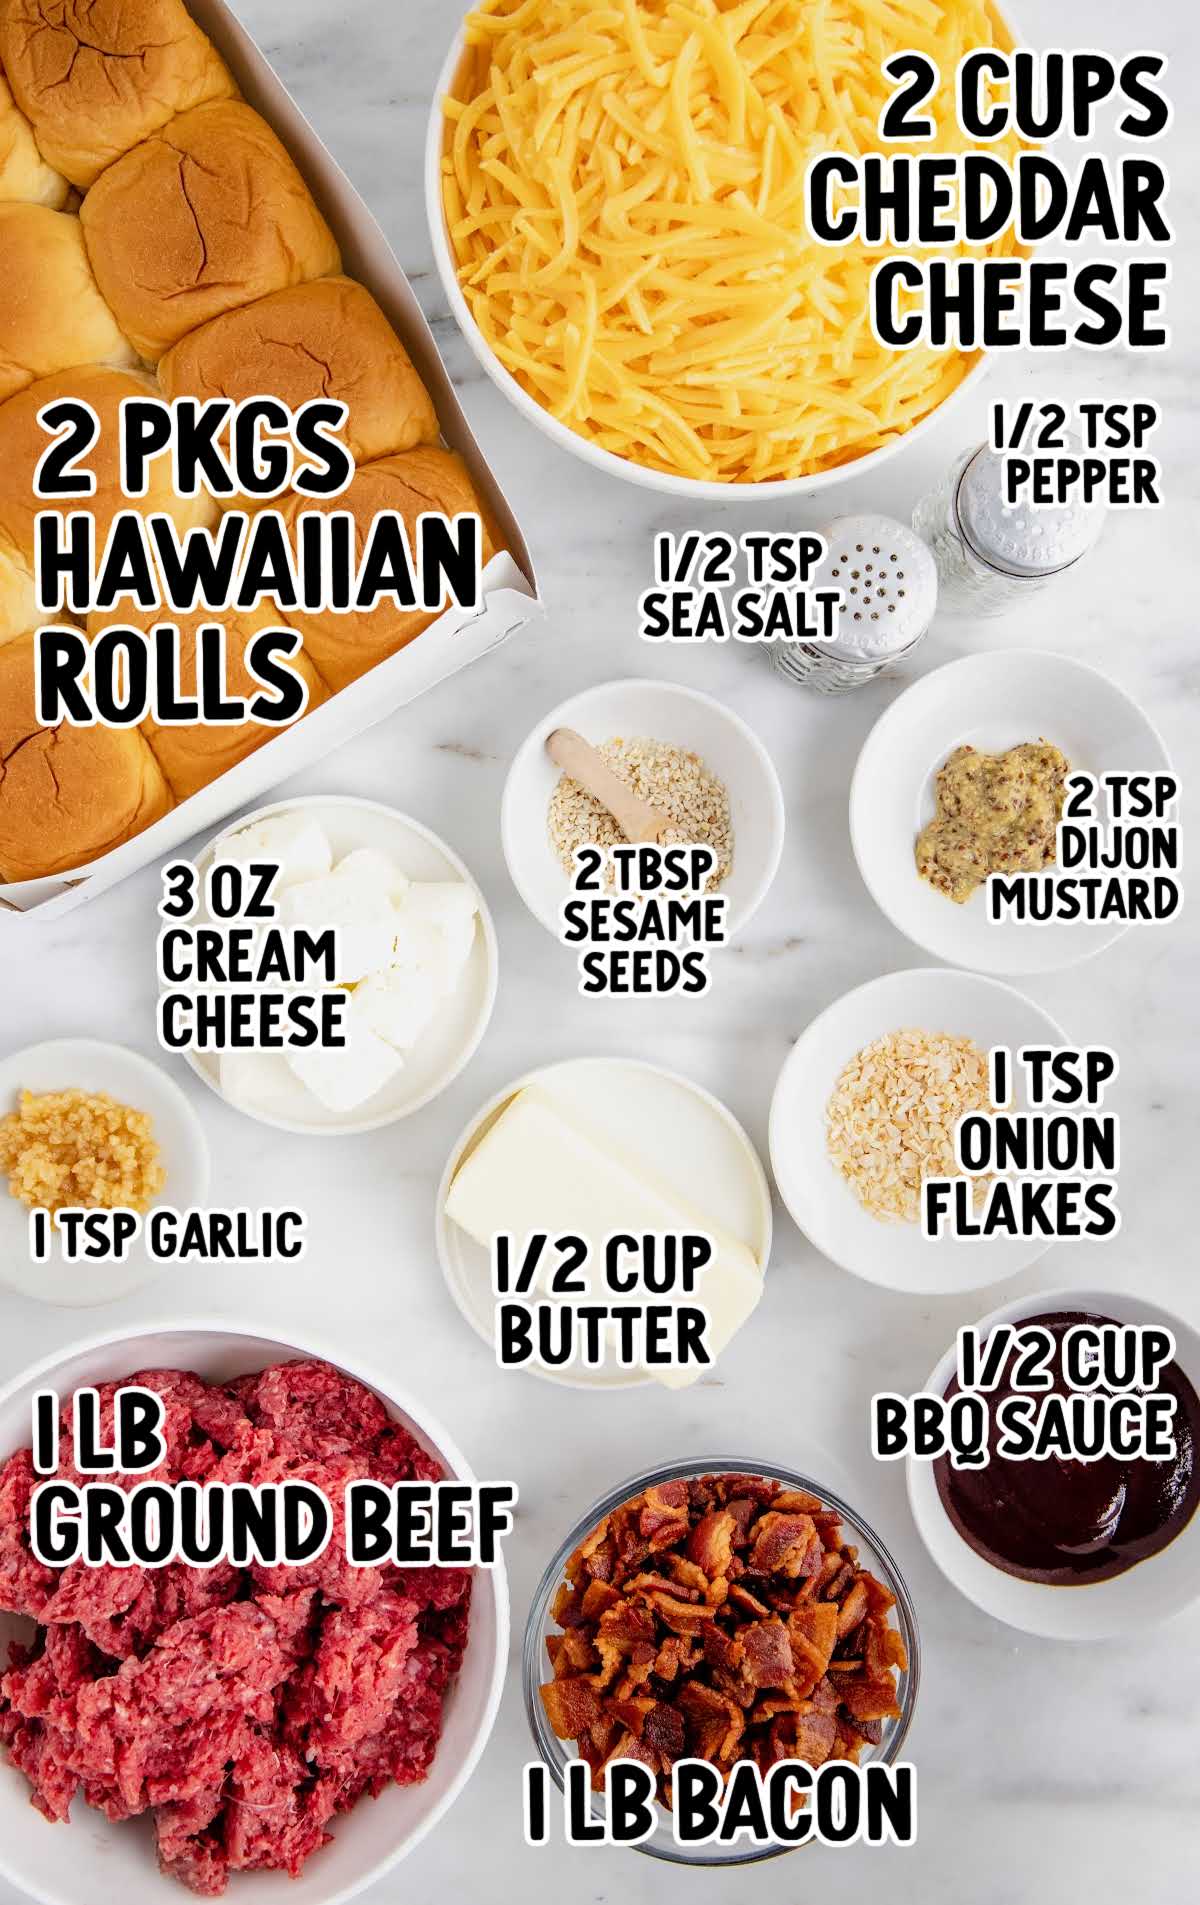
You’ll need these simple ingredients:
- 1 pound ground beef, crumbled
- 1 teaspoon minced garlic
- ½ teaspoon sea salt
- 1 teaspoon dried onion flakes
- ½ teaspoon ground black pepper
- 3 ounces cream cheese, cut into small cubes
- ½ cup barbecue sauce
- 2 teaspoons dijon mustard
- 1-2 packages Hawaiian rolls (may not use all; I used 1½ packages to fill a 9×13)
- 2 cups grated cheddar cheese
- 1 pound bacon, cooked and crumbled
- ½ cup salted butter, melted
- 1 to 2 tablespoons sesame seeds
Bacon Cheeseburger Sliders: Substitutions and Additions
GROUND BEEF: You could use ground turkey or chicken. You could also add in spicy ground sausage.
If using ground chicken or turkey, they have a milder flavor, so you might want to add a bit more seasoning to compensate.
CHEDDAR CHEESE: For a different taste, try swapping the cheddar with pepper jack, Swiss, Colby Jack, or provolone.
Each cheese brings its unique flavor profile, with pepper jack adding a spicy kick, Swiss offering a nutty taste, and provolone giving a smoother, milder touch.
We used shredded cheese, but you could use slices of cheese like American cheese as well.
BACON: While traditional bacon adds a smoky flavor, you can substitute it with turkey bacon for a lighter version.
BUNS: We used sweet Hawaiian rolls, but you could also use plain dinner rolls, potato slider buns, or small plain hamburger buns. Any type of dinner rolls are delicious with these!
ONIONS: Red onion can be used for a sharper flavor, or caramelized onions for a sweeter, more gourmet touch. For those who prefer a milder taste, green onions are an excellent alternative.
PICKLES: If you’re not a fan of pickles, consider replacing them with sliced olives for a briny flavor or jalapeños for a spicy kick. Both options can add an interesting twist to the sliders.
KETCHUP AND YELLOW MUSTARD: Try swapping these with BBQ sauce or a special burger sauce for a different flavor profile. A mix of mayonnaise, ketchup, and a dash of hot sauce can make for a creamy and slightly spicy burger sauce.
You might also love adding spicy brown mustard, honey mustard, Fireball BBQ sauce, or Carolina mustard BBQ sauce.
SEASONING: The key to any recipe is flavor! For a different taste, try using garlic salt, red pepper flakes, Worcestershire sauce, garlic powder, or a seasoning blend like Italian seasoning or a dash of paprika for a little extra kick.
How to Make This Bacon Cheeseburger Sliders Recipe
STEP ONE: Preheat the oven to 375°F. Spray 9×13 pan with nonstick cooking spray.
Use a sharp serrated knife to cut the rolls in half. You will not separate into individual sliders. Leaving the entire package of rolls intact, cut in the middle so you have a top half and bottom half of the rolls, then set aside.
STEP TWO: Add ground beef, minced garlic, sea salt, onion flakes, and pepper to a large skillet.
Cook the beef mixture over medium heat, breaking up the meat and stirring, until the meat is no longer pink.
STEP THREE: Stir cream cheese, barbecue sauce, and mustard into the hamburger meat mixture and set aside.
PRO TIP:
The cream cheese and sauce mixed into the ground beef help it stick together and also make the cheeseburger sliders extra tasty.
STEP FOUR: Place the bottom of the rolls into the prepared casserole dish.
STEP FIVE: Sprinkle one cup of cheese over the bottom half of the rolls. Top with the hamburger mixture.
Sprinkle crumbled bacon over the meat mixture and then cover with the remaining cheese.
Place the tops of the rolls back into place.
PRO TIP:
Crumbled bacon is much easier to work with than bacon slices when it comes time to pull the sliders apart for serving.
You can use leftover bacon from breakfast to make it really easy!
STEP SIX: Melt butter in a microwave-safe dish and stir sesame seeds into it.
STEP SEVEN: Pour the melted butter mixture over the rolls, using a pastry brush to spread the sesame seeds and butter evenly over the top buns.
PRO TIP:
Don’t skimp on the butter. It soaks into all the nooks and crannies and adds a ton of flavor to both the top and the bottom half of the slider buns.
STEP EIGHT: Cover with aluminum foil and bake for 20 minutes until cheese is melted and rolls are heated through.
Remove aluminum foil and bake for five to ten minutes longer until the top of the buns are browned.
How to Serve Bacon Cheeseburger Sliders
These easy bacon cheeseburger sliders make the perfect meal on busy school nights or would be a big hit to feed a hungry crowd at your next game day party.
Add some dill pickle slices, a Caeser salad, French fries, sweet potato fries, or coleslaw for a complete dinner.
Little sandwiches are a fun finger food option, just like our buffalo chicken pinwheels and pull apart pigs in a blanket.
If you’re looking for family dinner ideas, try our ground beef casserole.
When to Serve Cheeseburger Sliders
These are incredibly versatile and can be served on a variety of occasions.
Here are some ideal scenarios for serving them:
Casual Gatherings: They’re perfect for informal get-togethers like family reunions, picnics, or game nights. Their small size makes them easy to eat while mingling.
Sports Events and Tailgating: They are a classic choice for watching sports events, whether at home or game day tailgating. Easy to hold and eat, they won’t distract from the next big play.
Outdoor Events: Sliders are perfect for barbecues, pool parties, or beach outings. Prep them at home and then put them in a throw away baking dish. They’re easy to cook on a grill and convenient for outdoor eating.
Late-Night Snacks: Their size makes them ideal for a late-night snack, especially when you don’t want a full meal.
Buffets or Potlucks: Their small size makes them an excellent option where guests are eating a variety of dishes.
Quick Dinner: They can be a simple and satisfying option for a weeknight meal, especially if you’re looking for something that’s both fun and easy to make. They’re delicious enough to be Sunday supper though too if you’re having a laid back day.
Remember, the best time to serve cheeseburger sliders is when you want a dish that’s easy, enjoyable, and sure to please a crowd!
What to Serve with Bacon Cheeseburger Sliders
Onion Rings: Crispy onion rings or frizzled onions are a delicious and crunchy side that pairs well with the savory flavors of the sliders.
Coleslaw: A tangy, creamy pineapple coleslaw or copycat KFC coleslaw can provide a refreshing contrast to the rich flavors of the sliders.
Salad: Serve a green salad for a lighter, healthier side. A tomato cucumber salad, broccoli apple salad, or a simple garden salad with a vinaigrette dressing works well.
Pickle Spears: Pickles add a nice crunch and tanginess, balancing the richness of the cheese and bacon.
Vegetable Platter: A platter of raw veggies like carrots, celery, and bell peppers with a dip can be a refreshing and healthy side.
Macaroni and Cheese: For a truly indulgent meal, mac and cheese makes a hearty and delicious companion to sliders.
Baked Beans: The sweetness and smokiness of baked beans complement the flavors in bacon cheeseburger sliders.
Potato Salad: A classic at barbecues and picnics, creamy potato salad is a filling and tasty side option. Try ranch potato salad or German potato salad for other flavor ideas.
Chips and Dip: Simple and easy, chips with a dip like guacamole or salsa can be a casual and tasty side. Potato chips and chip dip are great too!
Fruit Salad: For a sweet and fresh counterpoint, serve a colorful fruit salad.
Pasta Salad: Another classic side choice that rounds out a meal. Try loaded pasta salad or egg pasta salad for two favorites.

Storage Tips for Cheeseburger Sliders with Bacon
MAKE AHEAD: Bacon cheeseburger sliders are great for preparing ahead of time. You can fully assemble the sliders, including the cooked meat, cheese, and bacon, and store them in an airtight container.
You could make them ahead of time for an easy meal time or as part of your game day celebrations.
IN THE FRIDGE: After your sliders are cooked, they can be stored in the fridge.
Place them in a shallow airtight container or wrap them individually with plastic wrap.
Properly stored, they will last for three to four days. Remember, the fresher they are when stored, the better they will taste when reheated.
IN THE FREEZER: Freezing is a great option for extending the life of your sliders.
Wrap each slider individually in aluminum foil and then place them in a freezer-safe bag or container.
They can be stored in the freezer for up to three months.
When you’re ready to enjoy, defrost them in the refrigerator overnight before reheating. This method helps retain more moisture and flavor.
REHEATING: For reheating, you have a few options.
- In the Oven: The oven method is ideal for restoring the sliders’ original texture. Preheat your oven to 350°F and place the sliders on a baking sheet. Heat for about 10-15 minutes or until thoroughly warm.
- Microwave: If you’re in a hurry, the microwave works too, but be cautious as it can make the buns a bit soggy. Microwave them on a microwave-safe plate, covered with a damp paper towel, for one to two minutes or until heated through. Remember, reheating times can vary based on your appliance’s power.
- Air Fryer: Start by preheating your air fryer to around 350°F then arrange the sliders in the air fryer basket in a single layer. Make sure there’s some space between each slider to allow for proper air circulation. This is key for getting them evenly reheated. Cook the sliders for three to four minutes.
Why We Love These Easy Sliders
Perfect Size: Their small size makes them ideal for various occasions. They’re easy to handle and perfect for both kids and adults. Great for parties where guests can sample multiple dishes without committing to a full-sized burger.
Delicious Flavor Combination: The classic combination of savory beef, crispy bacon, and melted cheese is hard to beat. Each bite offers a satisfying mix of flavors and textures that’s universally appealing. Talk about comfort food!
Customizable: Sliders are incredibly versatile. You can easily adapt them to suit different tastes from choosing different types of cheeses and buns to adding unique toppings and sauces.
Great for Sharing: Their size makes them ideal for creating a communal and fun dining experience. They’re perfect for social gatherings, family dinners, or as appetizers at a party.
Easy to Prepare: Bacon cheeseburger sliders are relatively simple and quick to prepare, making them a great option for a speedy meal or for feeding a large group without too much hassle.
Versatile for Any Meal: Sliders can be served as a main course, appetizer, or snack, making them suitable for any meal or occasion.
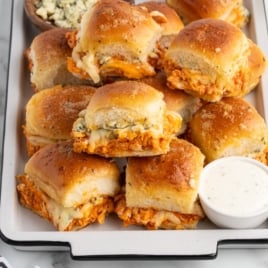
Saucy buffalo chicken and melty cheese tucked into soft rolls make these hard to pass up—check out more Super Bowl recipes for the party.
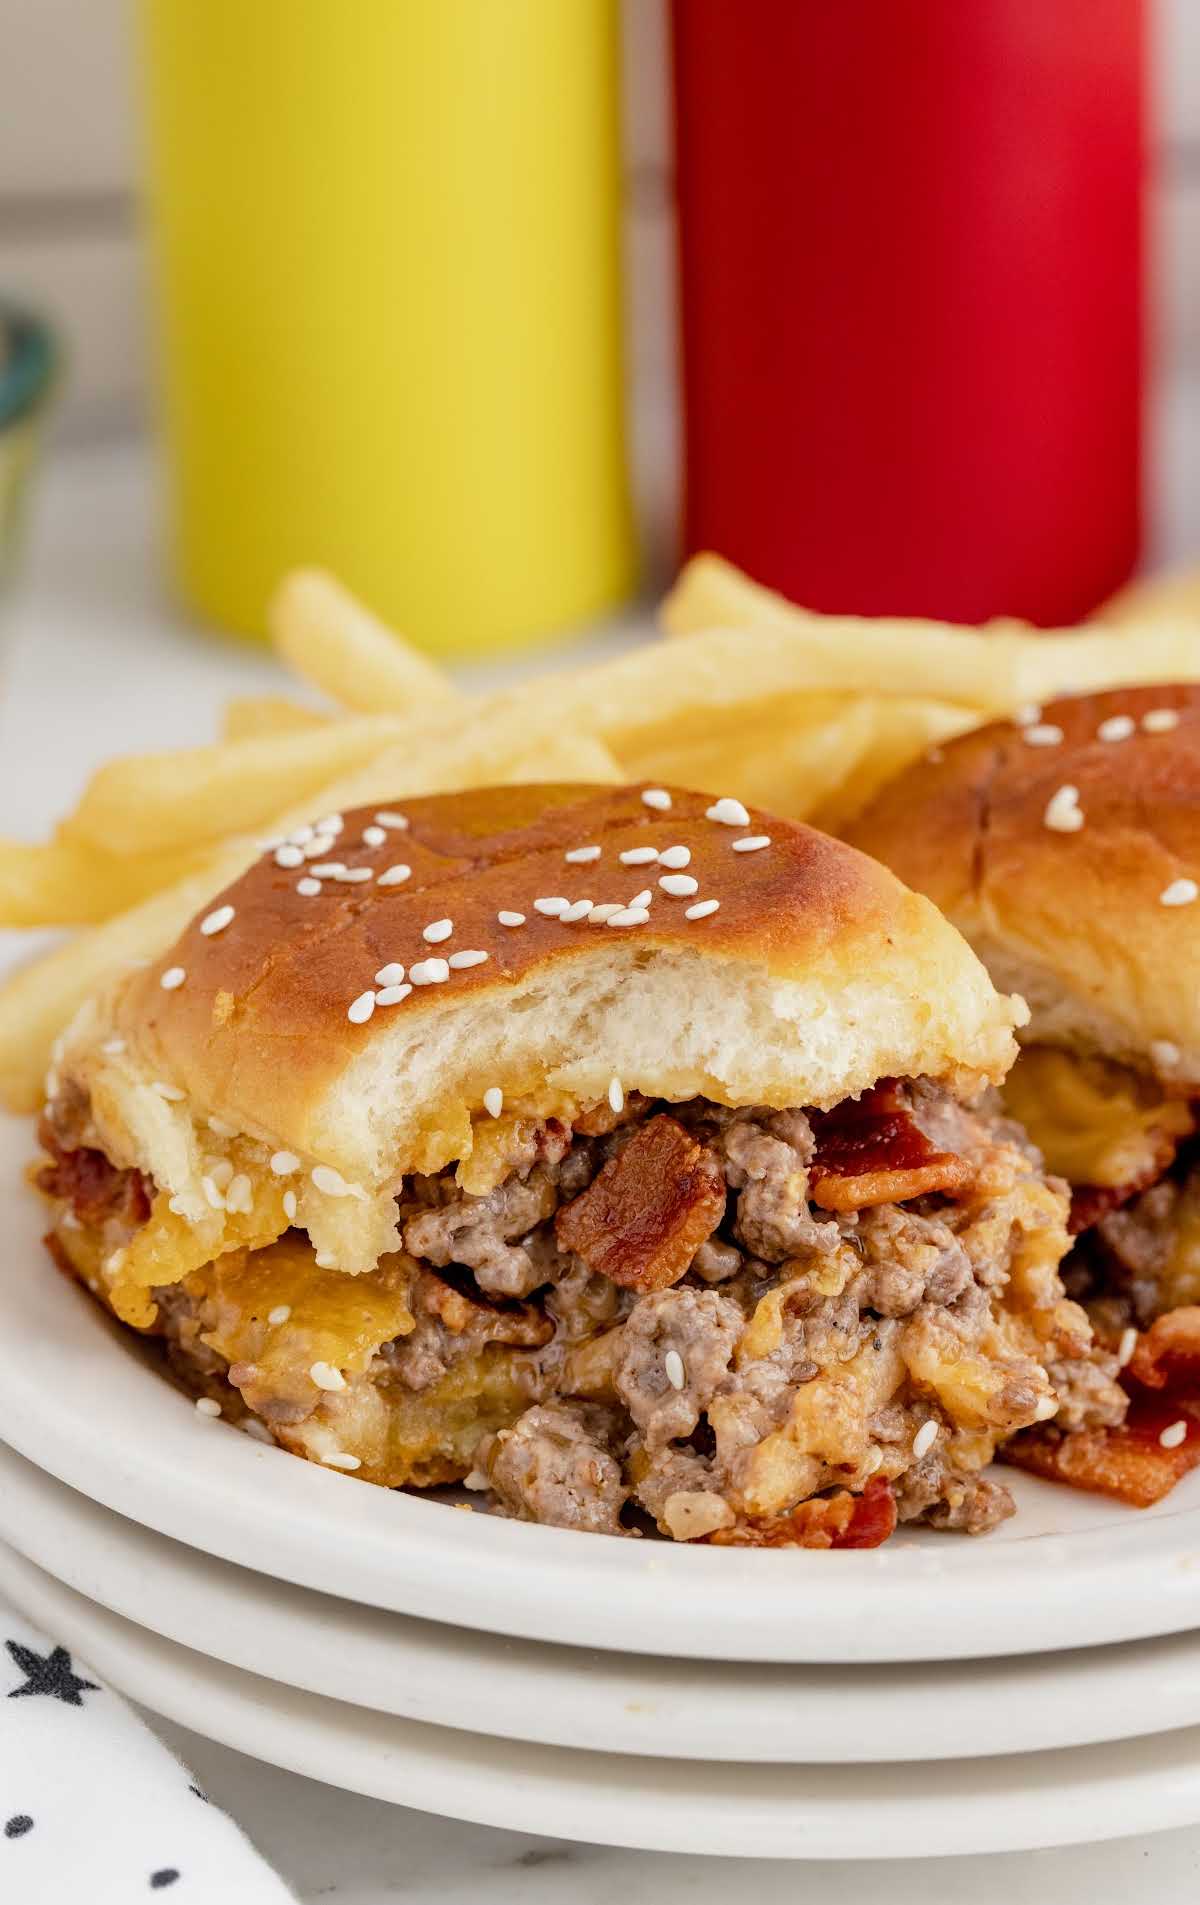
You know that feeling you get when the smell of bacon and cheeseburgers wafts through your house, causing your stomach to growl? With crispy bacon and plenty of favorite toppings, these yummy sliders are a fun way to put a new spin on a classic cheeseburger recipe.
Juicy, cheesy, and baked together in one pan, these are simple to prep and serve in batches, and you can browse more of my appetizer and dip recipes.
Frequently Asked Questions
This classic bacon cheeseburger sliders recipe can be frozen in an airtight container for up to two to three months.
These mini cheeseburgers would be yummy with any type of melted cheese on top to make them all gooey.
This bacon cheeseburger slider bake can be made ahead and kept in the fridge. You can then warm them in the oven when ready to serve.
Sweet Hawaiian rolls are just the right size for these, but any other mini sandwich rolls can be used as well.
Juicy beef, crispy bacon, and melted cheese tucked into soft buns, with more slider recipes that hit that same comfort-food note.
More Popular Recipes You’ll Love


Bacon Cheeseburger Sliders
Ingredients
- 1 pound ground beef crumbled
- 1 teaspoon minced garlic
- ½ teaspoon sea salt
- 1 teaspoon dried onion flakes
- ½ teaspoon ground black pepper
- 3 ounces cream cheese cut into small cubes
- ½ cup barbecue sauce
- 2 teaspoons dijon mustard
- 1 to 2 packages Hawaiian rolls may not use all; I used 1½ packages to fill a 9×13
- 2 cups cheddar cheese grated
- 1 pound bacon cooked and crumbled
- ½ cup salted butter melted
- 1 to 2 tablespoons sesame seeds
Instructions
- Preheat the oven to 375°F.
- Add ground beef, minced garlic, sea salt, onion flakes, and pepper to a saute pan. Cook over medium heat, breaking up the meat and stirring, until the meat is no longer pink.
- Stir cream cheese, barbecue sauce, and mustard into the meat mixture and set aside.
- Place the rolls into a 9×13 casserole dish and halve the second set of rolls to fill the casserole dish. Slice the tops off of the rolls in one full slice.Place the bottoms of rolls into the casserole dish and set tops aside.
- Sprinkle 1 cup of cheese over the rolls. Top with the meat mixture. Sprinkle crumbled bacon over the meat mixture and then cover with the remaining cheese. Place the tops of the rolls back into place.
- Melt butter in a microwave-safe dish and stir sesame seeds into it.
- Pour butter mixture over the rolls, using a pastry brush to spread the sesame seeds and butter evenly.
- Cover with aluminum foil and bake for 20 minutes until cheese is melted and rolls are heated through. Remove aluminum foil and bake for 5 to 10 minutes longer until the tops are browned.
Notes
Nutrition


Comments
Gloria says
These are a big hit with my guys!
Chris Howard says
Everybody loved these.
Lin says
What would the cook time be if you used only 4 Hawaiian buns?
Layne Kangas says
Hi, Lin – I’m not sure since that would be a pretty big change from the current amounts and we haven’t tested it like that. If you halve the entire recipe, I would assume the bake time would stay similar to the current times. Enjoy!
Jessica Shipley says
Had to make just a bit different using what I had on hand.
But all in all, the guys loved it.
I didn’t have bacon slices, just crumbled. So i cooked them at the end of the ground beef cooking.
Sandra Thomas says
Awesome
Kathleen says
I made these and they are delicious! Super easy, I sprinkled four cheese on in place of the Cheddar. Will make again! They make great leftovers.
Katby says
Made these for a dinner at Church…. Boy were they a super hit. Everyone loved them. No leftovers. Super easy to make. This is definitely a keeper.
Sharon says
Your recipes are the best!
Yusuph says
Absolutely YUMMY! These were quick to make and everyone LOVED them. I doubled the ground beef recipe and it made 24 filling Hawaiian roll sliders. Will definitely make this again.