
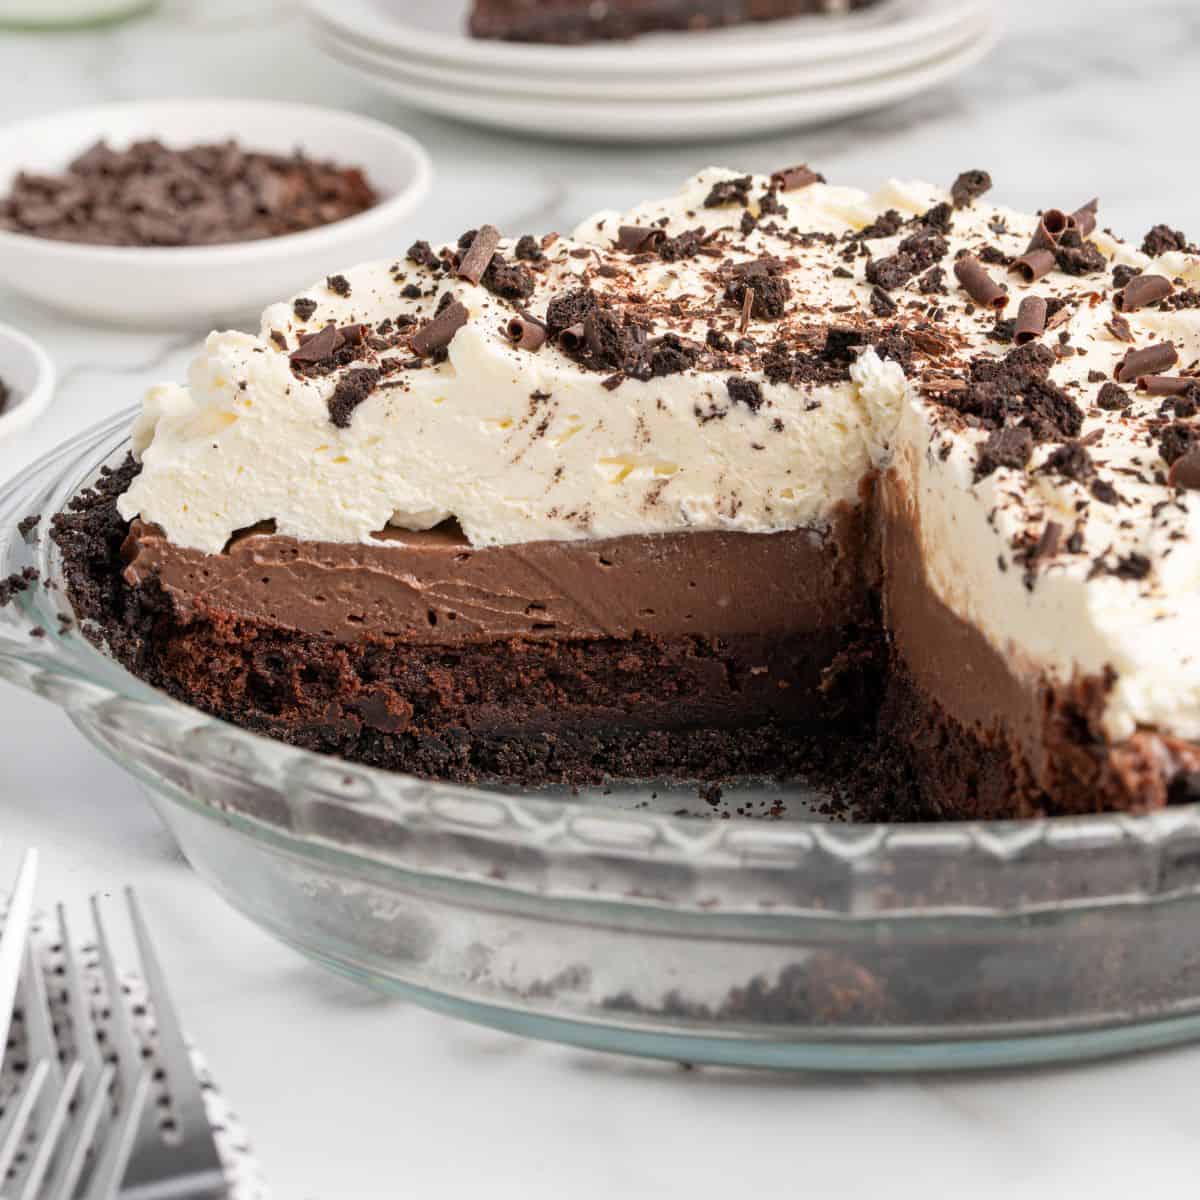
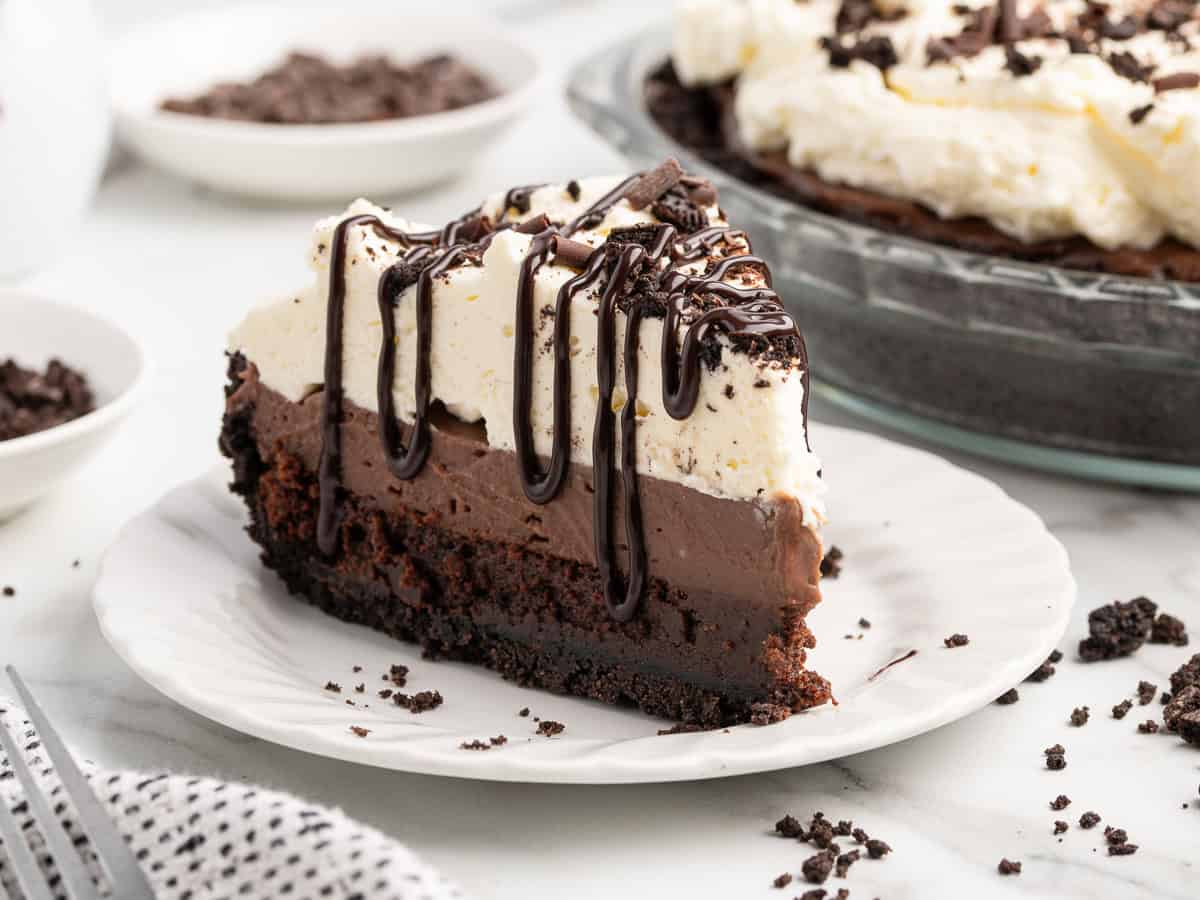
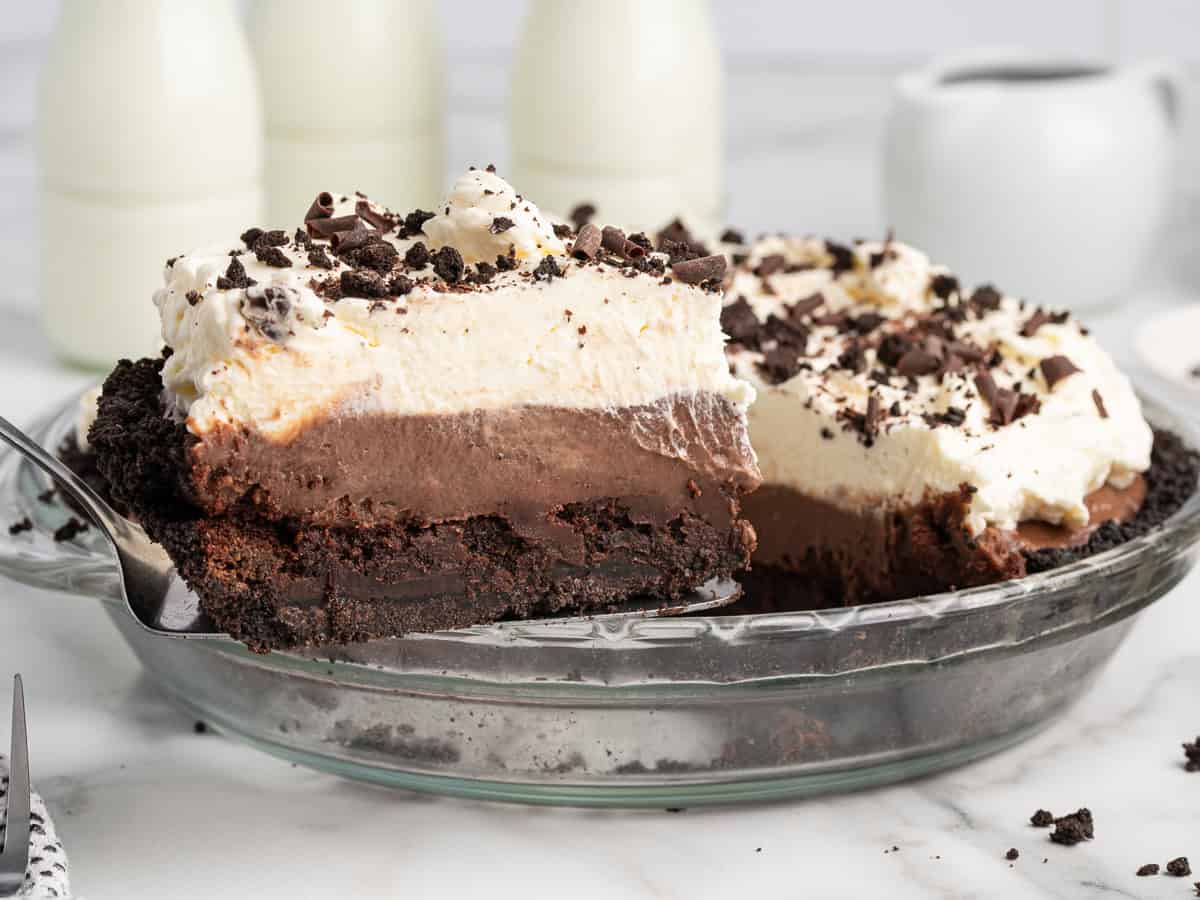
There are a lot of ways to make Mississippi Mud Pie, but the slice you’re picturing is impressive. It has distinct layers that hold together from the first slice to the last.
Getting those layers doesn’t depend on how long the pie is in the fridge. Taking the brownie out at the right time, cooking the pudding until it’s thick enough, and cooling each layer before adding the next are what keep everything from smooshing together. I’ll guide you through that process.
Plan Ahead
Don’t count on serving this the hour you make it. It needs at least four hours in the fridge for the pudding to set and the layers to firm. If it’s for company, I recommend an overnight chill.
If you haven’t nailed down exactly which type of chocolate pie you want to serve, here are some of my alternative recipes worth checking out:
The recipe for Mississippi mud pie itself is straightforward. I’ll point out the few places where timing makes the difference. You’ll get the entire recipe in the recipe card at the end of the post.
This is the layered, sliceable kind of Mississippi mud pie: an Oreo crust, a fudgy brownie, a cooked chocolate pudding, and whipped cream on top.

If you’re after the quick no-bake dessert made with instant pudding, my no bake chocolate pudding pie is the better fit. The version here takes a bit longer, mostly just because the pudding is cooked from scratch, but that’s the trade for sturdy slices.
A Note On Shortcuts
You can simplify any of the three made-from-scratch layers if you’re short on time. However, while any one of them is fine on its own, the more you swap, the further you get from the clean, sturdy slices the from-scratch version is made for.
- A boxed brownie mix works in place of the homemade one, though it won’t be as fudgy.
- Instant pudding works for the cooked pudding, but it sets softer, so a tall pie like this slices less cleanly.
- Thawed Cool Whip can stand in for the homemade whipped topping, though it won’t hold its shape quite as long.
While You’re Making It
The Crust
Press the crumbs up the sides of the pan, not just across the bottom. The first time I made this I did the bottom only, and it didn’t hold together.
It’ll look a little dry coming out of the oven. It’s not overbaked. It softens once the pie chills.
The Brownie
This layer stays fudgy even after time in the fridge, which is when most of these brownie bottom desserts turn hard and dry. The addition of melted chocolate and a little oil makes the difference.
The brownie’s done when the toothpick shows a few damp crumbs, not a clean one. A clean toothpick feels like success, but it means the brownie layer isn’t as fudgy.
The Pudding
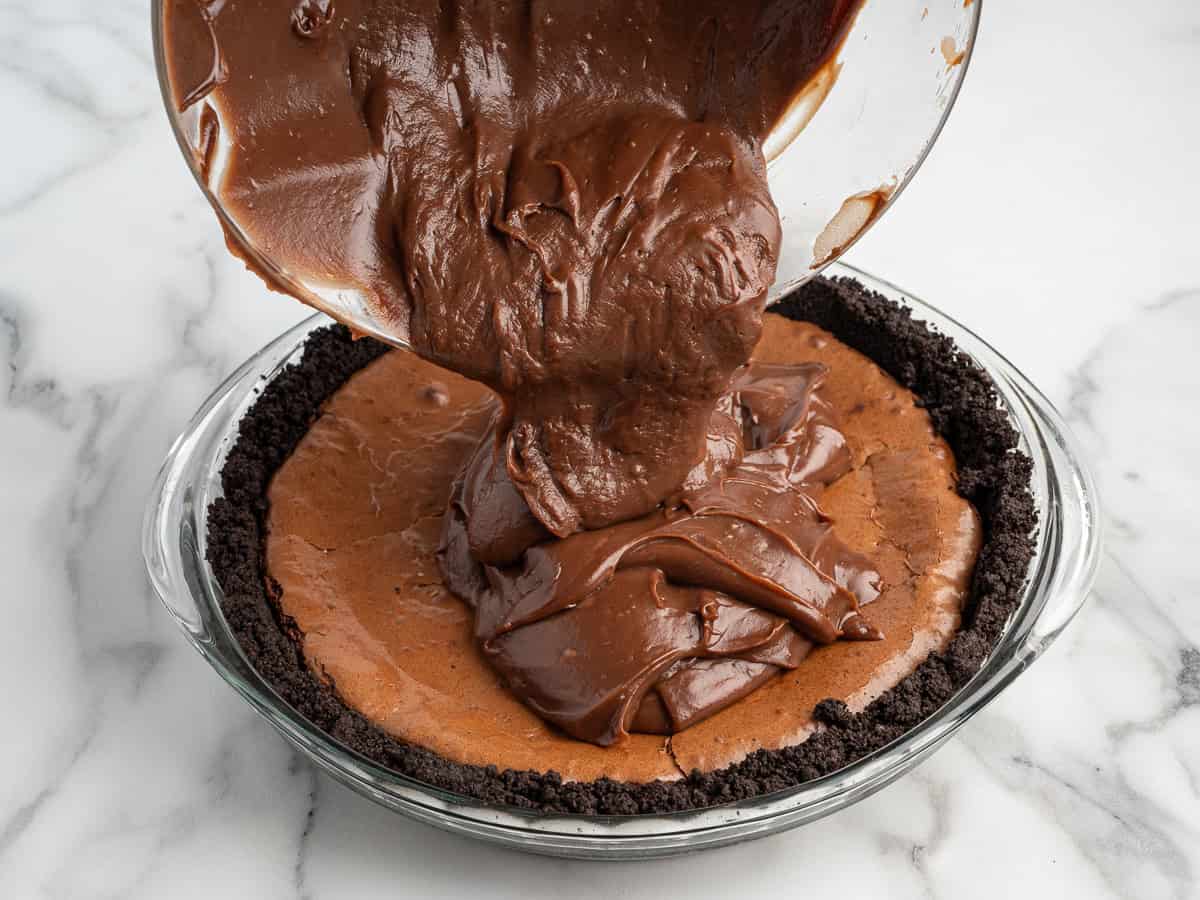
Cook it until it coats the back of a spoon, then drag a finger through that coating. The line should stay open instead of closing back up. If it floods together, keep going. It firms more as it cools, so pull it off the heat the moment that line holds.
Let the brownie cool all the way down before the pudding goes on. I know that’s the slow part when you want to keep moving, but a warm brownie melts the pudding, and that’s how the layers never fully set.
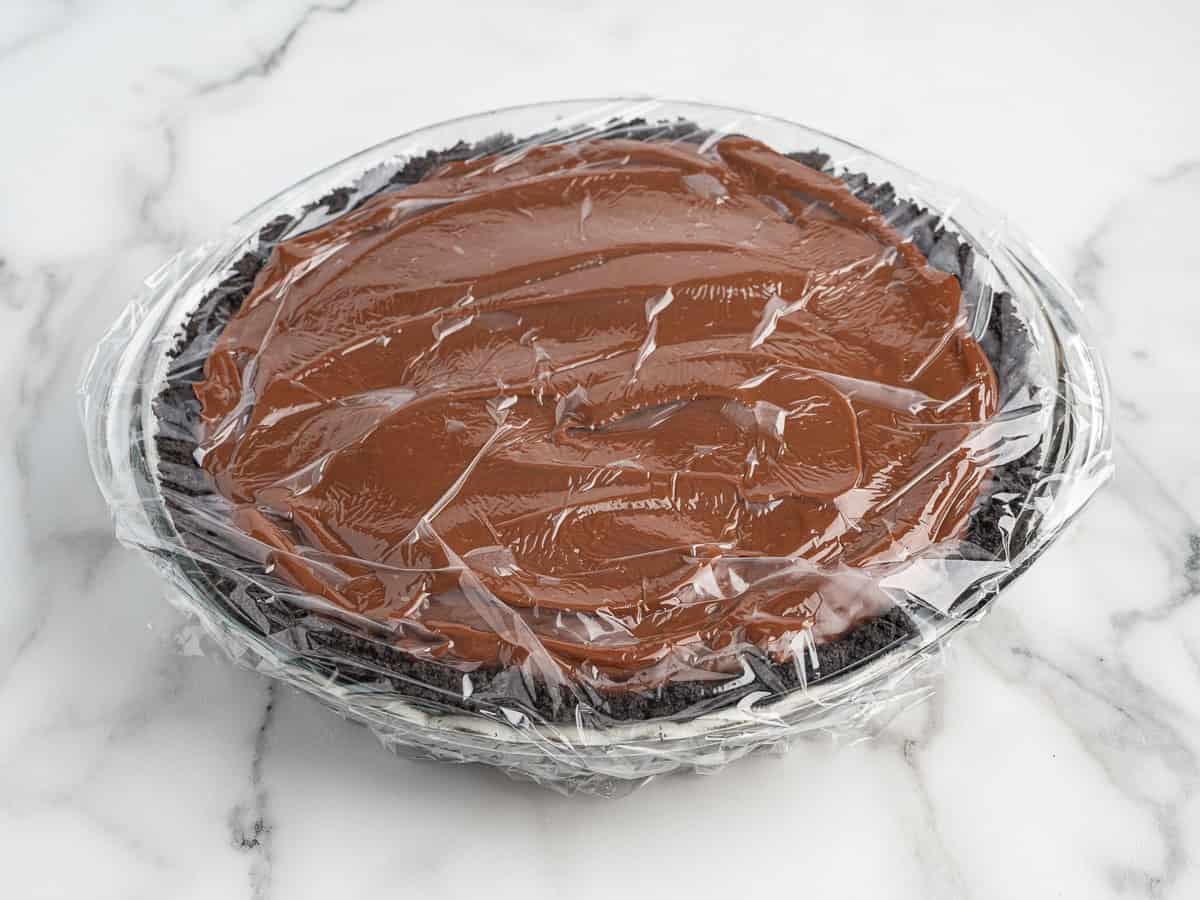
Press plastic wrap right onto the surface before it chills, actually touching the pudding, or a skin forms on top.
The Topping
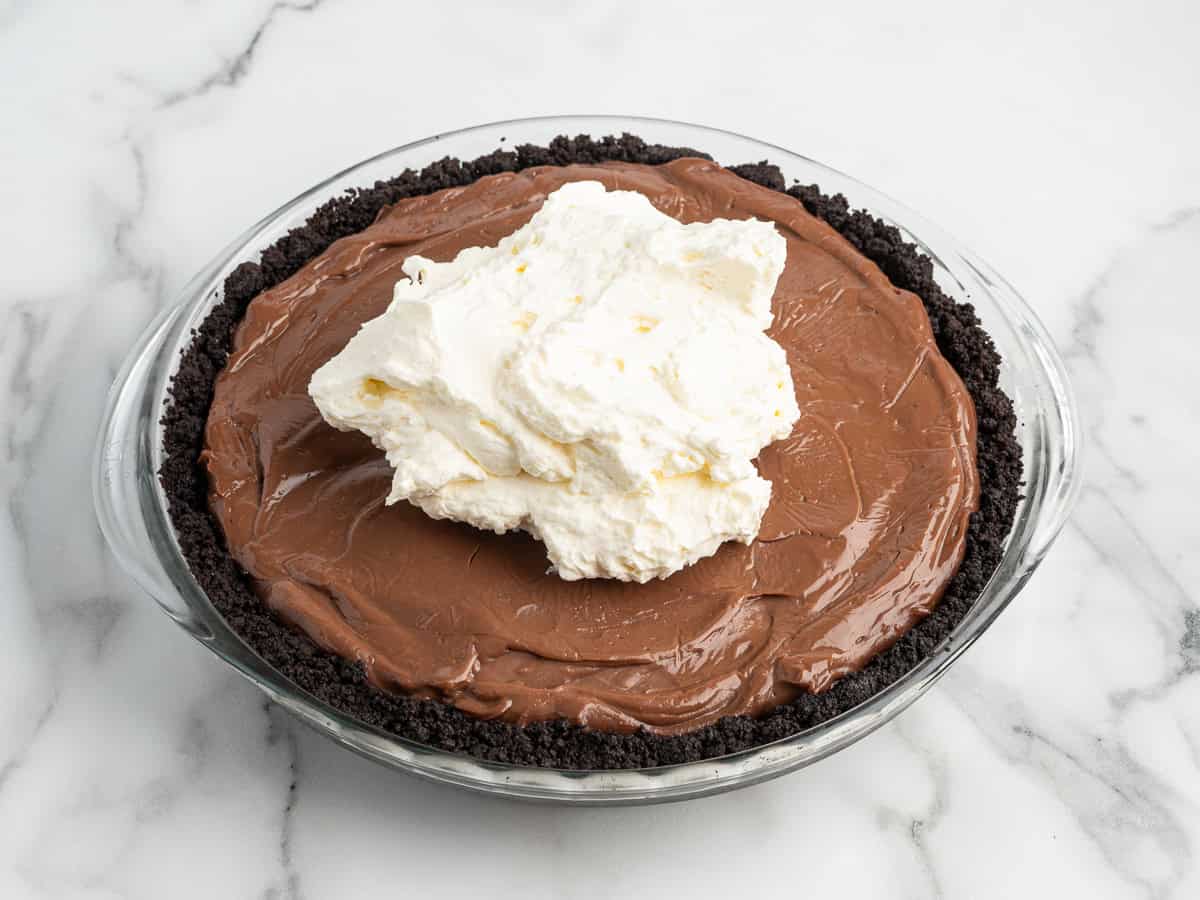
A small amount of instant white chocolate pudding mix helps the whipped cream stay stable. Whip the cream just until it holds stiff peaks. Add it only when everything underneath is cold.
If Your Mud Pie Didn’t Turn Out Like The Photos
The crust came out hard. Either it baked a little long, or you cut into it before it had chilled. It firms up in the oven and softens again after a few hours cold, so give it that time before you decide.
The brownie was cakey. Usually too much flour. Spoon the flour into the cup and level it rather than scooping, which packs in more than you think, and pull the brownie at damp crumbs.
The pudding stayed soft. It either came off the heat before it was ready or went onto a brownie that was still warm. If it’s only had a couple of hours, don’t give up yet, it firms as it sits cold. If it’s had a full night and still won’t hold, it needed another minute on the stove.
The layers blended, or the cream slid. Almost always something went on warm. Each layer has to be fully cool before the next. The other thing that makes the cream runny is underwhipping, so take it to stiff peaks before it goes on.
Make Ahead And Chilling
This is a good dessert to make ahead because you can leave it in the fridge overnight and the texture only improves. The brownie stays fudgy, the pudding becomes a little firmer, and the slices hold together even better.
If the pie feels a little soft when you cut into it, it almost always just needs more time in the refrigerator. The pudding continues to firm as it chills, and another hour or two can make a noticeable difference in how cleanly it slices.
Leftovers keep well in the refrigerator for up to four days. The crust softens slightly over time, but the brownie does well and the pudding holds its shape.
You can also freeze the pie for up to two months. Freeze it whole or in individual slices, then thaw overnight in the refrigerator before serving.
More Recipes You’ll Love
This post was originally posted October 2021. It was updated June 2026.
Mud Pie
Ingredients
Crust
- 25 standard OREO brand cookies
- 5 tablespoons unsalted butter, melted and cooled slightly
Brownie Layer
- 4 tablespoons unsalted butter
- 4 ounces semi-sweet chocolate baking bar, finely chopped
- ½ cup light brown sugar, packed
- ¼ cup granulated sugar
- 2 large eggs, room temperature
- 2 tablespoons canola oil (or any neutral oil)
- 1 teaspoon vanilla extract
- ⅓ cup all-purpose flour
- ¼ cup Dutch-processed unsweetened cocoa powder
Chocolate Pudding Layer
- 3 large egg yolks, room temperature
- 3 tablespoons cornstarch
- 1½ cups whole milk
- ⅓ cup heavy cream
- ¾ cup granulated sugar
- 4 ounces semi-sweet chocolate baking bar, very finely chopped
- 1 tablespoon unsalted butter, room temperature
- 1 teaspoon vanilla extract
Whipped Topping
- 2 cups heavy cream, very cold
- ¼ cup powdered sugar
- 2 tablespoons white chocolate flavored instant pudding
Optional Garnishes
- 1 to 2 OREO cookies, finely crushed
- 2 to 3 teaspoons Semi-sweet chocolate shavings
Instructions
Crust
- Preheat the oven to 350°F. Spray a deep-dish 9-inch pie plate with non-stick baker’s spray and set aside.
- Add the OREO cookies to the bowl of a food processor and pulse until fine crumbs form.
- Remove the cap on the lid, and with the food processor running, slowly stream the melted butter into the cookie crumbs. Mix just until the crumbs resemble wet sand.
- Transfer the mixture to the prepared pie dish and press firmly into the bottom and up the sides of the pie dish to form the crust. You can use the bottom of a measuring cup or glass to help press the mixture evenly into the pie dish. This helps create a crust that holds together well once baked, chilled, and sliced.
- Bake for 10 minutes. Remove from the oven and allow to cool slightly while you prepare the brownie layer.
Brownie Layer
- In a small saucepan over medium-low heat, melt the butter and chocolate, stirring until smooth. Remove from the heat and allow to cool 1-2 minutes before adding to the rest of the ingredients.
- In a large bowl, whisk together the light brown sugar, granulated sugar, eggs, canola oil, and vanilla extract just until well combined. The mixture will look slightly frothy at the surface.
- Add 2 tablespoons of the melted chocolate to the bowl and whisk until fully incorporated. This helps temper the eggs so they do not scramble when the rest of the warm chocolate is added.
- Slowly drizzle in the remaining melted chocolate, while whisking constantly, until all the melted chocolate is incorporated and the mixture is smooth.
- Whisk together the all-purpose flour and cocoa powder, being sure to remove any lumps of cocoa. Add to the melted chocolate mixture and stir gently just until smooth and no dry pockets of flour remain. The batter should be thick but pourable.
- Pour the brownie batter into the crust and smooth to an even layer.
- Bake for 23-25 minutes or just until a toothpick inserted into the center comes out with a few moist crumbs. Do not overbake or the brownie layer will be tough once chilled.
- Allow the brownie layer to cool at room temperature for 30-45 minutes or until the pie dish is cool to the touch before adding the pudding layer. Because the pudding layer needs to be refrigerated immediately after being added to the brownie layer, for safety purposes, you do not want to add a hot pie dish to the cold refrigerator or you will risk shocking the pie dish and cracking it.
Chocolate Pudding Layer
- In a large bowl, whisk together the egg yolks and cornstarch until well combined. The mixture will be a thick paste-like consistency. Set aside.
- In a medium saucepan over medium heat, warm the whole milk, heavy cream, and granulated sugar for 2-3 minutes or just until the sugar has melted and tiny bubbles start to form around the outer edge of the saucepan. Do not bring the liquids to a boil.
- Remove about ⅓ cup of the warm milk and slowly drizzle into the egg yolk mixture, while whisking constantly, until fully incorporated and the mixture is pourable.
- While whisking constantly, slowly drizzle the heated egg yolk mixture into the saucepan. Cook the pudding mixture for an additional 1 to 1½ minutes, or just until thick enough to hold its shape on a spoon.
- Remove the saucepan from the heat and whisk in the finely chopped chocolate, unsalted butter, and vanilla extract until well combined and smooth.
- Pour the warm chocolate pudding mixture through a wire mesh strainer, over a clean bowl, to remove any lumps or cooked egg pieces. Pour the strained pudding over the brownie layer and smooth to an even layer. Immediately cover the pie, being sure to push the plastic wrap all the way onto the surface of the warm pudding to prevent a skin from forming while the pudding chills and sets.
- Refrigerate the pie for 3 to 3½ hours or until the pudding layer has completely chilled and set. Do not add the whipped topping until about 30-60 minutes prior to serving.
Whipped Topping
- Beat the heavy cream, powdered sugar, and white chocolate flavored instant pudding in a large mixing bowl using a handheld mixer on low speed, gradually working up to high speed, for 3-4 minutes or until stiff peaks form.
- Spread the whipped topping evenly over the chilled pudding layer, being careful not to combine the layers.
- Garnish with a sprinkle of cookie crumbs and semi-sweet chocolate shavings if desired before returning the pie to the refrigerator to finish chilling for an additional 30-60 minutes. This allows the whipped topping to fully firm to ensure clean slices for serving.
Notes
- Be sure to have all your ingredients prepped and ready to go when making the chocolate pudding as it comes together quickly in the pan and starts to set up immediately once removed from the heat.
- Using a good quality semi-sweet chocolate baking bar will yield the best flavor for both your brownie and pudding layers as well as melt the smoothest when heated. Do not use chocolate chips as they contain stabilizers that can hinder their ability to melt smoothly.
- For an easy shortcut, you can use a 3.9-ounce box of instant chocolate pudding whisked with 1½ cups of very cold whole milk for 3 minutes or until thickened. If using this shortcut, be sure that your brownie layer has cooled completely before adding the pudding layer. If the brownie layer is still warm, it will melt the pudding when added.
- Both the homemade chocolate pudding and the shortcut instant chocolate pudding yield approximately 2 cups.
- An 8-ounce container of Cool Whip, thawed according to package directions, can be used in place of the homemade whipped topping.
- The pudding can be made up to 24 hours in advance, tightly covered with plastic wrap, and stored in the refrigerator until ready to assemble the Mississippi Mud pie. Do not add the chilled pudding to a warm brownie layer or you will melt the pudding.
- The crust and brownie layers can be made up to 24 hours in advance as well. Tightly wrap the cooled brownie with plastic then assemble, top with whipped topping and garnish before serving.
- Using a sharp serrated knife that has been run under hot water, then wiped dry helps create clean slices when serving.
Nutrition












Comments
jay platte says
soooo delicious! the perfect dessert!!!
Gloria says
Love this delicious pie!
Gloria says
This is such a rich, delicious dessert!
Mary Kay says
This was the everyone’s favorite pie for Thanksgiving this year. There was a perfect ratio of crust, brownie, pudding and whipped topping! I will make this over and over again!
Karen says
I used whole Oreos in the crust. Very sweet and very good! Pudding layer was the smoothest stovetop pudding with eggs that I’ve ever made! Thank you for the recipe!
MAXINE YOUNG says
I have heard of this recipe, but never made it….that’s gonna change now…making my mouth water just looking at it