


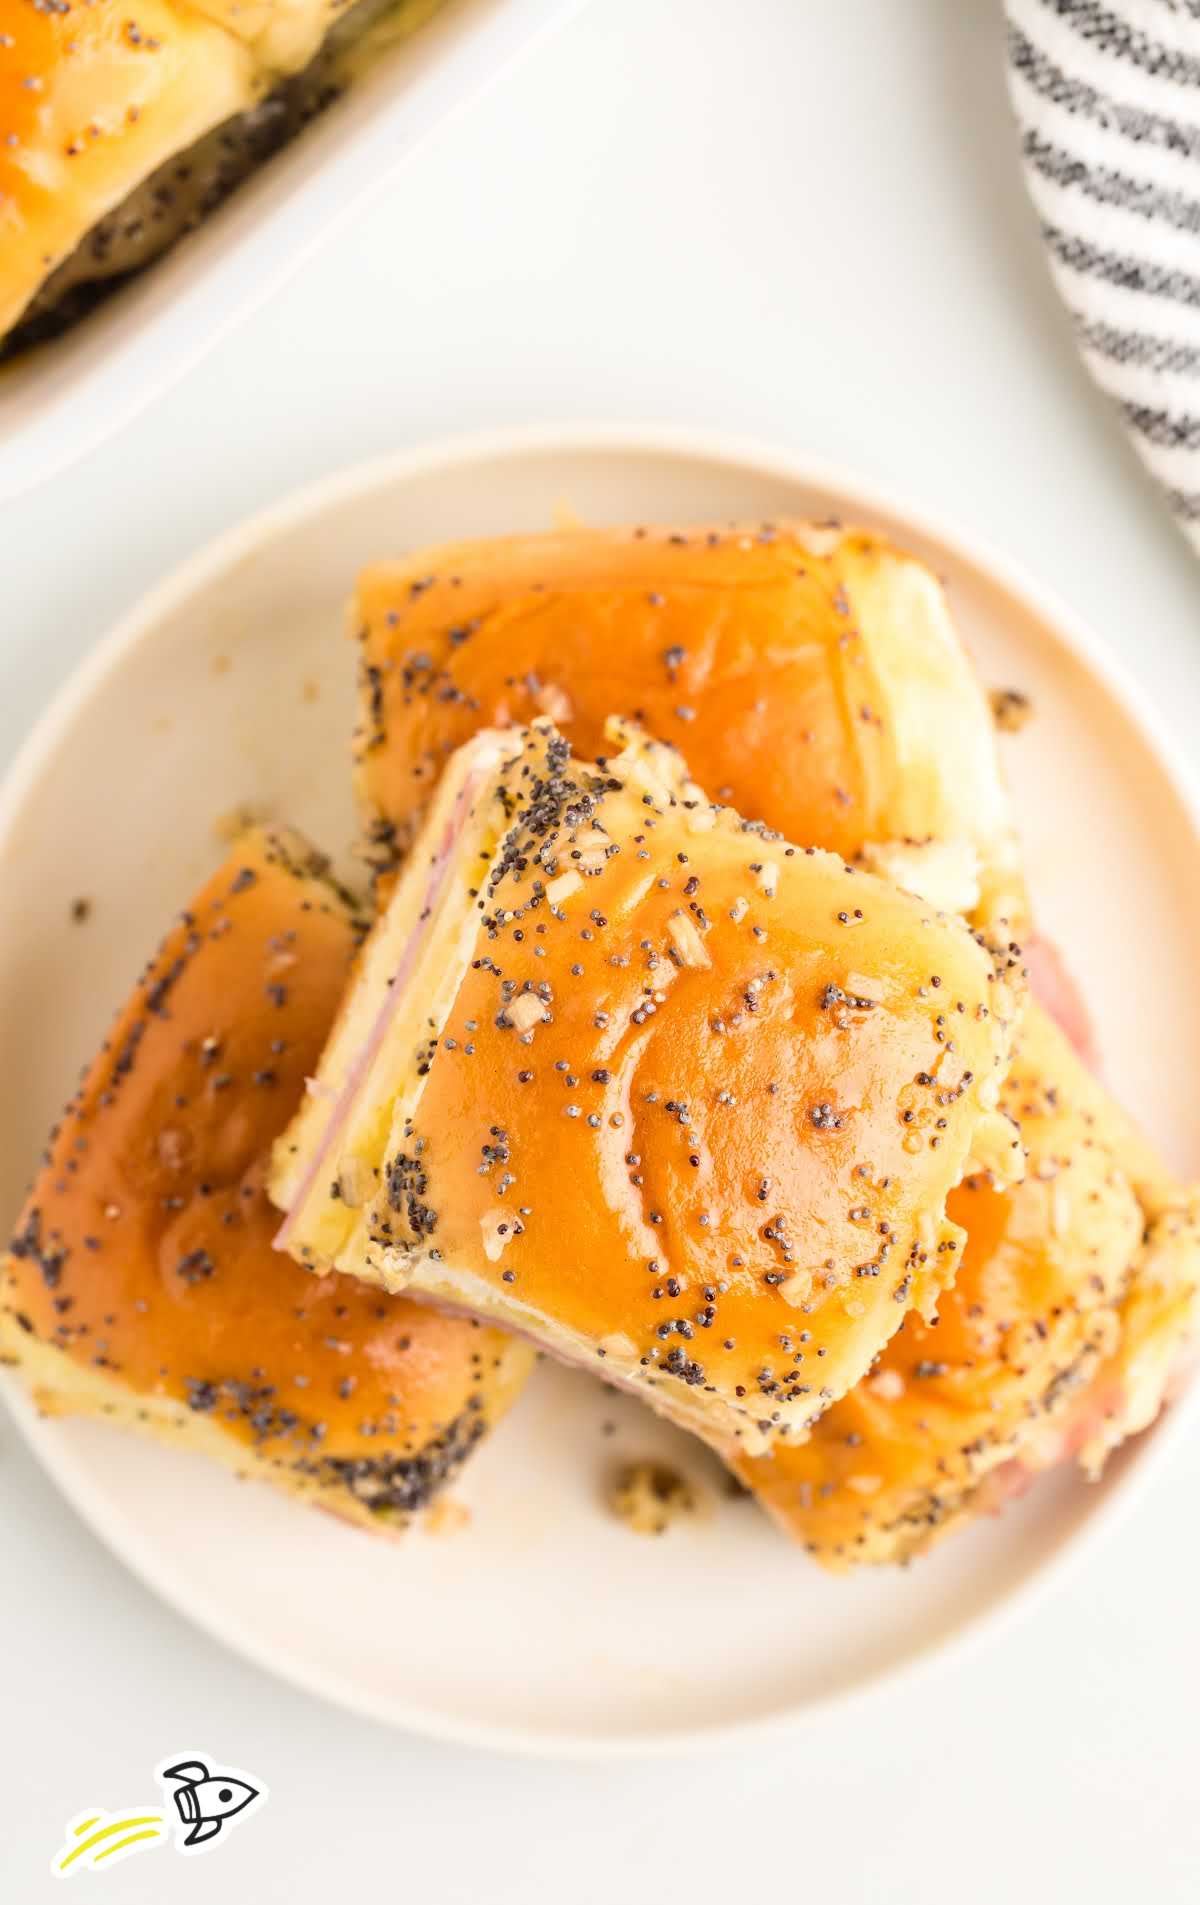
These easy homemade ham and cheese sliders are so satisfying. Sweet rolls are layered with ham and cheese before being drizzled in the most delicious honey poppy seed sauce and then baked to perfection.

Why you’ll Love These Easy Ham and Cheese Sliders on Hawaiian Rolls
Filled with flavor, these Hawaiian roll ham and cheese sliders are the ultimate in cheesy comfort food. A great option for tailgating, to serve at a game day party, or as a family dinner, you’ll love how hearty and delicious these are — and so quick and easy to make, too!
What you’ll need for Hawaiian Ham and Cheese Sliders
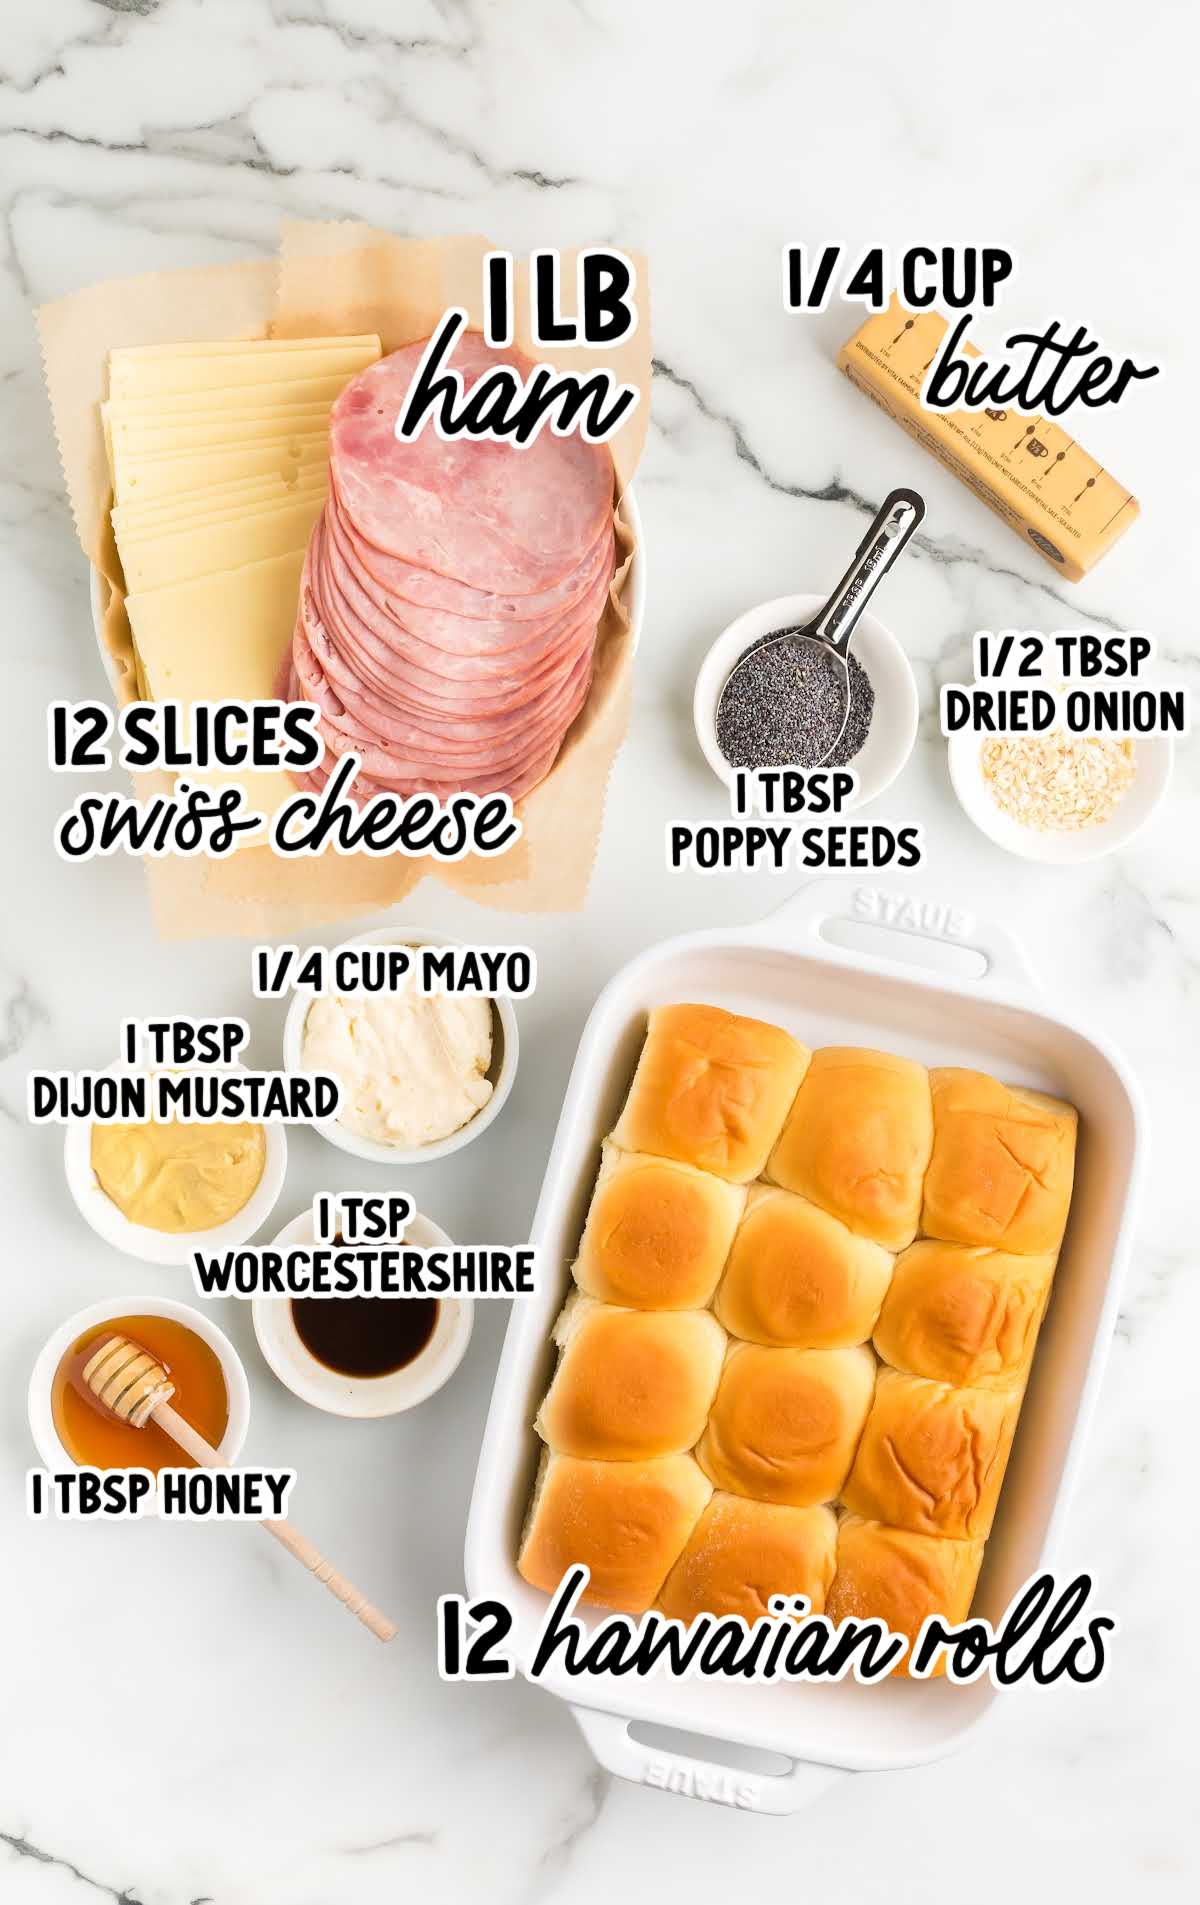
You’ll need:
- 1 package sweet Hawaiian rolls (12 rolls)
- ¼ cup mayonnaise
- 1 pound thinly sliced deli ham
- 1 package Swiss cheese (12 slices)
- ¼ cup butter, melted
- 1 tablespoon Dijon mustard
- 1 tablespoon honey
- 1 tablespoon poppy seeds
- ½ tablespoon dried minced onion
- 1 teaspoon Worcestershire sauce
How to Make Ham and Cheese Sliders on Hawaiian Rolls
These hearty little ham sandwiches are ideal party food but are also the perfect weeknight dinner the whole family will love.
PRO TIP:
You can assemble these Swiss cheese sliders up to two days before baking and leave them covered in the fridge until you’re ready to pop them in the oven.
If you are starting them off cold, you might need to add a few extra minutes in the oven to compensate.
STEP ONE: Preheat the oven to 350°F and spray a 9×13-inch baking dish with cooking spray.
We do recommend using a casserole dish for this recipe instead of a baking sheet so that the sliders can soak up all the butter sauce.
STEP TWO: Slice rolls down the middle and leave intact – do not separate into individual servings!
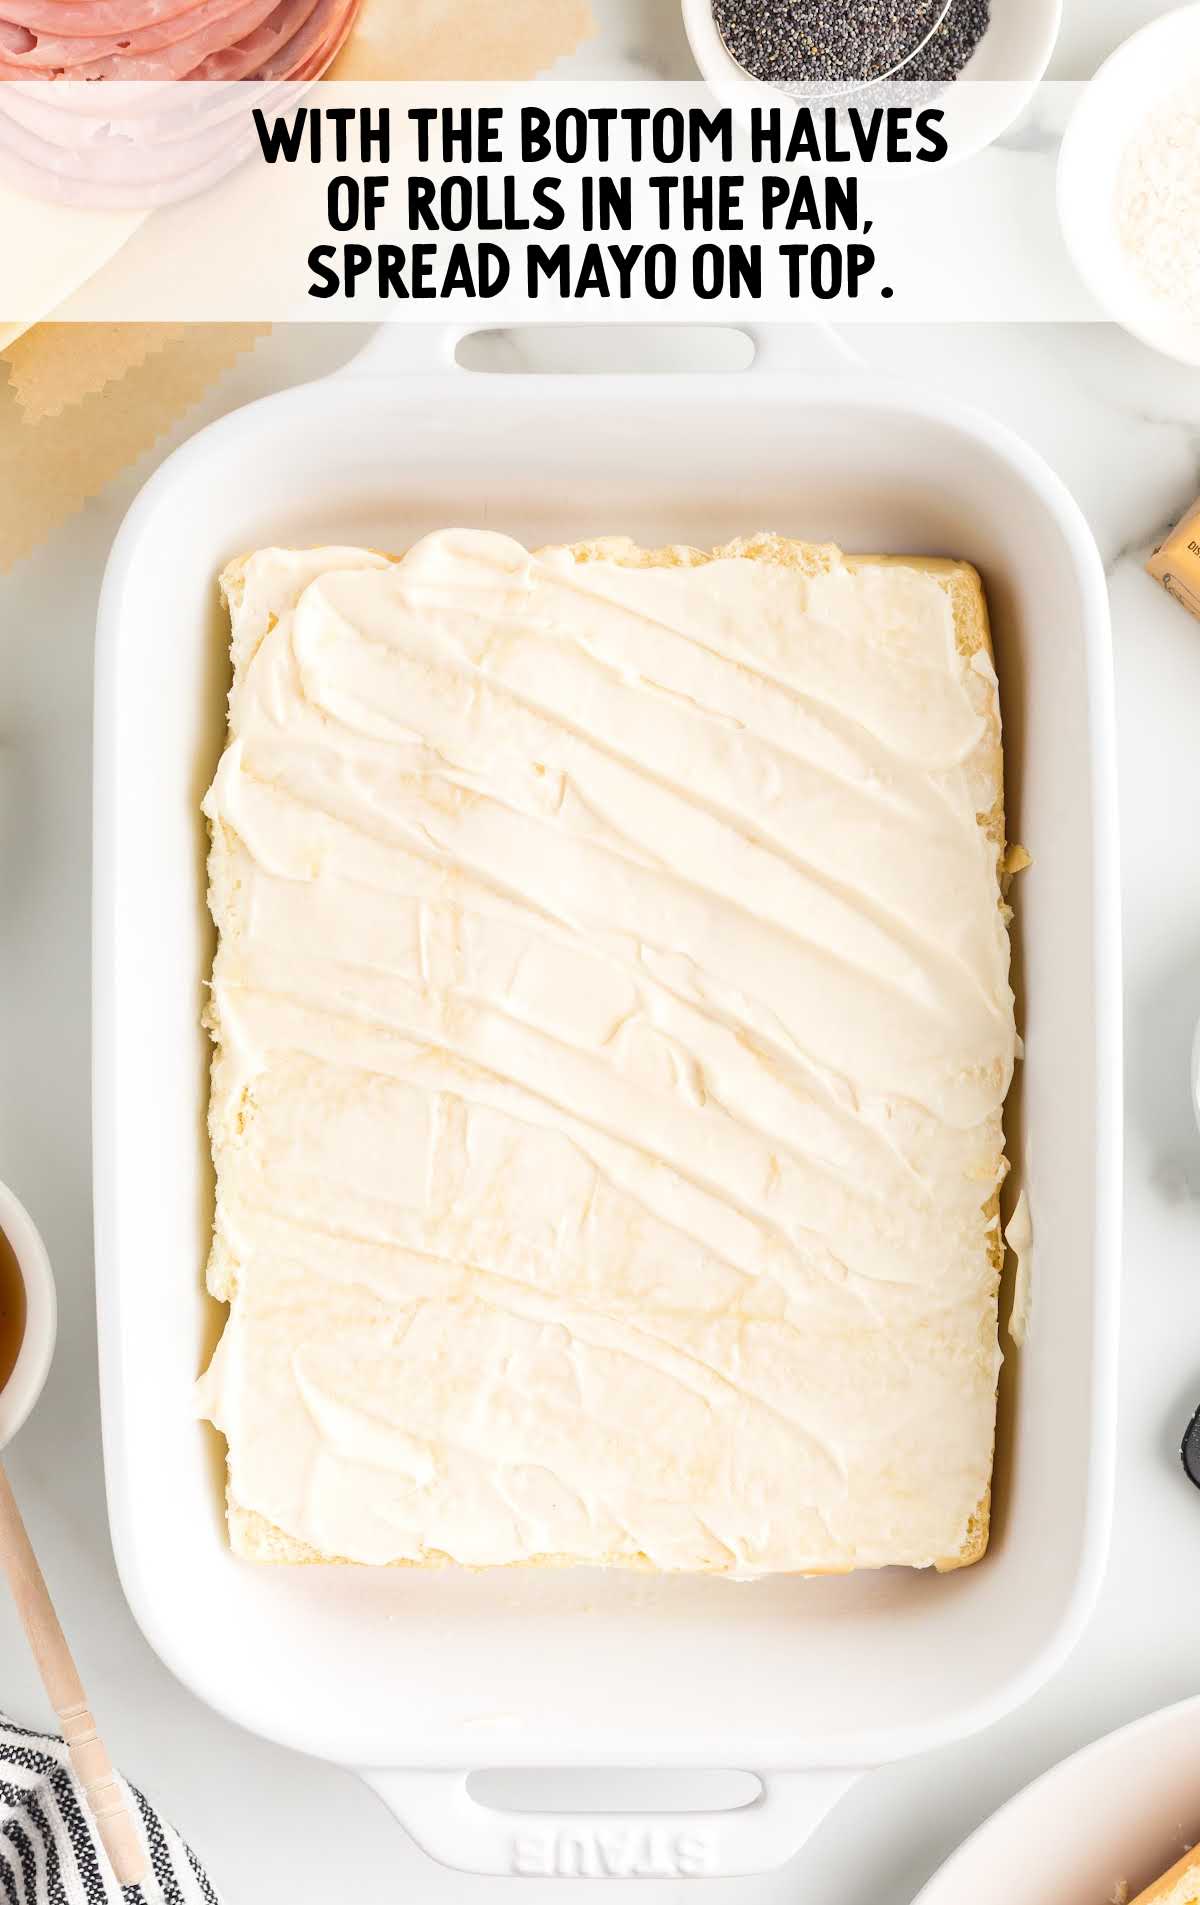
STEP THREE: Spread mayonnaise on the bottom layer of the rolls and place it in the bottom of the prepared pan.
PRO TIP:
I will often use disposable pans to make this recipe because I love easy cleanup.
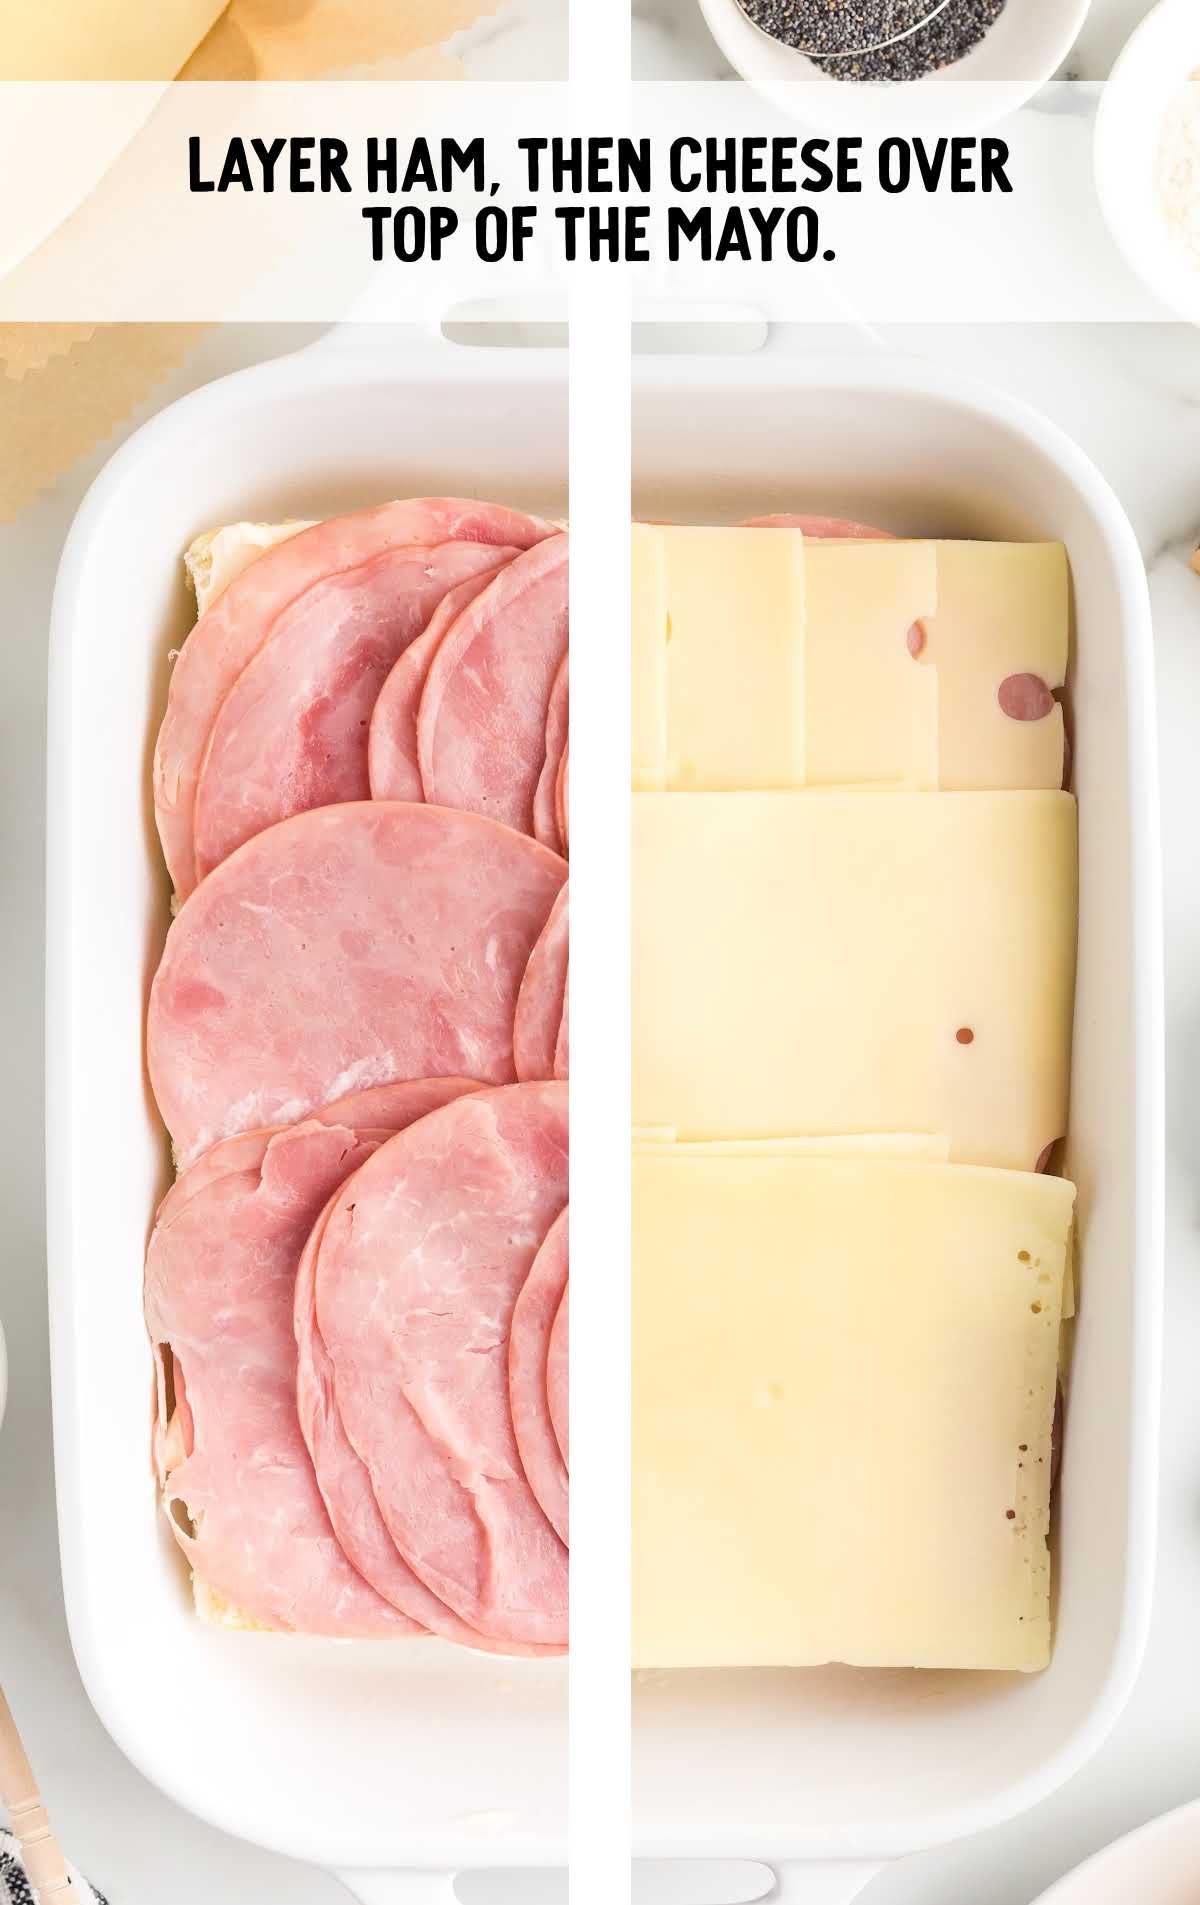
STEP FOUR: Place ham slices in an even layer, then top with an even layer of Swiss cheese before placing the top half of the rolls on top.
STEP FIVE: In a small bowl, mix melted butter, Dijon mustard, honey, poppy seeds, minced onion, and Worcestershire sauce until mixed.
Pour the butter mixture evenly over the top of the rolls.
PRO TIP:
Don’t skimp on the butter. It soaks into all the nooks and crannies and adds a ton of flavor to both the top and the bottom half of the slider buns.

STEP SIX: Cover with foil and bake for ten to 12 minutes until the melted cheese is bubbly and the tops of the rolls are golden brown.
PRO TIP:
Oven temperatures vary and may need to be recalibrated periodically to ensure they are accurate. Make sure to check your sliders at the lower end of the recommended baking time.
How long to bake ham and cheese sliders?
You will bake the ham and cheese sliders for ten to 12 minutes until the cheese is melted and bubbly.
Substitutions and Additions for Hawaiian Roll Ham Sliders
MEAT: For a twist, try different types of ham like honey-glazed or smoked. Each type brings its unique flavor, enhancing the overall taste of the sliders.
This is the perfect way to use leftover ham. You could even use leftover turkey breast!
Cook up some crispy bacon to add to the sliders either as whole strips or crumbles.
TYPES OF CHEESE: Experiment with different cheeses such as Swiss, cheddar, Monterey Jack, pepper Jack, Colby Jack, mozzarella, white cheddar, Gouda, or Havarti cheese. These cheeses melt well and add a variety of flavors and textures.
You can even add extra layers to make cheesier sliders if you’d like!
BUTTER: You can use olive oil or avocado oil instead of butter. These oils offer a different but equally delicious richness to the sliders.
WORCESTERSHIRE SAUCE: Soy sauce or balsamic vinegar can be great substitutes for Worcestershire sauce, adding a similar depth of flavor. For a gluten-free option, Tamari sauce works well too.
MUSTARD: Dijon mustard is a flavorful option for these mini sandwiches. You could also use regular mustard or try honey mustard, Chick Fil A sauce, or Carolina mustard BBQ sauce for other flavor profiles.
POPPY SEEDS: Sesame seeds or even everything bagel seasoning can be used instead of poppy seeds. They add a delightful crunch and a burst of flavor.
ONION POWDER: Garlic powder or finely minced fresh garlic can replace onion powder, giving a different but equally savory taste to the dish.
SUGAR: Brown sugar or maple syrup can be used instead of honey.
SPICY: Add a layer of banana peppers or pickled jalapeños in your sliders for an extra kick.
ROLLS: I love sweet Hawaiian rolls for this great recipe the most, but you can also use plain dinner rolls, potato slider buns, or small plain hamburger buns. Any type of dinner rolls are delicious with these!
What to Serve with Baked Ham and Cheese Sliders
Serving the right side dishes with ham and cheese sliders can turn them into a complete, satisfying meal.
Here are some ideas:
- Soups: A bowl of tomato soup, broccoli cheese soup, or a light vegetable soup can be a comforting and hearty addition, especially on colder days. The soup pairs well with the savory flavors of the sliders.
- Salads: Opt for a fresh tomato cucumber salad, Caesar salad, or a tangy coleslaw. These salads provide a crunchy, refreshing contrast to the richness of the sliders.
- Potato Dishes: French fries, sweet potato fries, potato salad, or even roasted potatoes make great accompaniments. They complement the flavors and add a satisfying, starchy component to the meal.
- Vegetable Sides: Roasted vegetables, broccoli, glazed carrots, or a green bean casserole offer a nutritious and colorful addition to your plate.
- Pasta Salads: A cold pasta salad can be a delightful side. It’s light yet fulfilling and can be made ahead of time.
- Chips and Dips: A simple side of potato chips or tortilla chips with guacamole, salsa, or a creamy chip dip can add a crunchy element to your meal. Try fresh pineapple salsa for another flavor profile.
- Pickles and Olives: A selection of pickles, olives, or a small antipasto platter can add a nice tangy and salty touch, which cuts through the richness of the sliders.
- Fruit Salad: For a sweeter side, consider a fresh pudding fruit salad. It’s light and refreshing, providing a nice balance to the savory sliders. It’s also a favorite with kids!
These sides not only complement the flavors of ham and cheese sliders but also add variety in terms of texture and nutrition, making your meal more balanced and enjoyable.
How to Keep Ham and Cheese Sliders Warm?
To keep your ham and cheese sliders warm, cover them in foil and place them in a 300°F oven for eight to ten minutes.
You can also wrap each slider individually with foil after it has been cooked and reheat them when needed.
When to Serve This Ham and Cheese Sliders Recipe
Ham and cheese sliders are incredibly versatile and can be served on a variety of occasions:
- Casual Gatherings and Parties: They are a perfect finger food for casual get-togethers, game nights, or birthday parties. Their small size makes them easy to eat while mingling.
- Lunch or Dinner: Sliders make a great main dish for a simple family favorite for lunch or dinner. Pair them with some sides, and you have a complete meal.
- Appetizers: If you’re hosting a dinner party, serving sliders as appetizers can be a great way to start the meal. They’re filling enough to satisfy but not so heavy as to spoil the main course.
- Sporting Events and Tailgating: Their easy-to-eat nature makes them ideal for football season tailgating or watching a sports game. They can be prepped ahead of time and are enjoyed by both kids and adults. Serving a hungry crowd watching the Super Bowl? Add some extra slices of cheese and extra ham.
- Picnics and Outdoor Events: Since they’re easy to transport and don’t require utensils, sliders are great for picnics or outdoor events like concerts in the park.
- Kid-Friendly Meals: Kids love the small size of sliders, making them a hit for children’s parties or as a fun dinner option.
- Brunch: Serve them at a brunch with other items like fruit salad, pastries, and a variety of beverages.
- Holiday Celebrations: They can be a great addition to holiday parties, offering a satisfying option that’s easy to prepare in large batches.
MORE SLIDERS RECIPES


Storing Ham & Cheese Sliders
IN THE FRIDGE: These are best eaten right away, but you can store leftovers in the fridge and reheat them for later. I would suggest first wrapping with plastic wrap and then adding a second layer of aluminum foil.
IN THE FREEZER: You can freeze for up to three months. Allow them to thaw for about 30 minutes before baking.
How to Reheat
To reheat your ham and cheese sliders, we have a few options:
- Oven (Recommended): Preheat your oven to 350°F. Place the sliders on a baking pan and cover them loosely with aluminum foil. This helps to keep them moist. Heat them for about ten to 15 minutes or until they are warmed through. The foil prevents the tops from getting too hard or burning.
- Microwave: If you’re in a hurry, you can use the microwave. Place the sliders on a microwave-safe plate and cover them with a damp paper towel. This helps to keep the bread from drying out. Microwave on medium power for about 30 seconds to one minute, checking them halfway through to ensure they don’t overheat.
- Toaster Oven: Similar to the regular oven, preheat your toaster oven to 350°F. Place the sliders inside and heat for about ten to 15 minutes. Covering them with foil is also a good idea in a toaster oven to prevent the tops from getting too crispy.
- Skillet: If you prefer a crispy bottom, you can reheat the sliders in a skillet. Preheat the skillet over medium heat and place the sliders in the skillet. Cover with a lid to trap the heat and warm them for a few minutes on each side. This method works best if you’re reheating a smaller number of sliders.
- Air Fryer: Start by preheating your air fryer to around 300°F then arrange the sliders in the air fryer basket in a single layer. Make sure there’s some space between each slider to allow for proper air circulation. This is key for getting them evenly reheated. Cook the sliders for three to four minutes.
Ham and Cheese Sliders FAQs
This easy recipe can be frozen in an airtight container for up to three months.
This slider recipe can be made ahead and kept in the fridge. You can then warm them in the oven when you are ready to serve.
These hot ham sliders would be yummy with any type of melted cheese on top to make them all gooey.
To keep your sliders from getting soggy, it is important to preheat the oven before baking and make sure that the cheese is melted and bubbly. Once you have taken them out of the oven, let them cool slightly before serving.
You will want to cover the sliders with aluminum foil before baking so that the tops of the buns don’t get too browned while waiting for the cheese to melt.
More New Recipes You’ll Love


Easy Ham and Cheese Sliders on Hawaiian Rolls
Ingredients
- 12 sweet Hawaiian rolls
- ¼ cup butter, melted
- 1 pound ham, thinly sliced
- 12 slices Swiss cheese (8-ounce package)
- ¼ cup mayonnaise
- 1 tablespoon Dijon mustard
- 1 tablespoon honey
- 1 tablespoon poppy seeds
- ½ tablespoon onion, dried minced
- 1 teaspoon Worcestershire sauce
Instructions
- Preheat oven or grill to 350°F, then use cooking spray in the bottom of the pan.
- Slice rolls down the middle and leave intact.
- Spread mayonnaise on the bottom layer of rolls and place in bottom of pan.
- Layer ham, then cheese, then place the top layer of buns on.
- Mix melted butter, dijon mustard, honey, poppy seeds, minced onion, and Worcestershire sauce until mixed and pour evenly over rolls.
- Cover with foil and bake for 10 to 12 minutes until cheese is bubbly and rolls are golden brown.
Notes
- These are best eaten right away, but you can store leftovers in the fridge and reheat them for later. I would suggest first wrapping with plastic wrap and then adding a second layer of aluminum foil. You can freeze for up to three months. Allow them to thaw for about 30 minutes before baking.
- You can assemble these Swiss cheese sliders up to two days before baking and leave them covered in the fridge until you’re ready to pop them in the oven. If you are starting them off cold, you might need to add a few extra minutes in the oven to compensate.
- I will often use disposable pans to make this recipe because I love easy cleanup.
- Don’t skimp on the butter. It soaks into all the nooks and crannies and adds a ton of flavor to both the top and the bottom half of the slider buns.
- Oven temperatures vary and may need to be recalibrated periodically to ensure they are accurate. Make sure to check your sliders at the lower end of the recommended baking time.
Nutrition


Comments
Layne Kangas says
We are obsessed with these sliders – they are so easy and tasty!!!
Christine says
I made these for the first time this Friday for a tailgating event – they were a hit! SO GOOD
Mary says
We love these! So good!
Jenny Lemon says
I made these for a super bowl gathering. Everyone LOVED them and I got so many compliments. So easy, so flavourful and such a nice change from the usual party appetizers.
Karen says
If freezing do you do so before or after baking?
Layne Kangas says
Hi, Karen – you could do either! Enjoy!
Donna says
If you prepare day before do you add butter mixture then or next day before cooking ?
Layne Kangas says
Hi, Donna – I would personally add the butter before cooking. Enjoy!
Cal says
You just can’t beat these sliders. They are extremely good, easy to make and great to take to work to reheat in the micro-wave.