
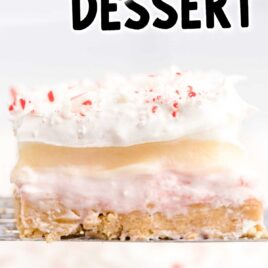

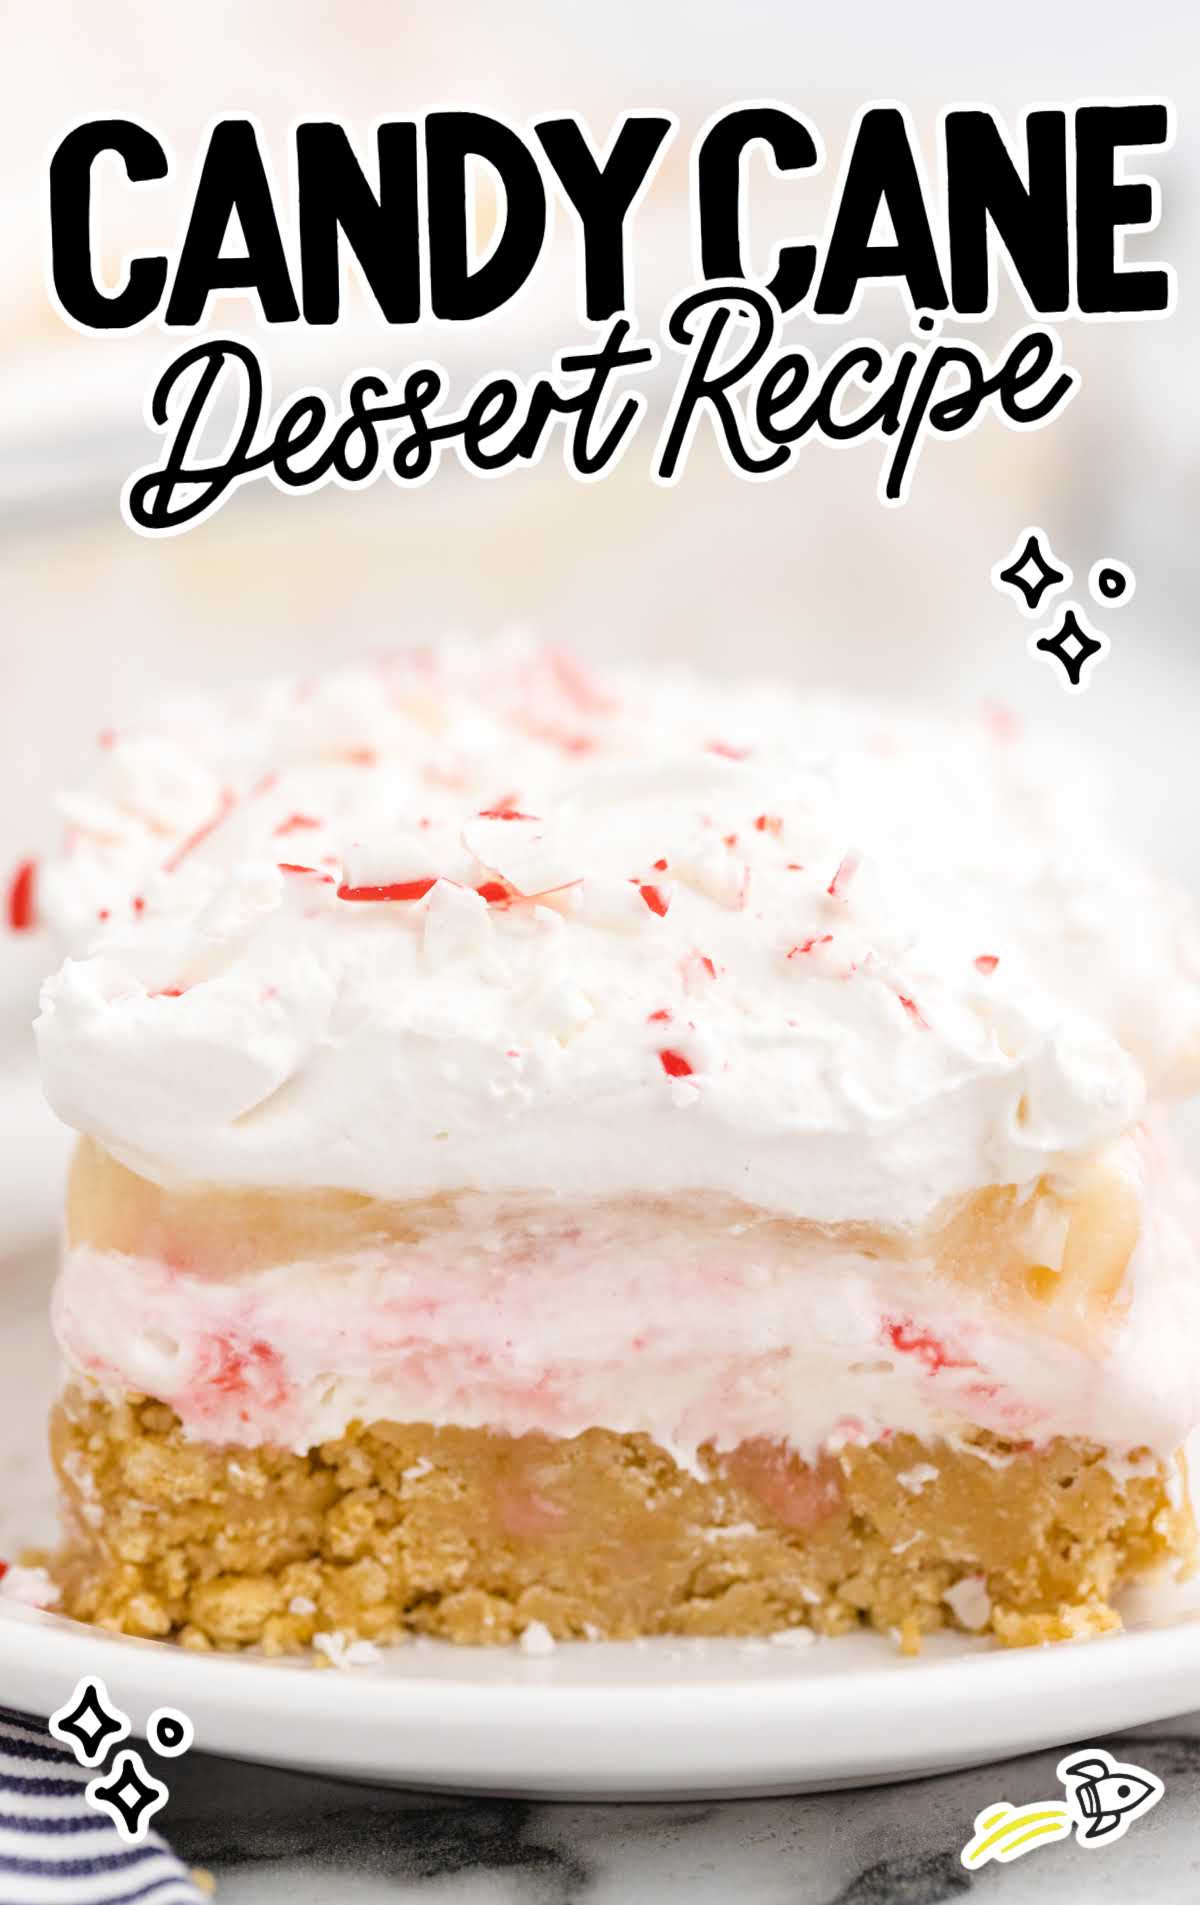
Sweet and delicious, this layered candy cane dessert is the perfect Christmas treat. Golden Oreos, crushed candy canes, cream cheese, pudding, and Cool Whip are layered together for an irresistible, fluffy no bake dessert that everyone will love!
Candy Cane Dessert Ingredients
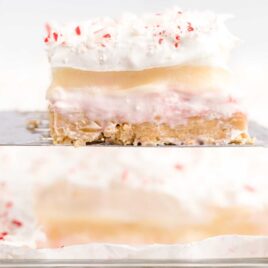
This candy cane dessert is a delightful treat with a sweet and creamy profile.
The golden Oreo crust offers a buttery base, while the vanilla pudding layer brings smooth, velvety sweetness.
The standout feature is the whipped topping infused with refreshing peppermint candy cane bits, creating a festive and minty twist in every bite.
You’ll need:
For The Oreo Crust:
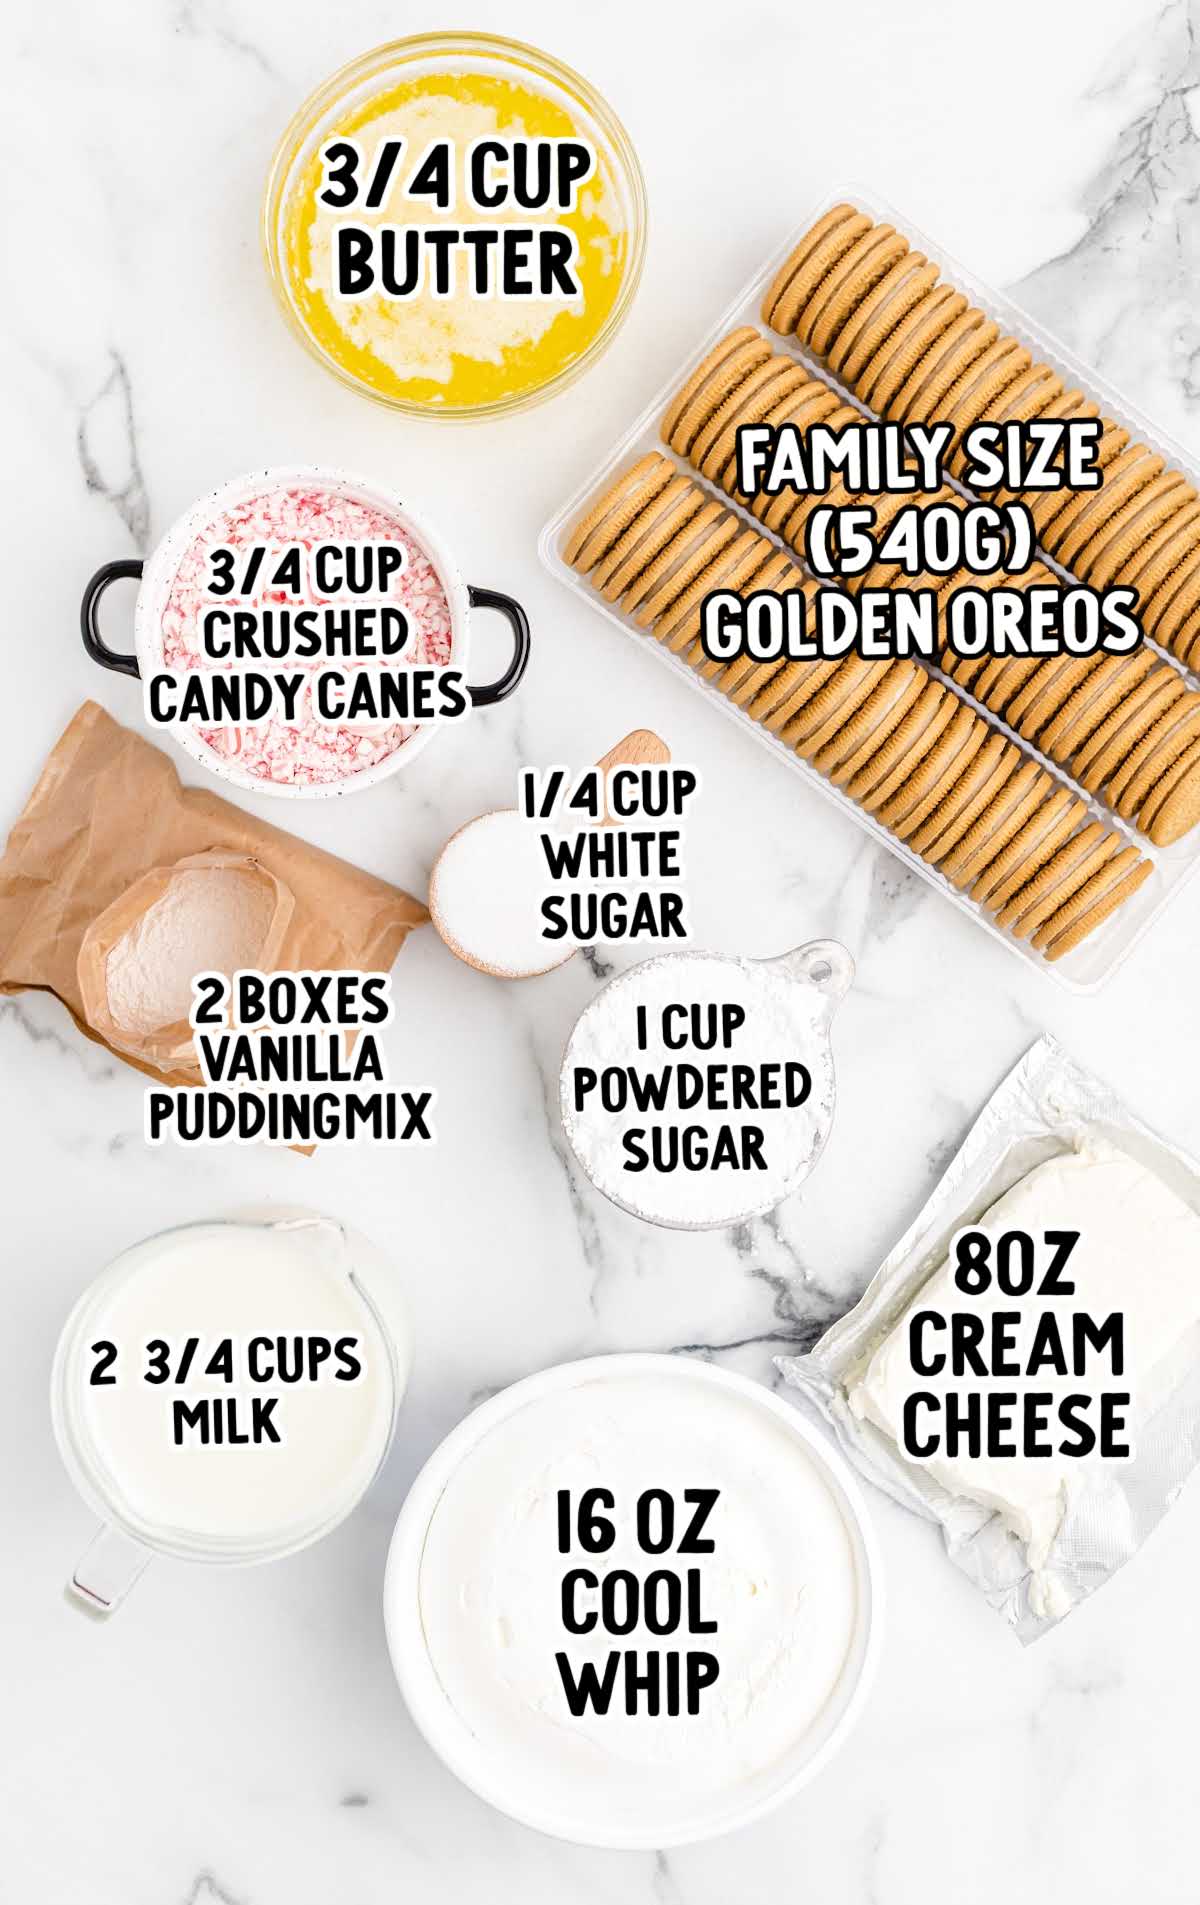
- 1 family-size package of golden Oreos (about 540 grams)
- ¾ cup of unsalted butter, melted
For The Cream Cheese Layer:
- ½ cup of crushed peppermint candy canes
- 1 (8-ounce) package of cream cheese, softened
- ¼ cup of white sugar
- 1 cup of powdered sugar
- 1 (16-ounce) container of Cool Whip, thawed and divided into 2 cups, and the remainder for the topping
For The Vanilla Pudding Layer:
- 2 (3.4-ounce) boxes of instant vanilla pudding mix
- 2¾ cups of cold milk
For The Whipped Topping:
- ¼ cup of crushed peppermint candy canes
- Remainder of Cool Whip, thawed
Substitutions And Additions
GOLDEN OREOS: If you prefer, you can use chocolate Oreos or wafer cookies for the crust.
POWDERED SUGAR: Also known as icing sugar or confectioner’s sugar, if you don’t have this, you can use half a cup of granulated white sugar instead.
VANILLA PUDDING MIX: You could substitute this for a white chocolate pudding mix if you prefer. You could also try cheesecake-flavored pudding mix for an extra flavor profile in your dessert.
PEPPERMINT CANDY CANES: Instead of crushed candy canes, you can use crushed peppermint candies, Andes mints, or even chocolate chips for added texture and flavor variation.
COOL WHIP: Instead of Cool Whip, you can use our homemade whipped cream if you prefer.
FRUIT: You could add fresh strawberries or raspberries before serving as well.
NUTS: To add a nutty crunch, sprinkle chopped nuts like almonds, pecans, or walnuts on top of the dessert. The nutty texture pairs wonderfully with the creamy layers and provides a delightful contrast.
EXTRA SPICES: If you enjoy spiced desserts, consider adding a pinch of cinnamon or nutmeg to the vanilla pudding mix. These spices can add warmth and depth to the overall flavor profile without overpowering the mint.
TOPPING: Add a chocolate drizzle or shaved chocolate on top of this creamy dessert for a decadent garnish.
How To Make This Candy Cane Dessert Recipe
Let’s have a look at the steps for creating all the delicious layers of this dessert.
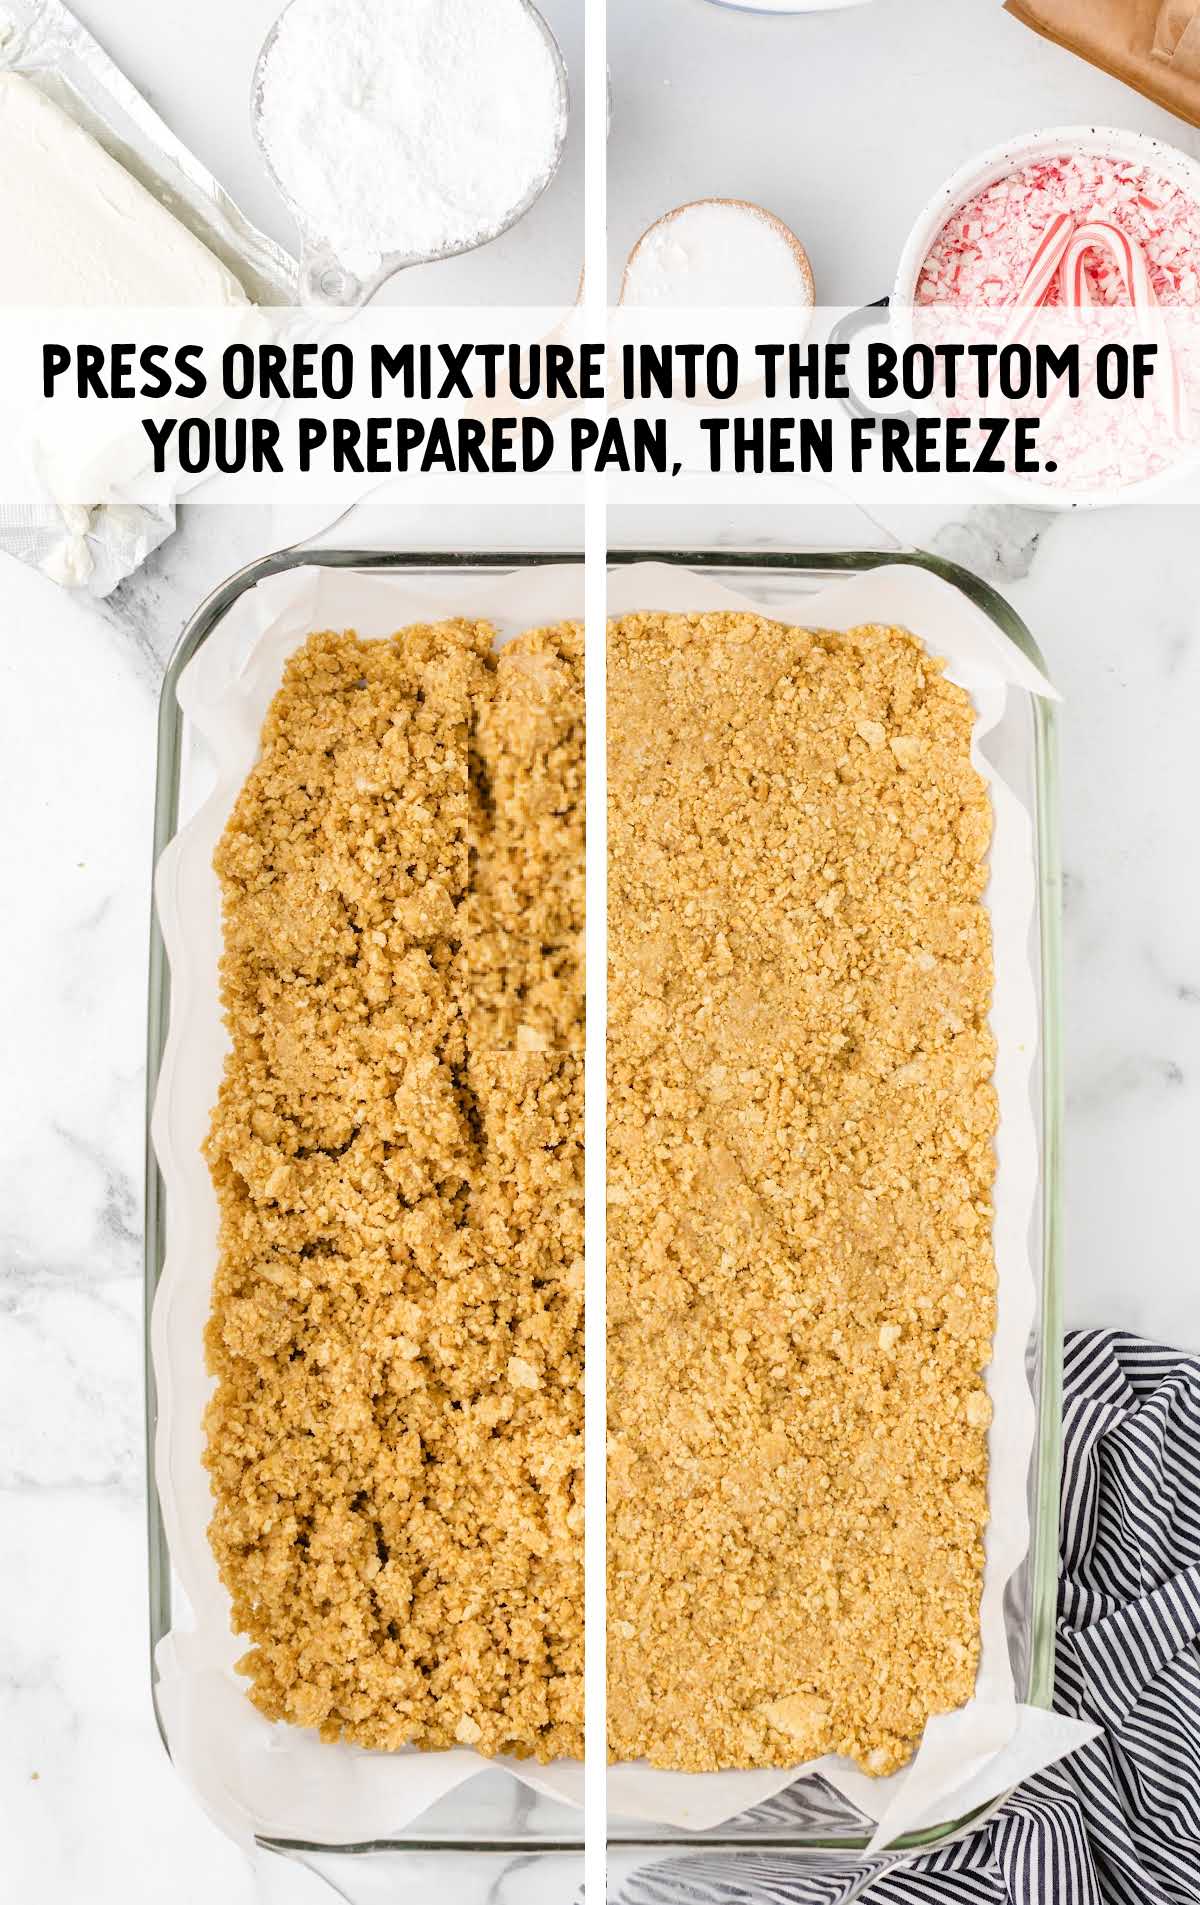
STEP ONE: Line a 9×13-inch baking dish with parchment paper or spray with nonstick cooking spray.
STEP TWO: Use a food processor to crush the candy canes until coarsely crushed and three-quarters of a cup in volume. Set aside.
STEP THREE: Use a food processor to turn the Oreos into fine crumbs. Add the melted butter and mix.
STEP FOUR: Press the mixture into the baking dish. Store in the freezer while you prepare the next layer.
STEP FIVE: In a large bowl, beat the cream cheese with an electric mixer.
OUR RECIPE DEVELOPER SAYS
Make sure your cream cheese is at room temperature; otherwise, you will end up with lumps in your cheesecake mixture.
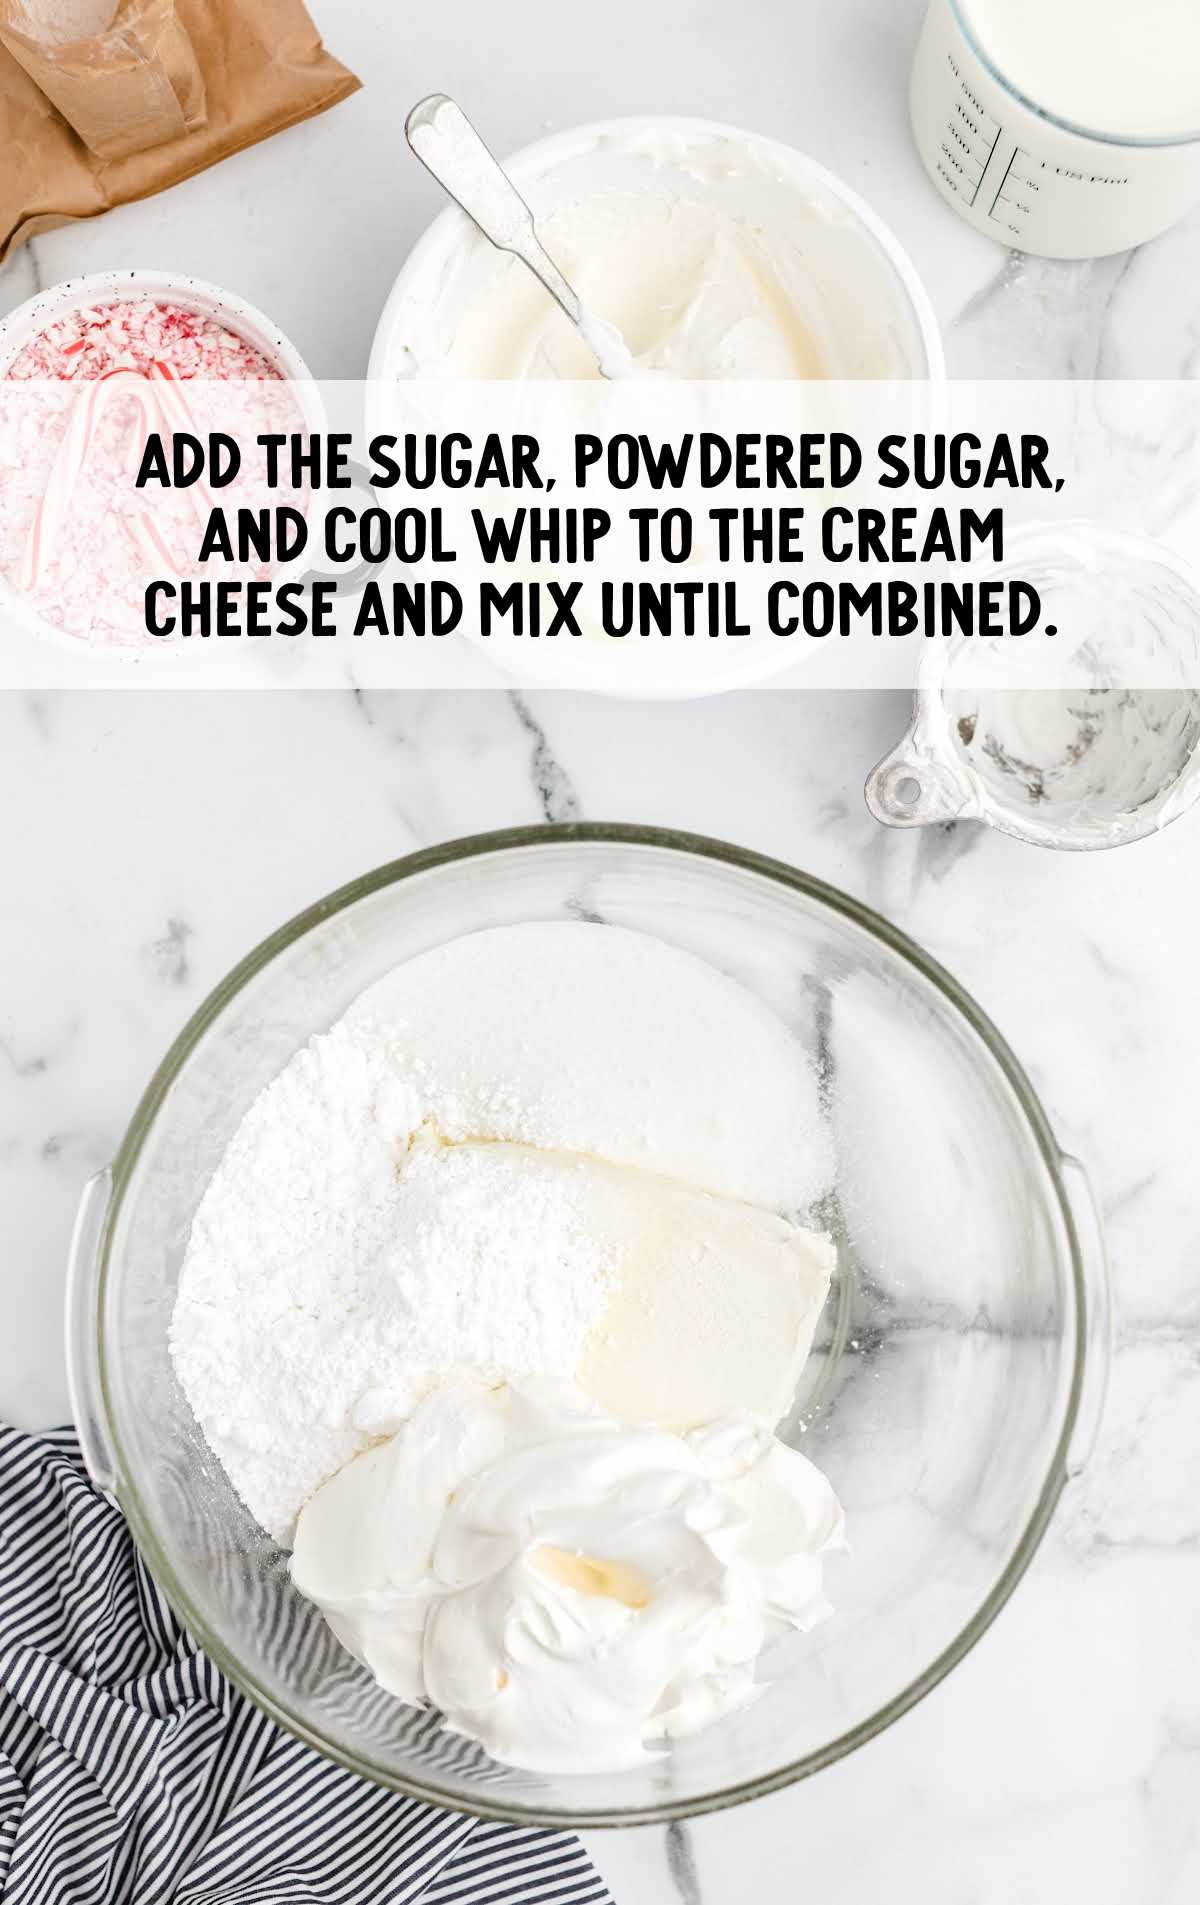
STEP SIX: Add the white sugar, powdered sugar, and two cups of Cool Whip to the cream cheese and mix until combined.
Make sure not to over-mix the cream cheese layer.
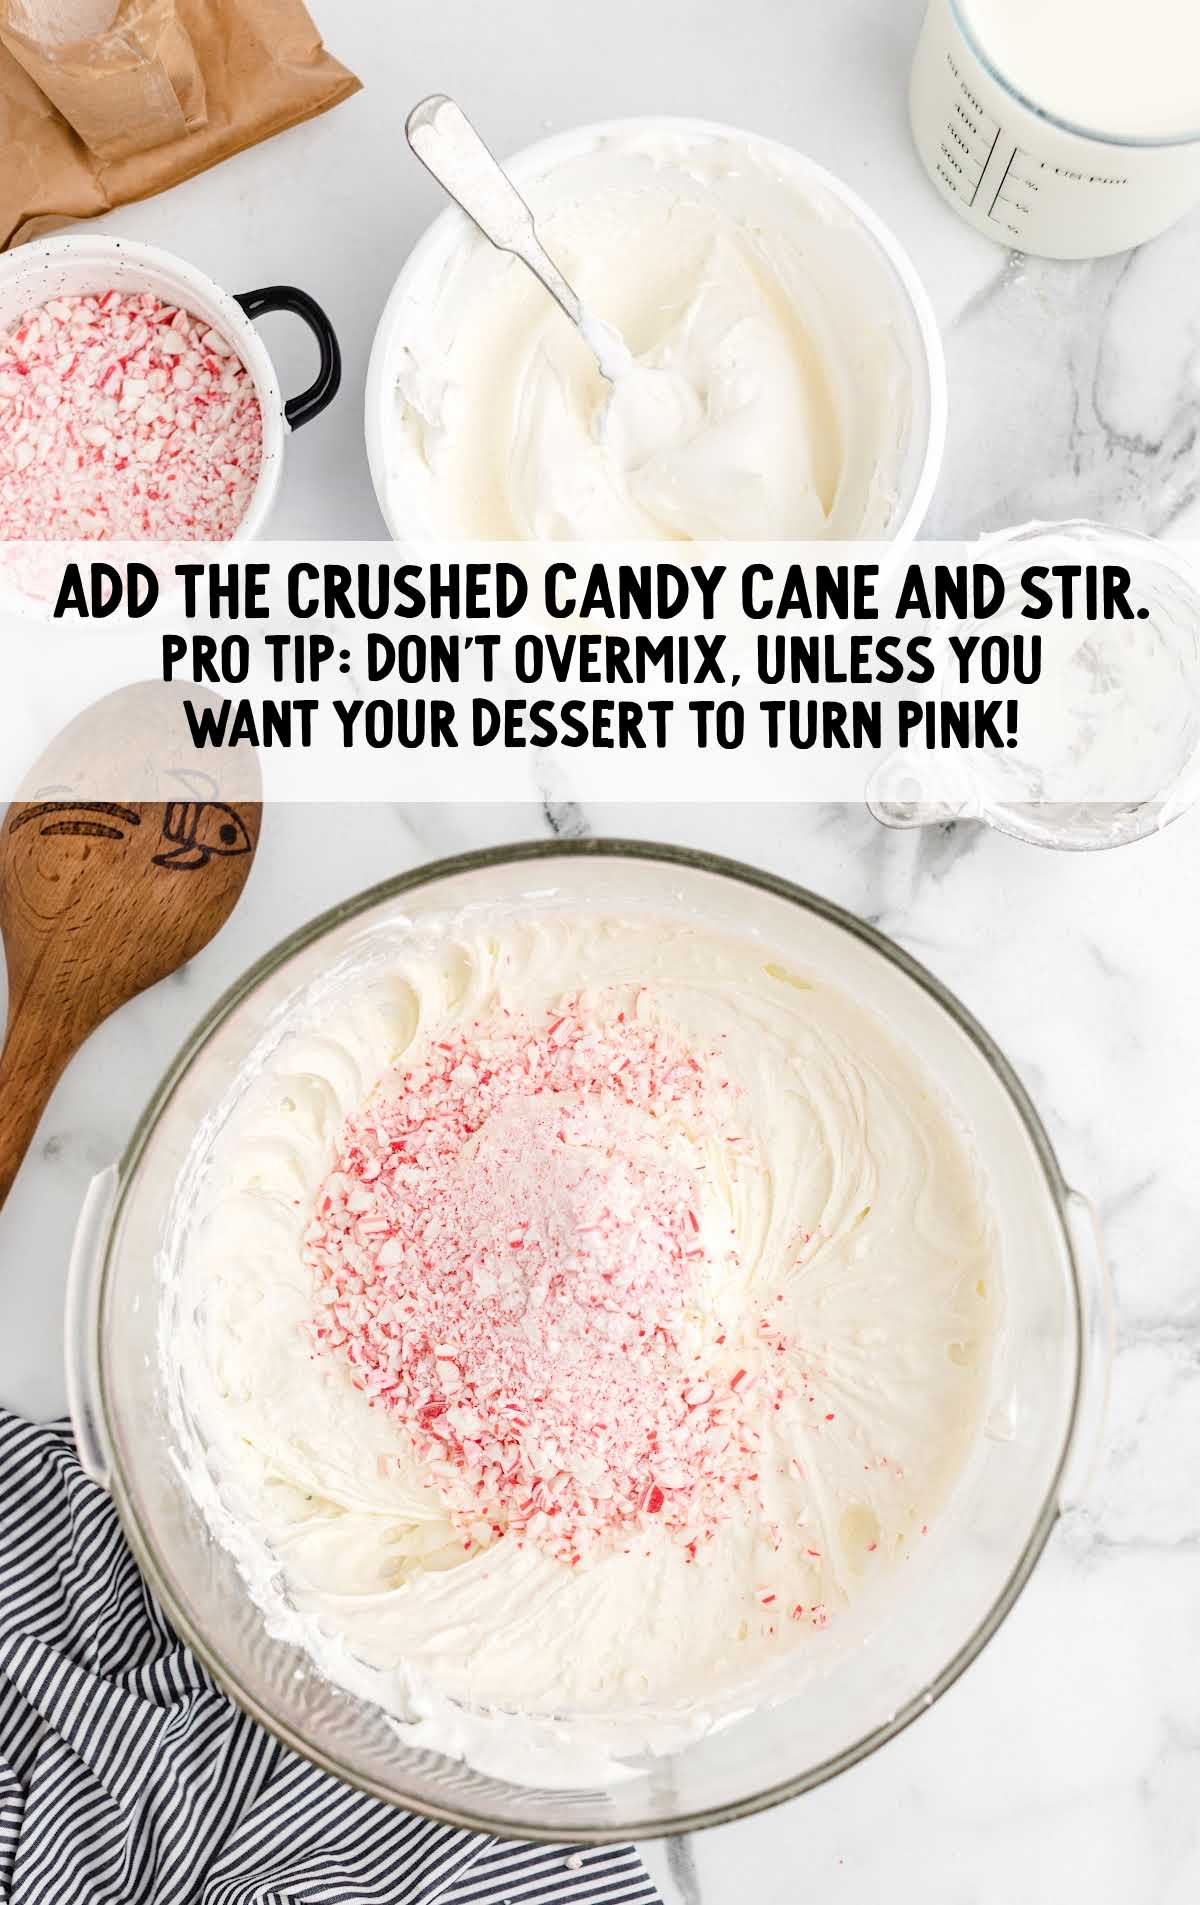
STEP SEVEN: Stir half a cup of the crushed candy canes into the cream cheese mixture. Set aside the remaining quarter cup for the topping.
PRO TIP:
When stirring in the candy cane bits, don’t mix too much, or this layer will turn pink or green, depending on the color of the candy canes you use.
STEP EIGHT: Use a spatula to smooth this layer over the prepared crust. Put the baking dish back into the freezer while you prepare the next layer.
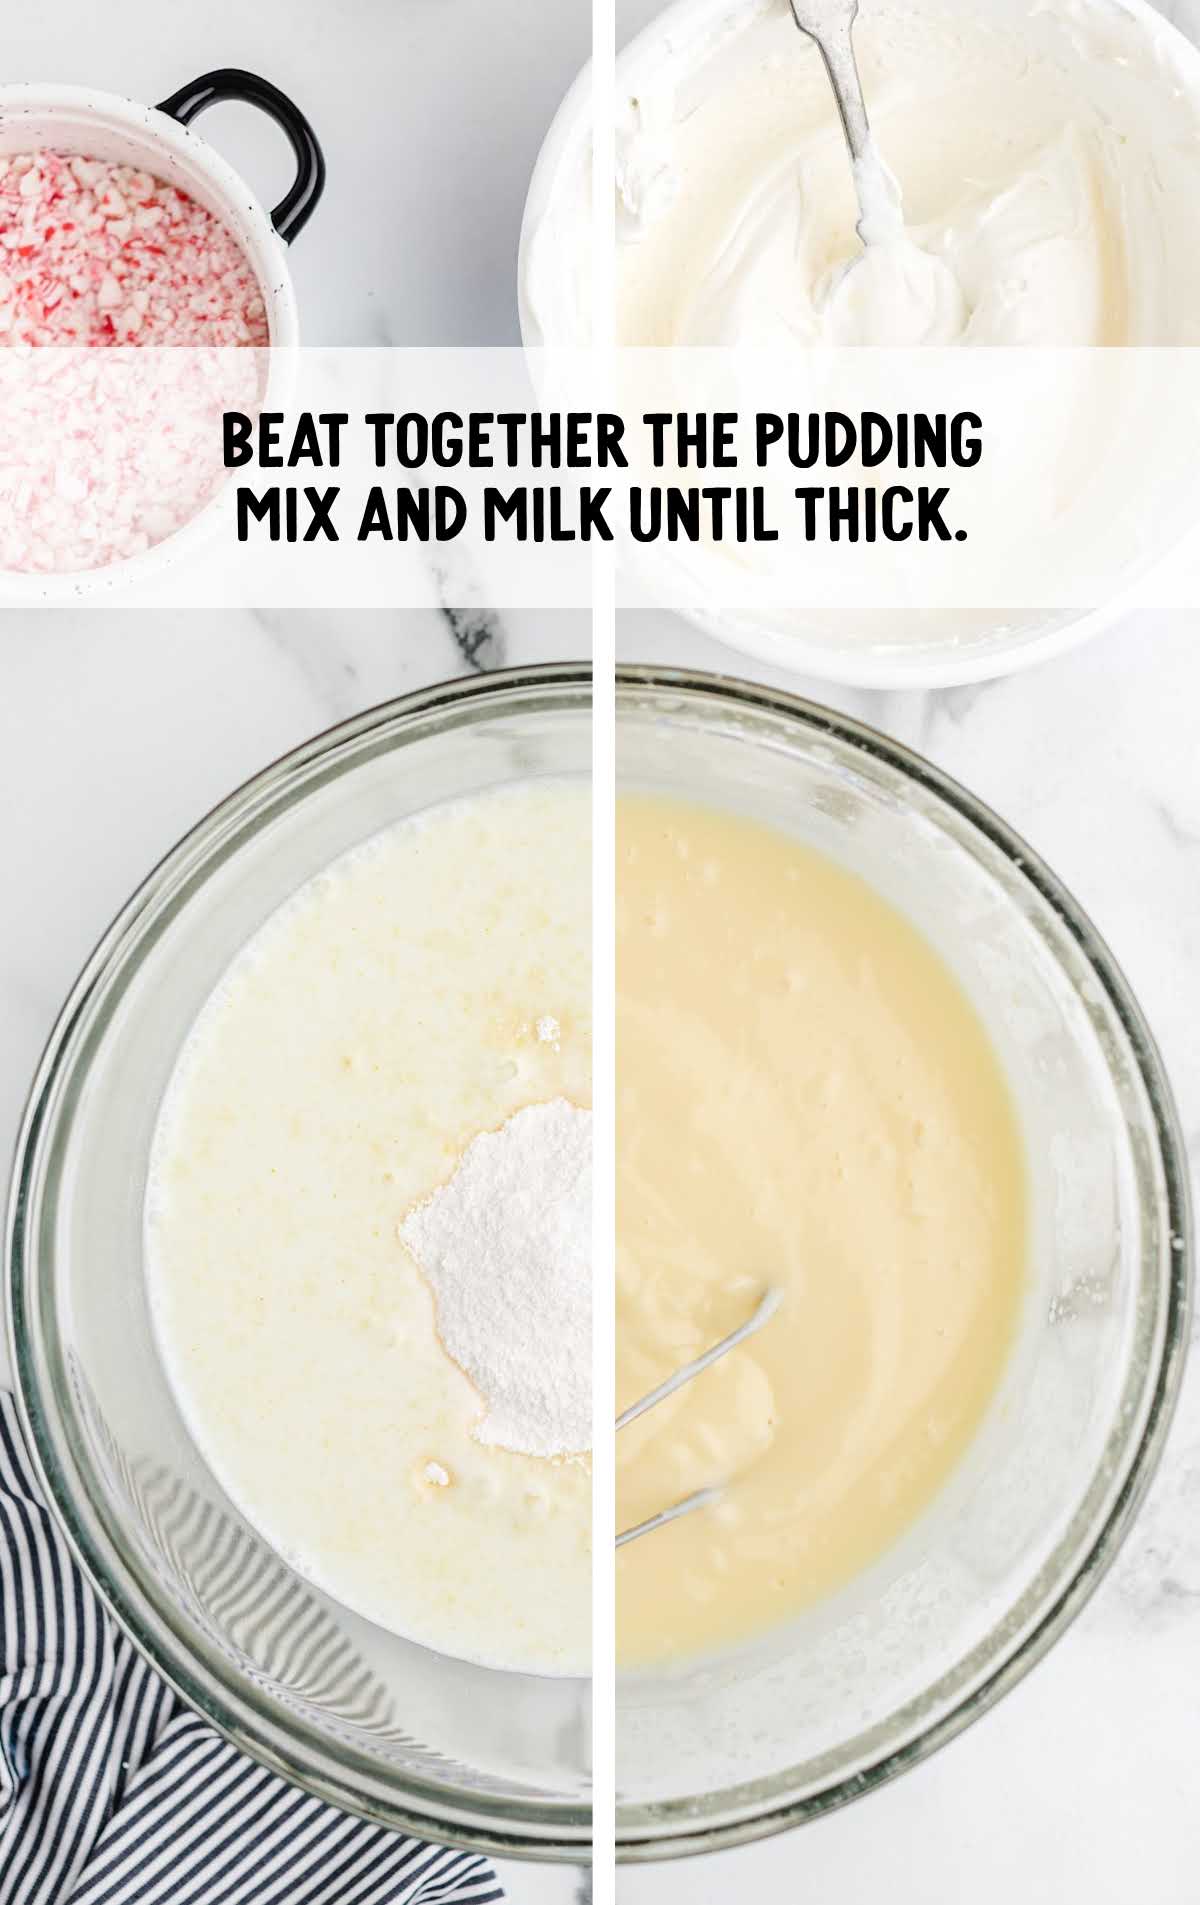
STEP NINE: Combine the dry pudding mix and milk and beat for two minutes until it starts to thicken.
STEP TEN: Use a spatula to evenly smooth the pudding layer over top of the cream cheese layer. Put it back into the freezer for ten minutes.
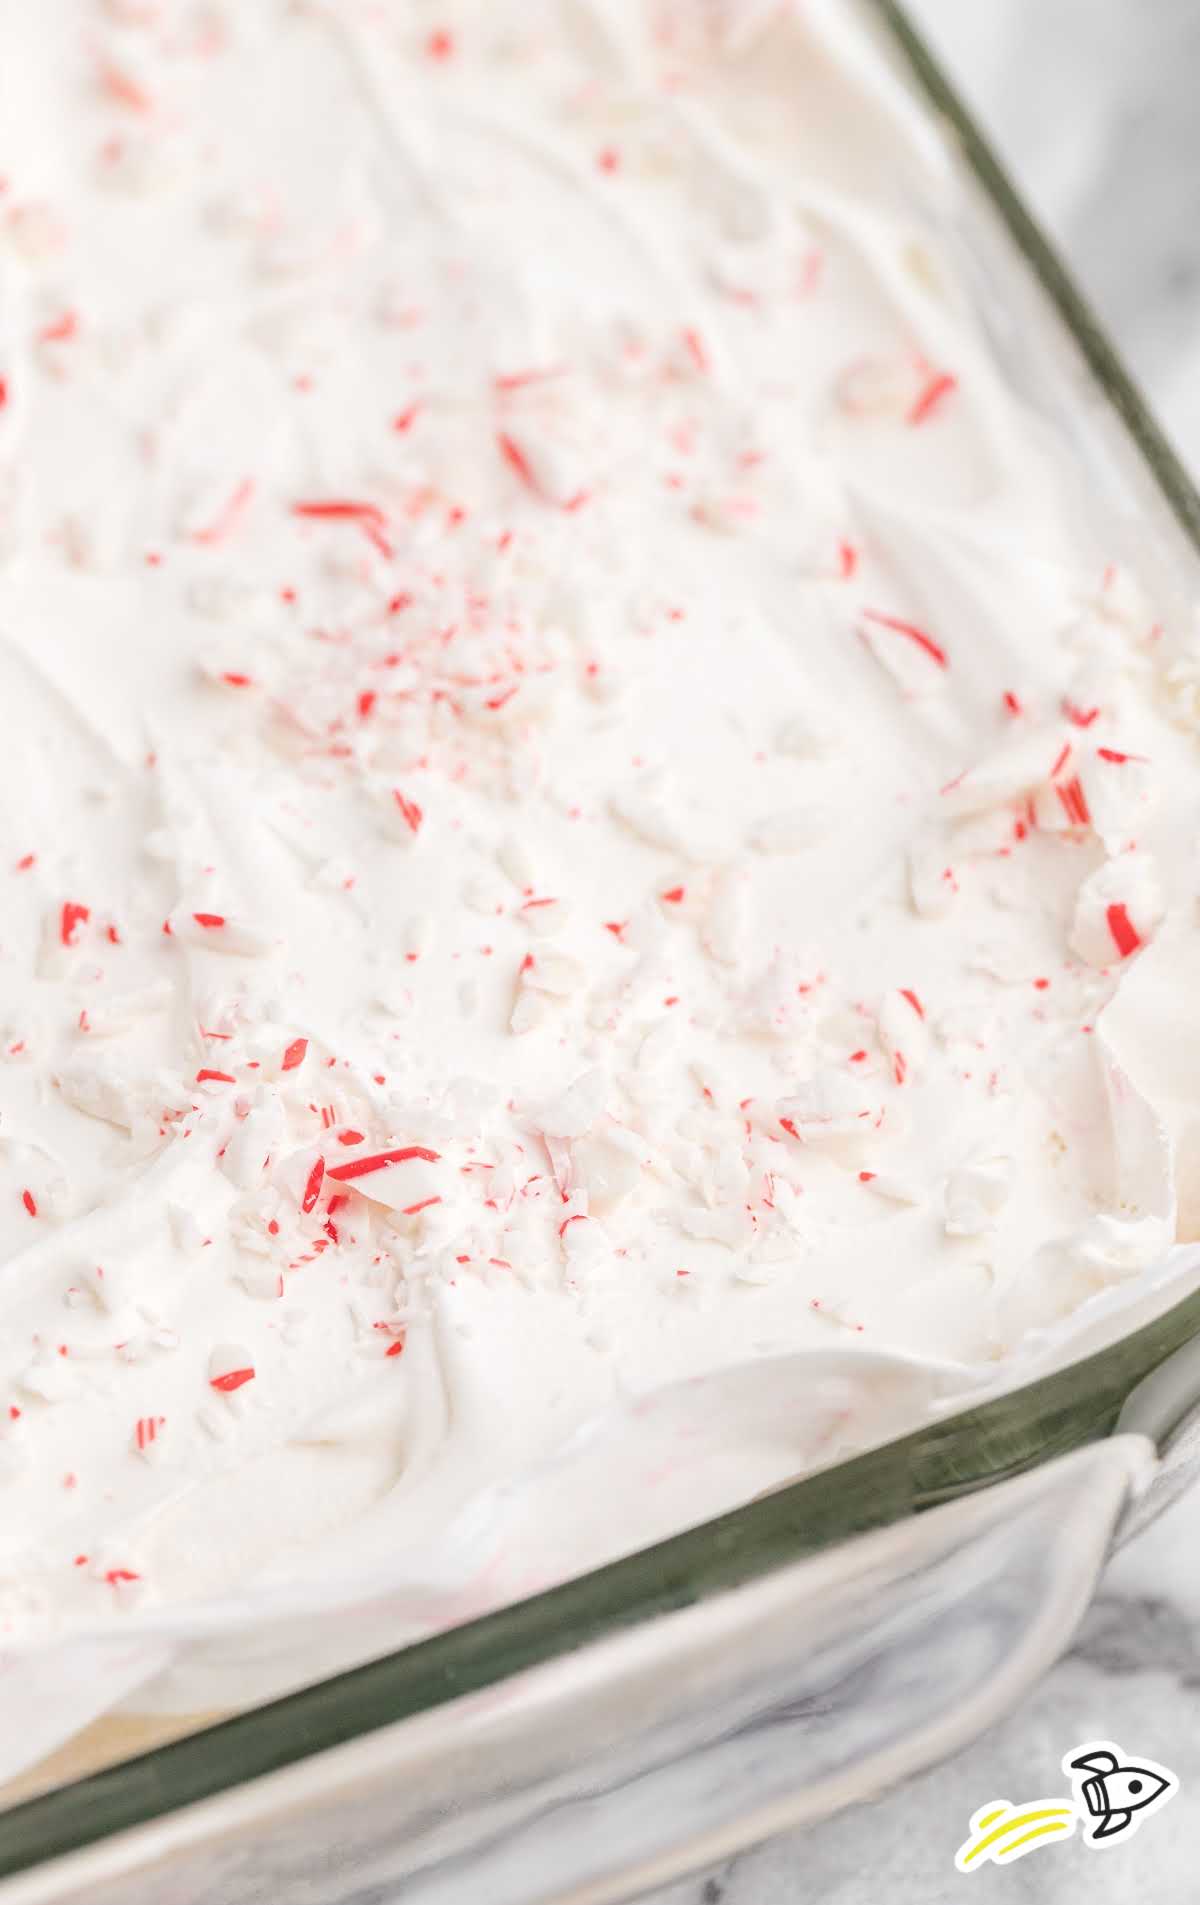
STEP ELEVEN: Smooth the remaining Cool Whip over the top of the dessert and sprinkle with the remaining crushed candy cane pieces.

STEP TWELVE: Place the dish into the refrigerator for at least six hours before slicing and serving. For the best layers, it should chill overnight.
PRO TIP:
The long chill time allows all the flavors to mingle and blend together even more!
How to Easily Cut This Dessert
Cutting the Candy Cane Dessert can be a breeze with a few simple tips:
- Chill It First: Before attempting to cut the dessert, make sure it’s well-chilled. Refrigerate it for a few hours or overnight to allow the layers to set. A chilled dessert is easier to slice cleanly.
- Use a Sharp Knife: Ensure your knife is sharp. A dull knife can cause the layers to smush together rather than cleanly separate. A sharp knife will give you clean edges.
- Hot Water Method: Dip your knife in hot water and wipe it dry before each cut. The heat helps the knife glide through the layers smoothly without sticking. Repeating this process between cuts ensures clean slices.
- Size of Slices: Decide on the size of slices you want before you start cutting. It can be helpful to mark the cutting lines with a toothpick lightly. This way, you can achieve even and consistent portions.
- Gentle Pressure: Apply gentle, even pressure when cutting through the layers. Don’t rush it; take your time to avoid squishing the dessert.
- Serve Chilled: After cutting, serve the slices immediately or keep them chilled until serving to maintain their shape and texture.
How To Serve
This fluffy layered dessert would be a huge hit at any of your festive events this holiday season.
Add a scoop of vanilla ice cream for an extra indulgent dessert, along with a mug of our peppermint white hot chocolate.
For added decadence, drizzle one of these sauces on top:
Enjoy a slice alongside your favorite cup of coffee or hot chocolate for an afternoon snack.
For more festive candy cane recipes, take a look at our no-bake candy cane pie or this tempting candy cane fudge.
MORE CANDY CANE RECIPES


Storage
Whether you plan to enjoy it right away or save some for later, here’s what you need to know:
MAKE AHEAD: Simply follow the recipe until you’ve assembled all the layers. Then, cover it tightly with plastic wrap or aluminum foil and refrigerate it.
It’s best to wait until just before serving to sprinkle the crushed candy canes on top to maintain their crunch and vibrant color.
When you’re ready to enjoy it, add the candy cane topping, and you’re good to go!
IN THE FRIDGE: This easy dessert can be stored in the fridge covered in plastic wrap for three to four days.
IN THE FREEZER: You can freeze this tasty winter treat for up to three months in an airtight container. You can serve this dessert frozen or thaw it in the refrigerator.
Why We Love This Recipe
FESTIVE FLAVORS: This dessert perfectly captures the essence of the holiday season with its blend of creamy vanilla pudding and the refreshing minty crunch of crushed candy canes.
EASY TO MAKE: With step-by-step instructions and simple ingredients, it’s a stress-free dessert that yields impressive results.
MAKE AHEAD CONVENIENCE: You can prepare this dessert ahead of time, allowing you to focus on other holiday preparations. Just assemble the layers and add the candy cane topping right before serving for a fresh and festive touch.
This layered candy cane dessert recipe is sometimes known as candy cane lush or candy cane delight. But whatever you call it, we’re sure you’ll agree that this heavenly holiday dessert is sure to please a crowd at your next holiday party.
FREQUENTLY ASKED QUESTIONS
Chocolate Oreos or a graham cracker crust would be fantastic alternatives to the Golden Oreos in this recipe.
You can freeze this sweet treat in an airtight container for up to three months.
To get the cream cheese to room temperature quickly, cut it into cubes and place it on a plate for about 20 minutes.
More Recipes You’ll Love
- Oreo Peppermint Bark
- Layered Peppermint Fudge
- Italian Cookies
- Candy Cane Kiss Cookies
- Peppermint Bark
- Candy Cane Cupcakes


Candy Cane Dessert
Ingredients
Oreo Crust
- 540 grams golden Oreos (1 family-size package)
- ¾ cup unsalted butter, melted
Cream Cheese Layer
- ½ cup peppermint candy canes, crushed
- 8 ounces cream cheese, softened
- ¼ cup white sugar
- 1 cup powdered sugar
- 16 ounces Cool Whip, thawed and divided into 2 cups, and the remainder
Vanilla Pudding Layer
- 2 boxes instant vanilla pudding mix (3.4-ounce boxes)
- 2¾ cups cold milk
Whipped Topping
- ¼ cup peppermint candy canes, crushed
- Remainder of Cool Whip, thawed
Instructions
- Line a 9×13-inch baking dish with parchment paper or spray with nonstick cooking spray.
- Use a food processor to crush the candy canes until coarsely crushed and ¾ cup in volume. Set aside.
- Use a food processor to turn the Oreos into fine crumbs. Add the melted butter and mix.
- Press the mixture into the baking dish. Store in the freezer while you prepare the next layer.
- In a large bowl, beat the cream cheese with an electric mixer.
- Add the white sugar, powdered sugar, and Cool Whip to the cream cheese and mix until combined. Make sure not to over-mix the cream cheese layer.
- Stir ½ cup of the crushed candy canes to the cream cheese mixture. Set aside the remaining ¼ cup for the topping.
- Use a spatula to smooth this layer over the prepared crust. Put the baking dish back into the freezer while you prepare the next layer.
- Combine the dry pudding mix and milk and beat for two minutes until it starts to thicken.
- Use a spatula to evenly smooth the pudding layer over top of the cream cheese layer. Put it back into the freezer for ten minutes.
- Smooth the remaining Cool Whip over the top of the dessert and sprinkle with the remaining crushed candy cane pieces.
- Place the dish into the refrigerator for at least six hours before slicing and serving. For the best layers, it should chill overnight.
Notes
- Make sure your cream cheese is at room temperature; otherwise, you will end up with lumps in your cheesecake mixture.
- When stirring in the candy cane bits, don’t mix too much, or this layer will turn pink or green, depending on the color of the candy canes you use.
- The long chill time allows all the flavors to mingle and blend together even more!
Nutrition


Comments
Gloria says
This is a real winner – easy to make and very delicious. Everyone loves when I make it!
Sherry Schumann says
Good morning Gloria:
What is the package sizes for the pudding ? Since the recipe doesn’t indicate.
Layne Kangas says
The smaller size box that is 3+ ounces.
Kathy Pritchett says
Can this be made with Philadelphia cheesecake mix already made?
Layne Kangas says
Hi, Kathy – I’m not sure, I’ve never tried it like that! If you test it out, please let me know.