
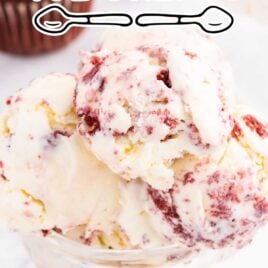

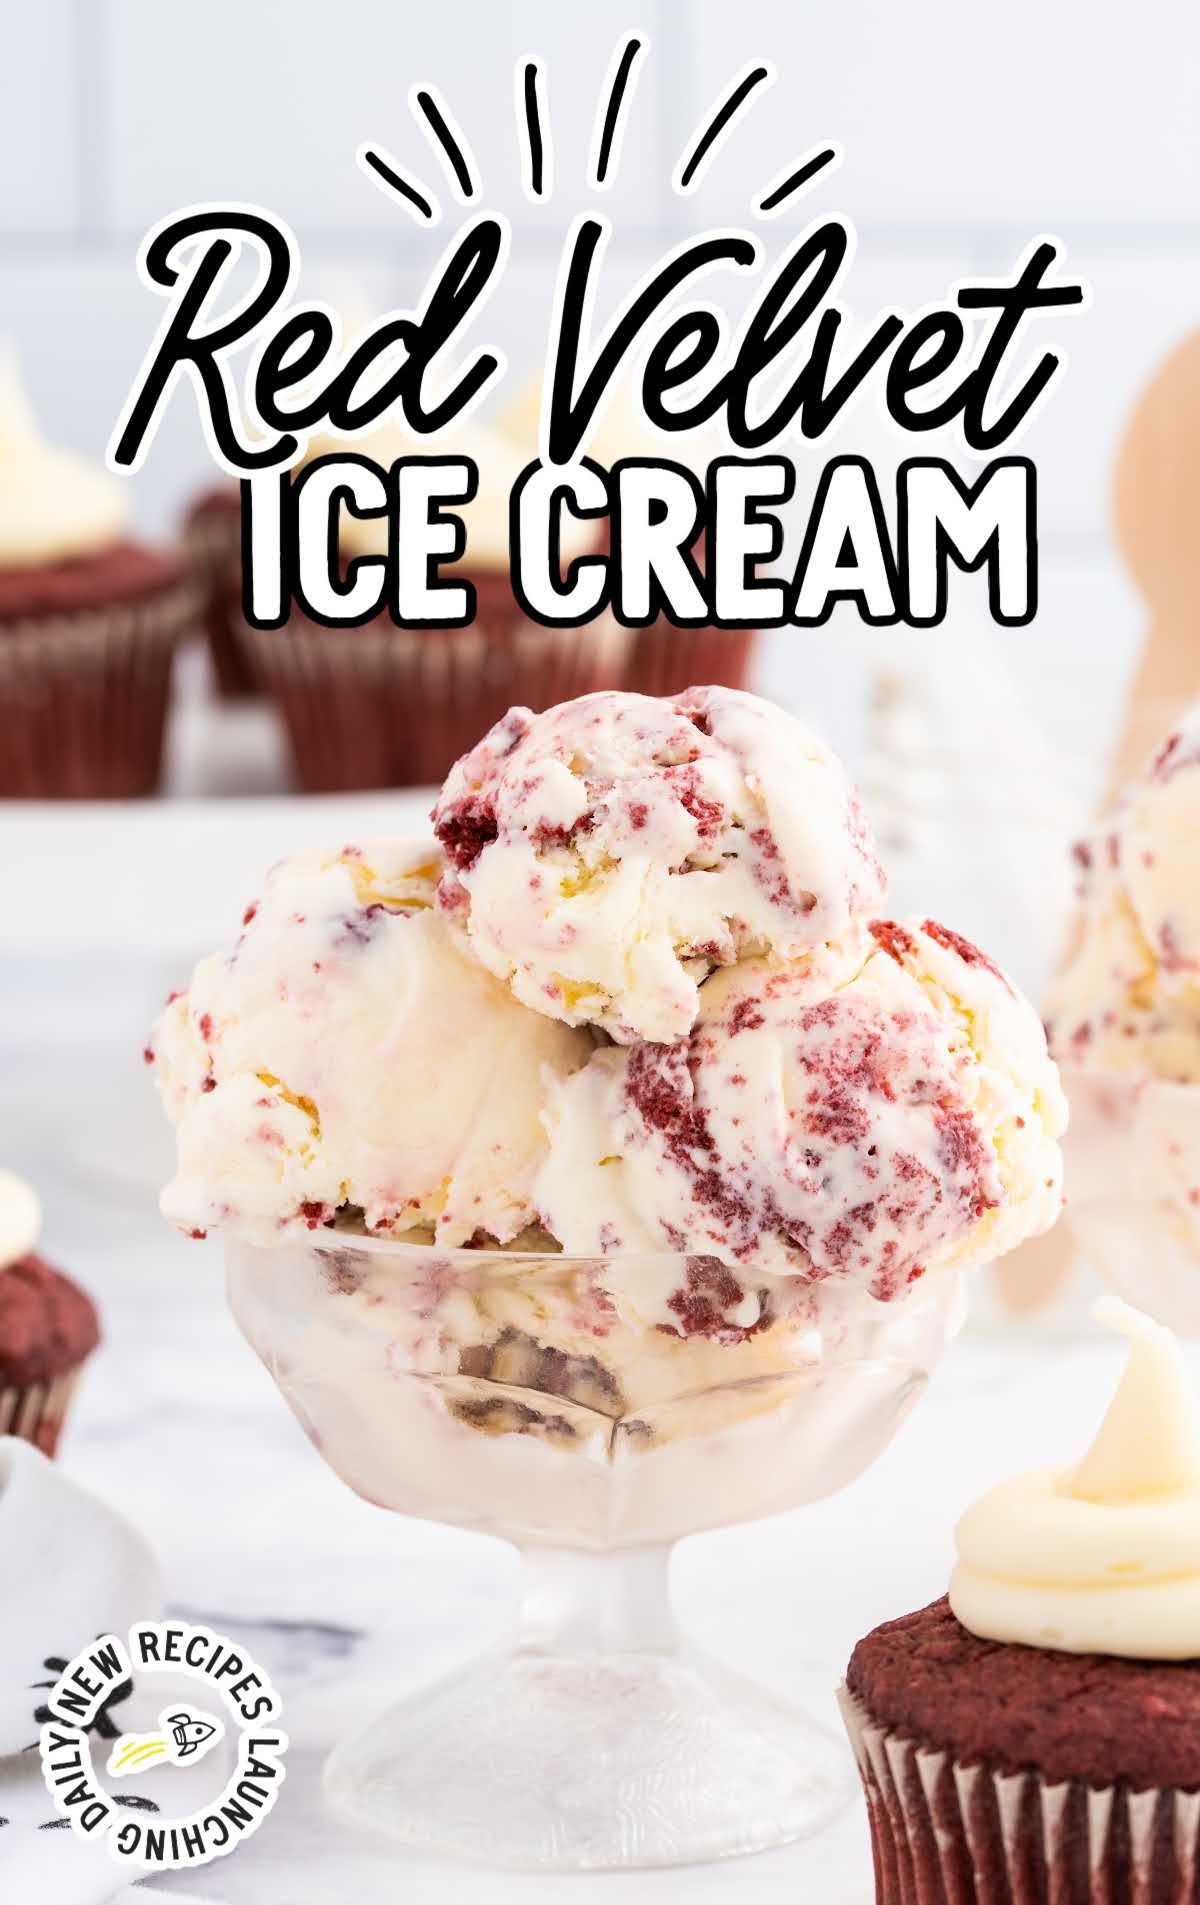
You can’t get much better than homemade red velvet ice cream. This no-churn recipe doesn’t require any fancy equipment and creates creamy ice cream with real chunks of red velvet cake and a cream cheese swirl.
Once you discover how easy and fun it is to make ice cream at home, we have recipes for other ice cream flavors including cotton candy ice cream and birthday cake ice cream.
Red Velvet Ice Cream Ingredients
You’ll need:
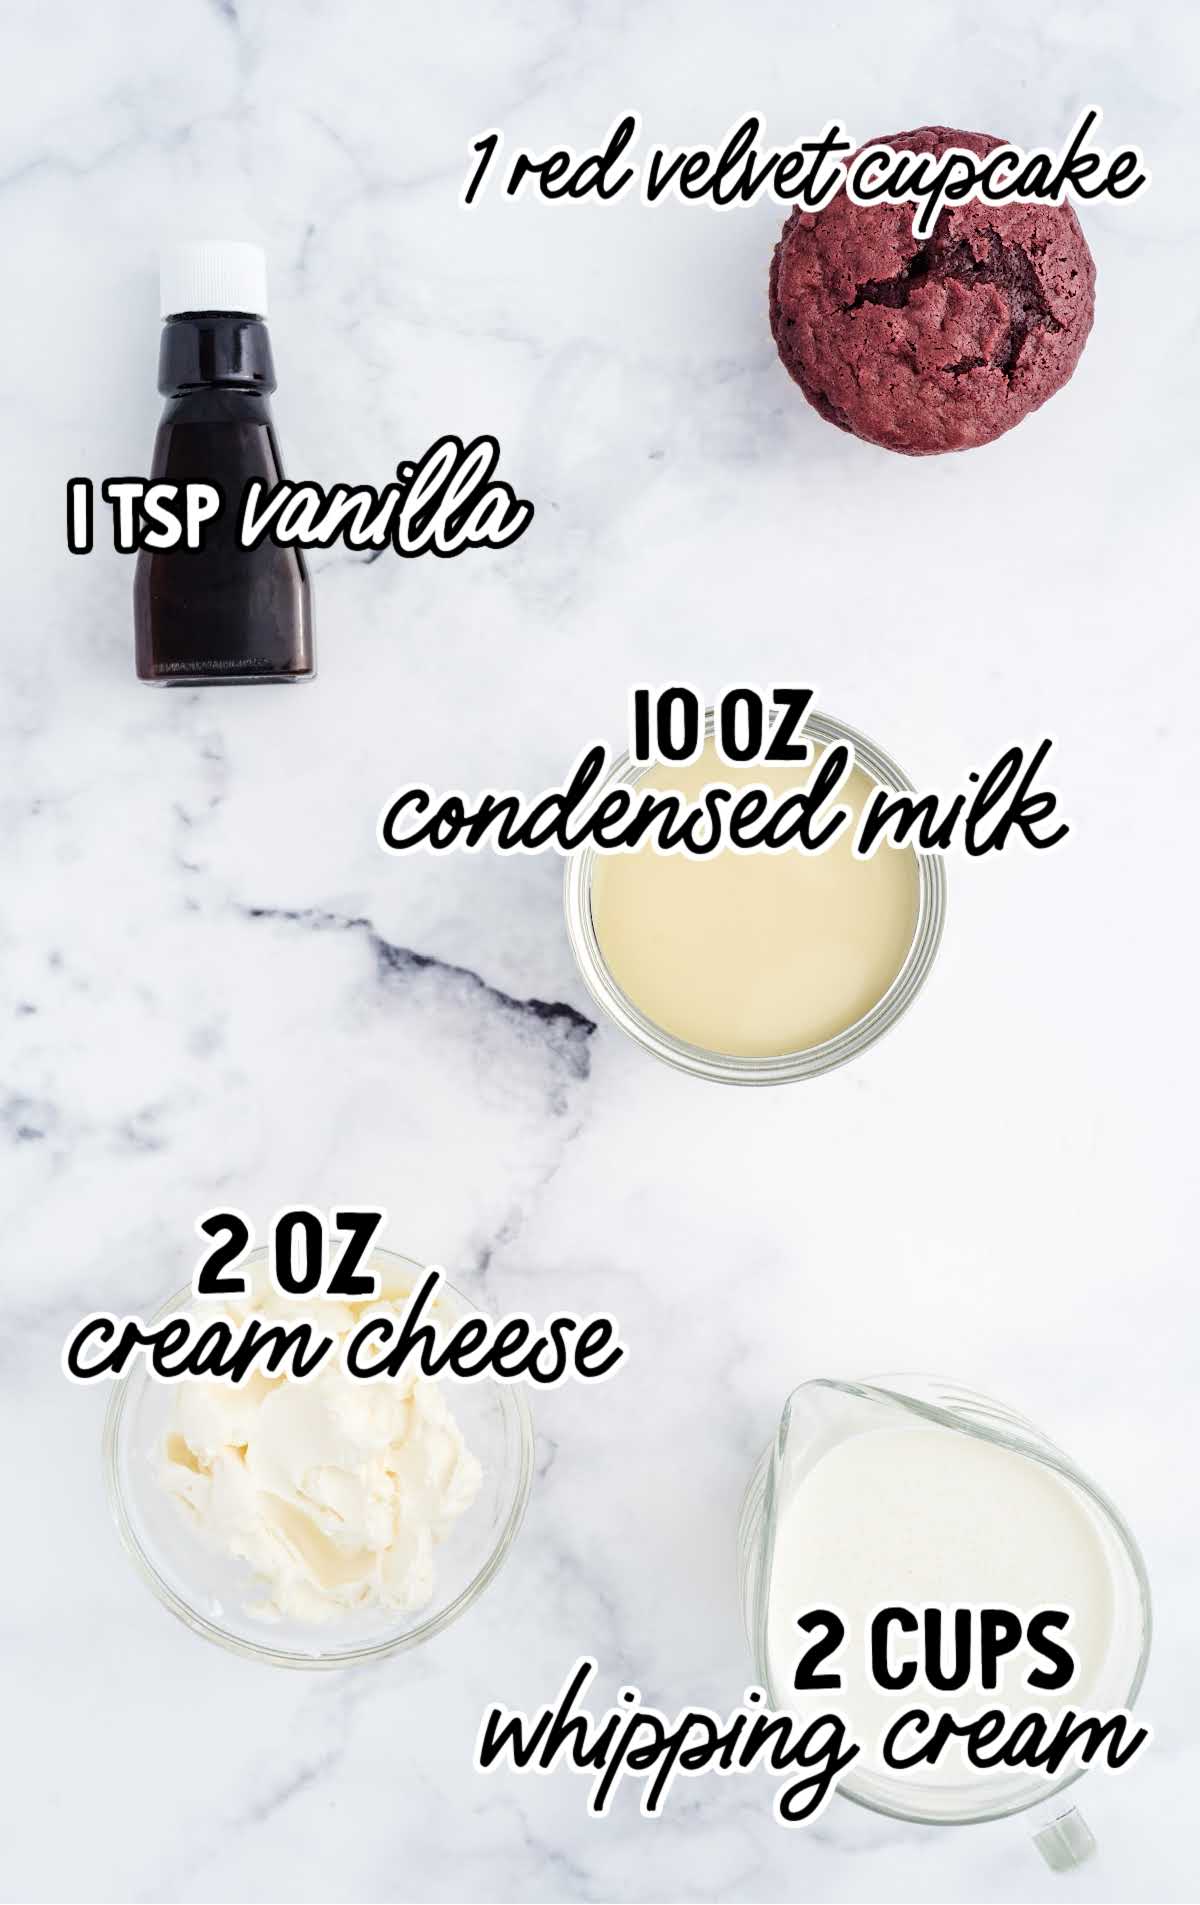
- 2 cups whipping cream
- 1 (10-ounce) can sweetened condensed milk
- 1 teaspoon vanilla extract
- 2 ounces cream cheese
- 1 red velvet cupcake (homemade or store-bought)
Substitutions and Additions
SWEETENED CONDENSED MILK: For a dairy-free alternative, you could use coconut milk for your ice cream.
RED VELVET CAKE: For the red velvet cake pieces, use your favorite red velvet cake recipe or you can use boxed mixed or premade cupcakes from the grocery store.
How To Make This Red Velvet Ice Cream Recipe
OUR RECIPE DEVELOPER SAYS
Chill your condensed milk, heavy whipping cream, and dish or loaf pan in the fridge before you start – it will make everything freeze better.
STEP ONE: In a large bowl with an electric mixer, whip your heavy cream with a mixer for at least 4 minutes, until soft peaks form. The cream will go through several stages, from bubbly, to slightly thickened, to rippling, and finally puffy and airy.
STEP TWO: Gently stir in the sweetened condensed milk, along with the vanilla extract. You don’t want to deflate the cream, so avoid overmixing.
STEP THREE: Pour the ice cream mixture into a clean loaf pan or casserole dish lined with parchment paper. Smooth it out into an even layer with the back of a spoon or an offset spatula.
PRO TIP:
Lining the loaf pan with parchment paper prior to filling will make clean up much easier.
STEP FOUR: Dot on softened bits of cream cheese and push them into the ice cream mixture with your spoon or spatula. Break up the red velvet cupcake into pieces and add the same way.
STEP FIVE: Cover with aluminum foil or plastic wrap and freeze for 4 hours or overnight.
PRO TIP:
Higher fat content ice cream melts quicker than the lower fat ice creams so have those cups or cones ready!
How To Serve
Enjoy this luscious red velvet cake ice cream in a bowl topped with a spoonful of whipped cream. You can also serve this delightful ice cream in homemade chocolate chip cookie cups.
MORE RED VELVET RECIPES

Storage
IN THE FRIDGE: The fridge isn’t cold enough to store ice cream, you’ll need to freeze it. Don’t use the freezer section of your refrigerator as it won’t be as cold as a separate freezer.
IN THE FREEZER: Be sure to store the finished ice cream in the freezer wrapped with plastic or with an airtight lid on top for up to two weeks. When ready to serve, take it out about 5 minutes before you plan to scoop it, to give it a bit of time to thaw. This will make it much easier to scoop out. Place back in the freezer immediately after serving. The texture may change if the ice cream is taken out and put back in the freezer too many times.
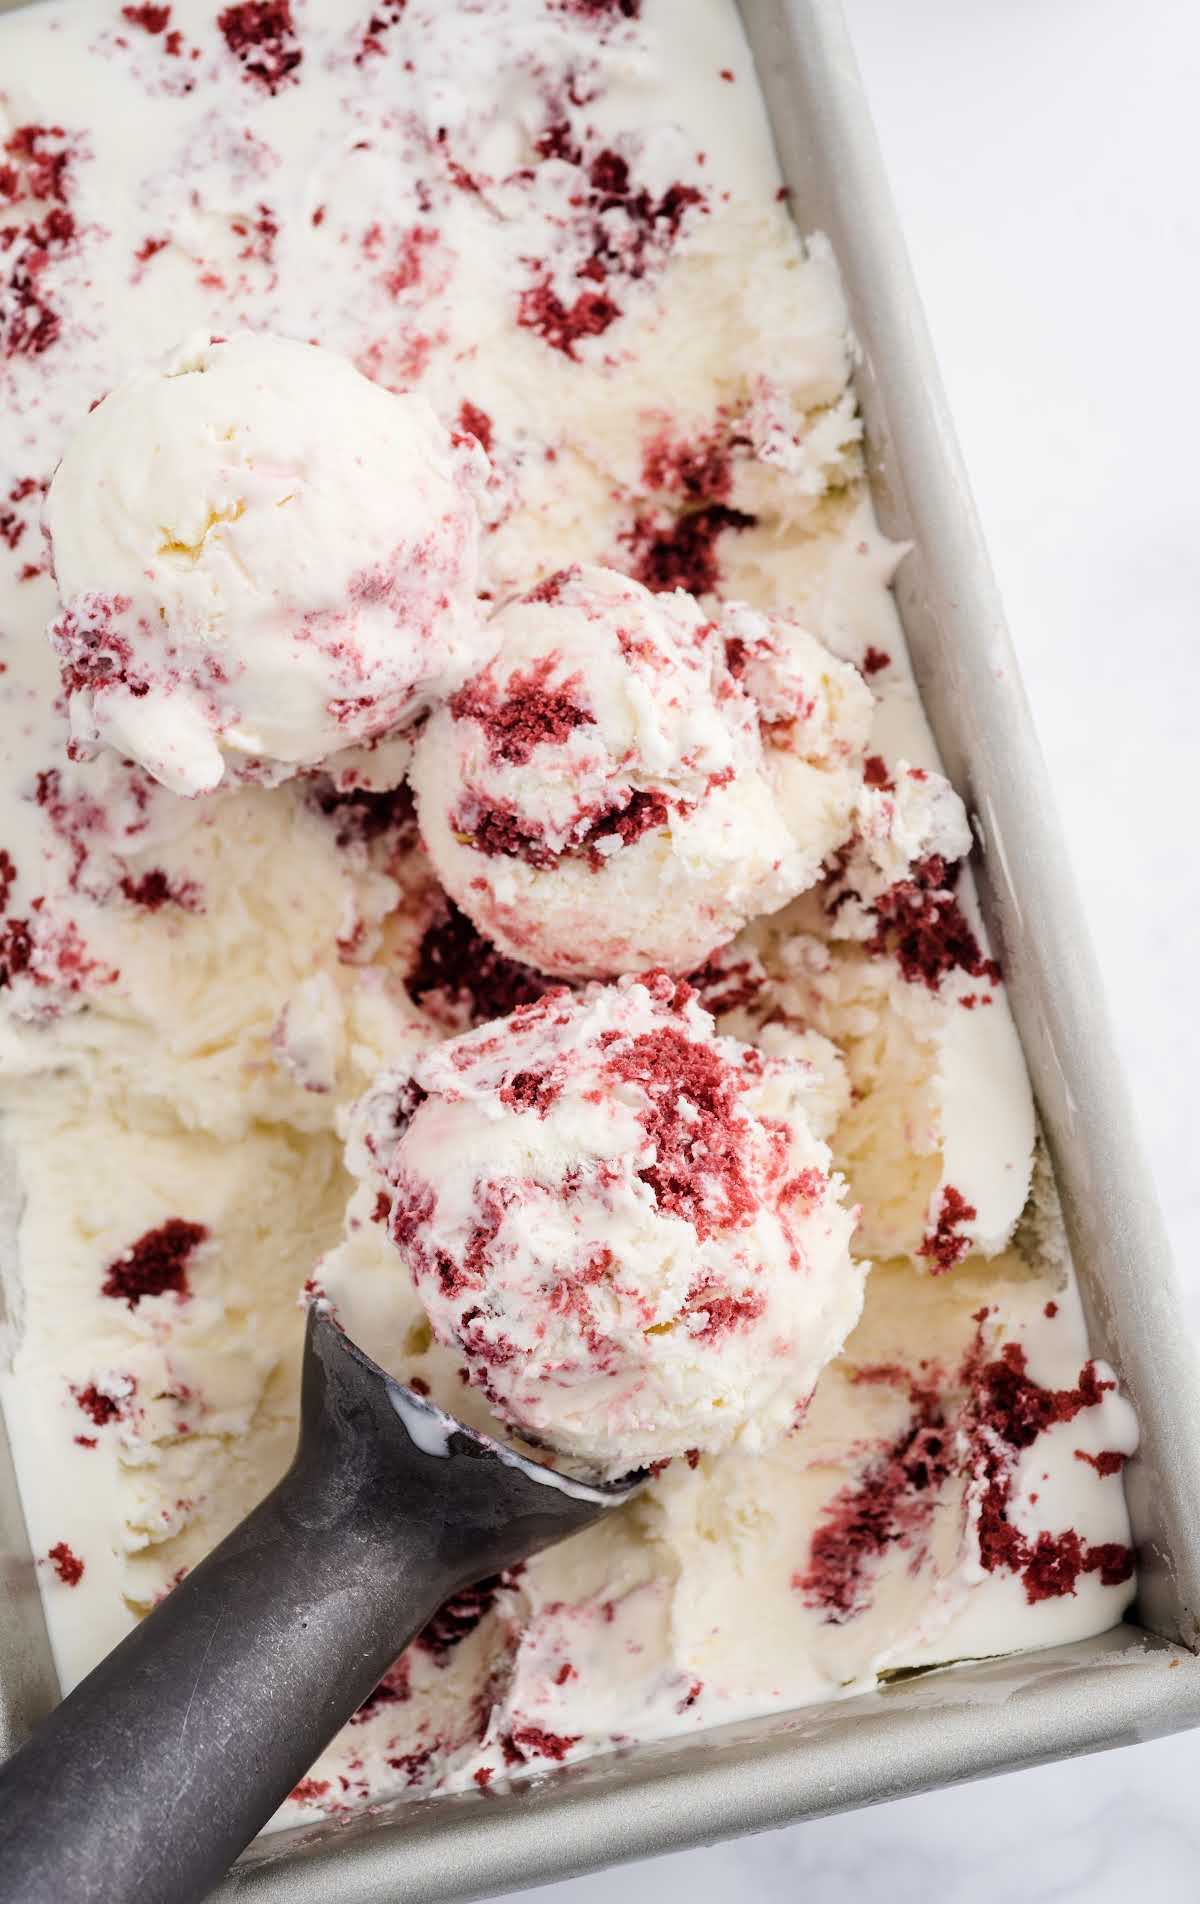
There is something so unique about the red velvet flavor and this delicious ice cream has all the components of the original cake. Between the pieces of red velvet cake and cream cheese frosting swirl, you will be eager to enjoy a scoop of this treat.
Frequently Asked Questions
Typically, when making ice cream from scratch, you will need to use an ice cream maker and that usually entails the step of “churning” the ice cream. A no-churn recipe means no ice cream machine and as you could guess, no churning. It saves many steps and makes it super easy to make homemade ice cream that is just as tasty as regular ice cream but doesn’t need fancy equipment.
You can use any type of milk in this recipe but lower-fat milk such as skim milk will result in less creamy ice cream than if you make it with whole milk or cream.
This ice cream will last about two weeks in the freezer.
More Ice Cream Recipes You’ll Love
- Cookie Monster No-Churn Ice Cream
- Cheese Ice Cream
- No Churn Vanilla Ice Cream
- Pumpkin Ice Cream
- Kool-Aid Ice Cream


Red Velvet Ice Cream
Ingredients
- 2 cups whipping cream
- 10 ounces sweetened condensed milk
- 1 teaspoon vanilla extract
- 2 ounces cream cheese
- 1 red velvet cupcake
Instructions
- Whip the whipping cream with a mixer for at least 4 minutes, until soft peaks form. The cream will go through several stages, from bubbly, to slightly thickened, to rippling, and finally puffy and airy.
- Gently stir in the sweetened condensed milk, along with the vanilla extract. You don’t want to deflate the cream, so avoid overmixing.
- Pour the ice cream mixture into a clean loaf pan or casserole dish lined with parchment paper. Smooth it out into an even layer with the back of a spoon or an offset spatula.
- Next, dot on softened bits of cream cheese and push them into the ice cream mixture with your spoon or spatula. Break up the red velvet cupcake into pieces and add the same way.
- Cover with foil or plastic wrap and freeze for 4 hours or overnight.
Notes
- Chill your condensed milk, heavy whipping cream, and dish in the fridge before you start – it will make everything freeze more easily.
- Lining the loaf pan with parchment paper prior to filling will make clean up much easier.
- Higher fat content ice cream melts quicker than the lower fat ice creams so have those cups or cones ready!
Nutrition


Comments
Toni Thomason says
Homemade ice cream without a machine?! Yes please. I cannot believe how simple and delicous this recipe is. A must for kids!
Treena says
This no churn ice cream is absolutely delicious!
Lee says
No where in the recipe does it state when to add the cupcake.
Layne Kangas says
Hey, Lee – you’ll add it at the same time as the cream cheese. Enjoy!
Gloria says
What a yummy treat!