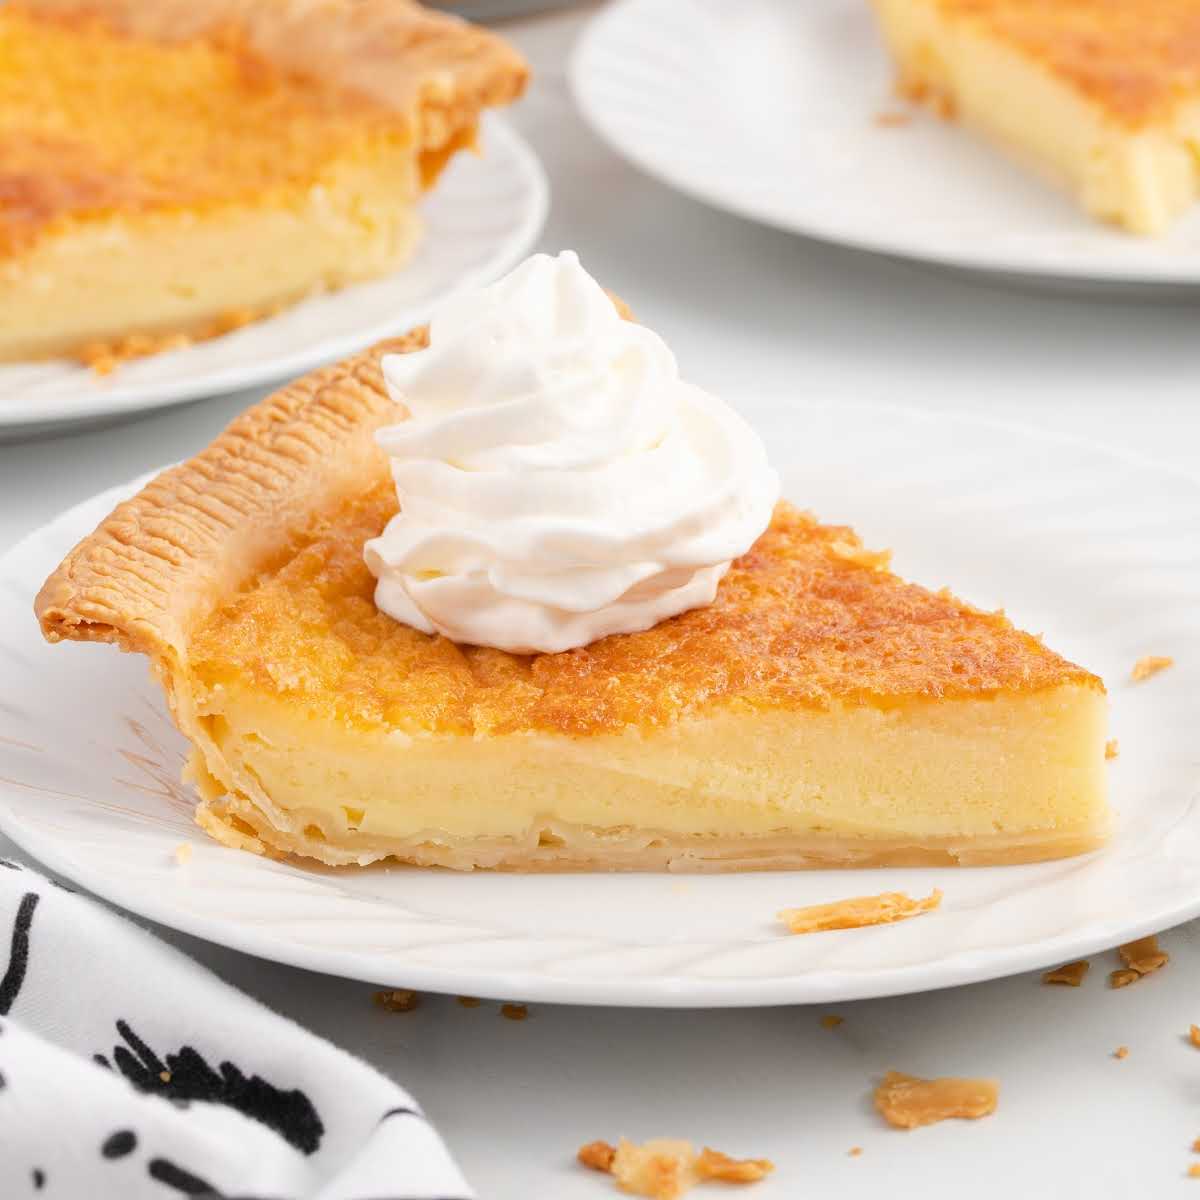

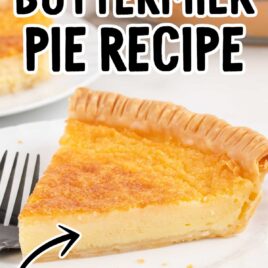
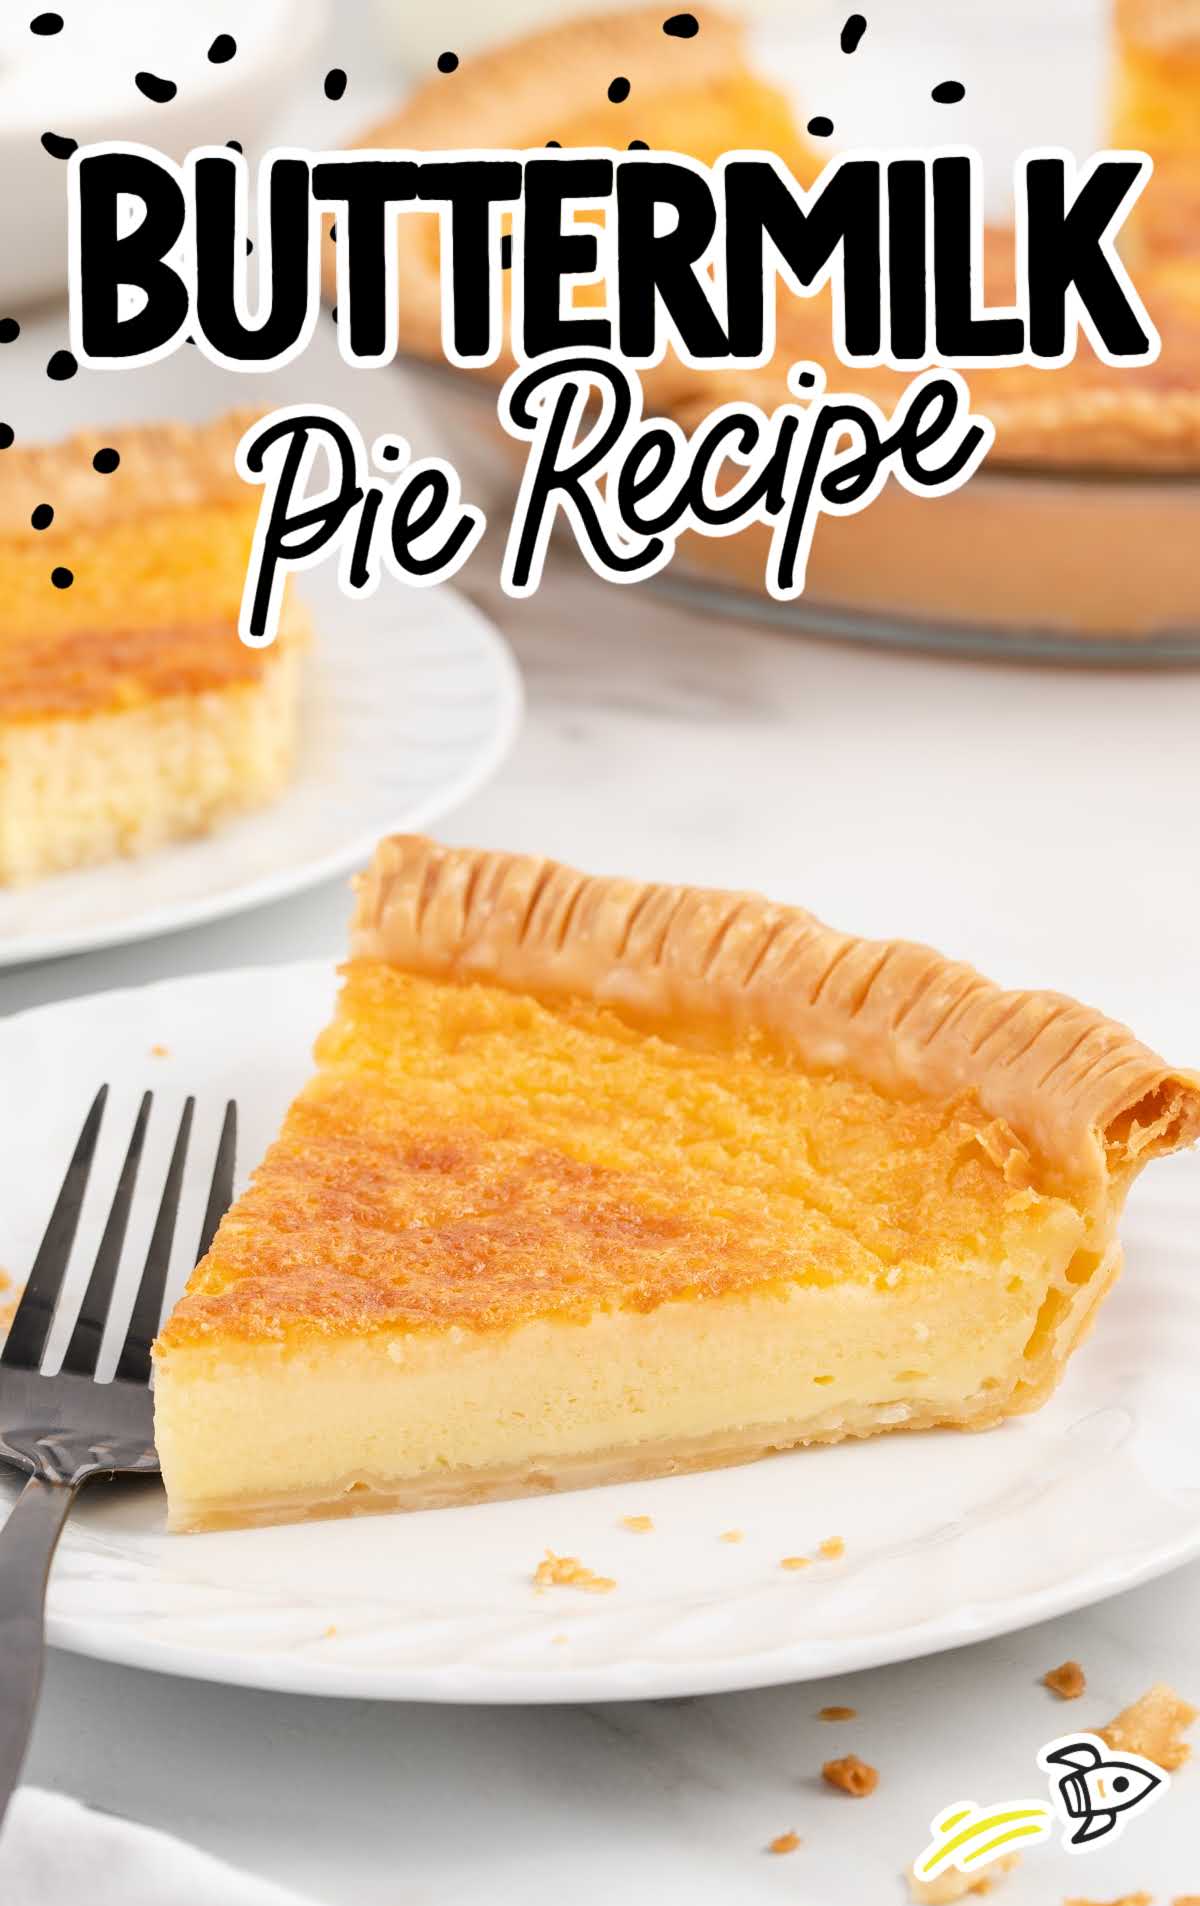
This old-fashioned buttermilk pie is here to steal the show with its creamy, buttery texture and subtly sweet flavor. The delicious dessert features a rich filling made with simple ingredients and a flaky pie crust that will have you coming back for more.
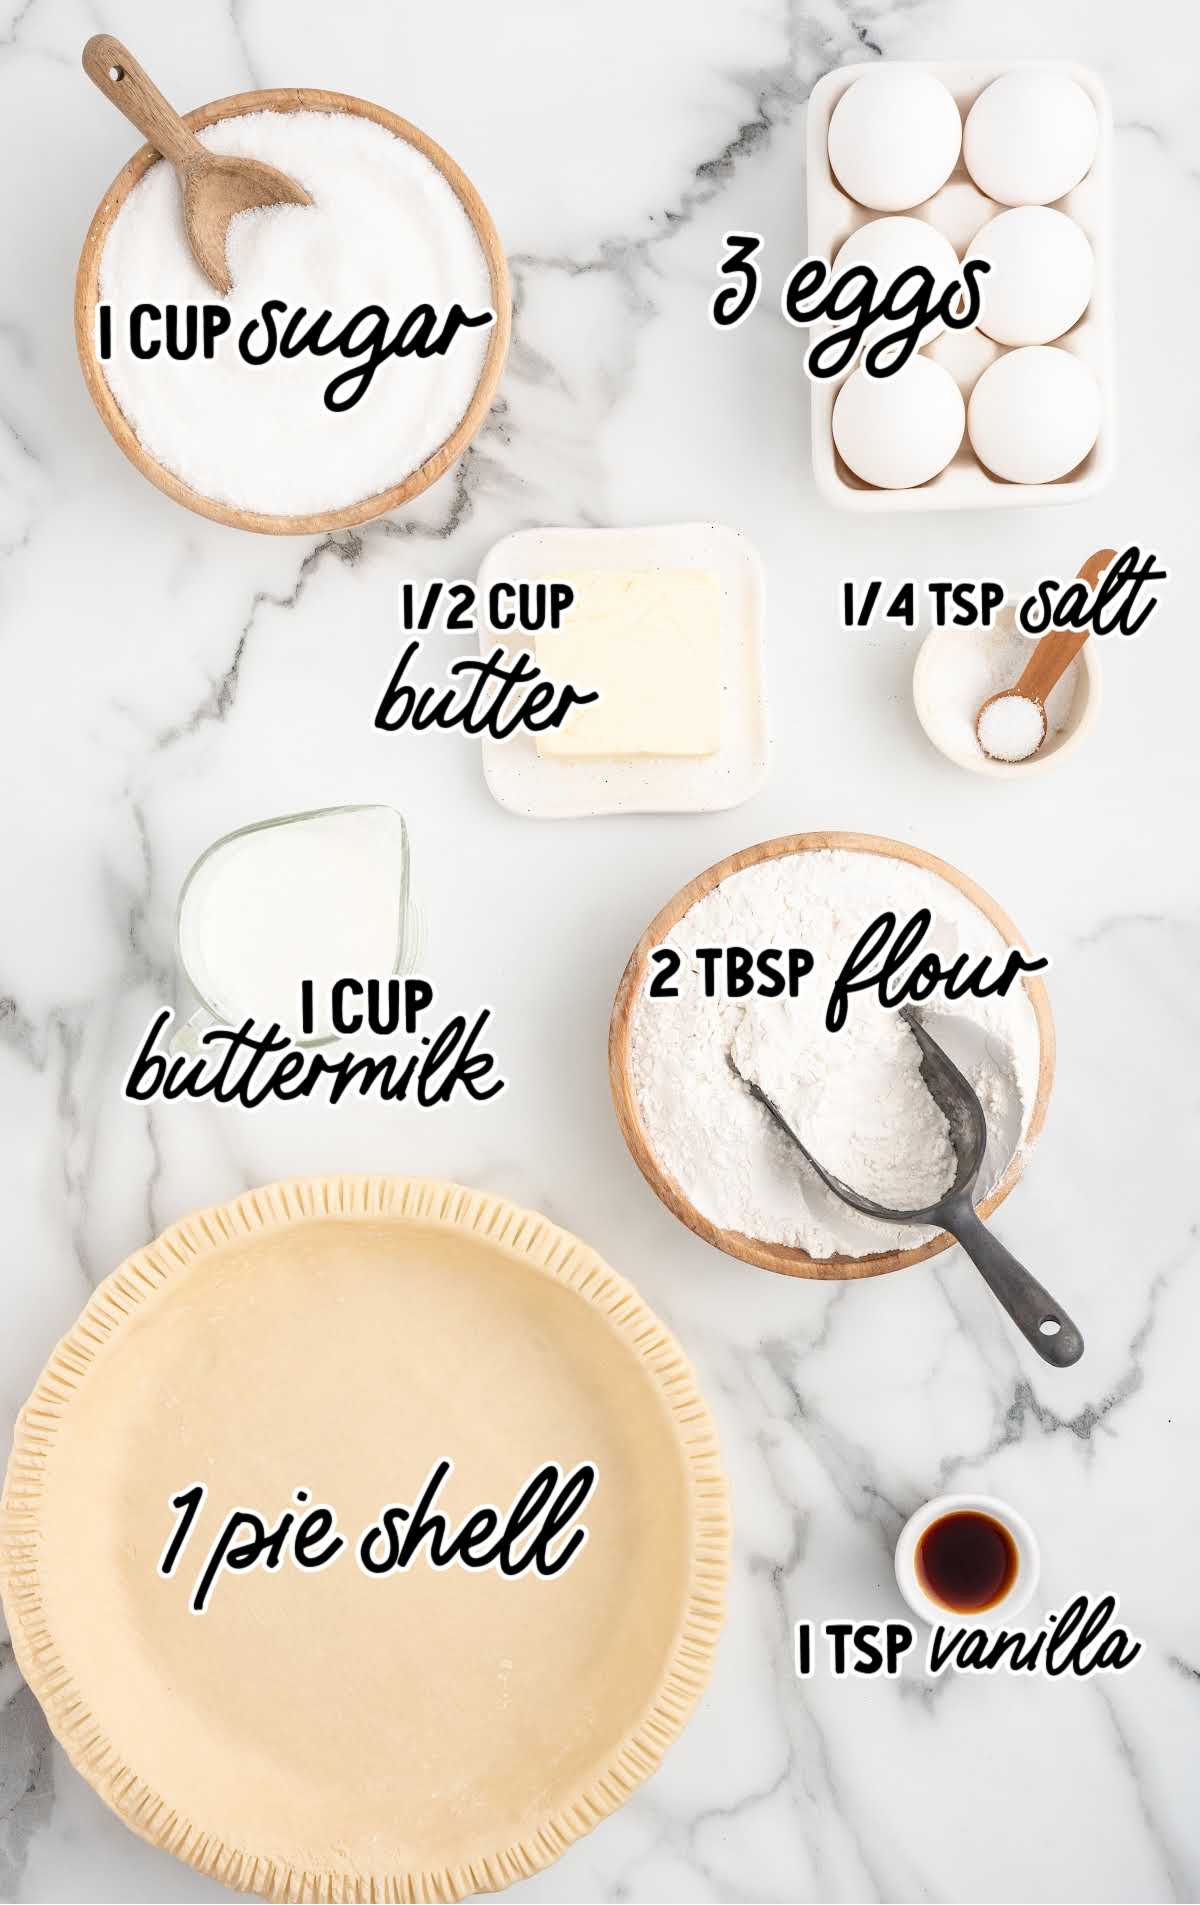
Buttermilk Pie Ingredients
This buttermilk pie is rich and velvety due to the generous use of butter and eggs, with sugar providing sweetness and a touch of salt for balance.
The star ingredient, buttermilk, adds a unique tanginess that complements the sweet notes, while vanilla extract adds warmth.
Baked in a golden-brown pie crust, it’s a nostalgic and irresistible dessert with a delightful contrast of flavors.
You’ll need:
- ½ cup of unsalted butter or margarine, softened
- 1 cup of sugar
- 2 tablespoons of all-purpose flour
- ¼ teaspoon of salt
- 3 eggs, room temperature
- 1 cup of buttermilk, room temperature
- 1 teaspoon of vanilla extract
- 1 (8-inch) pie shell (store-bought or use our pie shell recipe)
Substitutions And Additions
BUTTERMILK: We’d highly recommend getting real buttermilk for this easy pie recipe rather than making your own.
PIE SHELL: You can also use a 9-inch pie shell in this recipe.
VANILLA EXTRACT: Get creative and swap out vanilla extract for almond extract, lemon zest, or even a touch of bourbon for a unique twist on the classic pie.
LEMON ZEST: Add a zesty brightness to your buttermilk pie by incorporating a teaspoon of lemon zest.
NUTMEG: Enhance the warm, cozy flavors of your pie by including a pinch of nutmeg along with the cinnamon. It’ll infuse the filling with a hint of spiciness.
How To Make This Buttermilk Pie Recipe
Let’s have a look at our step-by-step instructions for making the simple filling for this vintage pie recipe.
STEP ONE: Preheat the oven to 325°F. Place your pie shell in the refrigerator to chill while you are making the pie.
OUR RECIPE DEVELOPER SAYS
Placing the pie crust in the freezer for 10 to 15 minutes before baking will help it to cook lightly and not become too dark during baking.
STEP TWO: In a large mixing bowl using a hand mixer on medium-high speed, cream butter, and sugar until light and fluffy, about two to three minutes.
STEP THREE: Add the flour and salt and beat for 15 to 30 seconds or until mixed in.

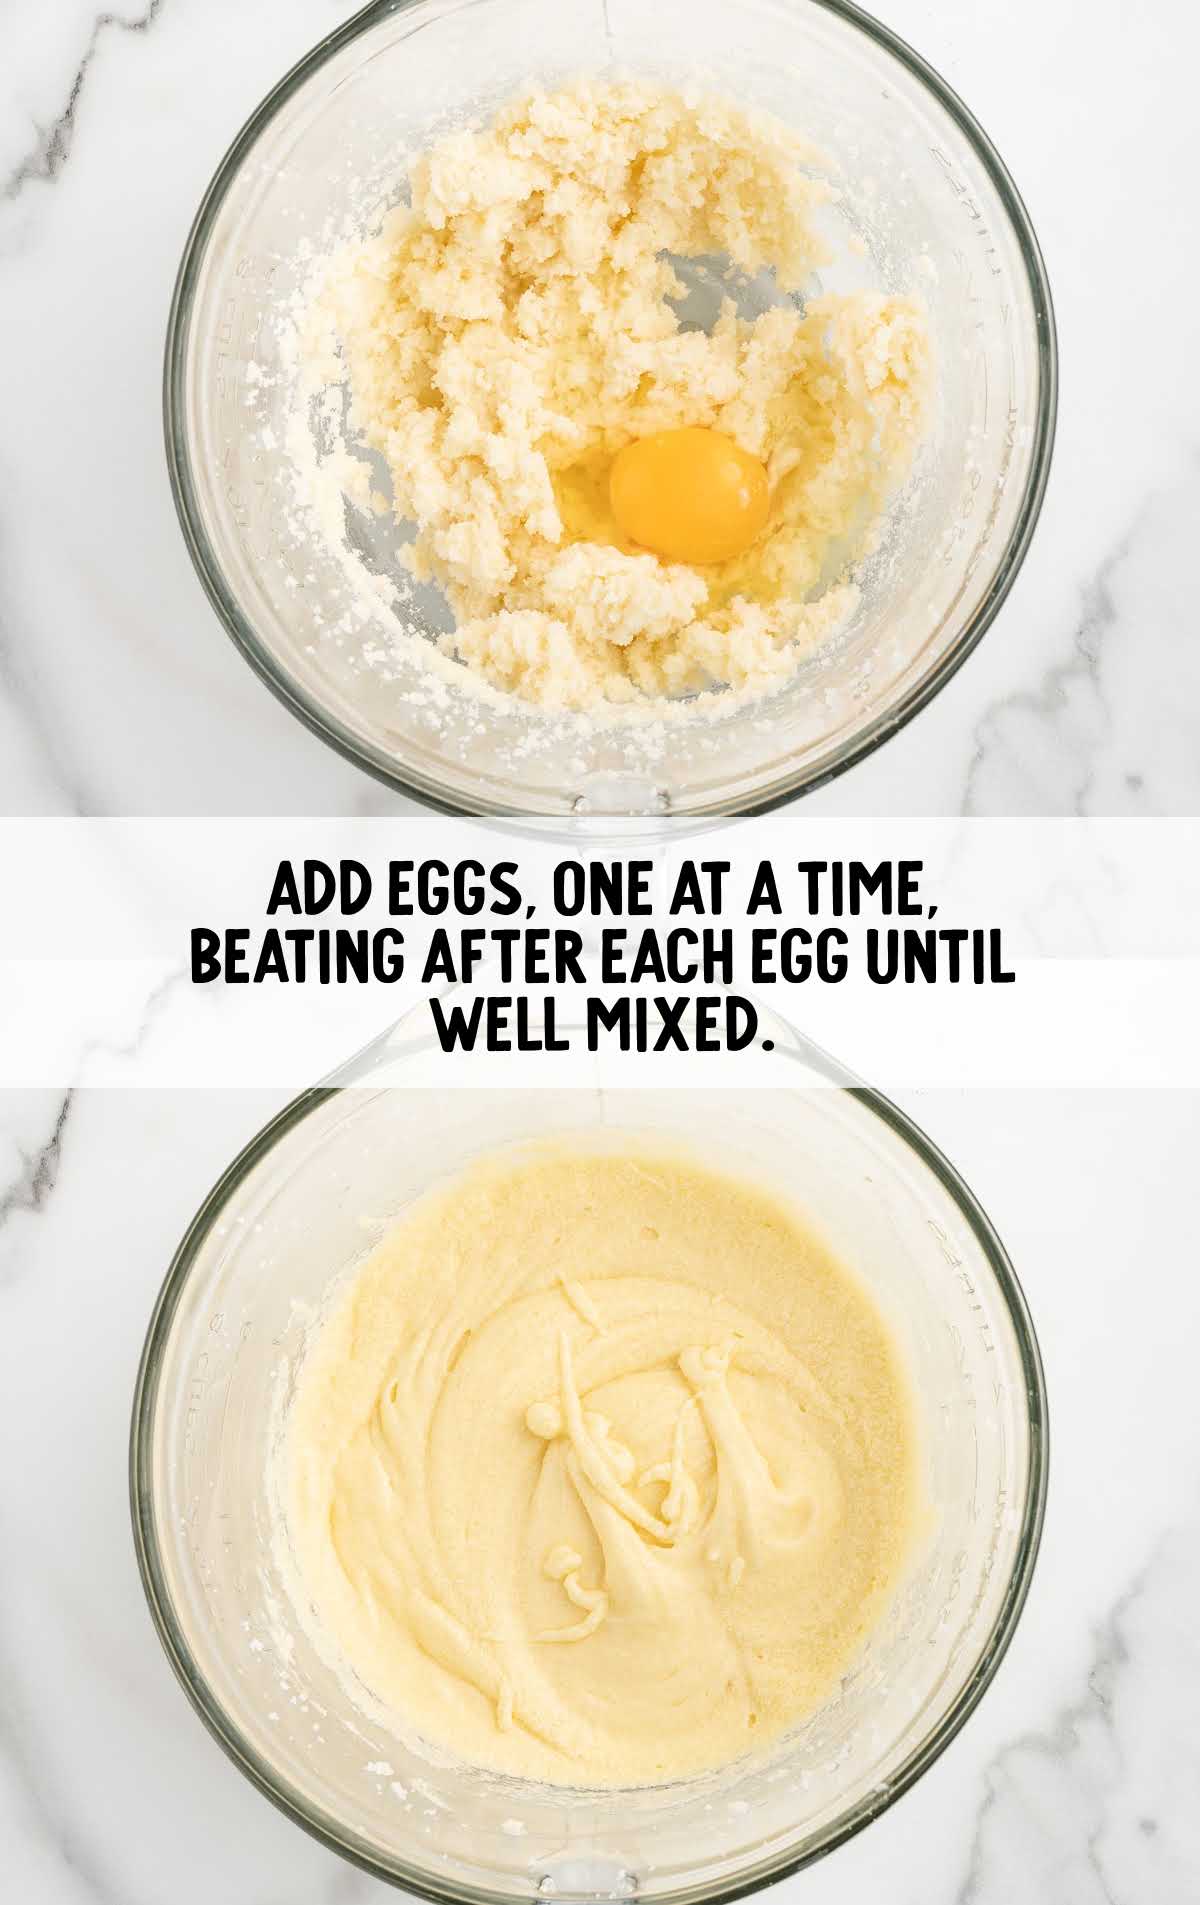
STEP FOUR: Add eggs, one at a time, beating after each egg until well mixed.
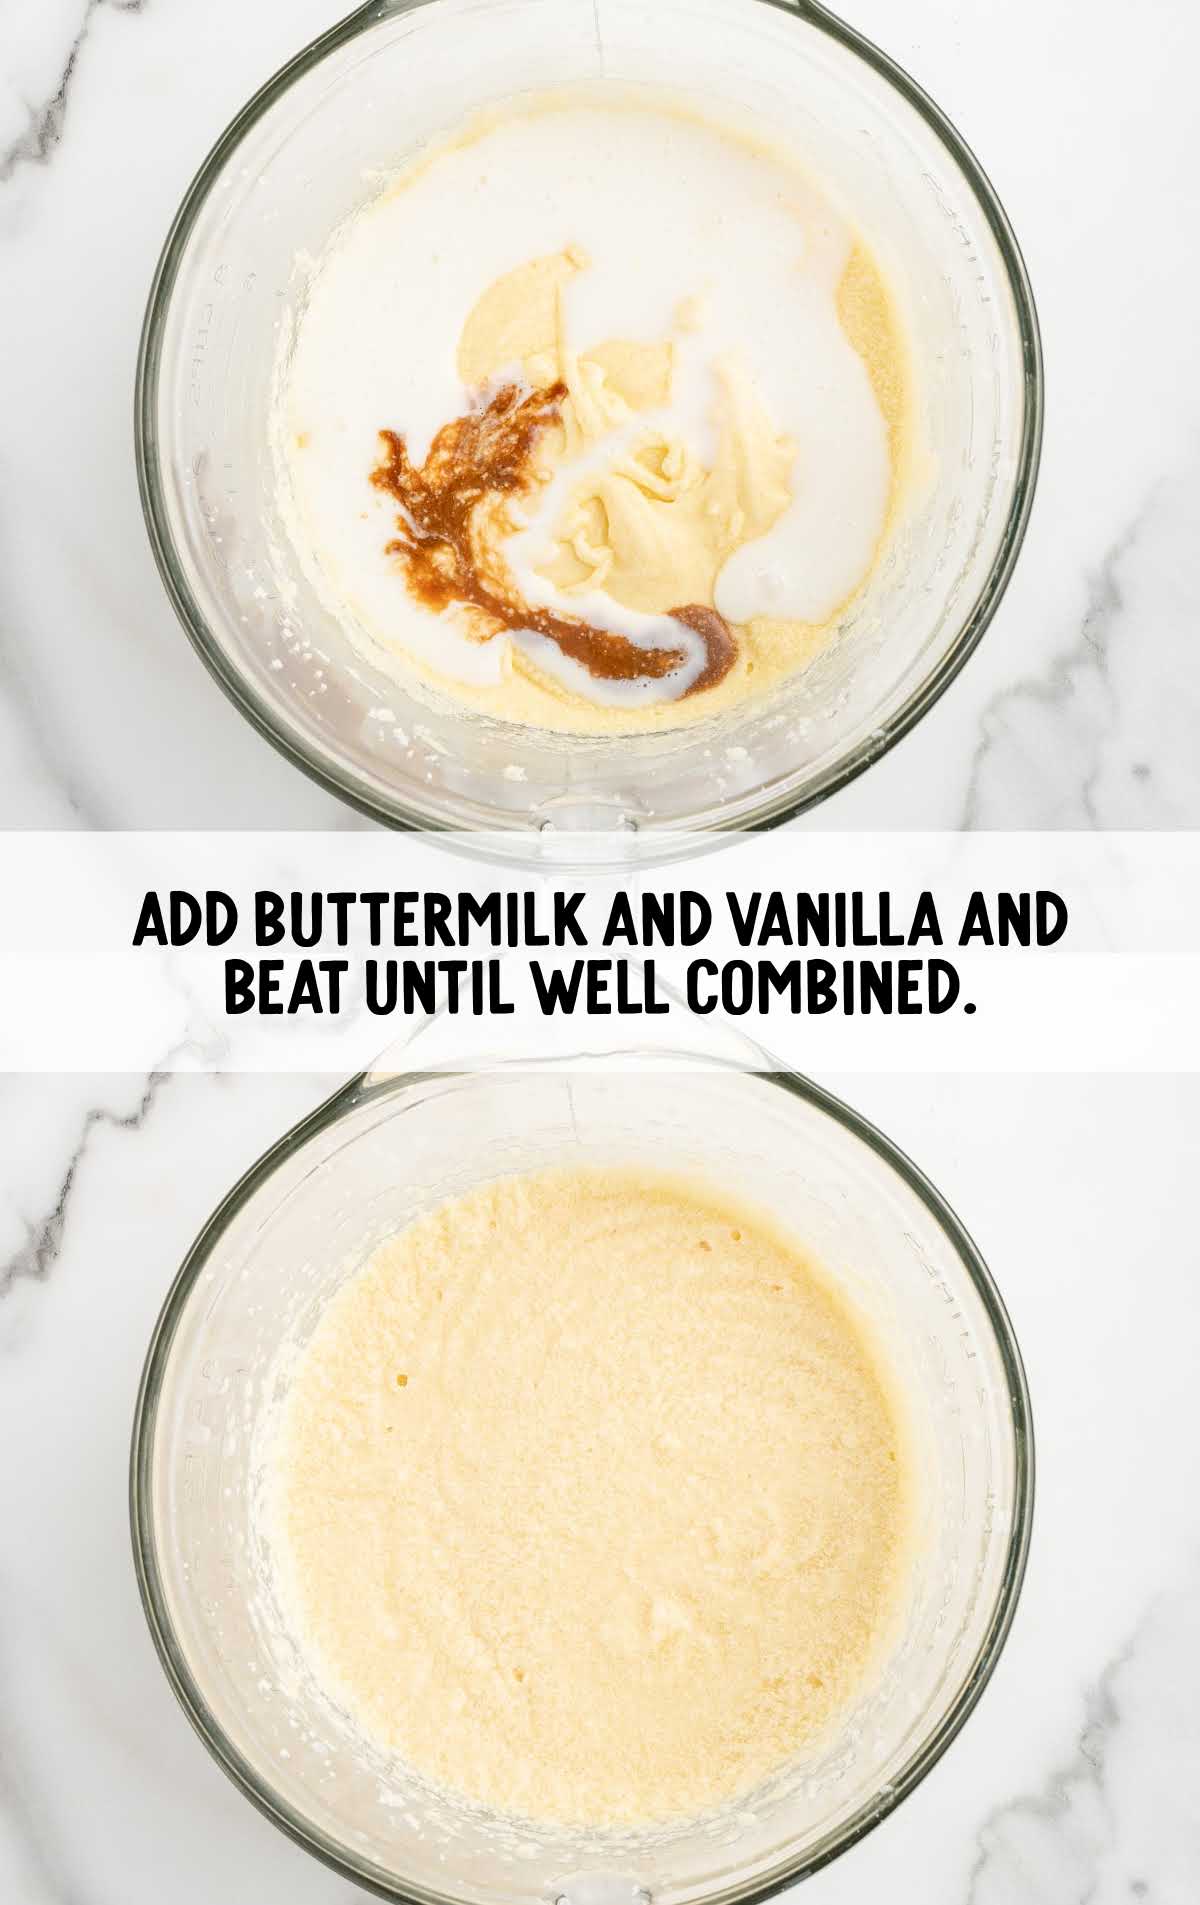
STEP FIVE: Add buttermilk and vanilla and continue beating until well combined.
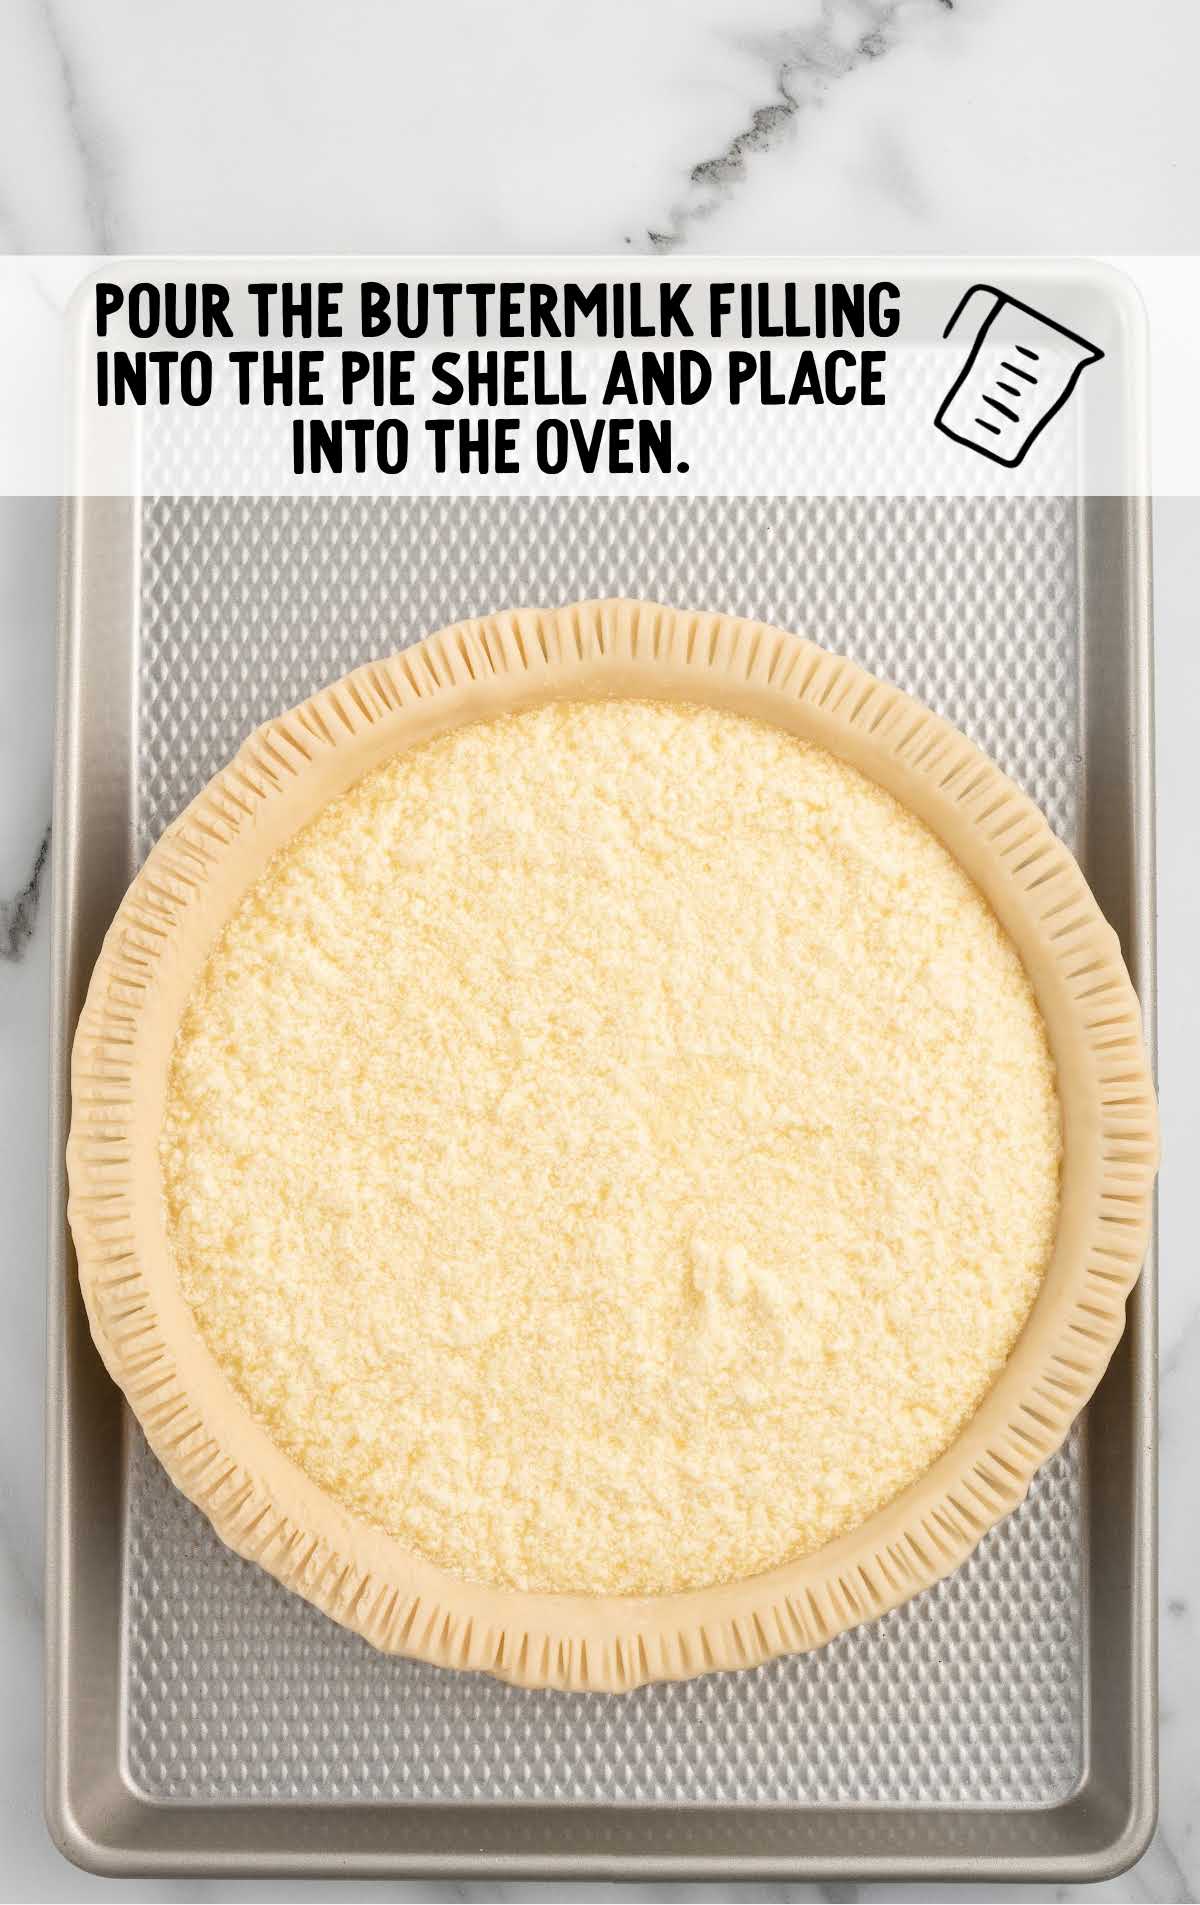
STEP SIX: Place your chilled pie shell onto a baking sheet, pour the buttermilk pie filling into the pie shell, and place pie into the oven.
PRO TIP:
Oven temperatures vary and may need to be recalibrated periodically to ensure they are accurate. Make sure to keep a close eye on your pie as the suggested baking time approaches.
STEP SEVEN: Bake for 60 minutes or until a knife inserted in the center comes out clean.
PRO TIP:
If you use a store-bought pie shell in an aluminum tin, check the doneness at 50 minutes. If using a store-bought pie crust that you roll out and place in your own glass dish, the bake time will need to be just a little longer.
This pie was tested using store-bought pie crust rolled out and placed in a glass 8-inch pie pan, and it took 60 minutes. It will still have just a slight jiggle even when the knife inserted into the top of the pie comes out clean.
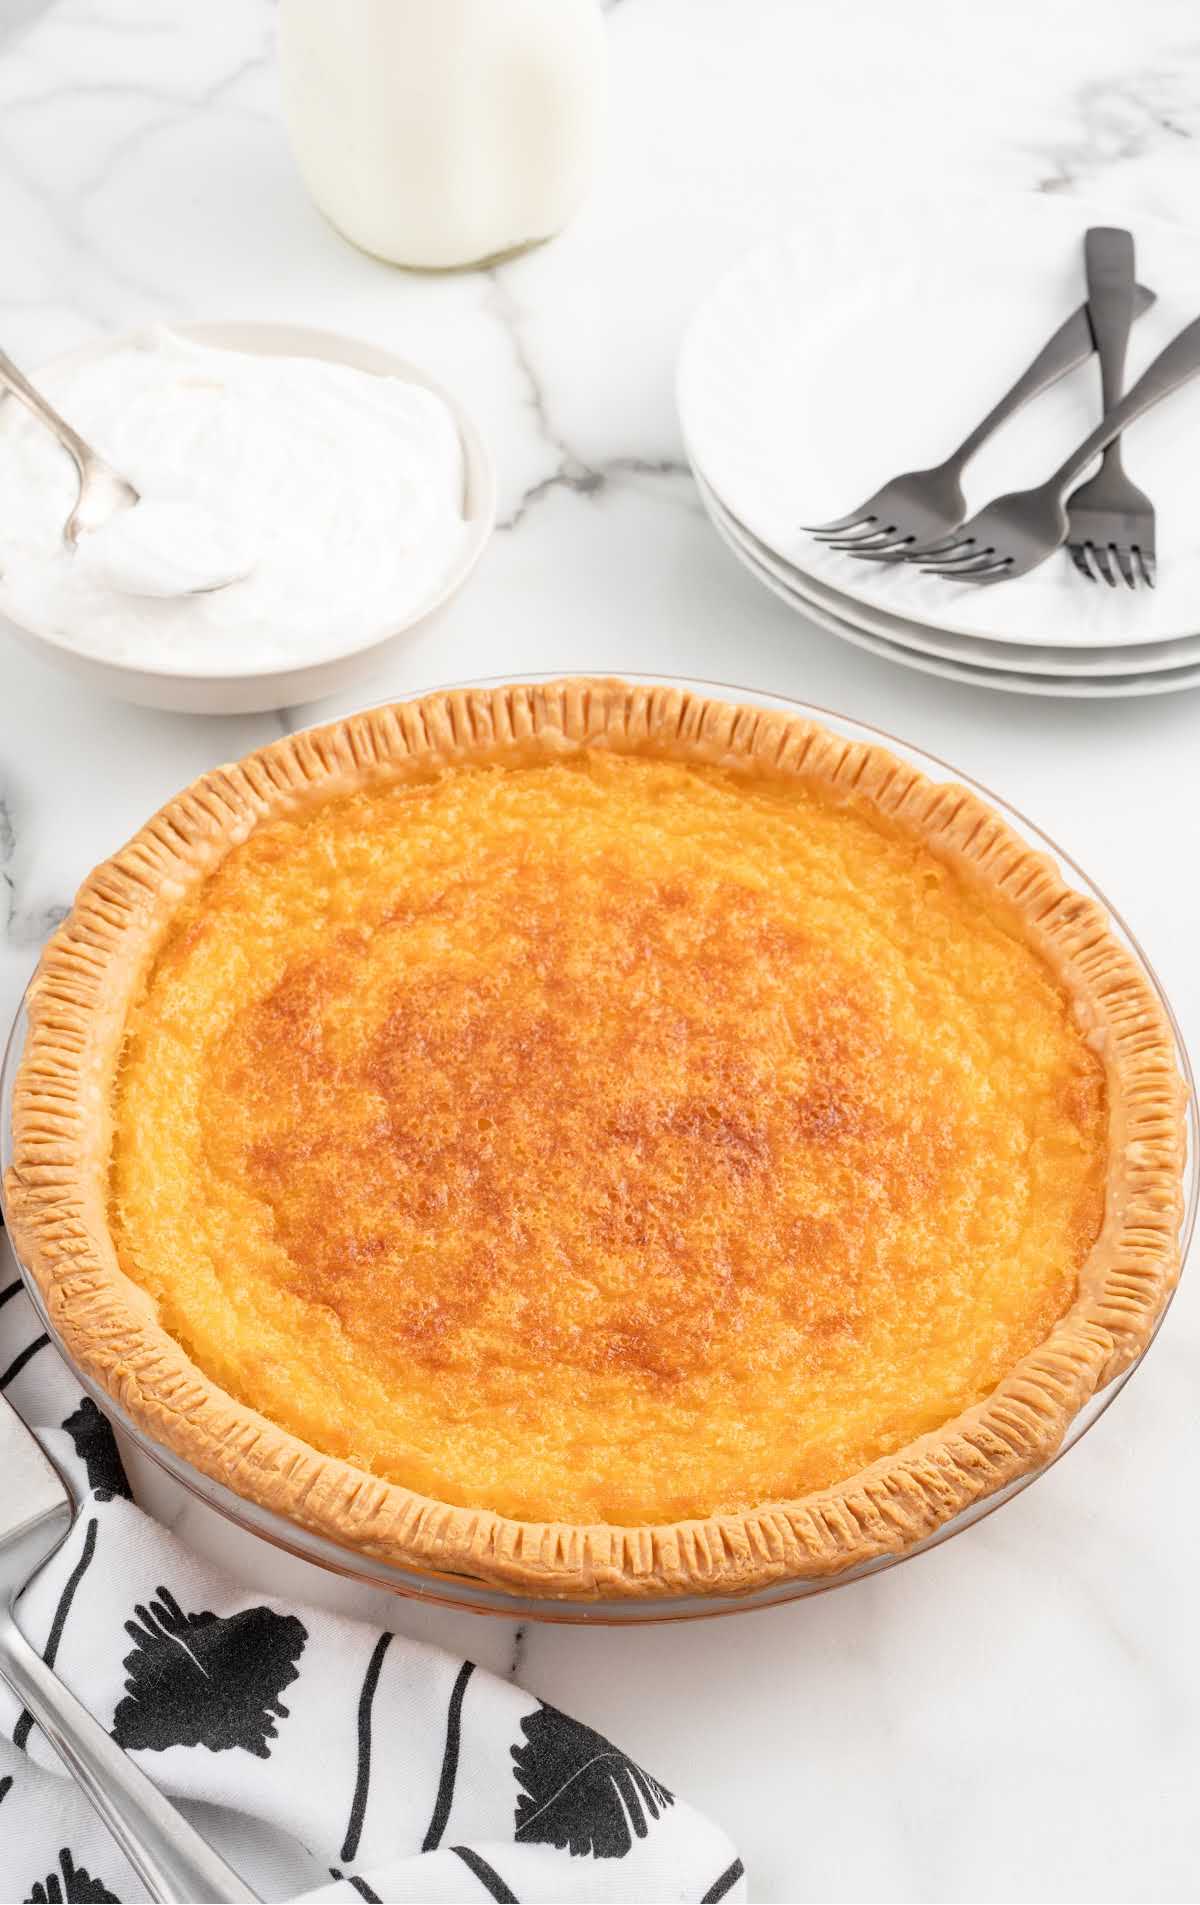
STEP EIGHT: Remove from the oven. Cool on a wire rack until ready to serve.
How To Serve
This wonderful pie is delicious on its own, but you could make it extra fancy by topping it with whipped cream and fresh berries.
Add a scoop of vanilla ice cream on the side for something even more indulgent.
Serve with a warm mug of homemade hot chocolate or pumpkin spice latte.


Storage
Whether you want to make it ahead of time or save leftovers, here’s how to store your buttermilk pie.
MAKE AHEAD: If you want to prepare your Pie in advance, you’re in luck! It’s a great dessert to make ahead of time.
Simply follow the recipe as usual, let the pie cool to room temperature, and then cover it tightly with plastic wrap or aluminum foil.
You can refrigerate it for up to two days before serving.
IN THE FRIDGE: Store this classic pie covered in plastic wrap in the refrigerator for two to three days.
IN THE FREEZER: Freeze this tangy custard pie for up to one month.
Why We Love This Recipe
CLASSIC COMFORT: This recipe captures the timeless appeal of classic Southern comfort food. It’s a nostalgic dessert that brings warm and familiar flavors to the table.
SIMPLE INGREDIENTS: With just a handful of readily available ingredients, this recipe is incredibly approachable for both novice and experienced bakers.
DELIGHTFUL TEXTURE: The combination of buttermilk and eggs results in a silky-smooth, custard-like filling that’s both creamy and slightly tangy. It’s a texture that melts in your mouth and pairs beautifully with the flaky crust.
What could be better than a piece of delicious pie? This Southern classic dessert is made with a quick and easy flaky pie crust topped with a creamy buttermilk filling. Reminiscent of chess pie, this buttermilk pie is sweet, rich, and almost irresistible.
Frequently Asked Questions
Your pie may be runny because it is not fully cooked. It may also be runny because it hasn’t fully cooled to room temperature. Let it cool for at least two hours to avoid it being runny.
This easy recipe should be kept in the fridge and can be stored for up to three days.
Either a pre-made pie crust or homemade pie crust works fine in this old-fashioned recipe
More Recipes You’ll Love


Buttermilk Pie
Ingredients
- ½ cup unsalted butter or margarine, softened
- 1 cup sugar
- 2 tablespoons flour
- ¼ teaspoon salt
- 3 eggs, room temperature
- 1 cup buttermilk, room temperature
- 1 teaspoon vanilla extract
- 8 inches pie shell (store-bought or use our pie shell recipe)
Instructions
- Preheat the oven to 325°F. Place your pie shell in the refrigerator to chill while you are making the pie.
- In a large mixing bowl, using a hand mixer on medium-high speed, cream butter and sugar until light and fluffy, about 2 to 3 minutes.
- Add the flour and salt and beat for 15 to 30 seconds or until mixed in.
- Add eggs, one at a time, beating after each egg until well mixed.
- Add buttermilk and vanilla and continue beating until well combined.
- Place your chilled pie shell onto a baking sheet, pour the buttermilk filling into the pie shell and place the baking sheet into the oven.
- Bake for 60 minutes or until a knife inserted in the center comes out clean.
- Remove from the oven. Cool on a wire rack until ready to serve.
Notes
- Placing the pie crust in the freezer for 10 to 15 minutes before baking will help it to cook lightly and not become too dark during baking.
- Oven temperatures vary and may need to be recalibrated periodically to ensure they are accurate. Make sure to keep a close eye on your pie as the suggested baking time approaches.
- If you use a store-bought pie shell in an aluminum tin, check the doneness at 50 minutes. If using a store-bought pie crust that you roll out and place in your own glass dish, the bake time will need to be just a little longer. This pie was tested using store-bought pie crust rolled out and placed in a glass 8-inch pie pan, and it took 60 minutes. It will still have just a slight jiggle even when the knife inserted in the top of the pie comes out clean.
Nutrition


Comments
Macy says
I have made this recipe about 7 times now throughout this year and every time it turns out perfect! I, along with everyone I share it with, absolutely love it! 20/10! Such a hit!