


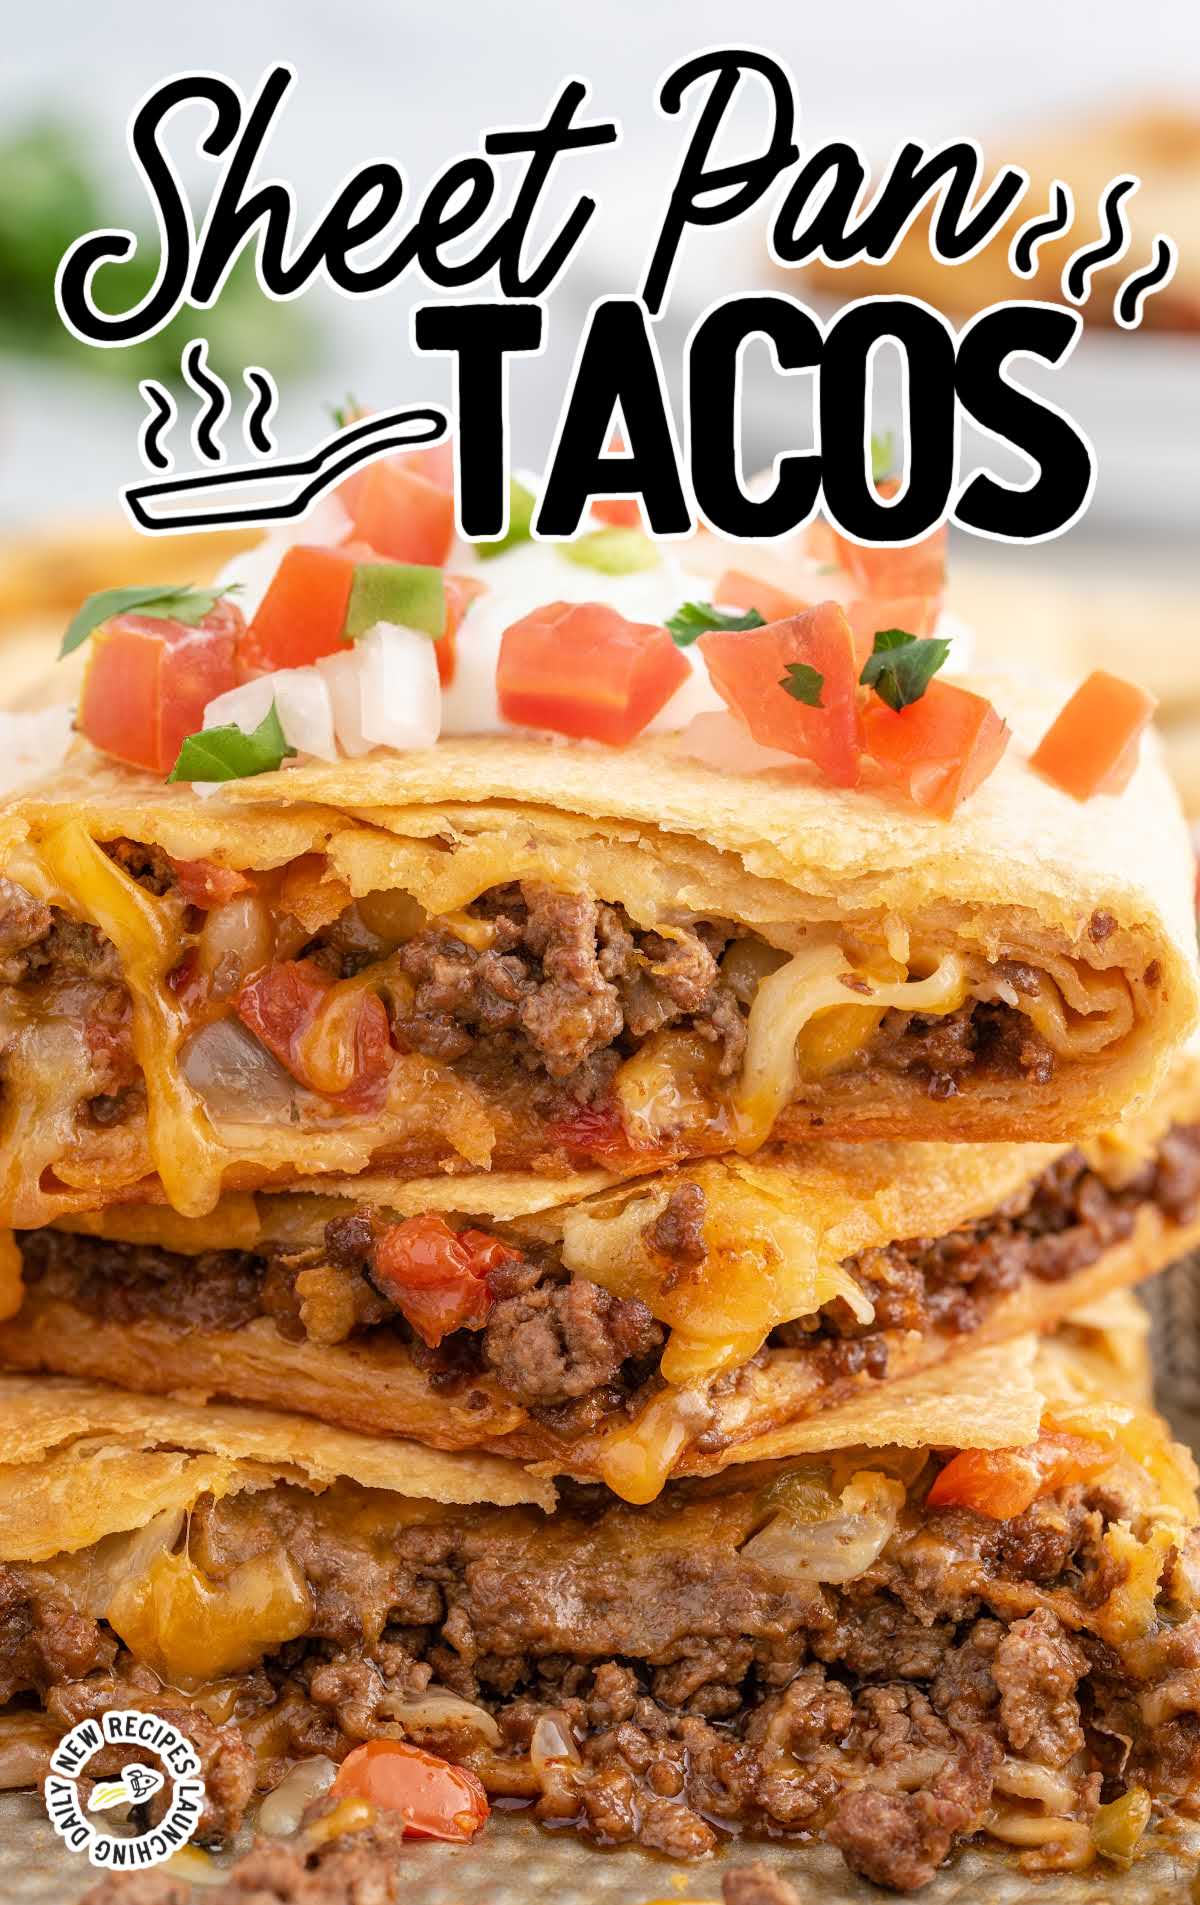
Sheet pan tacos are a great way to give taco night a makeover. This recipe has all the best parts of your favorite meal in one easy dish. Meaty tortillas loaded with tasty toppings are baked on a sheet pan for a cheesy meal full of Mexican-inspired flavors.
Sheet Pan Tacos Ingredients
This sheet pan tacos recipe is a flavorful fiesta, with juicy ground beef seasoned with taco seasoning taking center stage.
Caramelized yellow onions add a sweet and savory element, while soft taco flour tortillas provide the ideal base.
Generous layers of creamy Colby jack cheese and zesty store-bought pico de gallo complete the ensemble.
You’ll need:
For The Tacos:
- 5 tablespoons of canola oil, divided into 2 tablespoons, 1 tablespoon, and 2 tablespoons
- 2 cups of yellow onion, chopped
- 3 pounds of ground beef (I used a ground chuck 80%-20% blend)
- 2 (1-ounce) packets of original taco seasoning
- 2 teaspoons of salt
- 1 teaspoon of black pepper
- 16 (8-inch) soft taco flour tortillas
- 4 cups of shredded Colby jack cheese (from 2 (8-ounce) blocks)
- 1½ cups of store-bought pico de gallo
PRO TIP:
I used a standard-size flour tortilla for this sheet pan taco; however, the burrito or extra large-sized flour tortillas would also work. Note that you will not need to use as many extra-large flour tortillas.
I do not suggest using anything smaller than the 8-inch size soft flour tortillas as it may make it very hard to keep the smaller tortillas to stay together when assembling the top of the sheet pan taco.
For The Garnish:
- Sour cream and pico de gallo
Substitutions And Additions
CHEESE: I used Colby jack cheese for this delicious recipe. You can change up your cheese to whatever flavors you like.
Some great alternatives would be pepper jack or a combination of sharp cheddar and Monterey jack cheese.
PICO DE GALLO: If you want to make your own pico de gallo, here’s an easy recipe:
Combine 3 cups of diced tomatoes, 1 cup of white onion, and ⅓ cup fresh lime juice in a bowl.
Add 3 tablespoons of finely diced fresh jalapeño and 3 tablespoons chopped fresh cilantro, and refrigerate.
TACO SEASONING: You can substitute the two (1-ounce) packets of taco seasoning with your own homemade taco spice blend.
You will need to use six tablespoons of your homemade taco spice blend.
Three tablespoons for the first batch of cooked ground beef and three tablespoons for the second batch.
You may want to adjust the amount of spices according to your taste preference.
GROUND BEEF: I used a ground beef chuck (80%-20% fat blend) for the taco meat in this recipe.
You can use lean ground beef, ground sirloin, or even ground turkey if you want to make this recipe a little healthier.
How To Make This Sheet Pan Tacos Recipe
Once you brown the beef and cook the onions, you can assemble the tacos. We will walk you through our steps below.
STEP ONE: Preheat the oven to 350°F.
Using a pastry brush, brush two tablespoons of canola oil onto the inside bottom and sides of a 13×18-inch rimmed baking sheet tray.
You will need a second rimmed sheet tray for the baking process. Set aside.
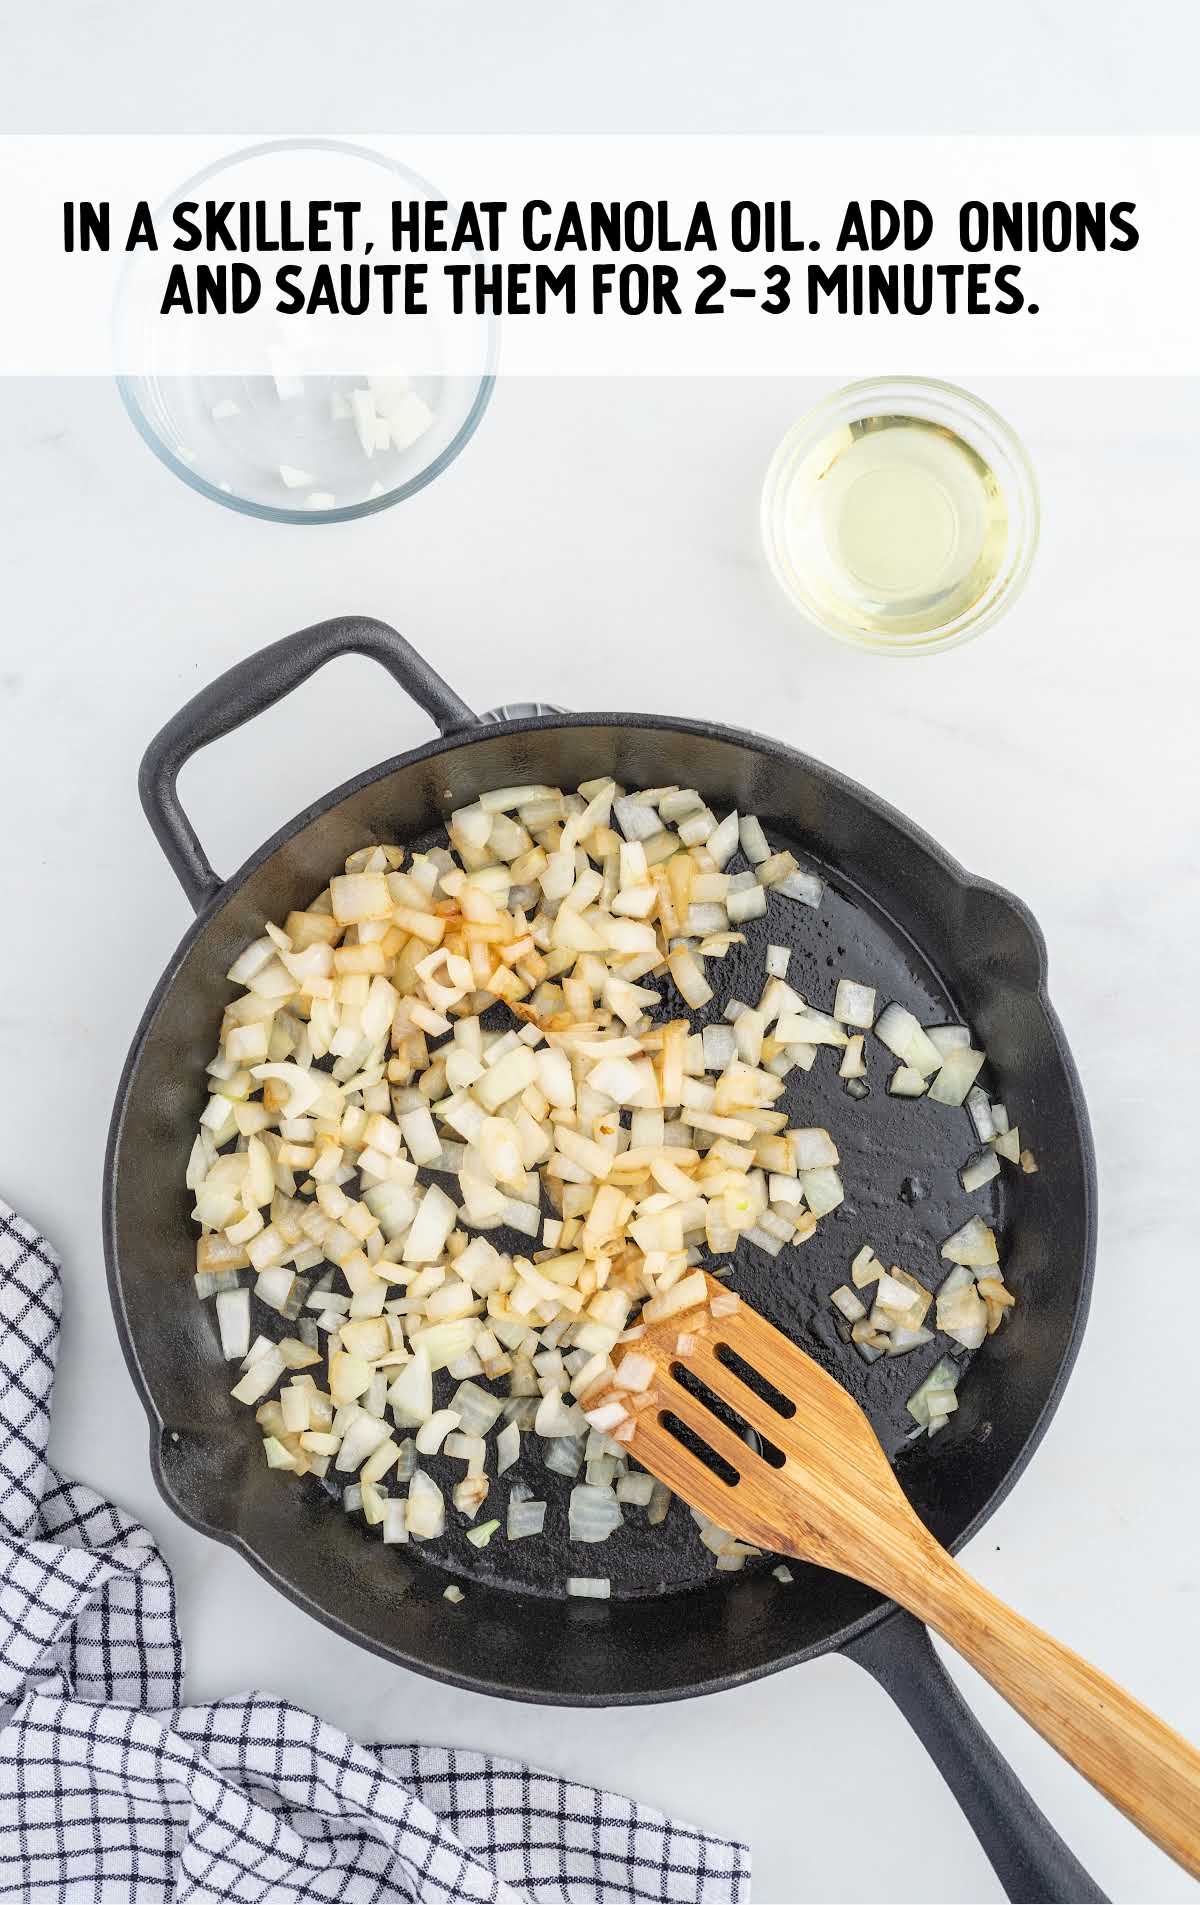
STEP TWO: In a large skillet, heat one tablespoon of canola oil on medium-high heat.
Add two cups of chopped yellow onions and saute them for two to three minutes or until they are translucent and soft.
Transfer the cooked onions to a plate and set them aside.
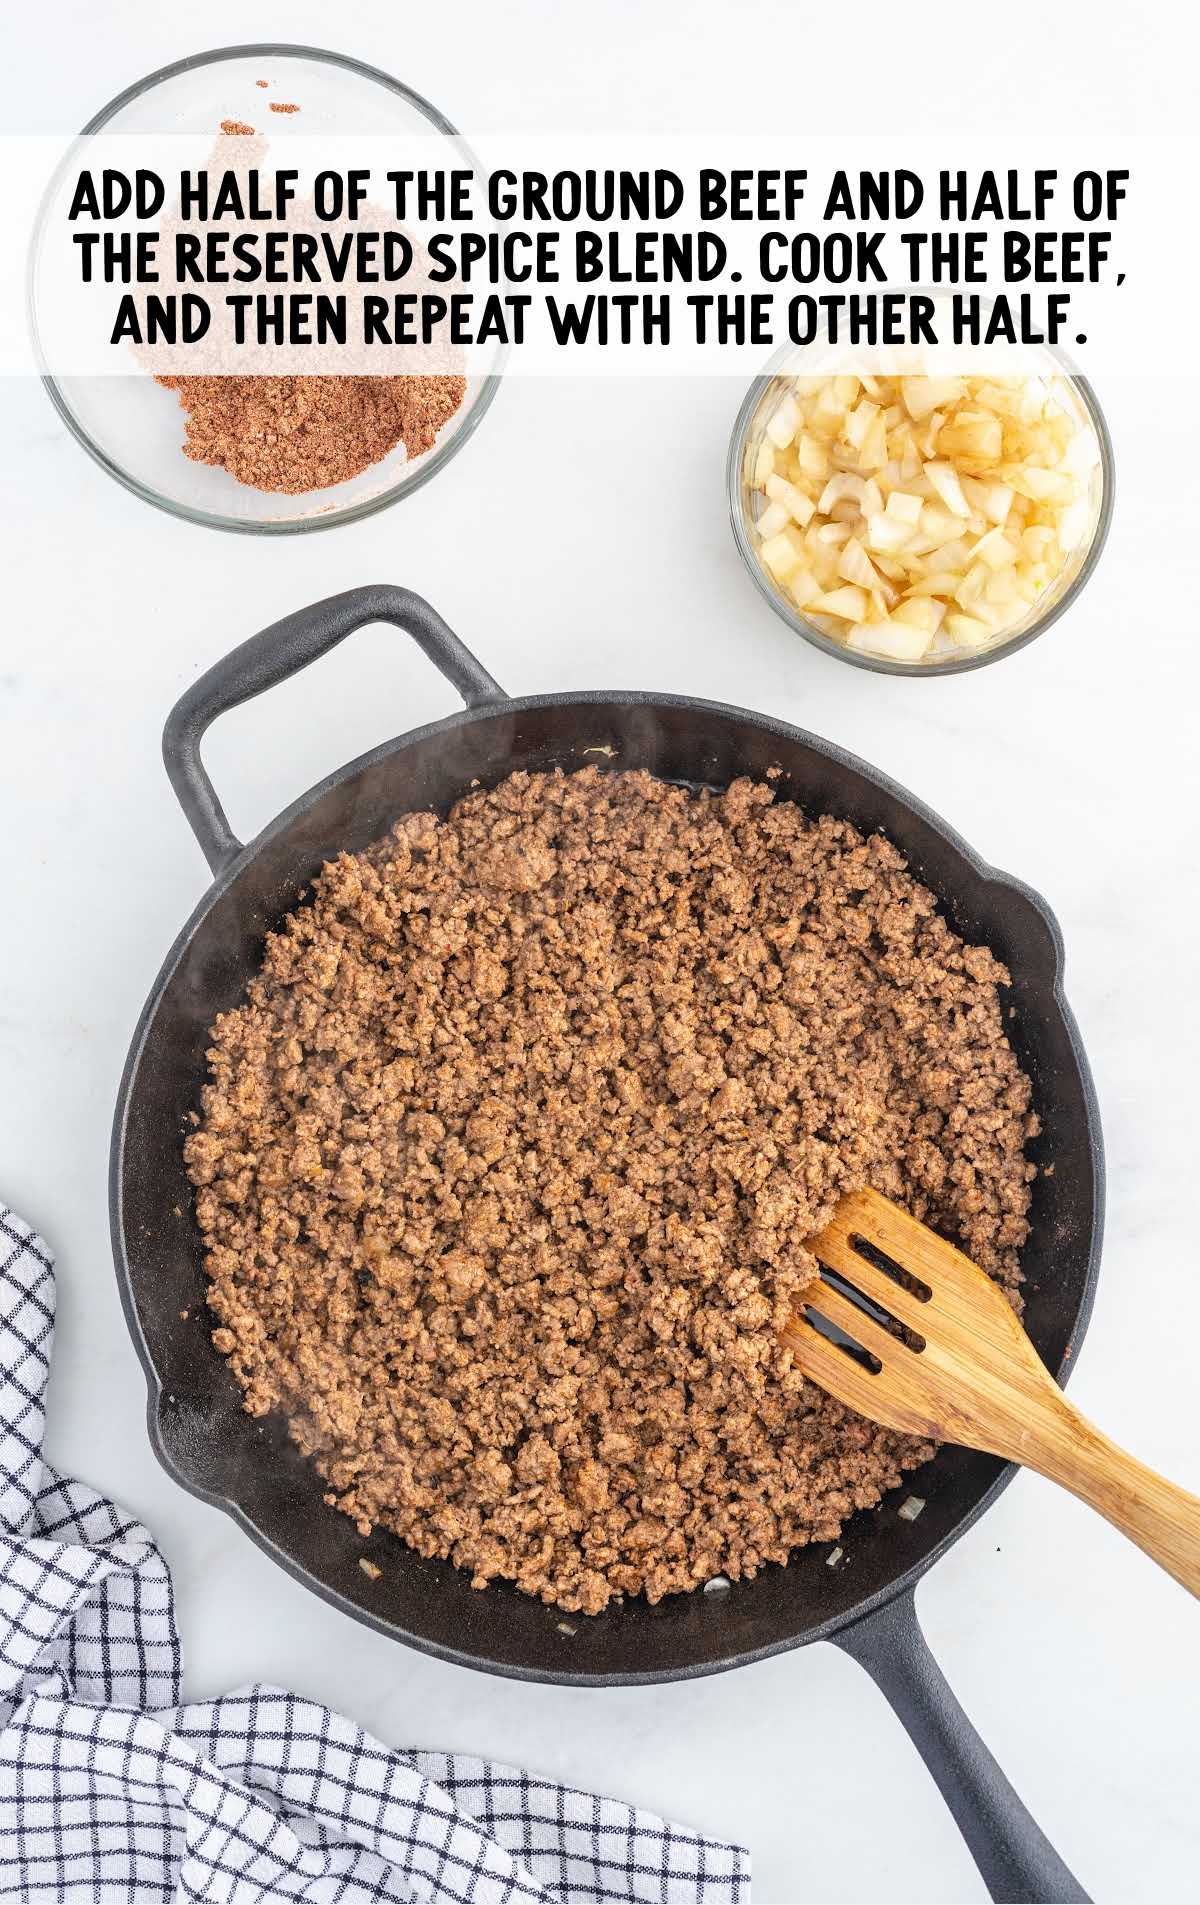
STEP THREE: Add half of the ground beef and one of the 1-ounce taco seasoning packets to the same larger skillet on medium-high.
Sprinkle one teaspoon of salt and a half teaspoon of black pepper into the meat mixture.
Cook the ground beef for four to five minutes.
Break it up into crumbles until there is no longer any pink, and the ground beef is completely coated with the taco seasoning spice blend.
Transfer the cooked ground beef to a large bowl or large shallow dish.
Repeat with the second half of the ground beef.
Add the second 1-ounce packet of taco seasoning, the remaining one teaspoon of salt, and half a teaspoon of black pepper until all the ground beef is cooked.
Transfer the rest of the cooked ground beef to the bowl with the first batch of cooked ground beef.
STEP FOUR: Add the cooked yellow onions to the cooked ground beef in the bowl, and stir to incorporate.
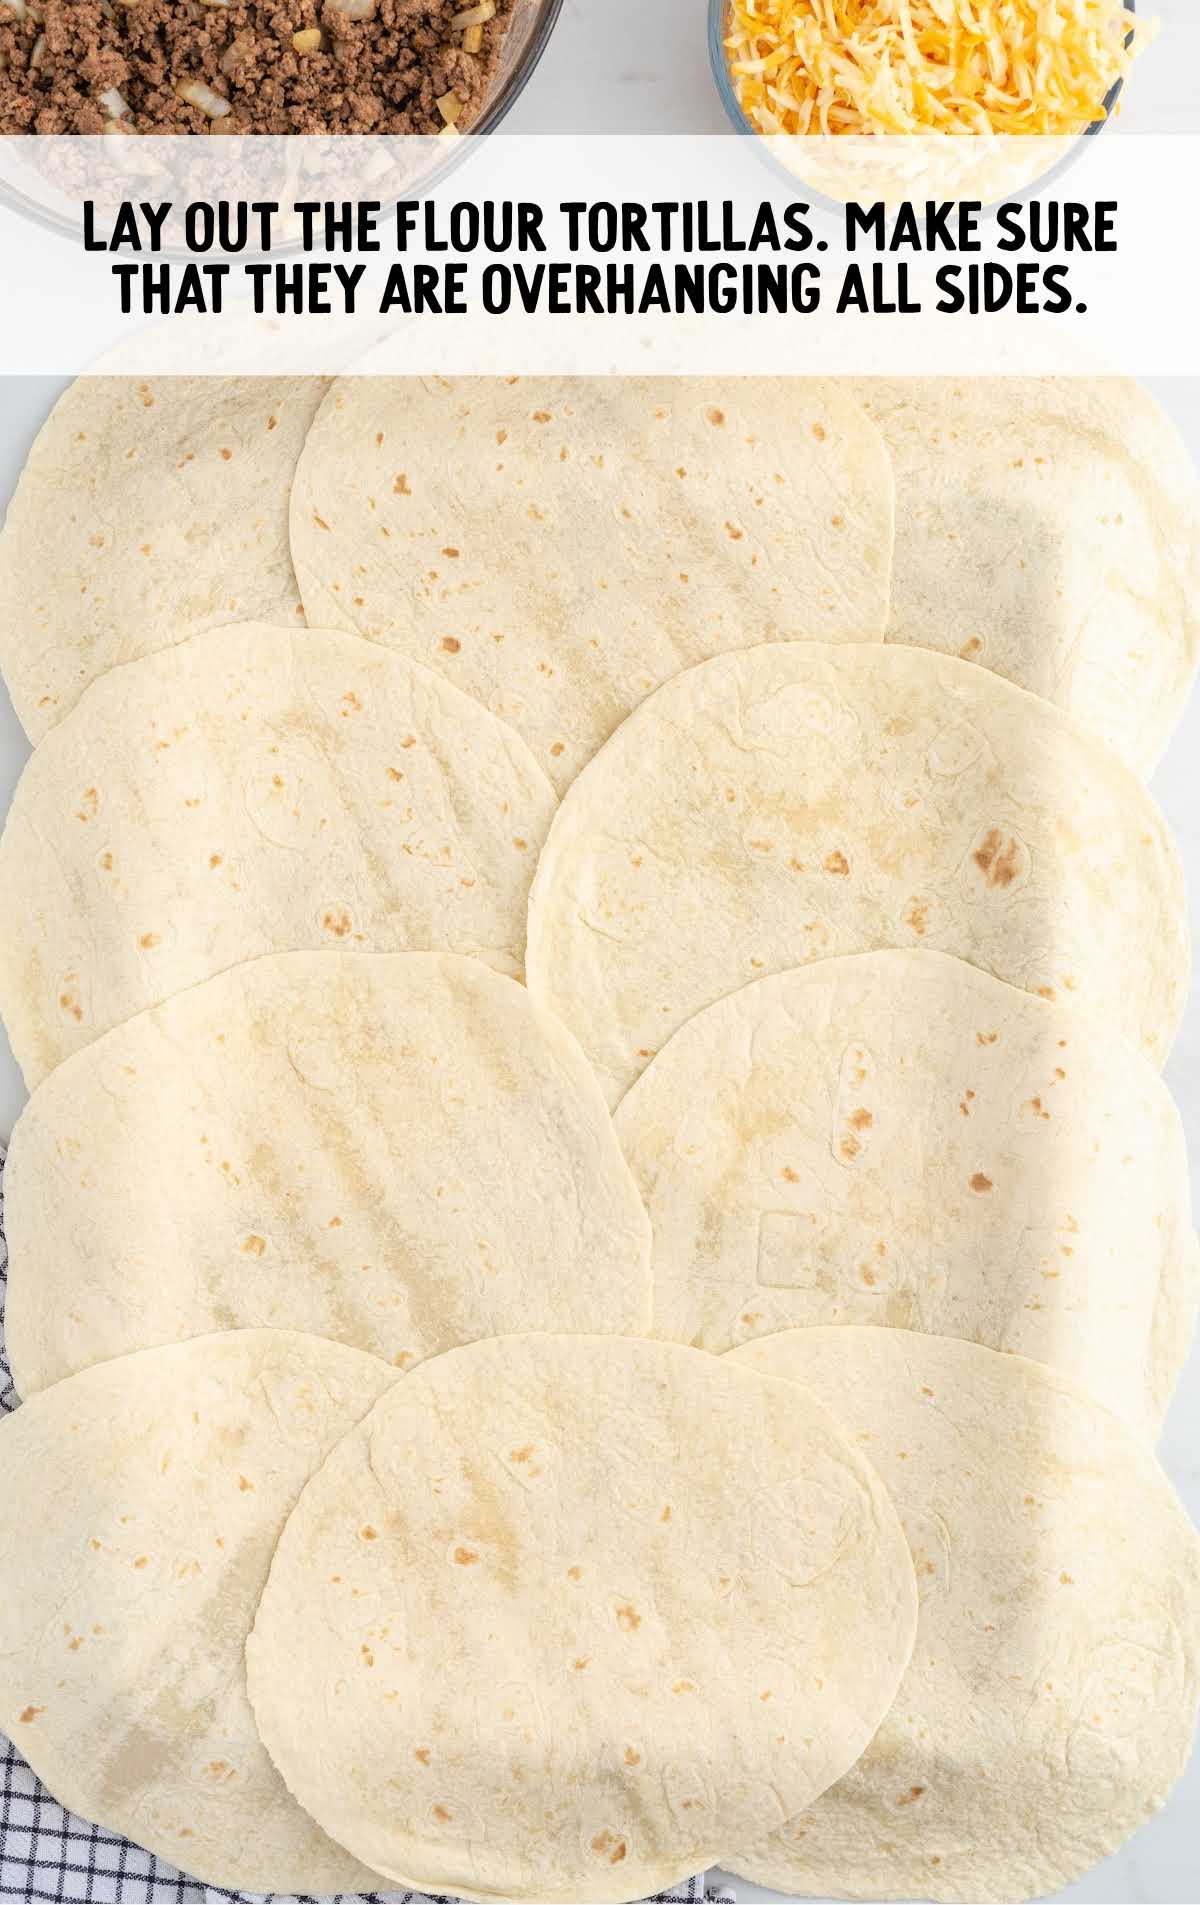
STEP FIVE: To the prepared rimmed baking sheet tray, you will lay out ten flour tortillas.
You will need to make sure that they are overhanging all sides of the sheet tray by at least two to three inches.
You also want to make sure that there are no gaps or open spaces between the flour tortillas.
It should look like a solid layer of flour tortillas with all the sides overhanging.
Our Recipe Developer Says
The part of the flour tortillas that are overhanging will be used to fold over and seal the sheet pan tacos once assembled.
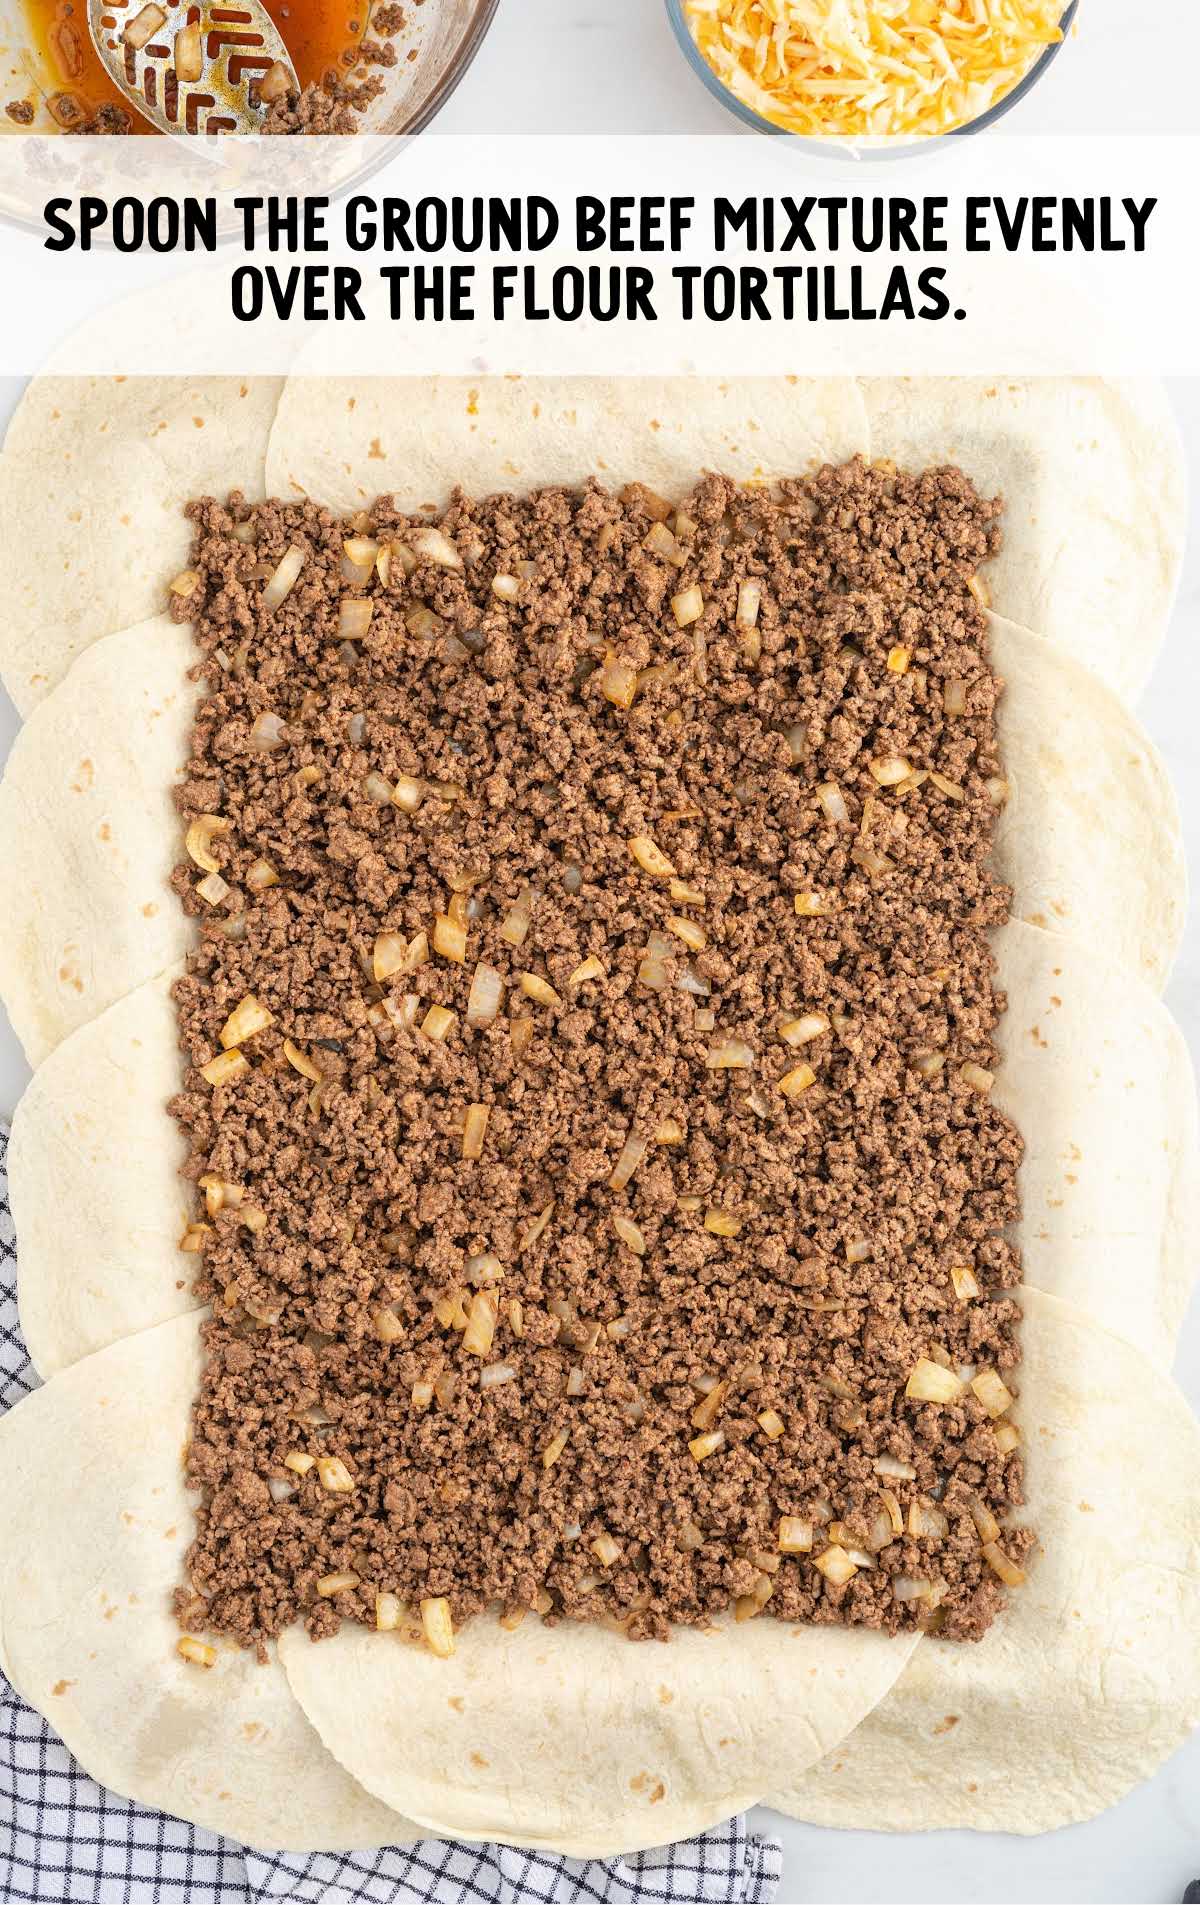
STEP SIX: Using a large slotted spoon, spoon the ground beef mixture evenly over the flour tortillas.
Make sure to allow as much of the fat from the ground beef mixture to drip off through the slotted spoon before placing the meat onto the tortillas.
This ensures that you don’t have soggy tortillas when baked.
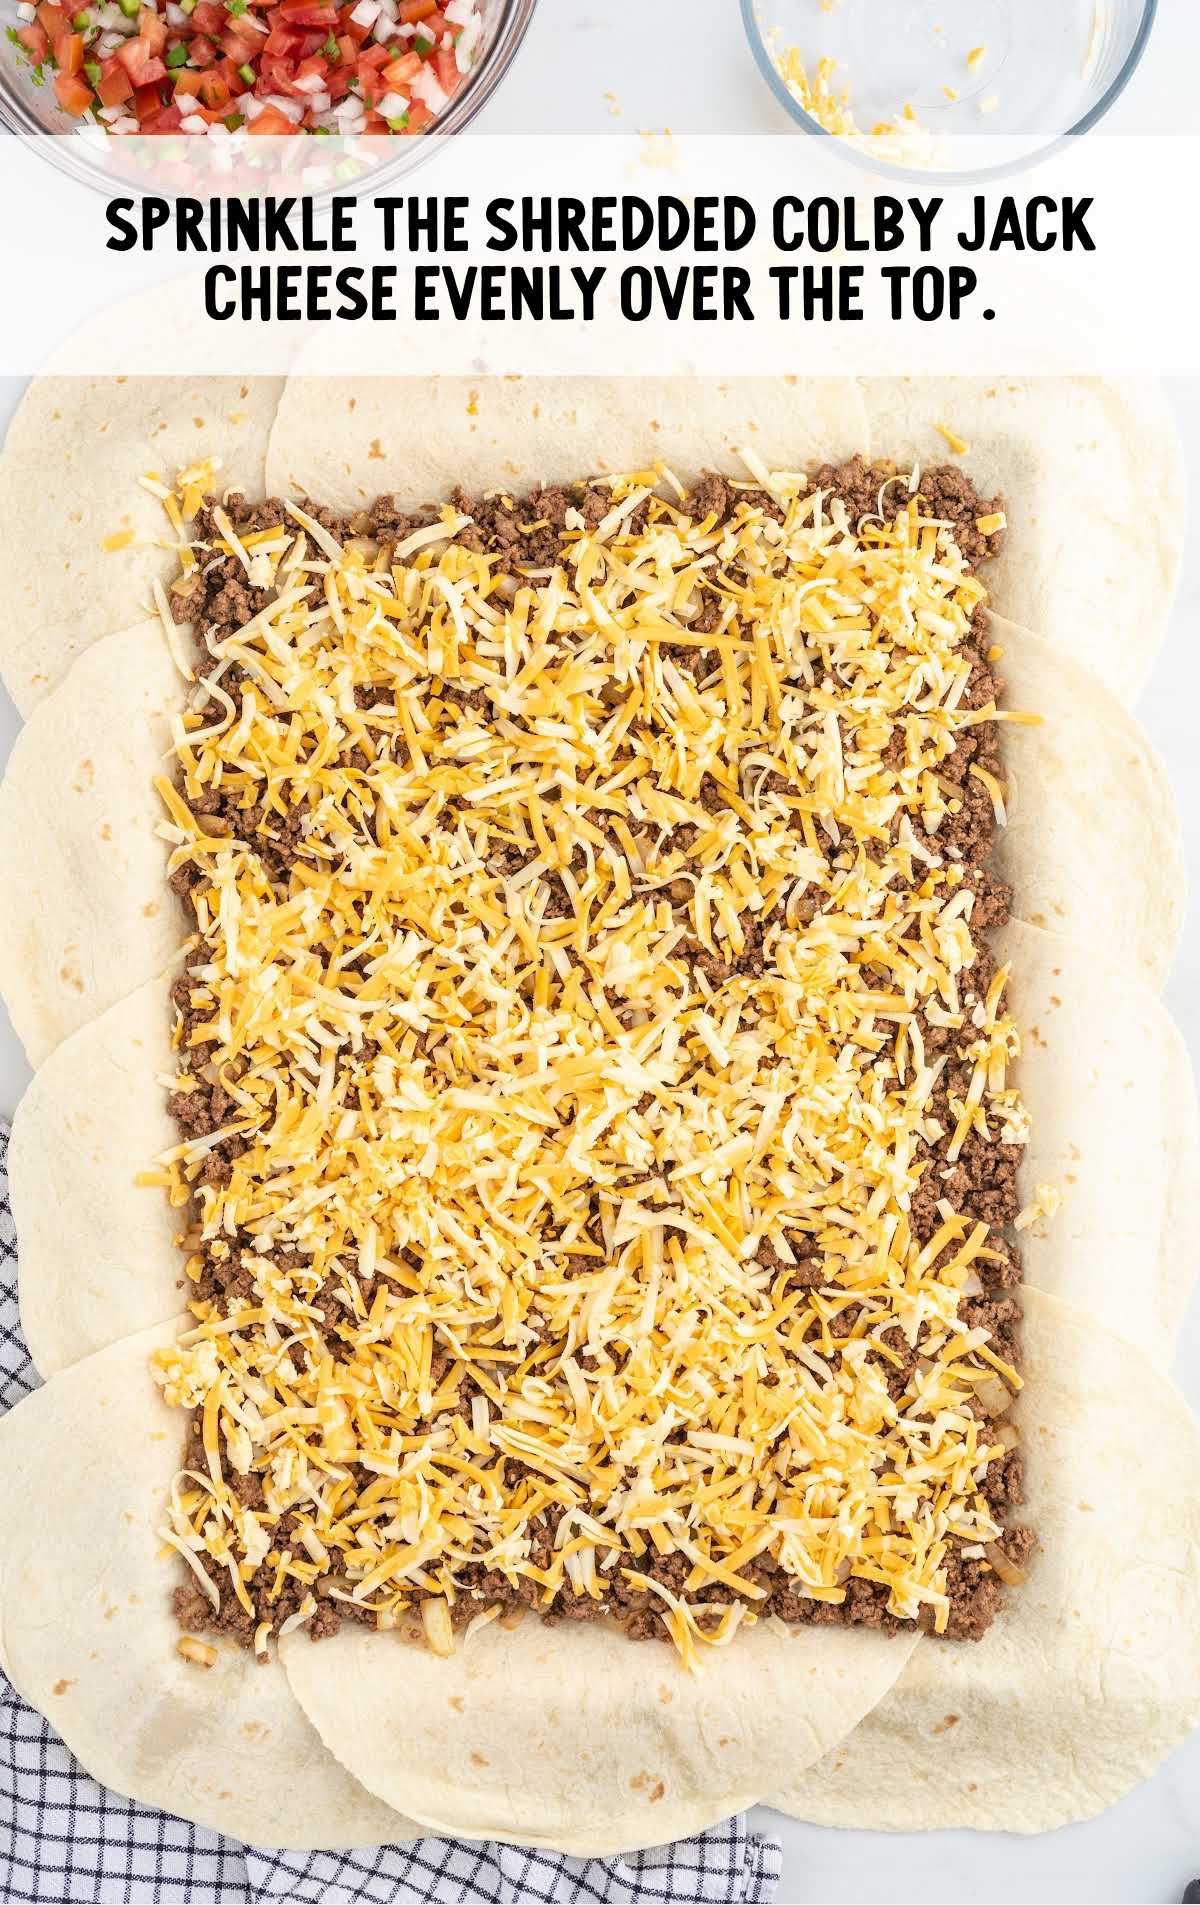
STEP SEVEN: Sprinkle the shredded Colby jack cheese evenly over the top of the ground beef layer.
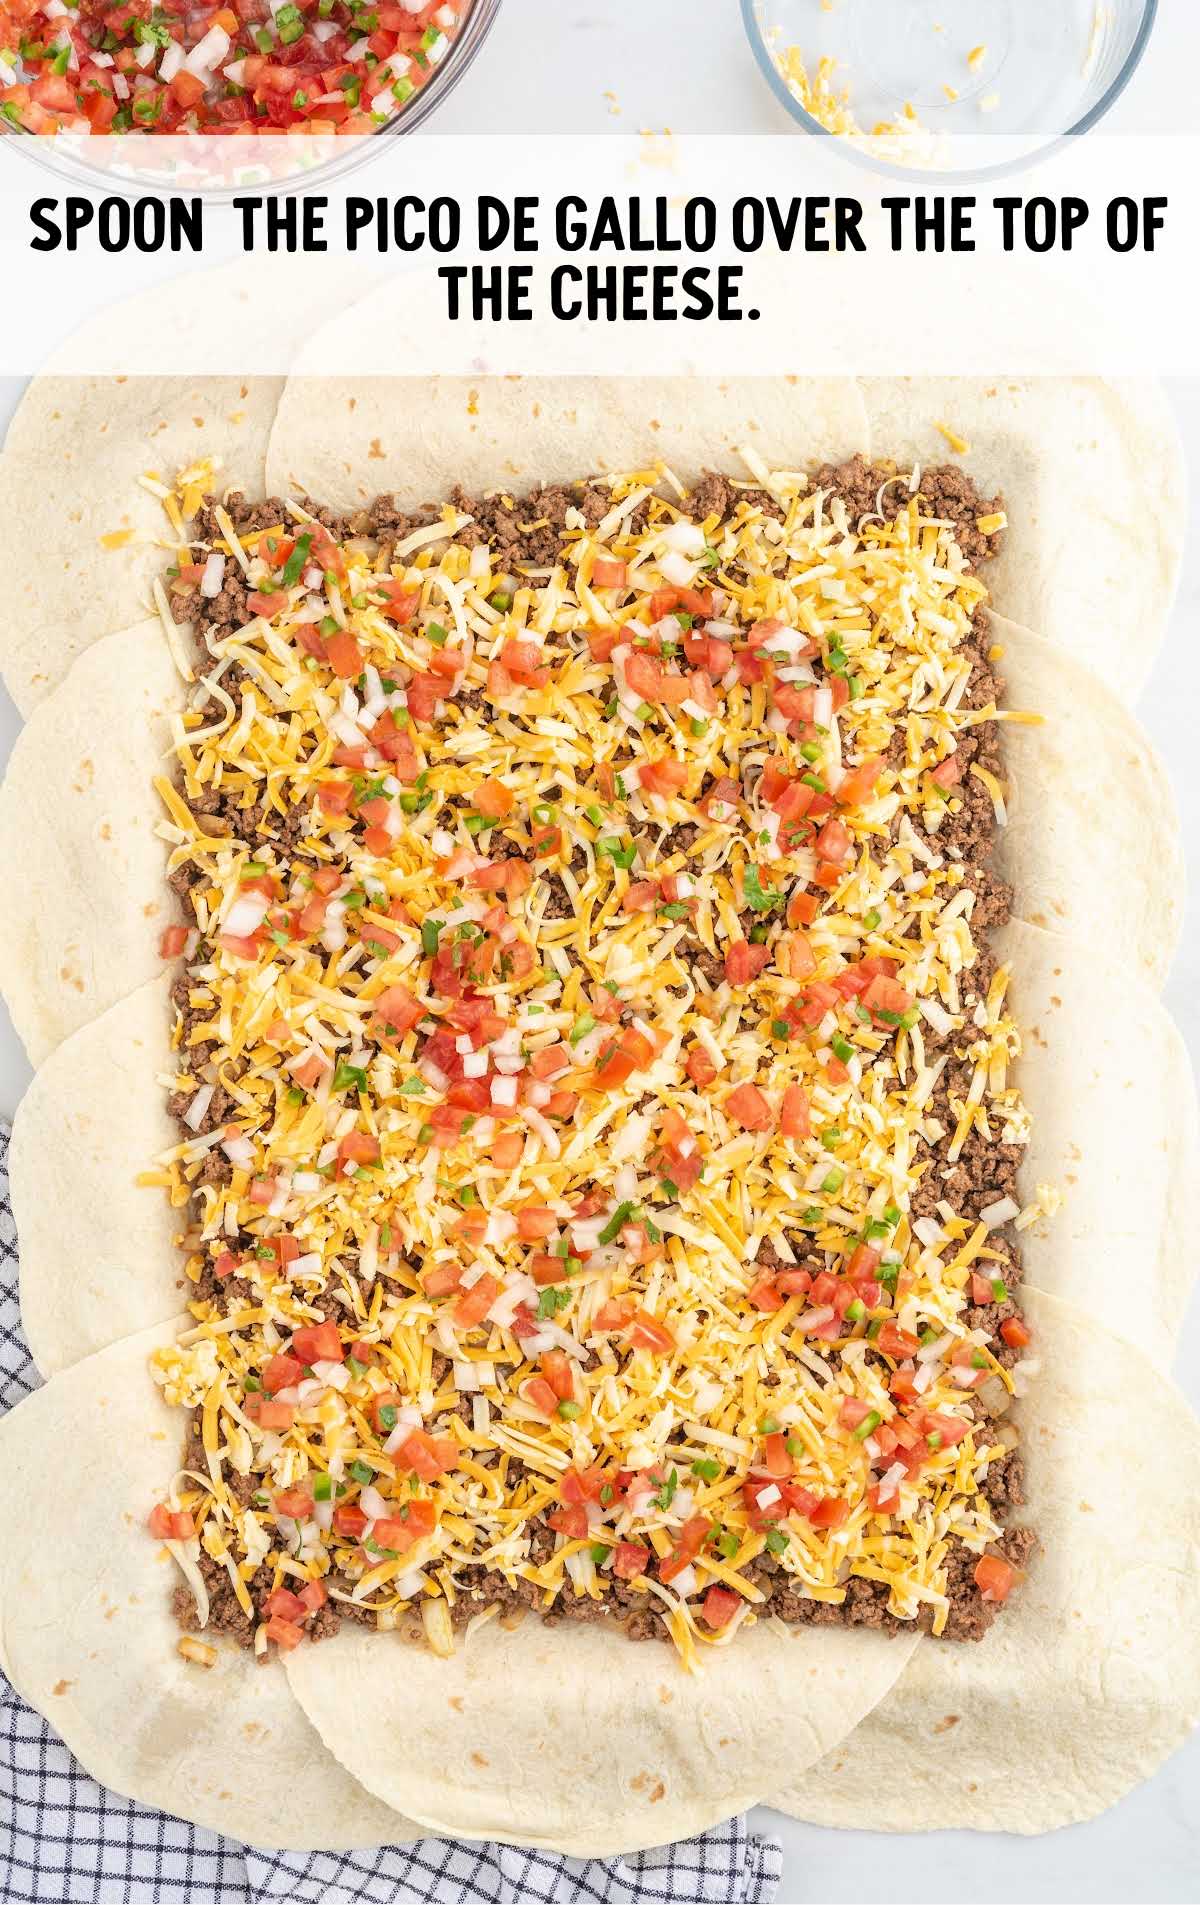
STEP EIGHT: Finally, using a slotted spoon, spoon 1½ cups of the pico de gallo over the top of the cheese.
You will want to make sure that you allow as much of the juices from the pico de gallo to drain out before layering it onto your cheese.
PRO TIP:
If you have little ones that are sensitive to the fresh jalapeño or cilantro in the pico de gallo, you can cover only half of the cheese with the pico de gallo and leave the other half plain before covering your layers with the top flour tortillas.
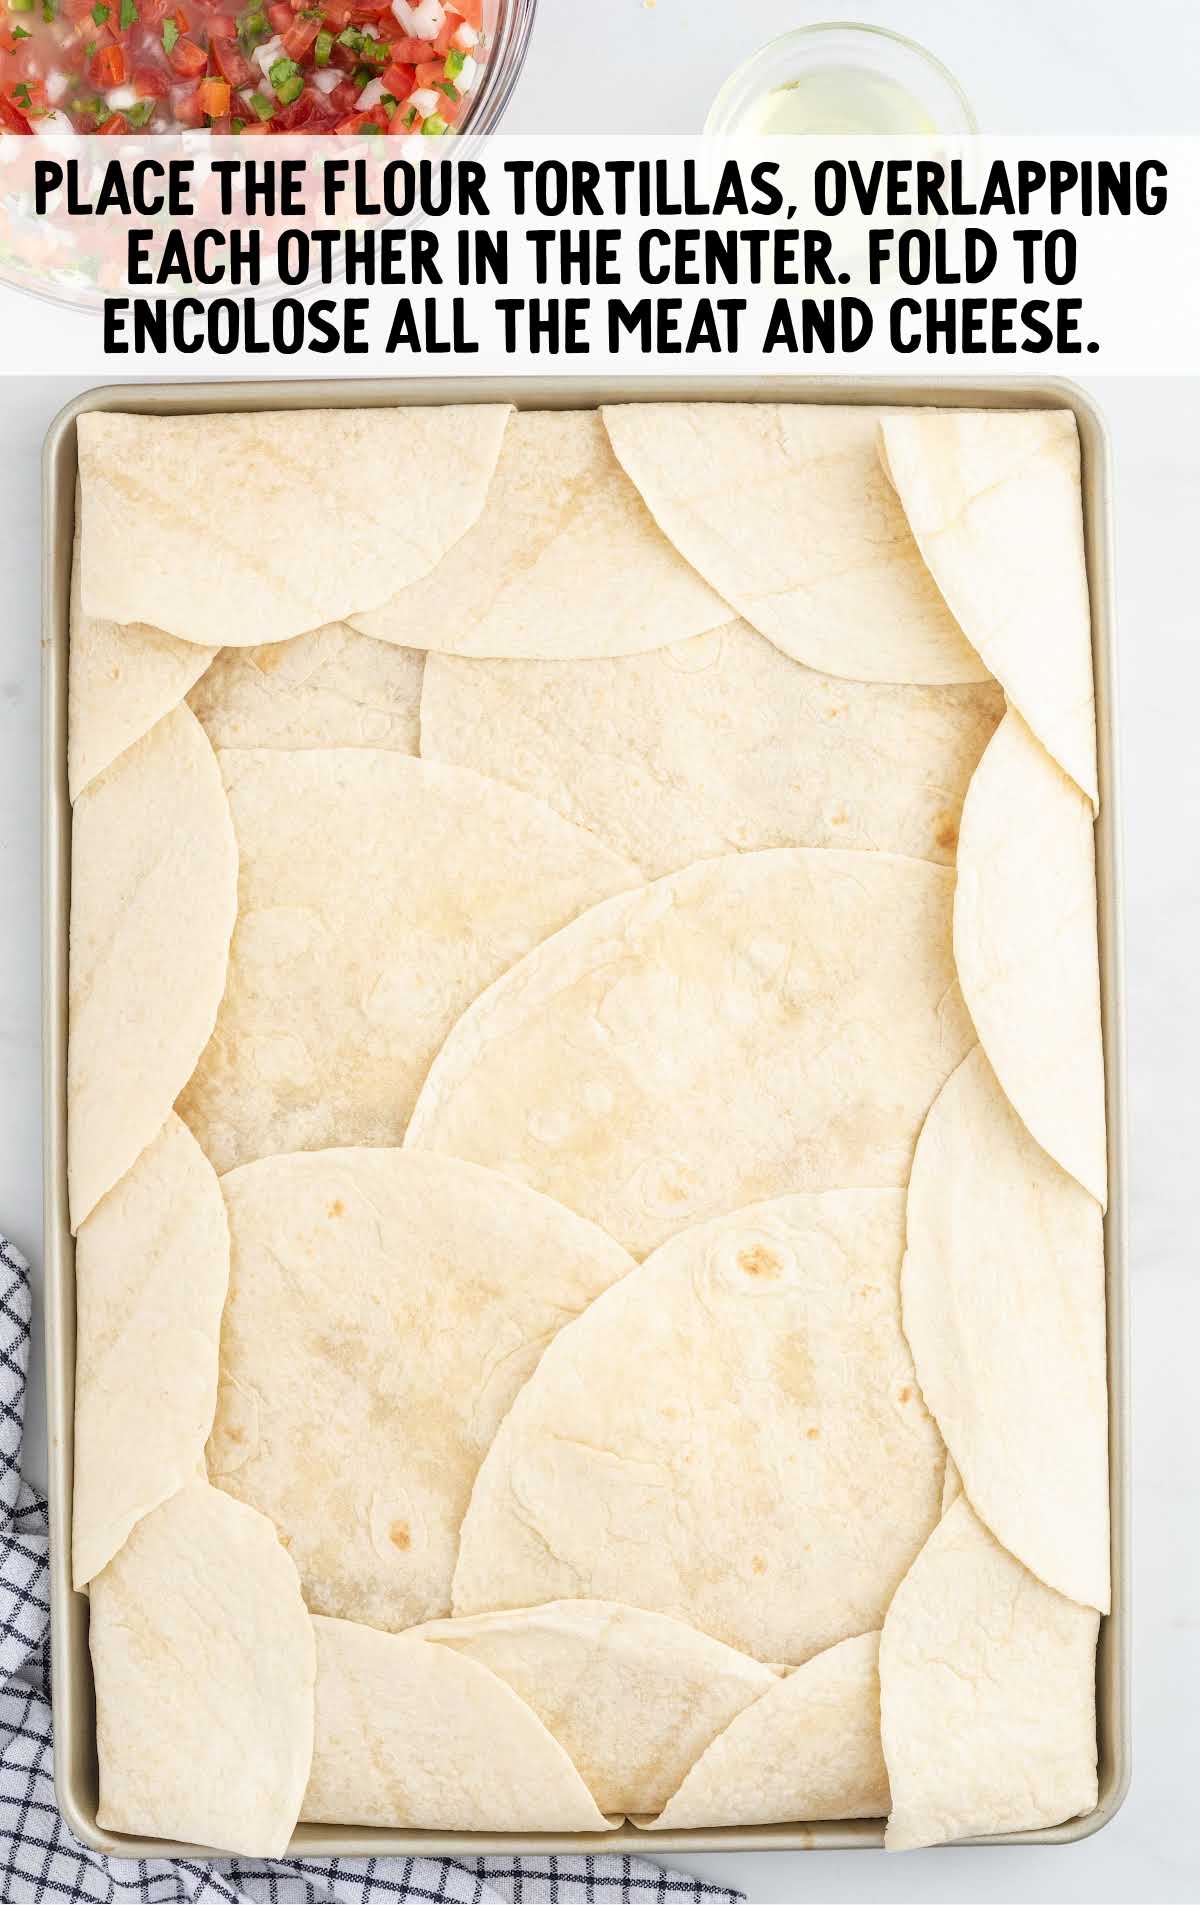
STEP NINE: Place your last six flour tortillas, overlapping each other in the center of your sheet tray, onto the top of the meat and cheese.
Fold the overhanging flour tortillas over the top six tortillas so that you are enclosing all the meat and cheese.
STEP TEN: Brush the remaining two tablespoons of canola oil evenly over the tops of all the flour tortillas.
You can use the oil to help the top overhanging pieces stick to each other.
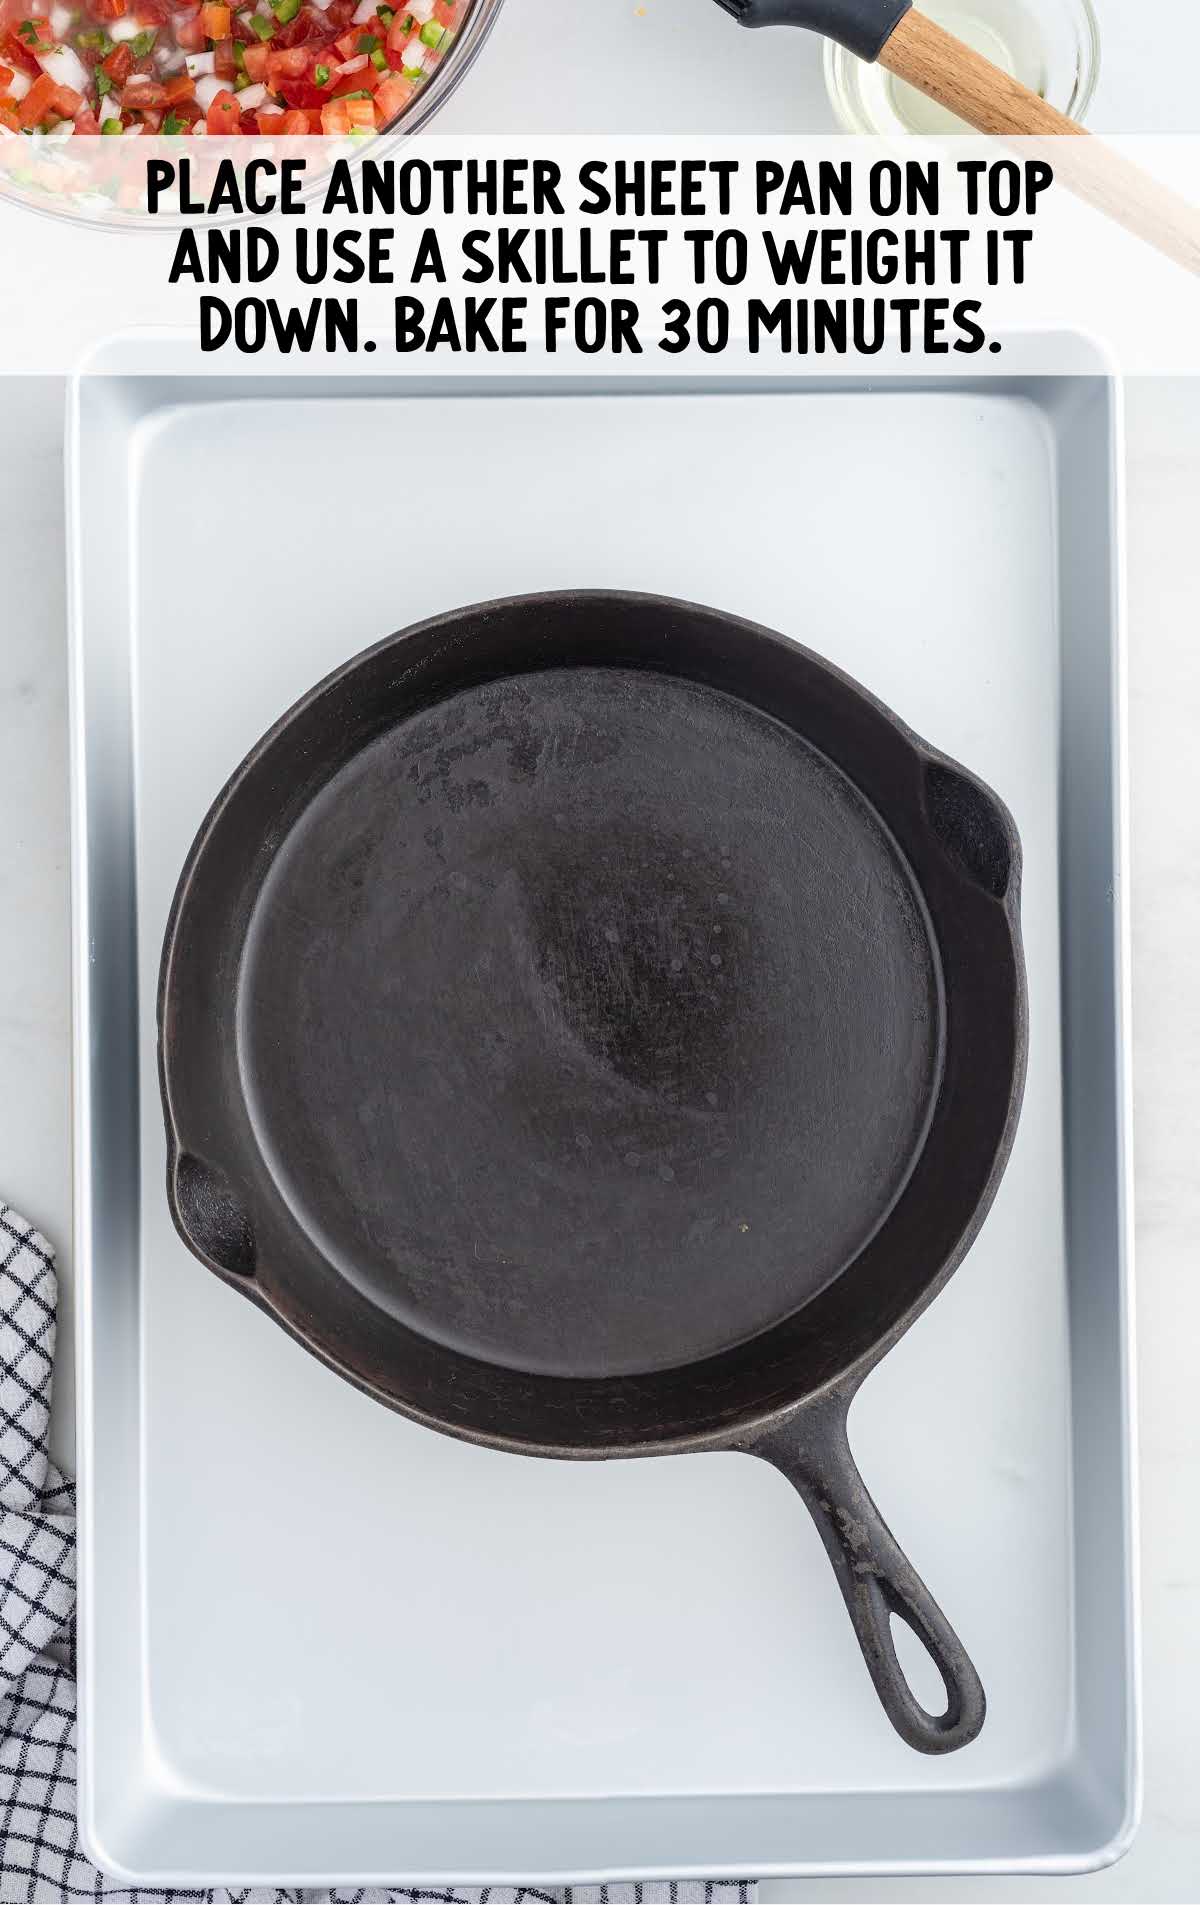
STEP ELEVEN: Place the second 13×18-inch rimmed sheet baking tray onto the top of the sheet pan taco, making sure that all the folded-over tortillas stay in place.
Place one or two oven-safe heavy skillets, like cast iron, onto the sheet tray to weigh it down.
This will create a nice sealed sheet pan taco. It also helps to ensure that the flour tortillas become crisp and golden brown. Bake for 30 minutes.
Carefully remove the heavy skillet(s) and the top sheet tray. Continue to bake the sheet pan taco for an additional 30 minutes or until the top is golden and crisp.
You may want to tent your four sides with long strips of aluminum foil like you would a pie crust when baking.
This ensures that the edges do not get too dark before the center of your sheet pan tacos gets nice and golden.
PRO TIP:
If you have an excess amount of fat from the ground beef mixture, very carefully tilt your pan and pour out the excess grease into a separate container.
Once that grease has cooled, you can dispose of it. This will make sure that your sheet pan tacos are not sitting in any excess grease.
You really want to make sure you use a slotted spoon to drip off as much excess fat before placing the ground beef onto the flour tortillas.
If you use leaner ground beef, you will not have as much excess fat to worry about.
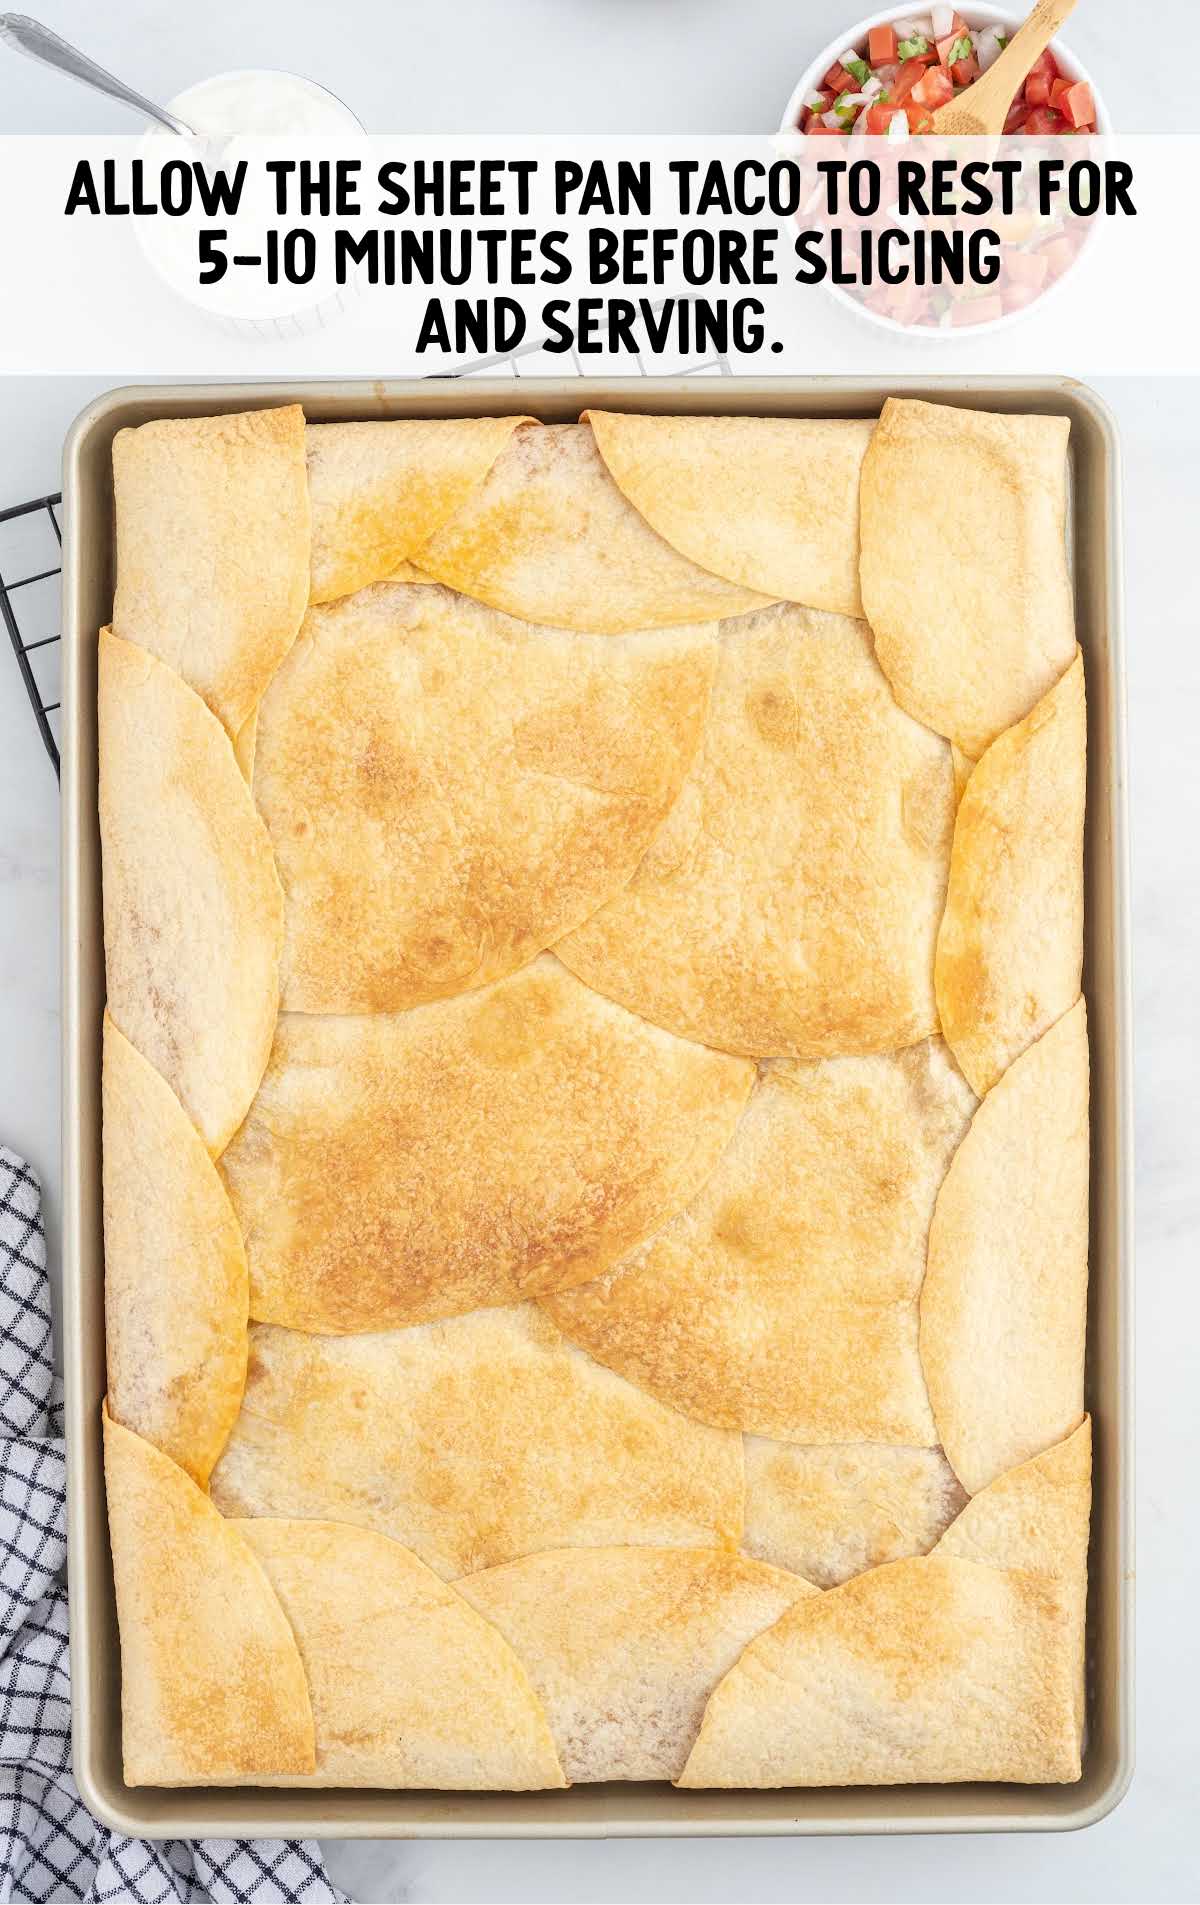
STEP TWELVE: Allow the sheet pan taco to rest for five to ten minutes before slicing and serving.
PRO TIP:
A pizza cutter works great to slice up the warm tortillas into individual servings.
Keep your sheet pan taco warm by covering it with a piece of aluminum foil and keeping it in a 200°F oven for up to 30 minutes.
How To Serve This Oven Baked Taco Recipe
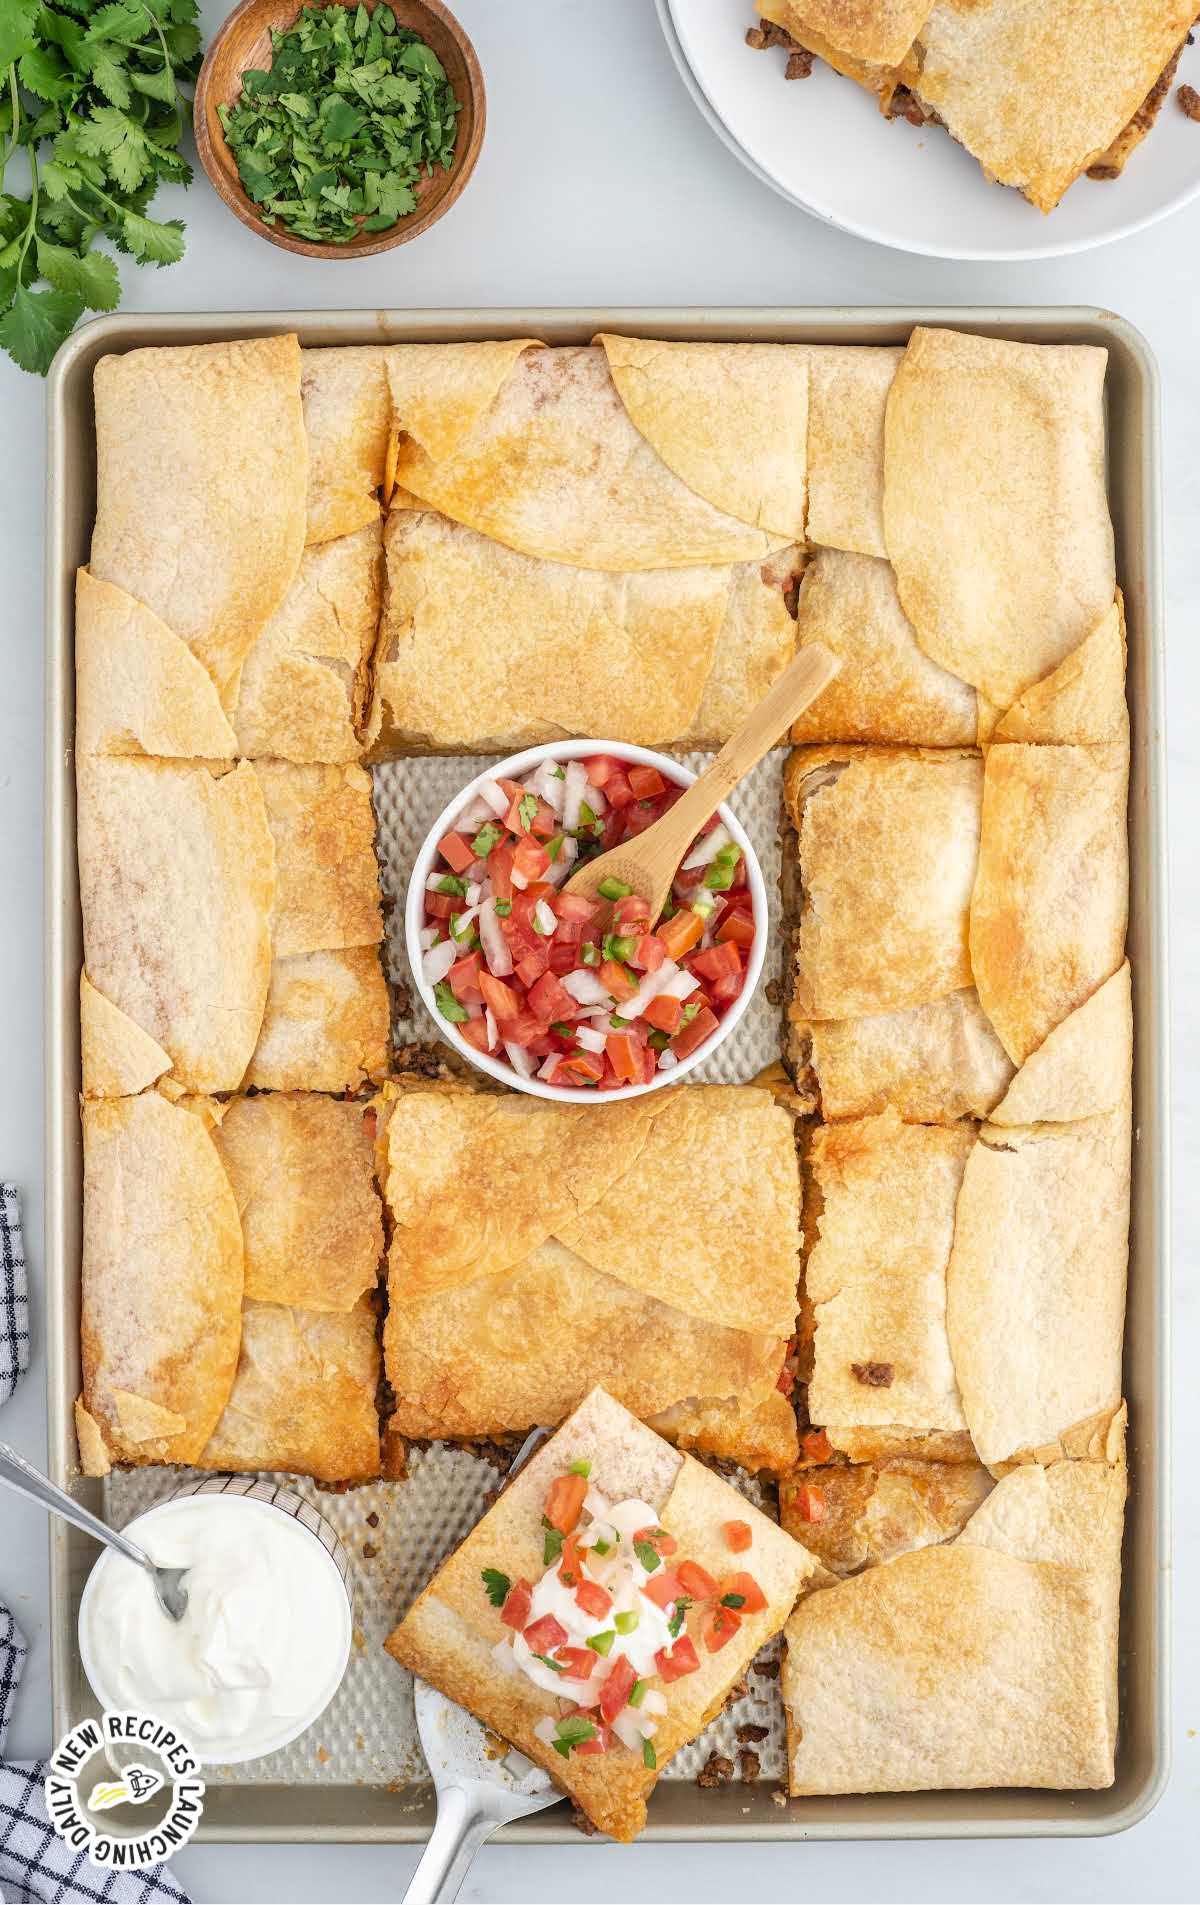
You can garnish your individual servings of this sheet pan taco with a dollop of sour cream and a spoonful of the remaining pico de gallo.
Serve along with your family’s favorite taco toppings, including salsa and guacamole, and our Spanish rice to complete your tasty meal.
A sheet pan meal makes prep fast and cleaning up even faster.
We love our baked burritos, sheet pan nachos, and sheet pan fajitas for two more ways to dress up your dinner menu.
MORE MEXICAN DISH RECIPES


Storage
Here’s your guide to storing, making ahead, and reheating these tasty tacos:
MAKE AHEAD: While these sheet pan tacos are best enjoyed fresh out of the oven, you can make certain components ahead to save time.
Brown the ground beef, season it with taco seasoning, and sauté the onions in advance.
Store them separately in airtight containers in the fridge for up to two to three days.
When you’re ready to assemble your tacos, simply reheat the fillings in a skillet over medium heat until warmed through.
Proceed with assembling your tacos for a speedy meal.
IN THE FRIDGE: Store leftovers of your sheet pan taco meal in the fridge for up to two days.
IN THE FREEZER: We don’t recommend freezing these tacos as the pico de gallo topping will become soggy once thawed.
REHEATING: When reheating sheet pan tacos, there are a few options. The microwave is the quickest, but it may result in slightly softer tortillas.
If using the microwave, wrap the tacos in a damp paper towel and heat them in 20 to 30-second intervals until warmed through.
For a crisper texture, use the oven method mentioned above, baking them at 350°F (175°C) for about 10-15 minutes until heated to your liking.
If you’re in a hurry, you can also use a skillet on medium heat, cooking them for a few minutes on each side until warmed through.
Why We Love This Recipe
FLAVORFUL AND CUSTOMIZABLE: The combination of seasoned ground beef, caramelized onions, and melted cheese creates a mouthwatering flavor profile. Plus, you can customize your tacos with your favorite toppings, adding a personal touch to each bite.
PERFECTLY CRISPY TORTILLAS: Baking the tortillas on the sheet pan results in tortillas that are perfectly crisp yet still pliable. They hold up well to the hearty fillings and stay deliciously crunchy on the edges.
CROWD-PLEASER: This recipe is a hit with both kids and adults, making it an excellent choice for family dinners or gatherings. It’s a crowd-pleaser that can be easily scaled up to accommodate a larger group.
This sheet pan tacos bake creates an easy meal on busy weeknights. Loaded with all your favorite taco ingredients, they make it easy to throw together plenty of tacos and bake them until they are hot and cheesy.
Everything bakes together into melty, slightly crisped edges that slice clean—see more easy dinners in these Mexican-inspired dish recipes.
Frequently Asked Questions
You can use corn tortillas, although we find flour tortillas tend to be more pliable.
If you do use corn, warm them in the microwave for a few seconds to soften them up before attempting to fill them and fold them over.
This simple recipe is best made fresh as the ingredients for the pico de gallo will become soggy once thawed.
Ground pork or ground turkey are two more great choices for the meat in this recipe.
More Recipes You’ll Love
- Slow Cooker Queso Chicken Tacos
- Crescent Roll Taco Bake
- Taco Lasagna
- Skillet Enchiladas
- Beef Quesadillas


Sheet Pan Tacos
Ingredients
- 5 tablespoons canola oil, divided into 2 tablespoons, 1 tablespoon, and 2 tablespoons
- 2 cups yellow onion, chopped
- 3 pounds ground beef, I used a ground chuck 80%-20% blend
- 2 ounces original taco seasoning, I used Old El Paso brand (two 1-ounce packets)
- 2 teaspoons salt
- 1 teaspoon black pepper
- 16 soft taco flour tortillas (8-inch)
- 4 cups shredded Colby jack cheese (two 8-ounce blocks)
- 1½ cups store-bought pico de gallo
Instructions
- Preheat oven to 350°F. Using a pastry brush, brush 2 tablespoons of canola oil onto the inside bottom and sides of a 13×18-inch rimmed baking sheet tray. You will need a second rimmed sheet tray for the baking process. Set aside.
- In a large skillet, on medium-high heat, heat 1 tablespoon canola oil. Add the 2 cups chopped yellow onions and saute them for 2 to 3 minutes or until they are translucent and soft. Transfer the cooked onions to a plate and set them aside.
- Add half of the ground beef and one of the 1-ounce taco seasoning packets, 1 teaspoon salt, and ½ teaspoon black pepper to the same large skillet on medium-high heat. Cook the ground beef for 4 to 5 minutes, breaking it up into crumbles until there is no longer any pink and the ground beef is completely coated with the taco seasoning spice blend. Transfer the cooked ground beef to a large bowl or large shallow dish, and repeat with the second half of the ground beef and the second 1-ounce packet of taco seasoning, remaining 1 teaspoon salt and ½ teaspoon black pepper until all the ground beef is cooked. Transfer the rest of the cooked ground beef to the bowl with the first batch of cooked ground beef.
- Add the cooked yellow onions to the cooked ground beef in the bowl, and stir to incorporate.
- On the prepared rimmed baking sheet tray, you will lay out 10 of the flour tortillas. You will need to make sure that they are overhanging all sides of the sheet tray by at least 2 to 3 inches. You will also want to make sure that there are no gaps or open spaces between the flour tortillas. It should look like a solid layer of flour tortillas with all the sides overhanging. The part of the flour tortillas that are overhanging will be used to fold over and seal the sheet pan tacos once assembled.
- Using a large slotted spoon, spoon the ground beef mixture evenly over the flour tortillas. Make sure to allow as much of the fat from the ground beef mixture to drip off through the slotted spoon before placing the meat onto the tortillas. This ensures that you don’t have soggy tortillas when baked.
- Sprinkle the shredded Colby jack cheese evenly over the top of the ground beef layer.
- Finally, using a slotted spoon, spoon 1½ cups of the pico de gallo over the top of the cheese. You will want to make sure that you allow as much of the juices from the pico de gallo to drain out before layering it onto your cheese.
- Place your final 6 flour tortillas, overlapping each other in the center of your sheet tray, onto the top of the meat and cheese. Fold the overhanging flour tortillas over the top six tortillas so that you are enclosing all the meat and cheese.
- Brush the remaining 2 tablespoons of canola oil evenly over the tops of all the flour tortillas. You can use the oil to help the top overhanging pieces stick to each other.
- Place the second 13×18-inch rimmed sheet baking tray onto the top of the sheet pan taco making sure that all the folded-over tortillas stay in place. Place 1 or 2 oven-safe heavy skillets, like cast iron, onto the sheet tray to weigh it down. This will create a nice sealed sheet pan taco. It also helps to ensure that the flour tortillas become crisp and golden brown. Bake for 30 minutes. Carefully remove the heavy skillet(s) and the top sheet tray. Continue to bake the sheet pan taco for an additional 30 minutes or until the top is golden and crisp. You may want to tent your 4 sides with long strips of aluminum foil (like you would a pie crust when baking) to ensure that the edges do not get too dark before the center of your sheet pan tacos gets nice and golden.
- Allow the sheet pan taco to rest for 5 to 10 minutes before slicing and serving.
Video
Notes
- I used a standard-size flour tortilla for this sheet pan taco; however, the burrito or extra large-sized flour tortillas would also work. Note that you will not need to use as many extra-large flour tortillas. I do not suggest using anything smaller than the 8-inch size soft flour tortillas as it may make it very hard to keep the smaller tortillas to stay together when assembling the top of the sheet pan taco.
- The part of the flour tortillas that are overhanging will be used to fold over and seal the sheet pan tacos once assembled.
- If you have little ones that are sensitive to the fresh jalapeño or cilantro in the pico de gallo, you can cover only half of the cheese with the pico de gallo and leave the other half plain before covering your layers with the top flour tortillas.
- If you have an excess amount of fat that has cooked out of your ground beef mixture while your sheet pan taco was baking, then you can very carefully tilt your pan and pour out the excess grease into a separate container. Once that grease has cooled, you can dispose of it. This will make sure that your sheet pan tacos are not sitting in any excess grease. You really want to make sure you use a slotted spoon to drip off as much excess fat before placing the ground beef onto the flour tortillas. If you use leaner ground beef, you will not have as much excess fat to worry about.
Nutrition


Comments
Joe says
Hearty and delicious. Versatile with different toppings!
Karen says
I want to make this recipe, but I went to 2 stores and couldn’t find Pico de gallo. Is ok to use just salsa? Maybe drain some of the liquid? Thanks
Layne Kangas says
That should work fine, enjoy!
Sharon Rose Castleberry says
Love these! Fixed last night, the only problem was the use of too many bowls.