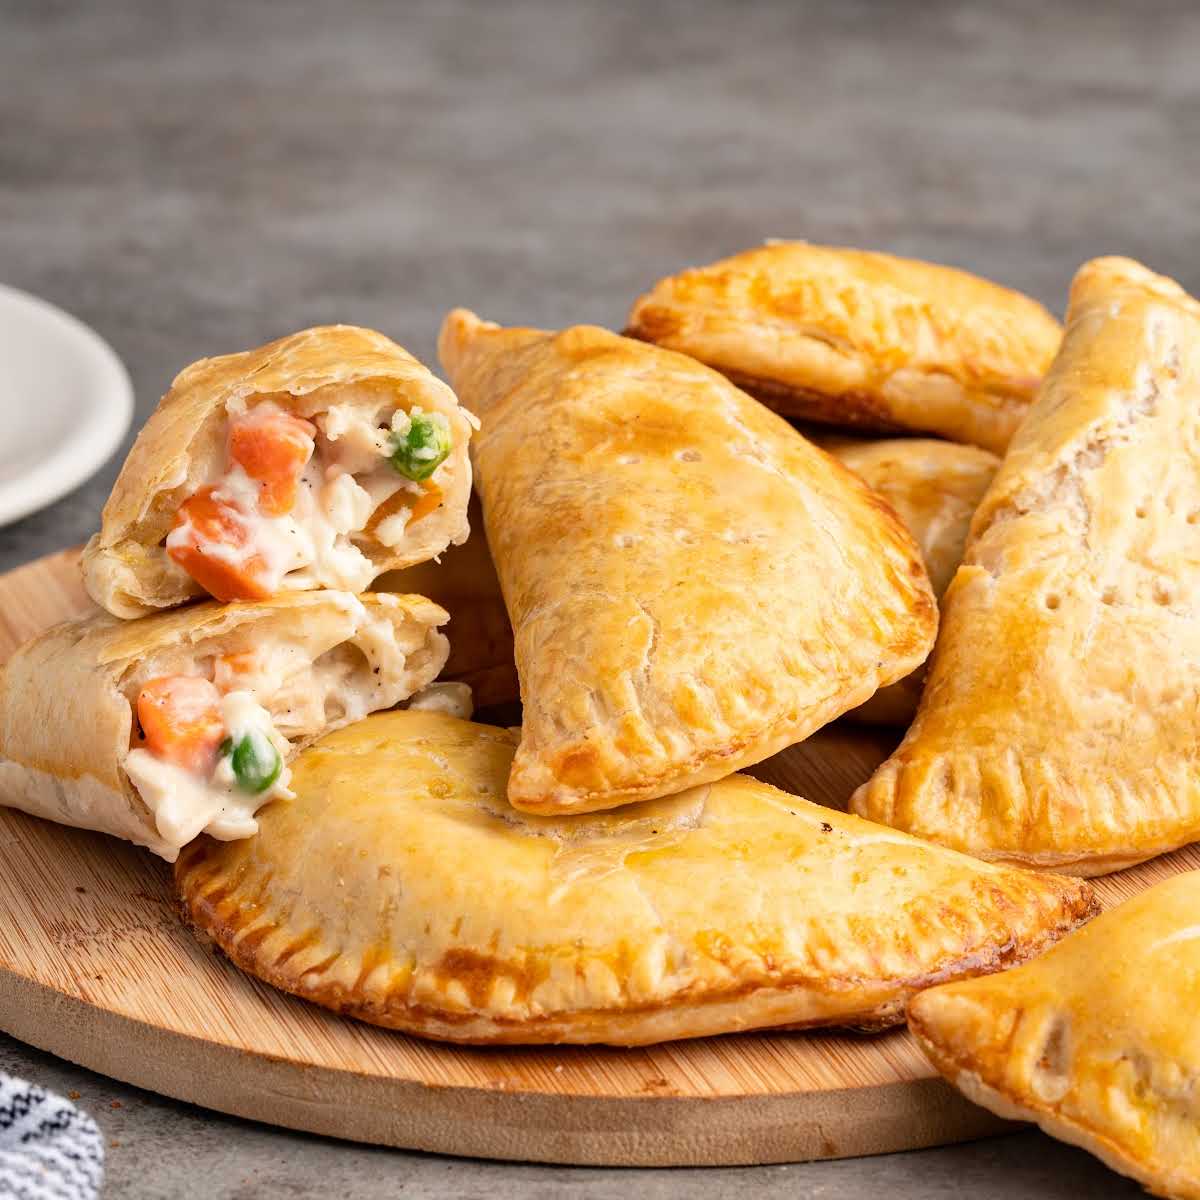


There’s something deeply comforting about breaking through a golden, flaky crust and finding a creamy, savory chicken filling inside. These chicken pot pie hand pies capture that classic pot pie feeling, but in a compact, buttery pastry that stays sealed, crisp, and ready to travel wherever you take it.
These aren’t small pot pies. They’re hand pies built specifically to stay sealed, stay structured, and eat cleanly. The difference is in how the filling is handled before it ever touches the pastry.
The Ingredients Needed
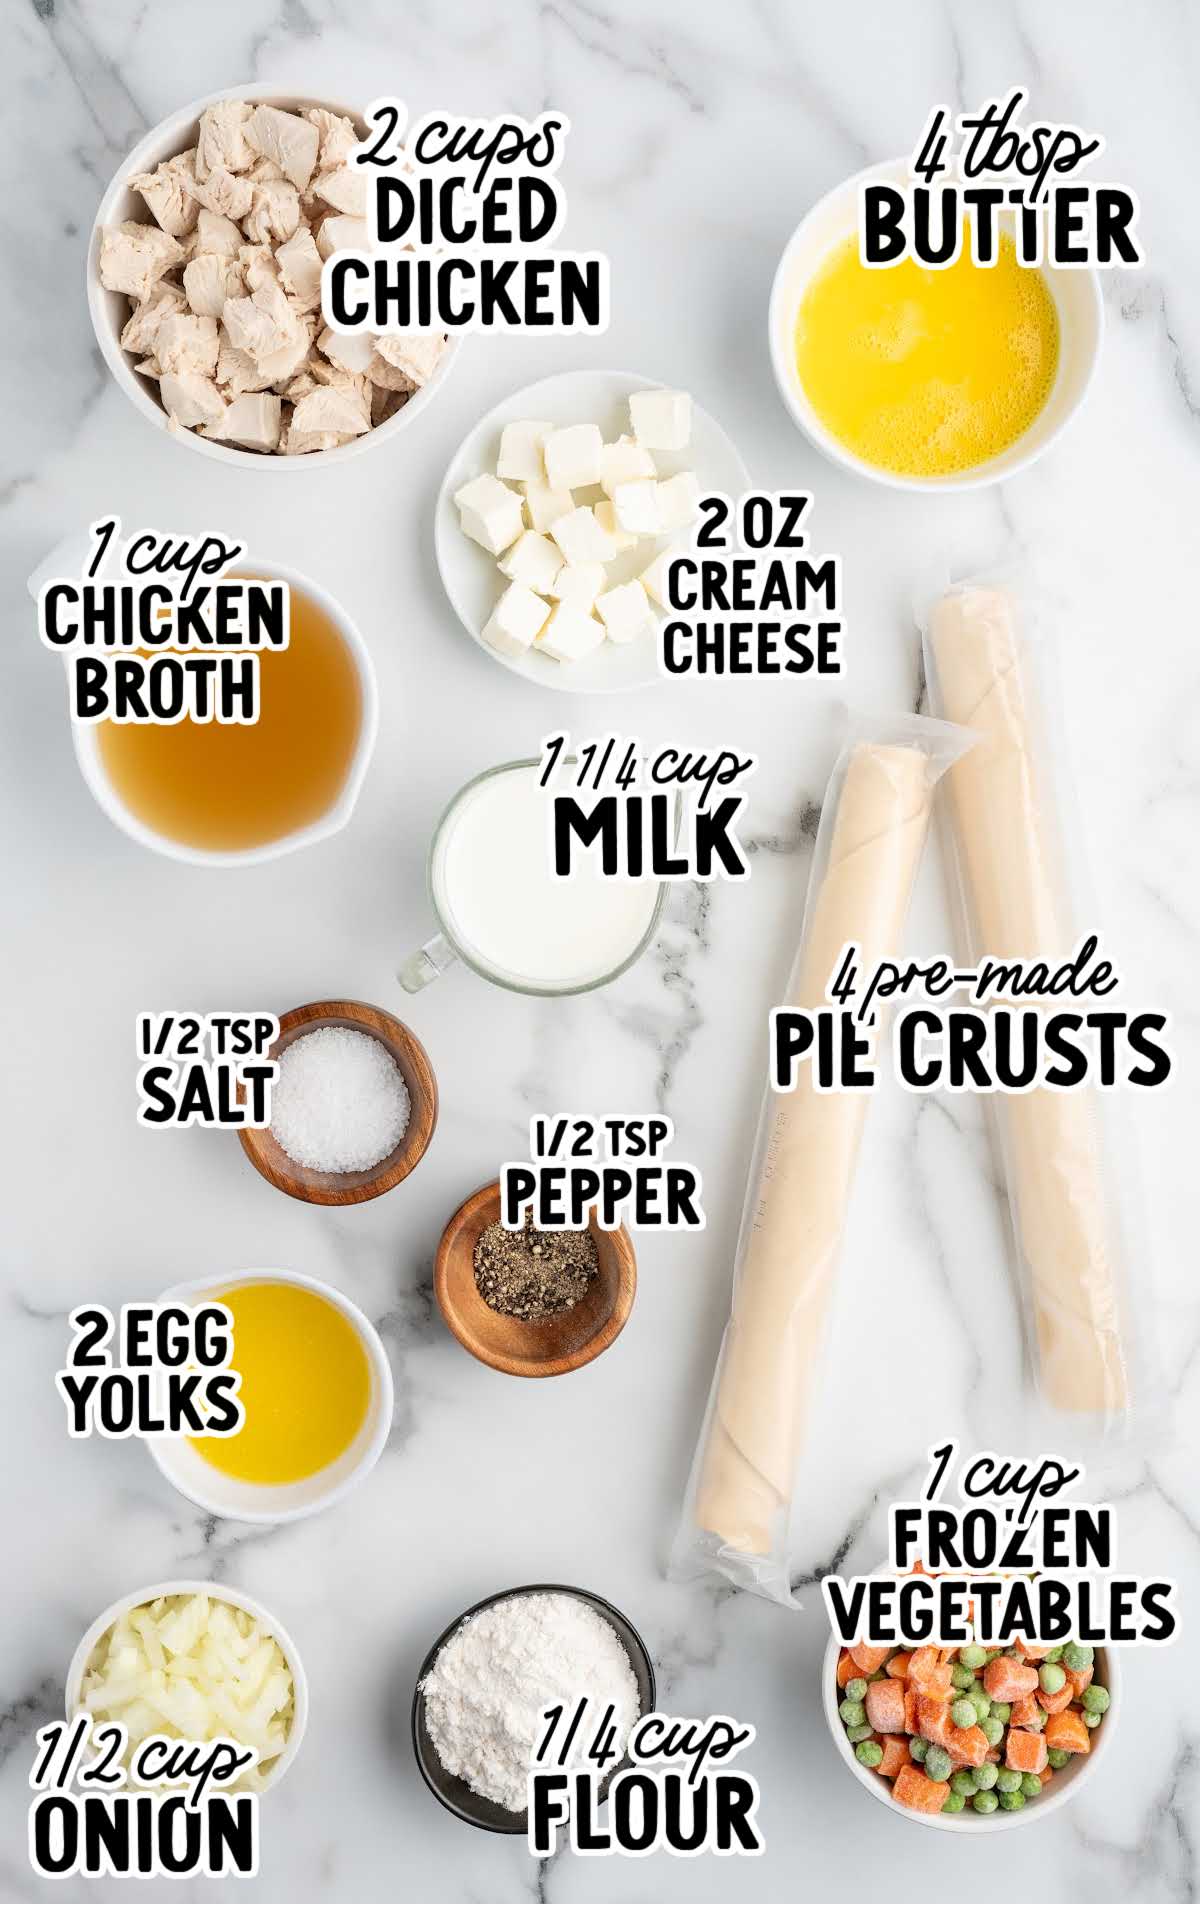
Note- You could substitute your own pie crust if you have a preferred recipe. Or, check out our simple pie crust recipe.
A Few Details That Make a Difference
- Cook the filling until it’s properly thick — it should mound slightly on a spoon rather than run. If it looks saucy in the pan, it will be too loose inside the pastry.
- Let the filling cool fully before assembling. This keeps the crust firm and prevents the bottoms from turning soft during baking.
- Avoid overfilling. A slightly smaller, well-sealed pie bakes more evenly and looks cleaner when finished.
- Cut small vents into the tops. Steam needs somewhere to go, and those vents protect the seams from splitting.

When The Hand Pies Are Finished
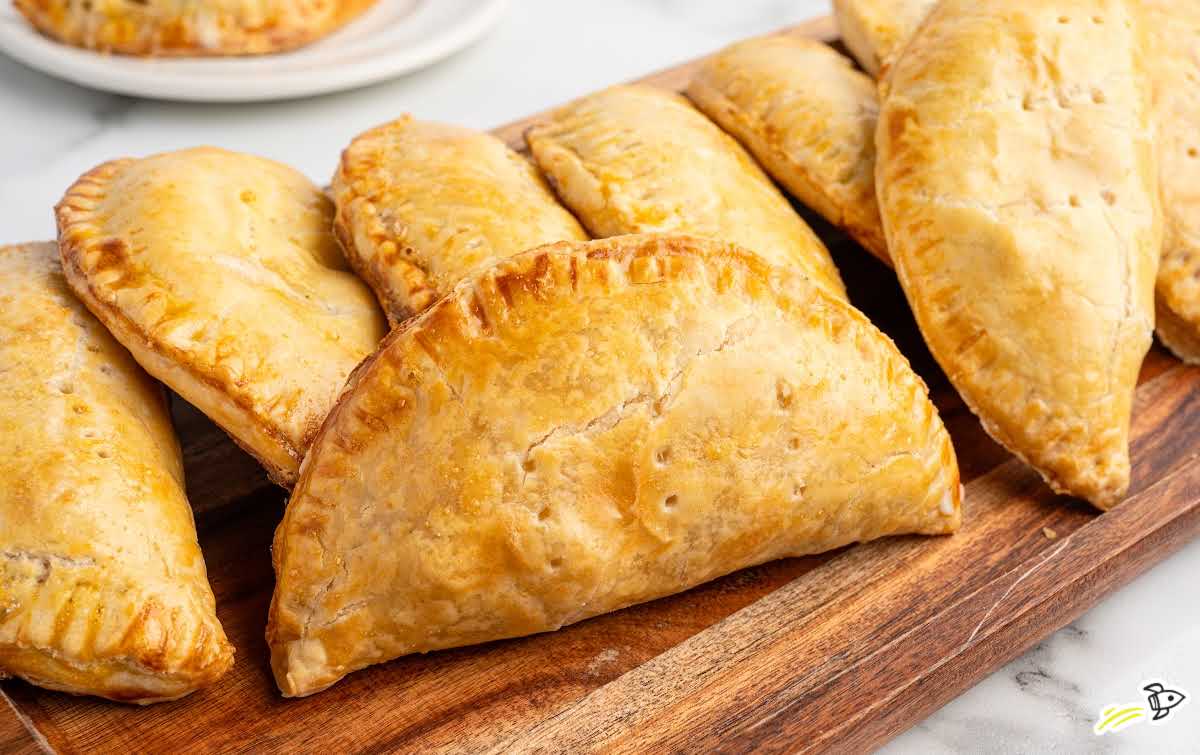
When baked, the crust should be golden and flaky with clean, defined edges. The filling should stay creamy and contained — rich but not greasy, thick but not dry.
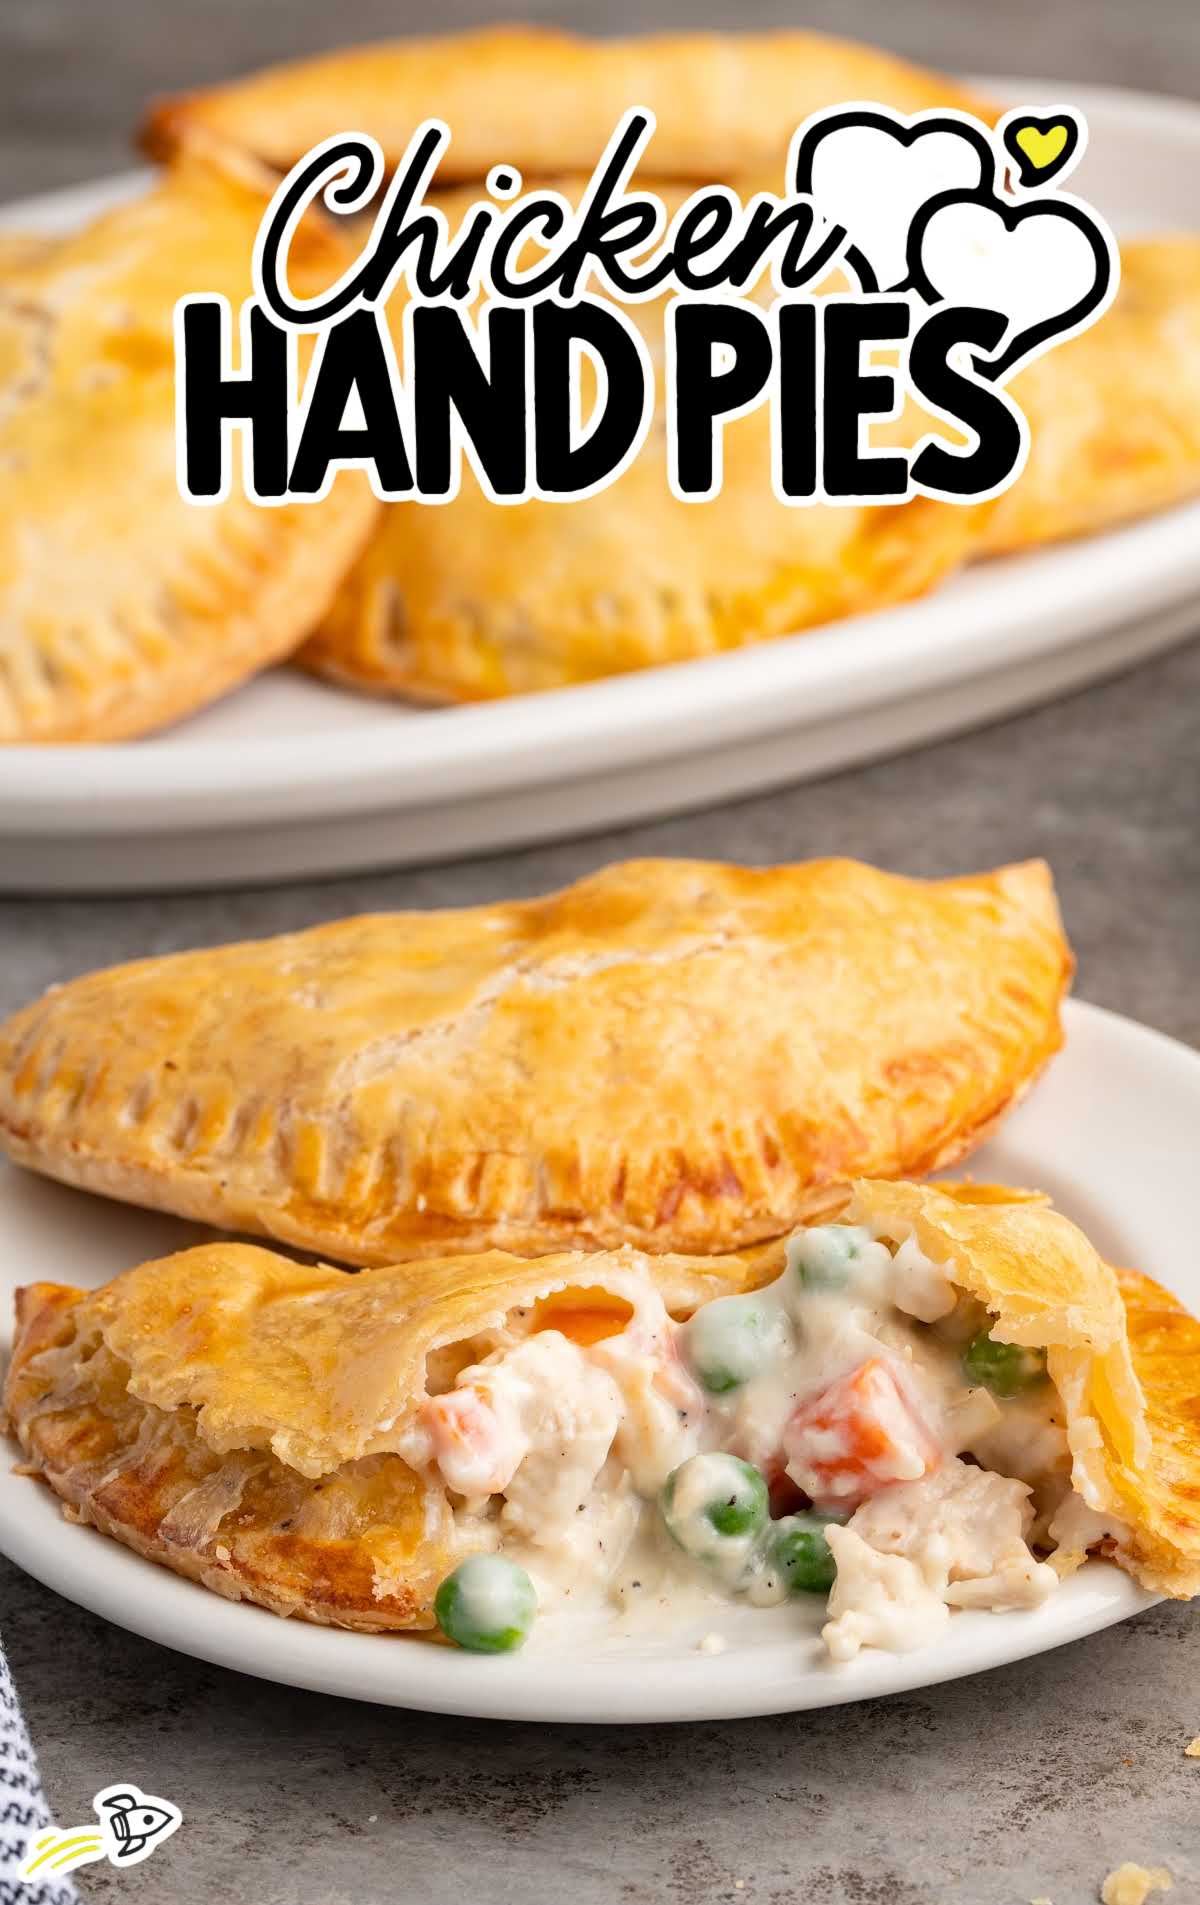
Let the hand pies rest briefly before serving. This allows the filling to settle and prevents it from spilling out immediately when bitten into.
Enjoy them on their own or alongside a simple Caesar salad.
Storage and Reheating
These are best the day they’re baked, but leftovers reheat well in a 350°F oven until warmed through. The oven keeps the pastry crisp; the microwave will soften it.
Unbaked hand pies can be assembled ahead and refrigerated for up to 24 hours before baking. They also freeze well, either before or after baking. Reheat from frozen in the oven for the best texture.
For two more unique takes on a traditional dish, try our chicken pot pie noodles, chicken pot pie soup or our chicken pot pie casserole.

Chicken Hand Pies
Ingredients
- 4 tablespoons salted butter, melted
- ½ cup yellow onion, diced
- ¼ cup all-purpose flour
- ½ teaspoon salt
- ½ teaspoon black pepper
- 1 cup chicken broth, or 1 cup water plus 1 ½ teaspoons chicken bouillon
- 1¼ cups whole milk
- 2 ounces cream cheese, cut into pieces
- 1 cup frozen peas and carrots
- 2 cups chicken, cooked and diced
- 2 refrigerated rolled pie crusts, 1 standard 14-ounce 2-pack
- 1 egg yolk, beaten (plus 1 teaspoon water)
Instructions
- Preheat the oven to 450°F.
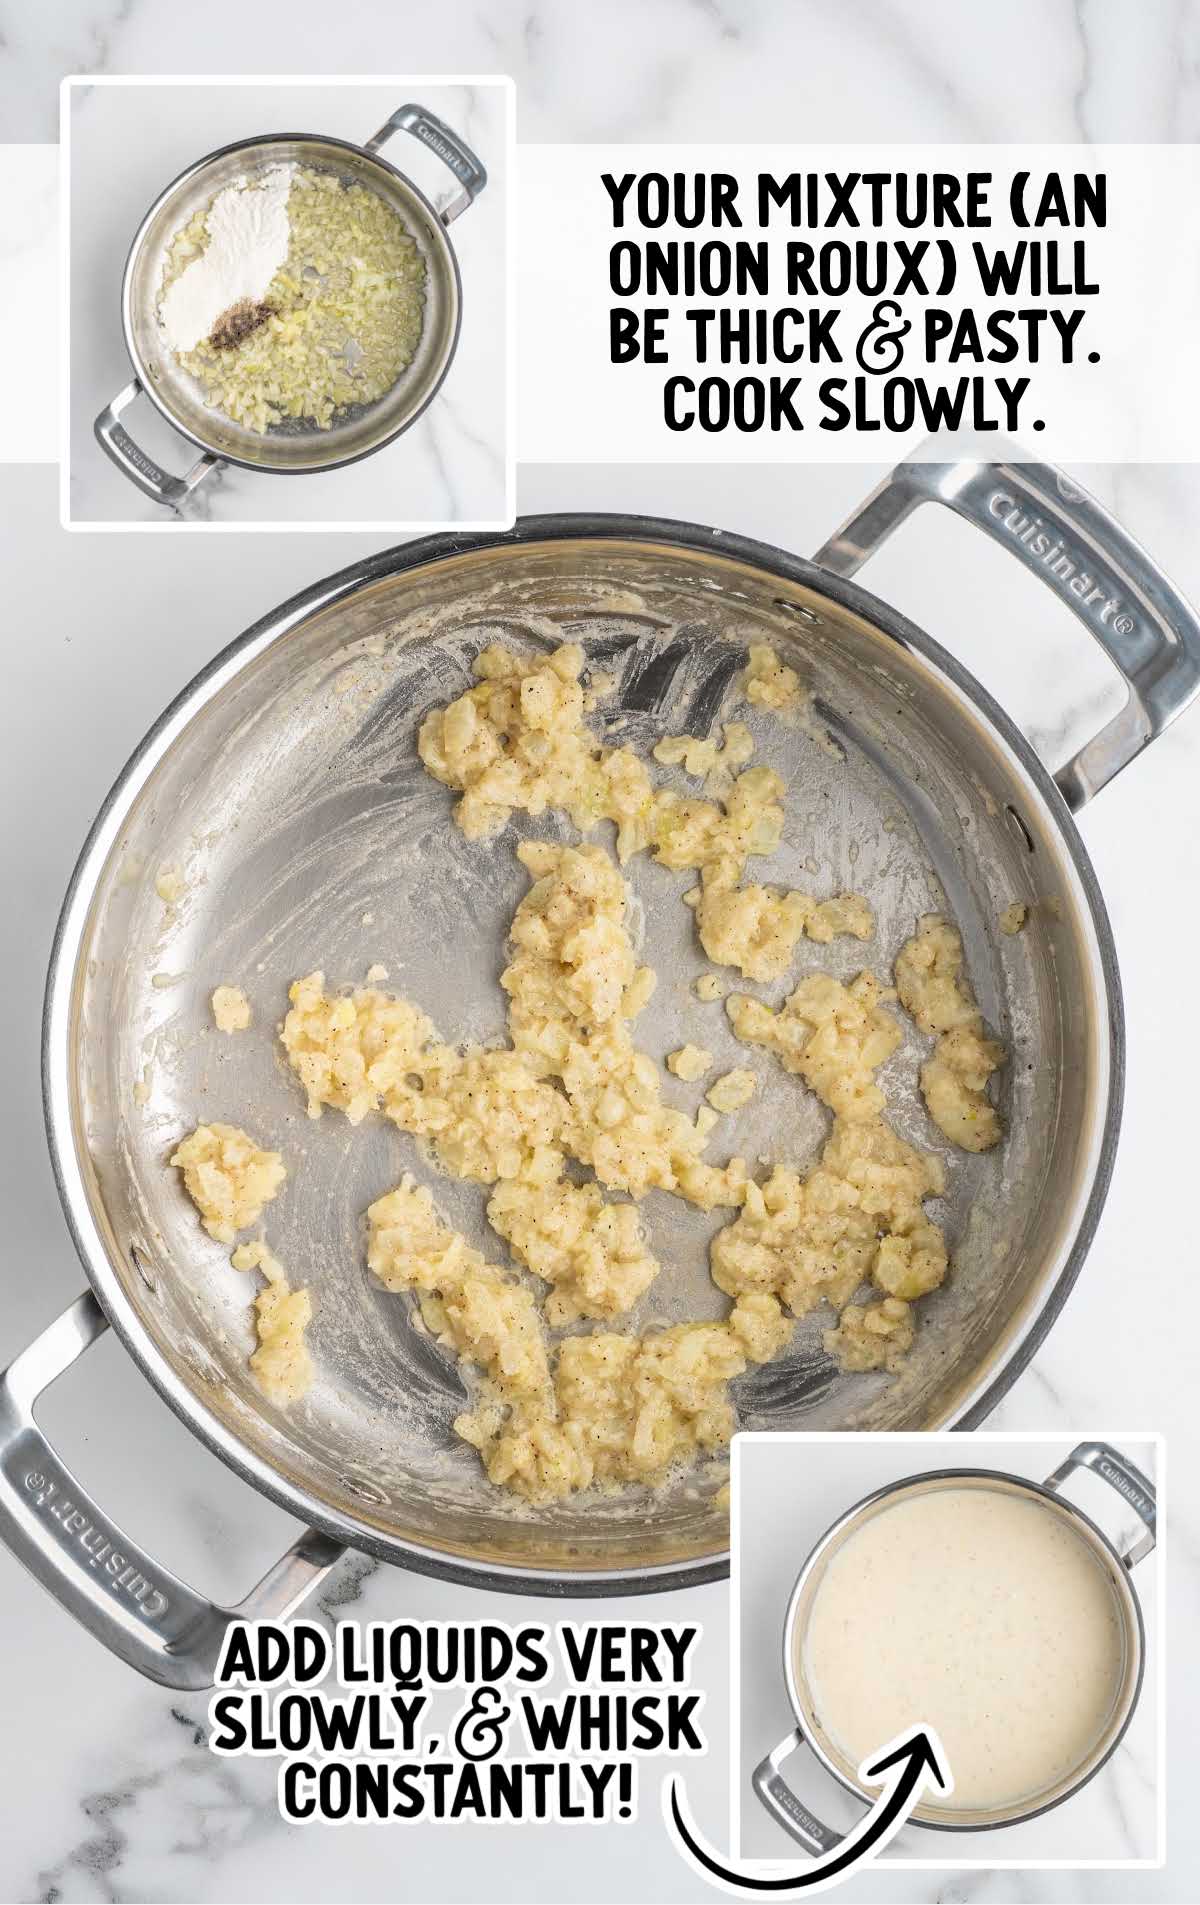
- In a medium saucepan, melt butter over medium heat. Add diced onions and saute until onion is translucent (3 to 4 minutes).
- Add flour, salt, and pepper. Cook, stirring constantly, until the flour mixture begins to brown (3 to 4 minutes).
- Slowly stir or whisk chicken broth and whole milk into the flour mixture. Stir constantly while pouring just a bit at a time to make a smooth mixture.
- Continue cooking over medium heat, stirring constantly to ensure milk does not burn on the bottom of the pan. Cook until mixture begins to bubble and thicken slightly (about 5 minutes). Remove from heat.
- Stir in cream cheese, frozen vegetables, and diced chicken. Stir to mix evenly.
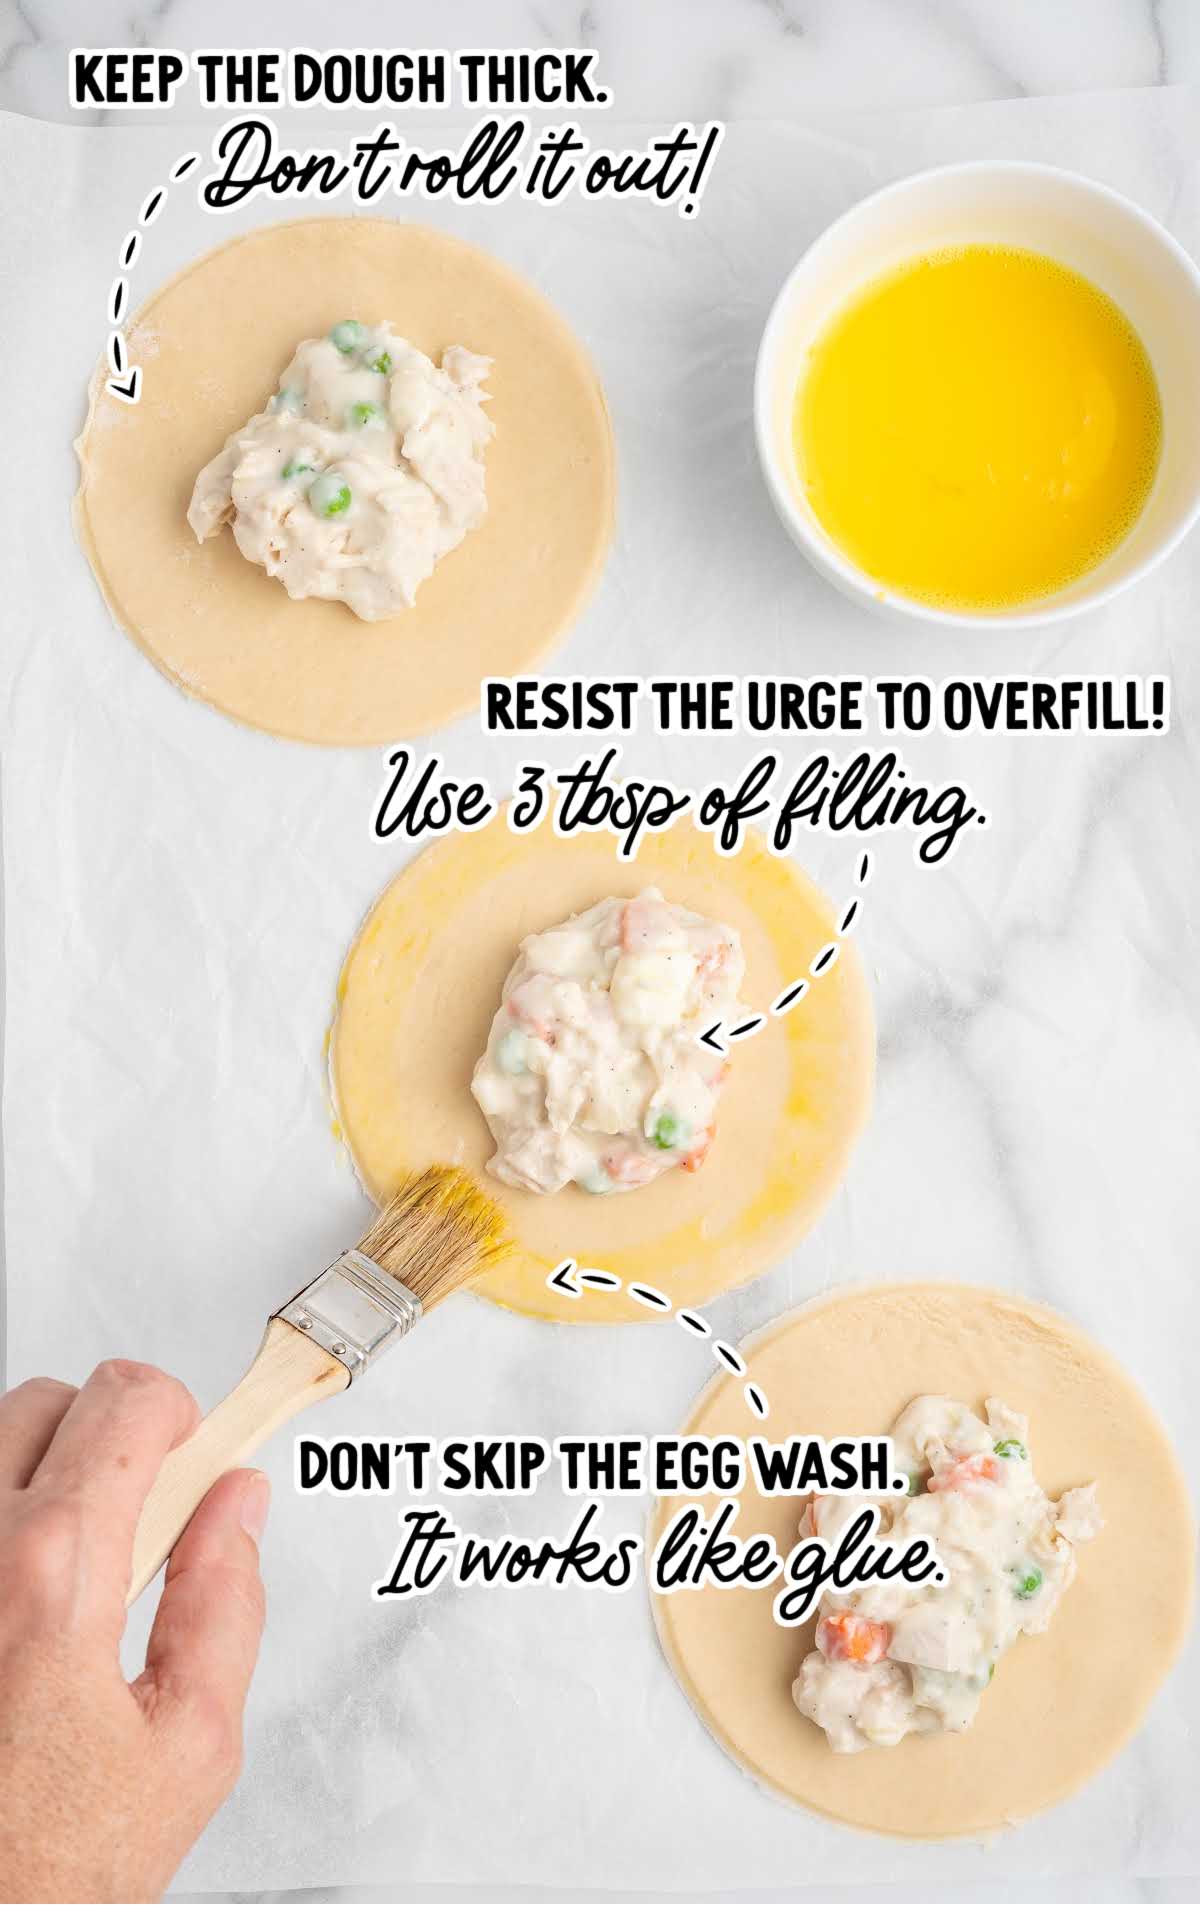
- Prepare pie crusts by removing pie crust from packaging. Unroll one crust on a lightly floured surface. It is important to keep the crusts thick enough to hold the pie filling, so I did not roll the crusts out any thinner than they came in the package. Use a bowl, placed upside down, to cut out two circles from the dough. Gently gather together the scraps, roll out just enough to cut two additional circles (you may even need to do one at a time).
- Place three crust circles onto a baking sheet sprayed with non-stick cooking spray.
- Place a scoop of filling into the center of the circle.
- Use a fork to beat the egg yolk with water.
- Brush a bit of the egg yolk wash around the edge of the circle to help the sides seal. Now, fold the pie crust in half to form a crescent shape. Press down (work from the outer edge in) and then crimp with your fingers or a fork to seal the edges. Brush the whole hand pie with the egg wash. Use a fork to poke a few holes in the top of the pies.
- Bake for 10 to 12 minutes or until the pies are golden brown and the crust is crispy. The filling is already cooked so we’re really just cooking the crust here.
Notes
- If the crusts are too thin, the pie will split apart during baking.
- Only a couple of tablespoons of the filling mixture will fit in the pie. Do not overfill.
- The egg yolk wash will give the hand pies a nice golden sheen. It is also really helpful to seal the edges together. For the best seal, be sure that the filling and/or any excess flour is away from the edge of the dough.
- I found that pinching the edges of the dough provides a better seal than crimping with the tines of a fork; just make sure you press edges together well so that they seal.
Nutrition


Comments
Gloria says
Love, love, love these!