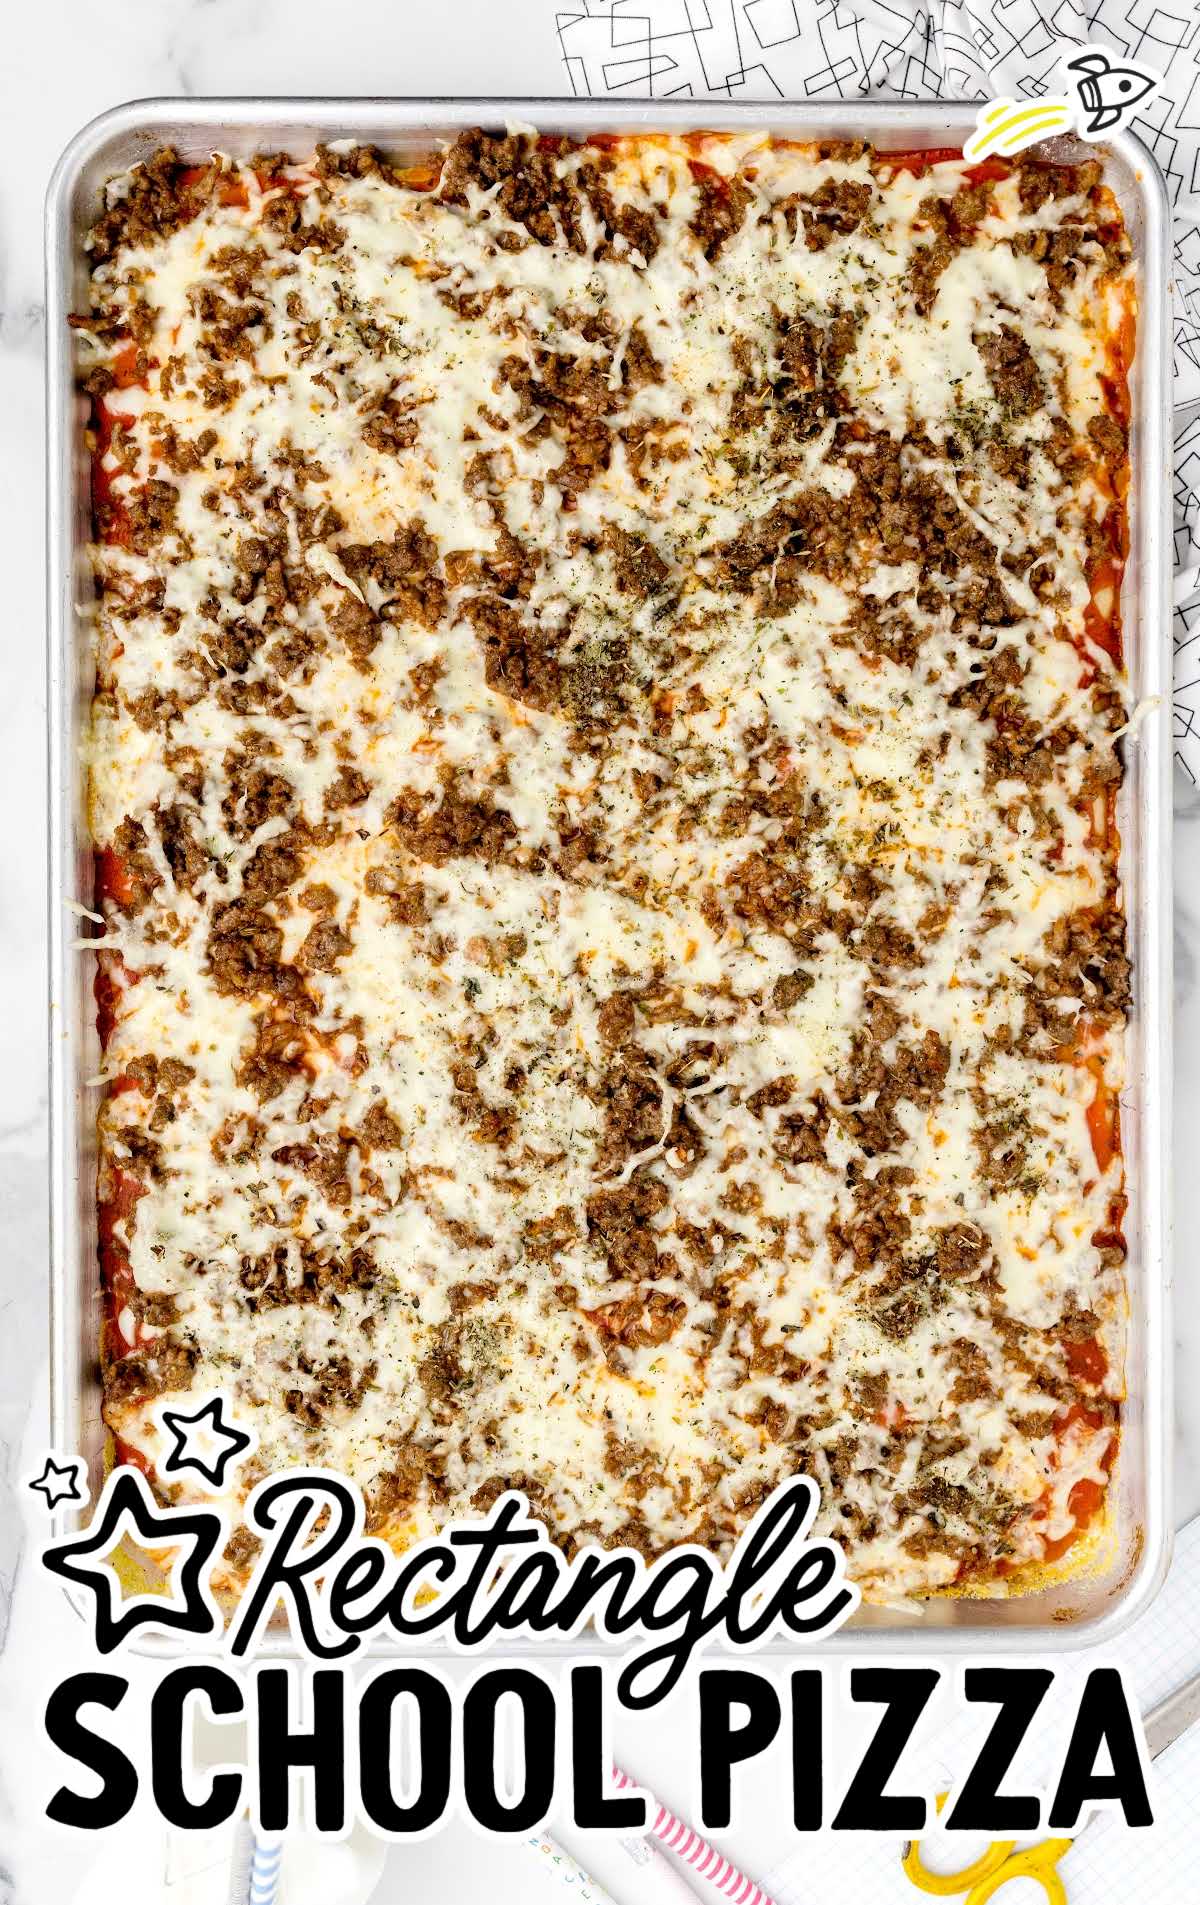
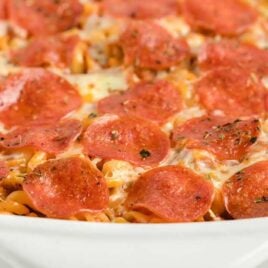
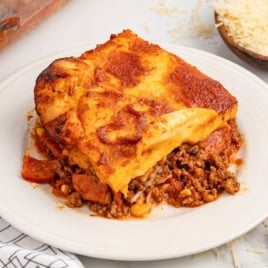
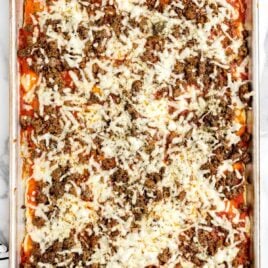
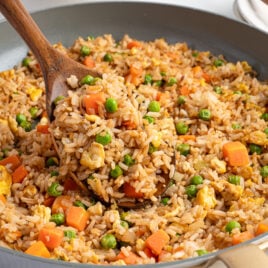
This rectangle school pizza transports you right back to the school cafeteria on pizza day. The thin crust, tomato sauce, meaty toppings, and rectangular slices will take you down memory lane with their easily recognizable flavor.
Rectangle School Pizza Ingredients
You’ll need:
For The Pizza Crust:
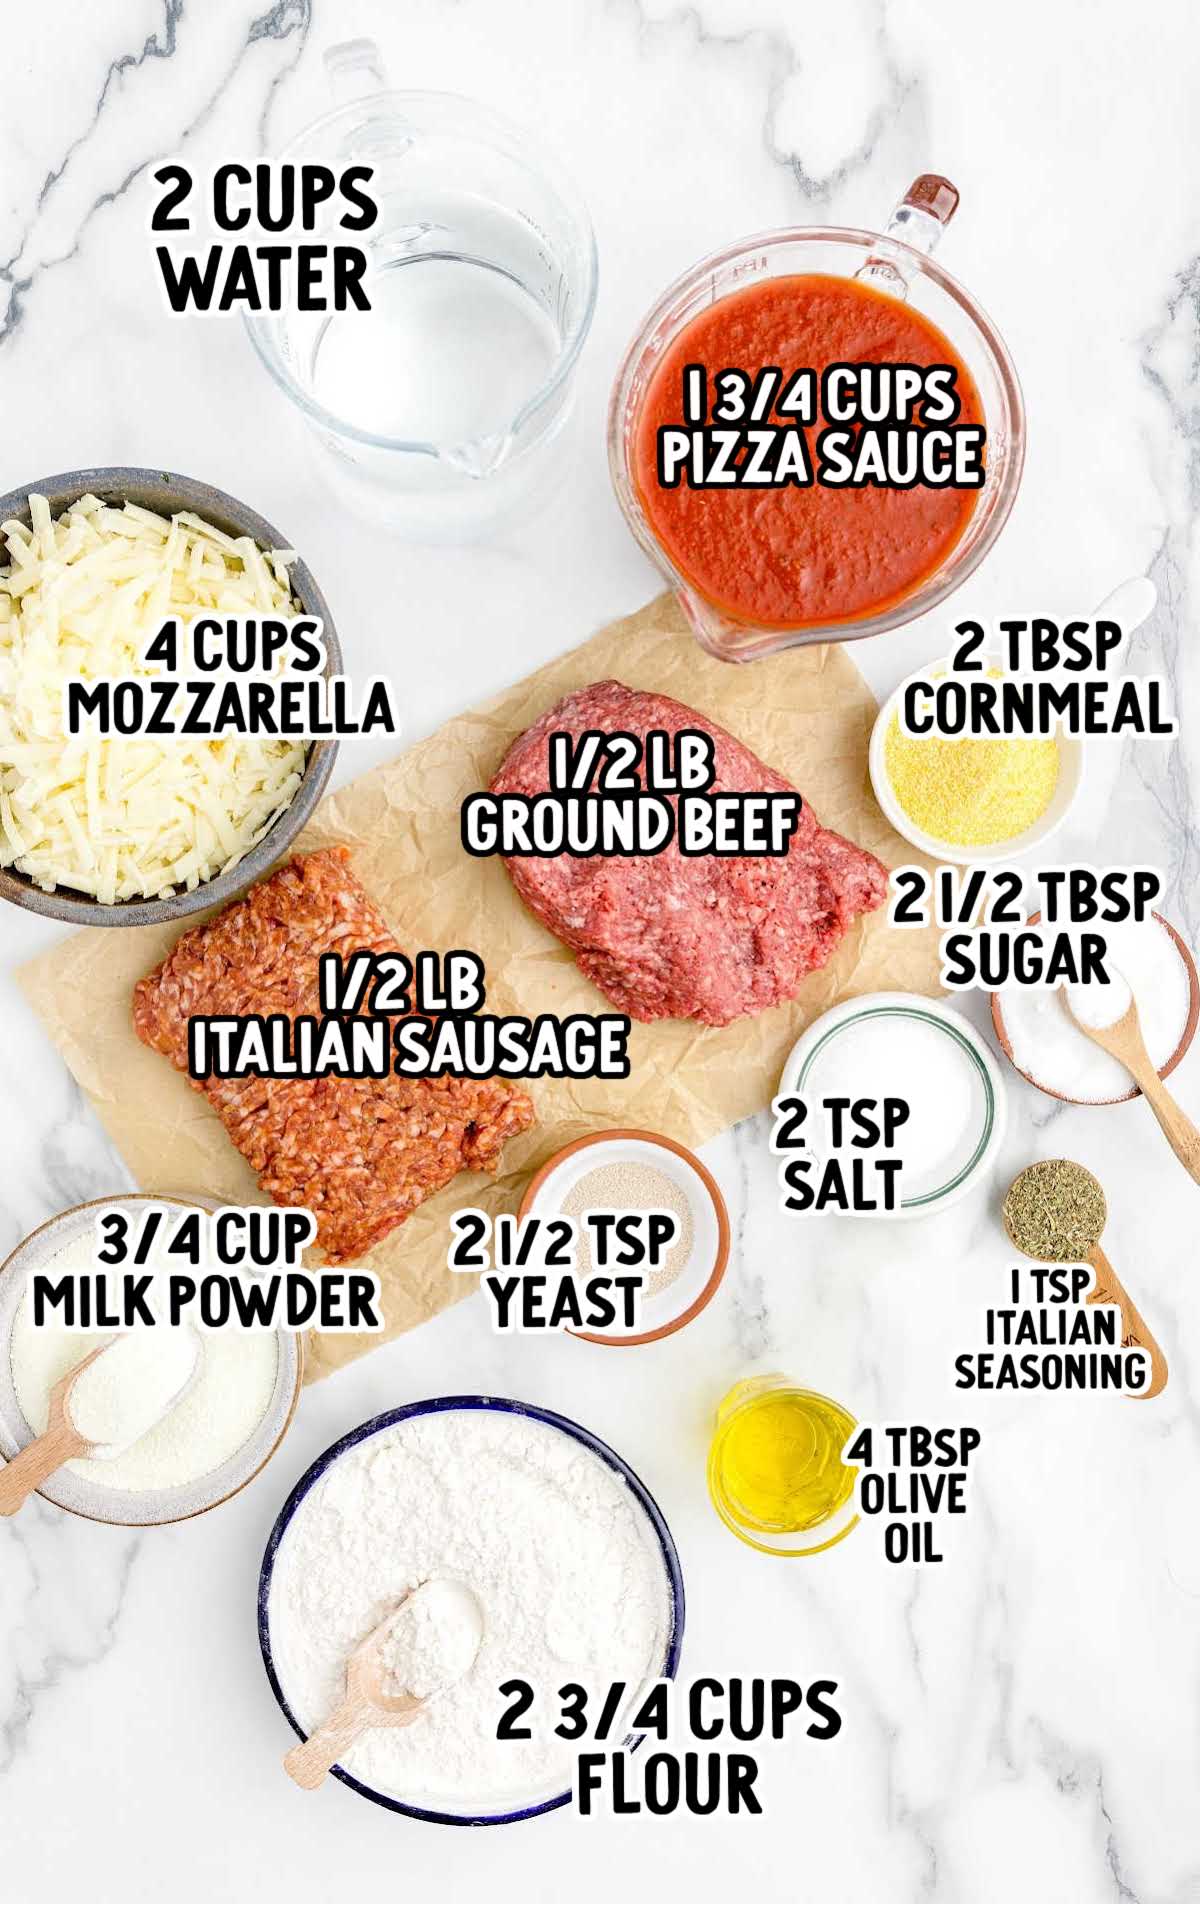
- 4 tablespoons of extra virgin olive oil, divided in half
- 2 tablespoons of yellow cornmeal
- 2¾ cups of all-purpose flour
- ¾ cup of instant nonfat dry milk powder
- 2 teaspoons of salt
- 2½ tablespoons of granulated sugar
- 1 (0.25-ounce) packet of rapid-rise yeast (2½ teaspoons), also known as instant yeast
- 1⅔ to 2 cups of warm (105°F) water
PRO TIP:
Instant nonfat dry milk powder is used for this recipe because it adds richness, and tenderness, to the pizza crust without adding additional liquid to the recipe. The milk also helps with the browning of the crust.
The crust for this recipe is meant to be soft and tender, not chewy like a traditional pizza.
The instant nonfat dry milk powder is shelf-stable so bakers can keep it as a pantry staple when they want to make tender loaves of white sandwich bread, chewy cookies, or this pourable pizza crust
For The Topping:
- ½ pound of lean ground beef
- ½ pound of mild Italian sausage
- 1¾ cups of pizza sauce
- 4 cups of freshly shredded mozzarella
- 1 teaspoon of dried Italian seasoning
Substitutions And Additions
TOPPINGS: You can substitute or add pepperoni or any other favorite toppings you wish on this old-school pizza.
MEAT: You can omit the meat topping and make it a cheese pizza if you prefer.
CHEESE: You can use a bag of pre-shredded mozzarella instead of freshly shredded to save time.
MILK: Skim milk powder can be substituted for nonfat dry milk in the pizza crust recipe.
FLOUR: We recommend that you use unbleached all-purpose flour. Bleached flours tend to be softer and don’t always perform consistently.
We love the King Arthur brand if you can get it or any brand name unbleached all-purpose flour. I also find that generic brands do not perform well either.
How To Make This Rectangle School Pizza Recipe
For The Pizza Crust
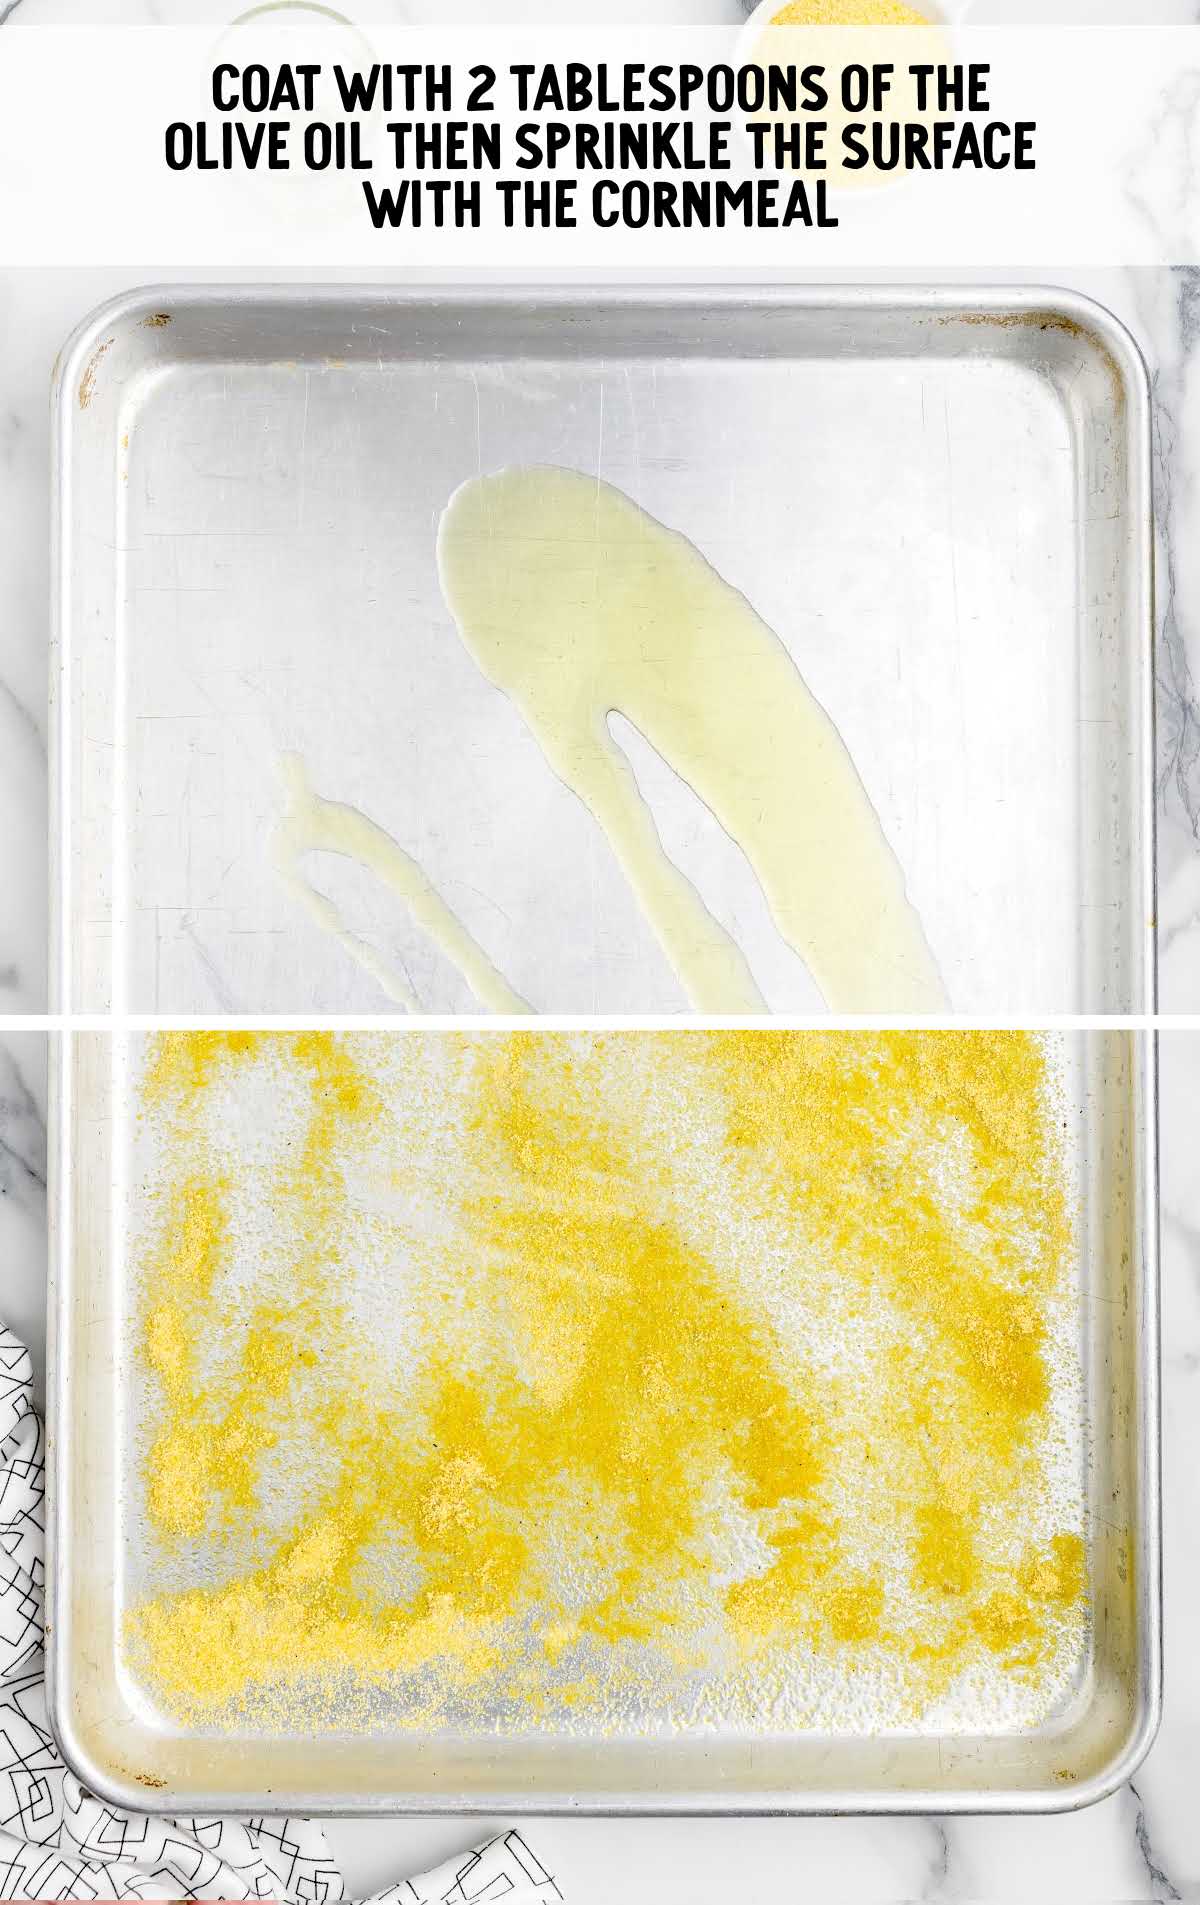
STEP ONE: Preheat the oven to 475°F.
Coat the entire surface of an 18×13 rimmed baking sheet (also known as a half sheet tray) with 2 tablespoons of the extra virgin olive oil, then sprinkle the surface with the cornmeal to keep the crust from sticking to the tray once baked. Set aside.
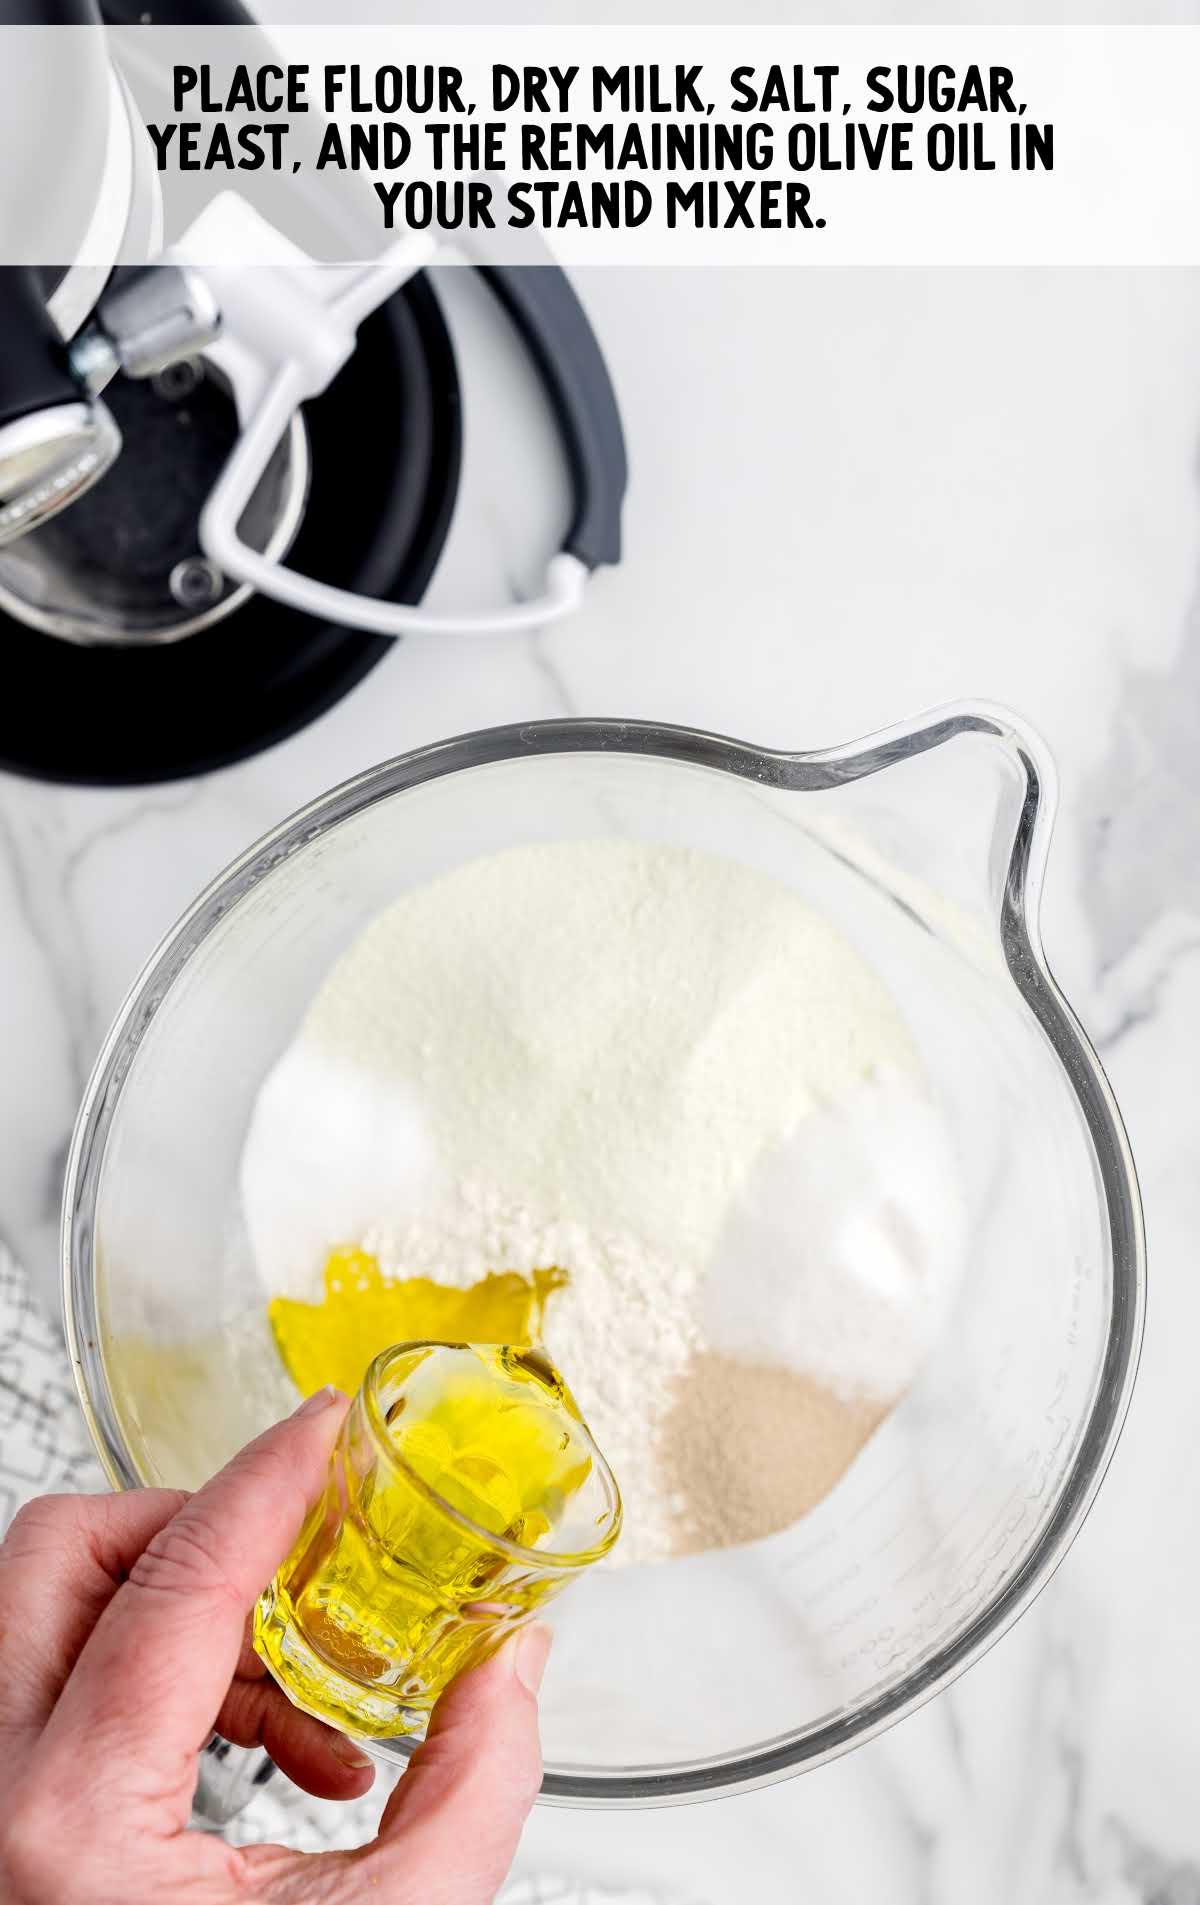
STEP TWO: In the bowl of a stand mixer with a paddle attachment, add the all-purpose flour, instant nonfat dry milk, salt, granulated sugar, quick-rise yeast, and the remaining 2 tablespoons extra virgin olive oil.
OUR RECIPE DEVELOPER SAYS
If you do not have rapid rise (also known as instant) yeast, you can substitute it with a packet of active dry yeast instead.
This is a standard yeast that can easily be found at your local grocery store in the baking aisle.
You will not add the active dry yeast directly to your bowl of dry ingredients, instead, you will add it to your warm water along with the granulated sugar and allow it to sit for three to four minutes or until it gets foamy.
You will then proceed with the recipe at step three for the pizza crust.
STEP THREE: With the mixer on low, slowly pour the warm water into your dry ingredients.
Start with the 1⅔ cups, then you may need to add a tablespoon at a time, but no more than the two cups, to get a pourable consistency to your dough.
My dough took a tablespoon or so more than the 1⅔ but did not take the entire two cups.
PRO TIP:
It’s really important to make sure your water is the right temperature (105°F) so that the yeast is activated.
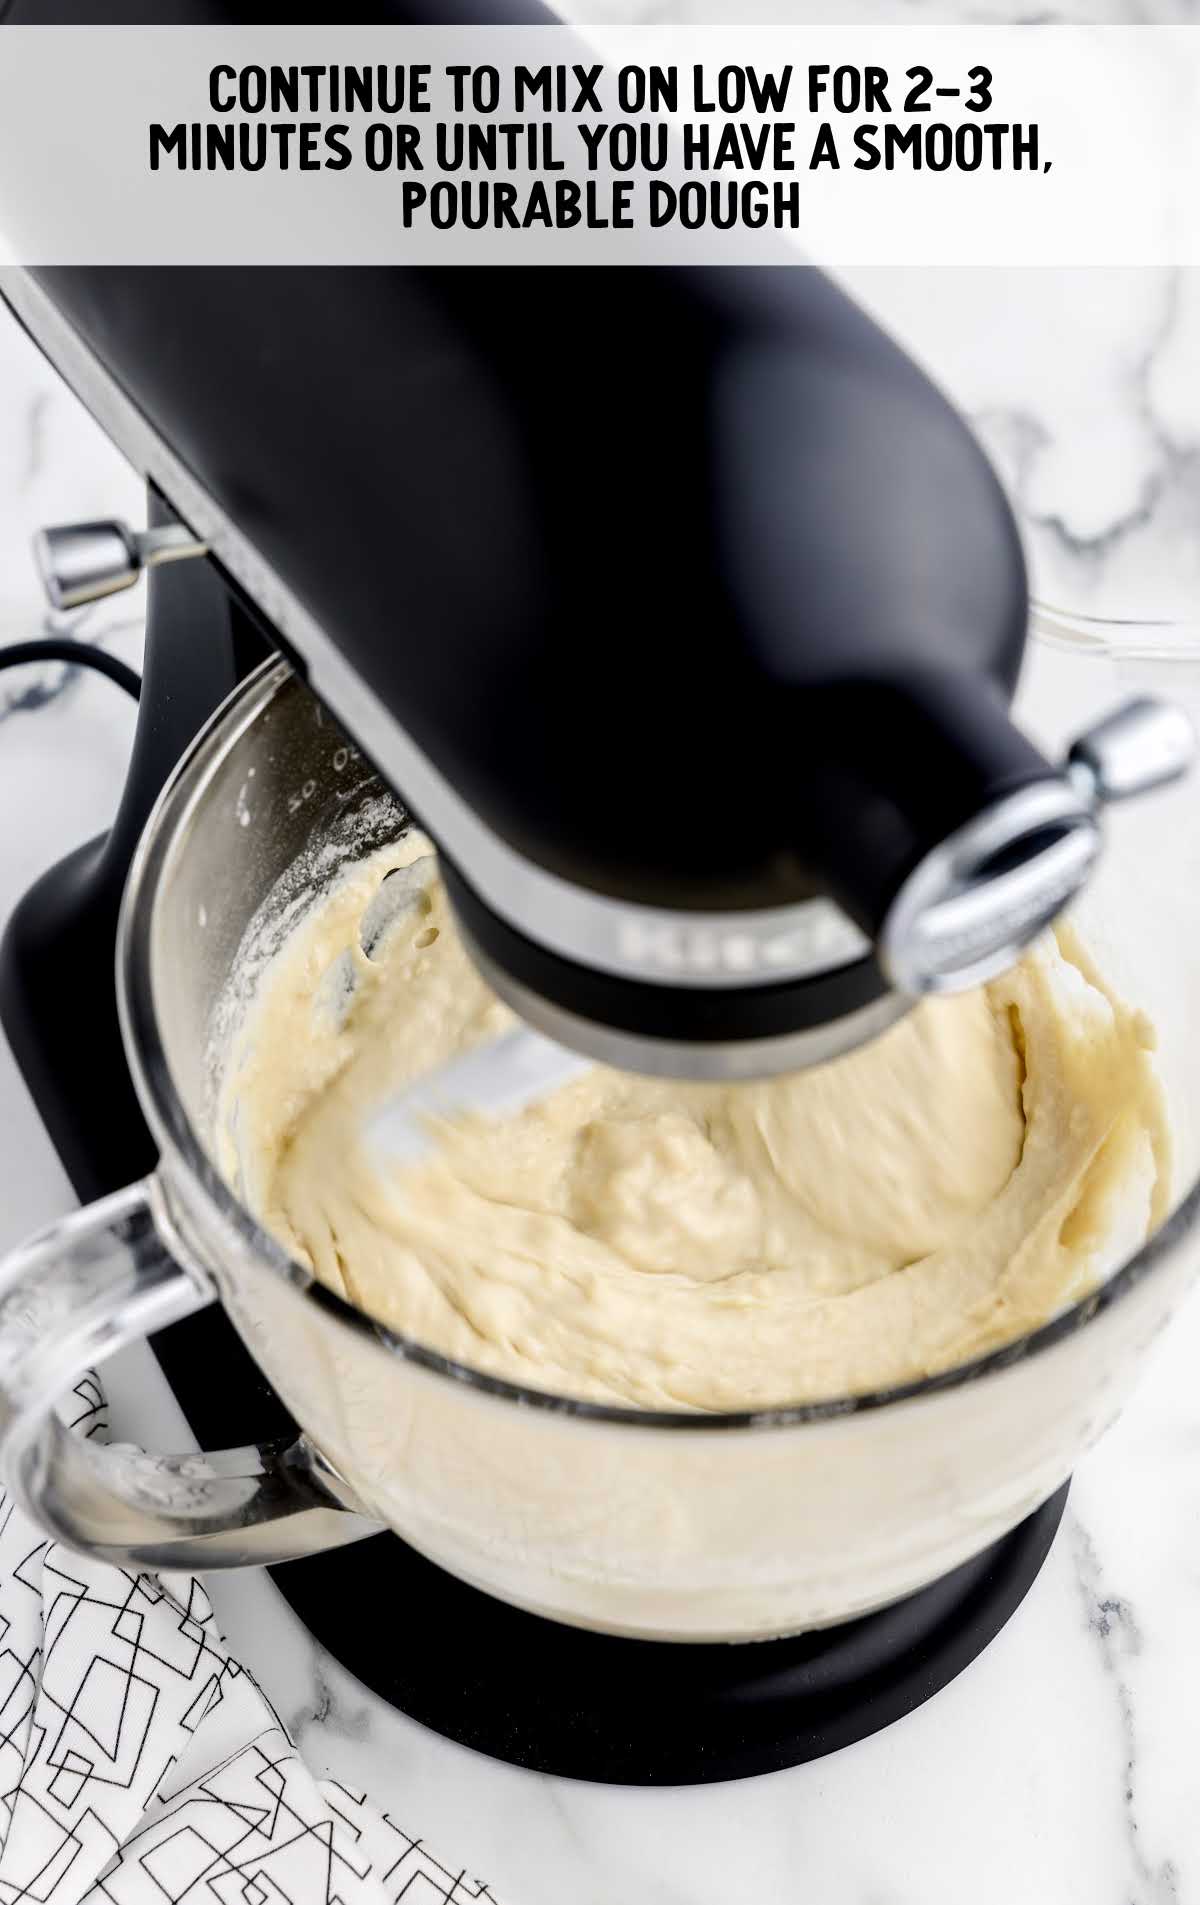
STEP FOUR: Continue to mix on low for two to three minutes or until you have a smooth, pourable dough.
A few small lumps are fine. It should be the consistency of a thick pancake batter.
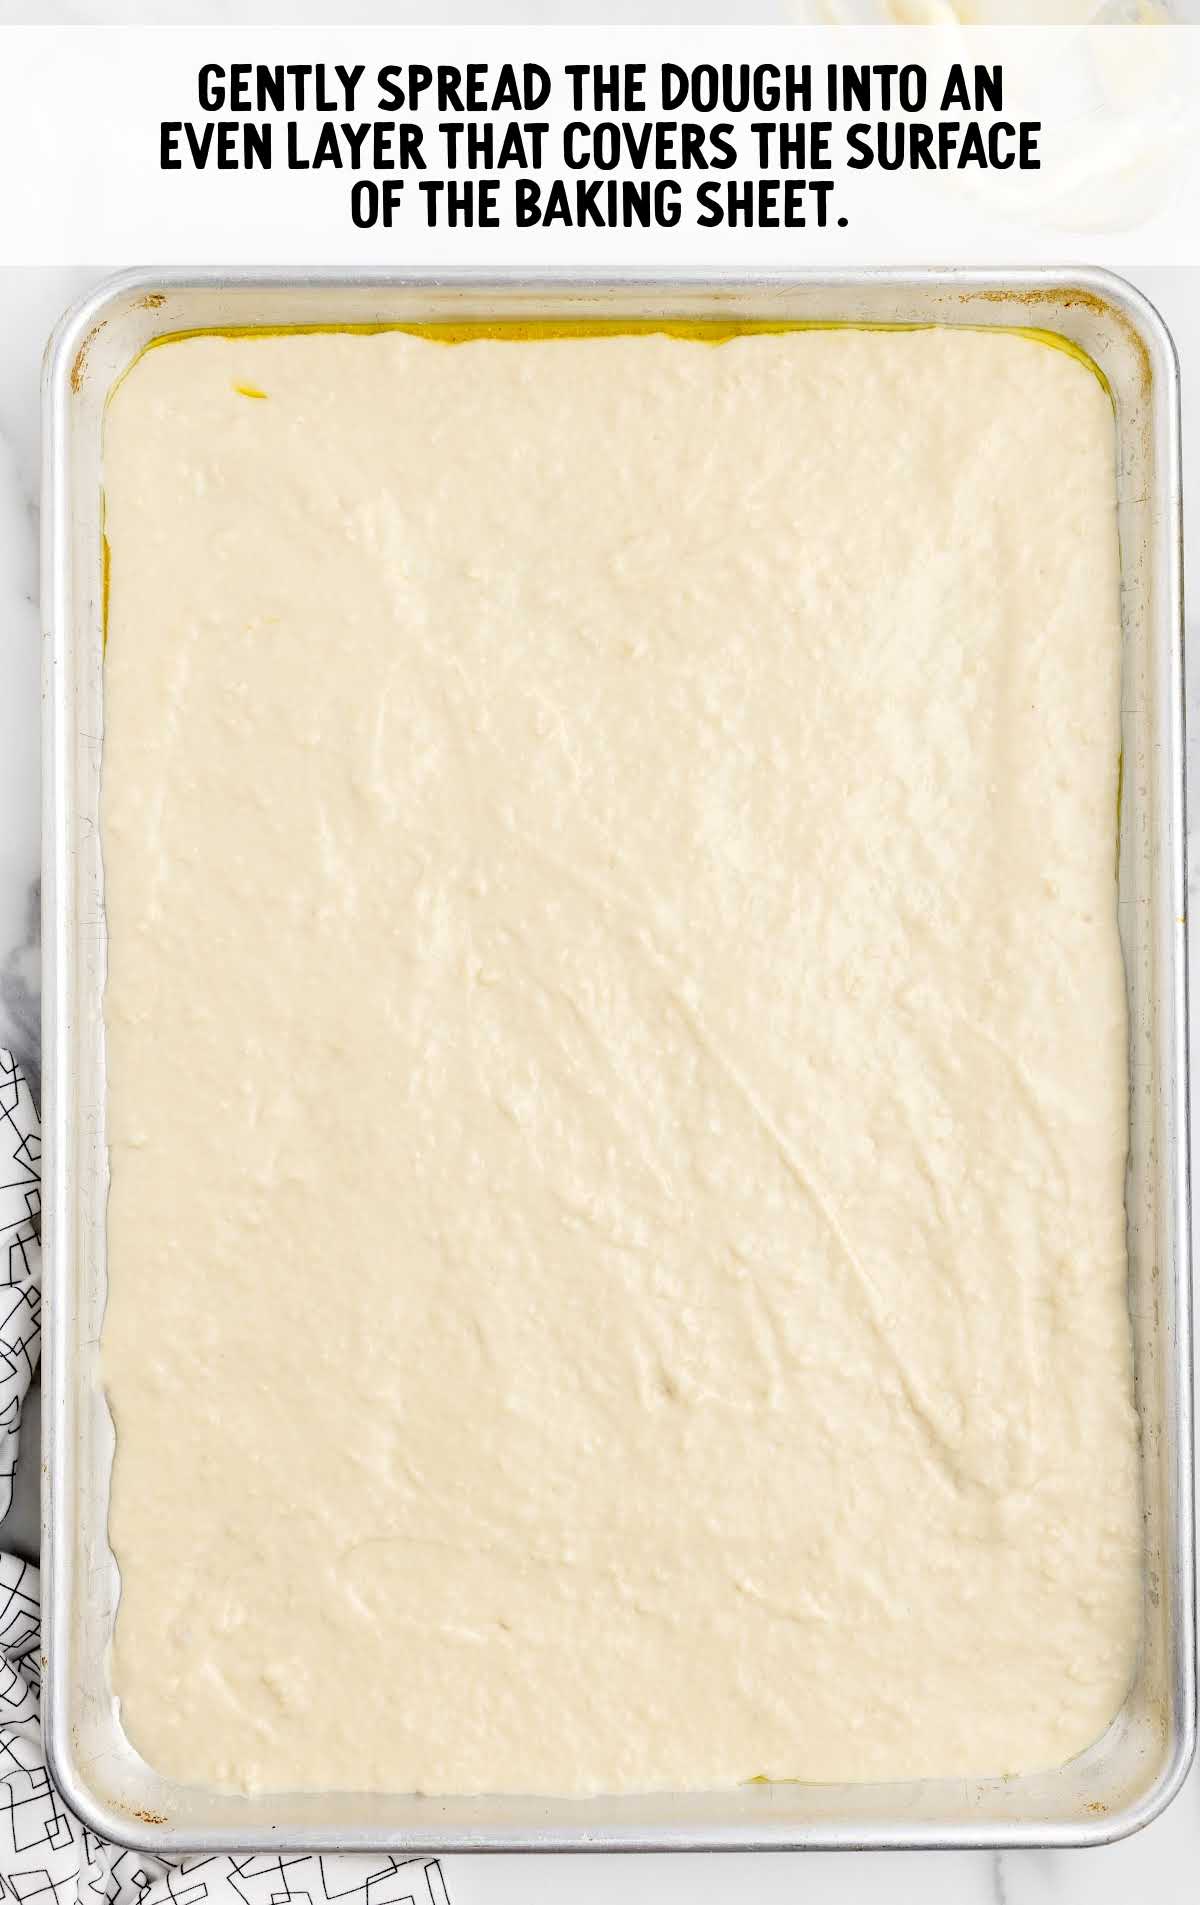
STEP FIVE: Pour the batter into the prepared rimmed baking sheet and gently spread the dough into an even layer that covers the entire surface of the baking sheet.
Allow the dough to rest in the pan for 10 minutes.
STEP SIX: Bake the pizza crust for 10 to 12 minutes, or just until it starts to get golden, on the lower rack of your oven.
STEP SEVEN: While your pizza crust is baking, you can prepare your toppings.
For The Topping
STEP ONE: In a large 10-inch skillet over medium-high heat, cook the ground beef and mild Italian sausage for seven to eight minutes or until no pink remains.
Be sure to break the meat up as it cooks. That way, it looks more like the topping on school pizzas.
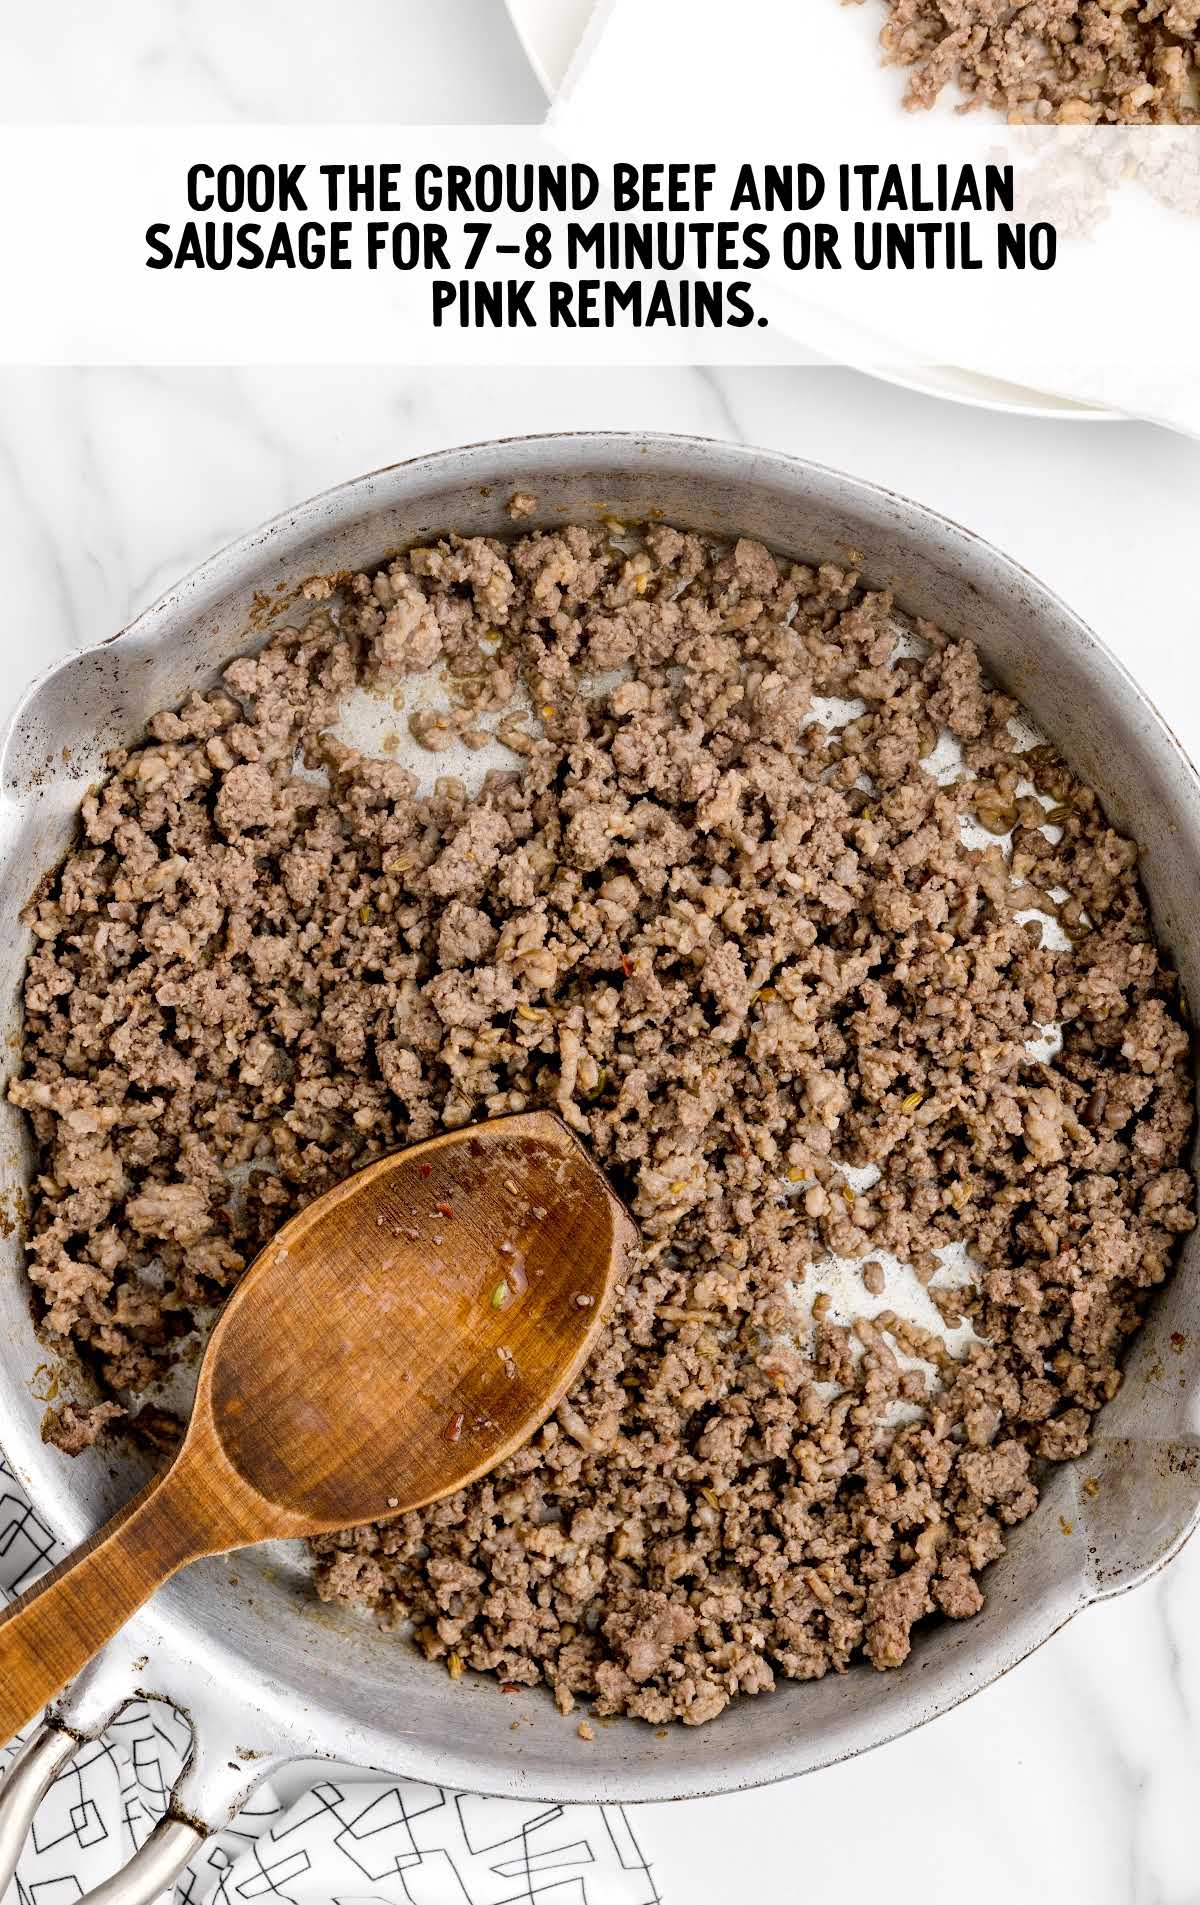
STEP TWO: Transfer the cooked meats to a paper towel-lined plate and set it aside.
STEP THREE: Once the crust has baked for 10 to 12 minutes, remove it from the oven and evenly spread the pizza sauce over the top of the crust.
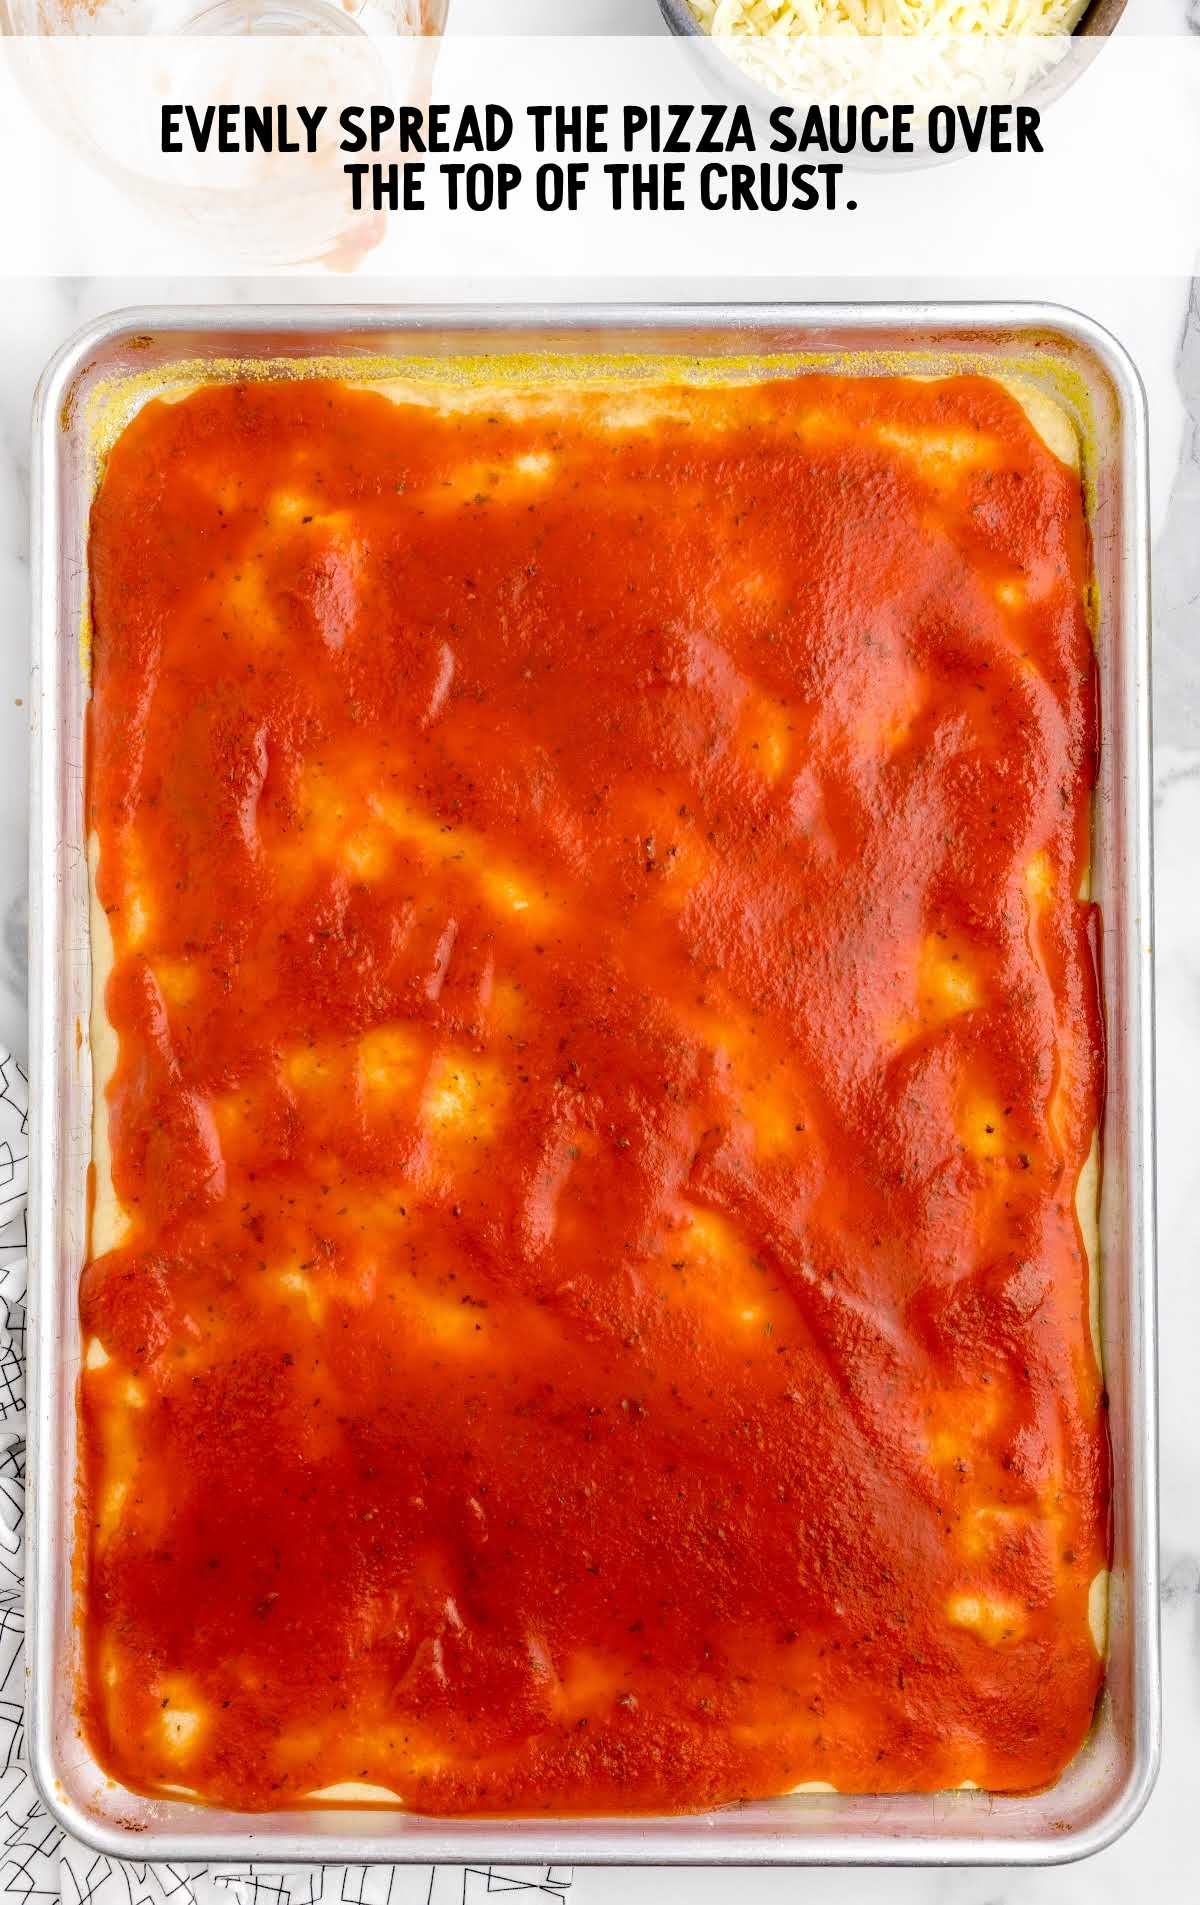
PRO TIP:
To get that authentic look you remember so well from school, spread the sauce almost right to the edge of the crust.
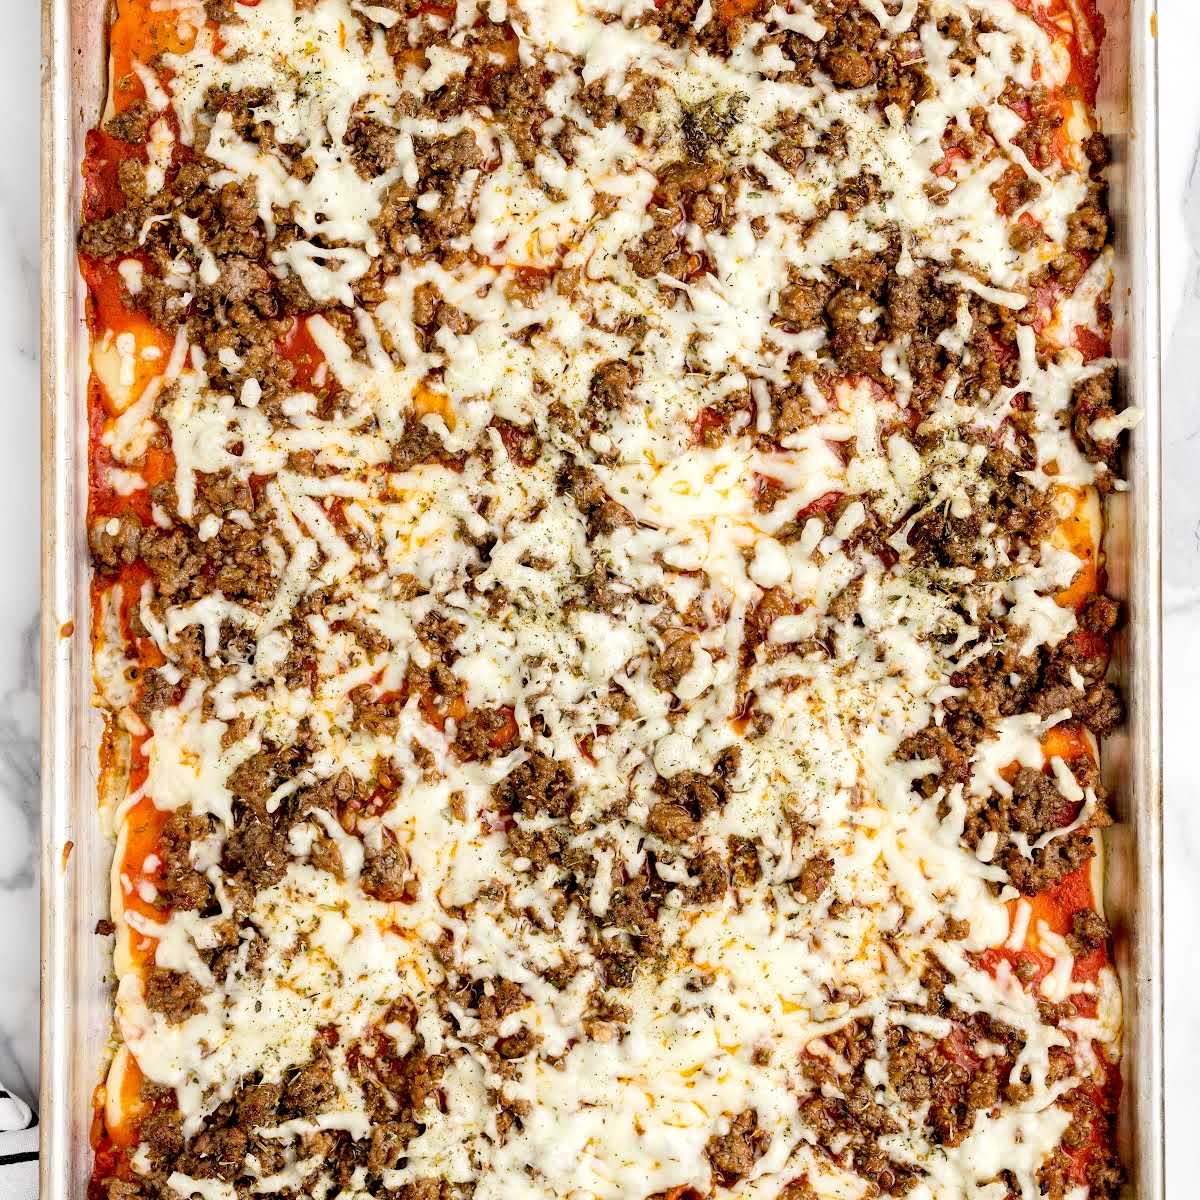
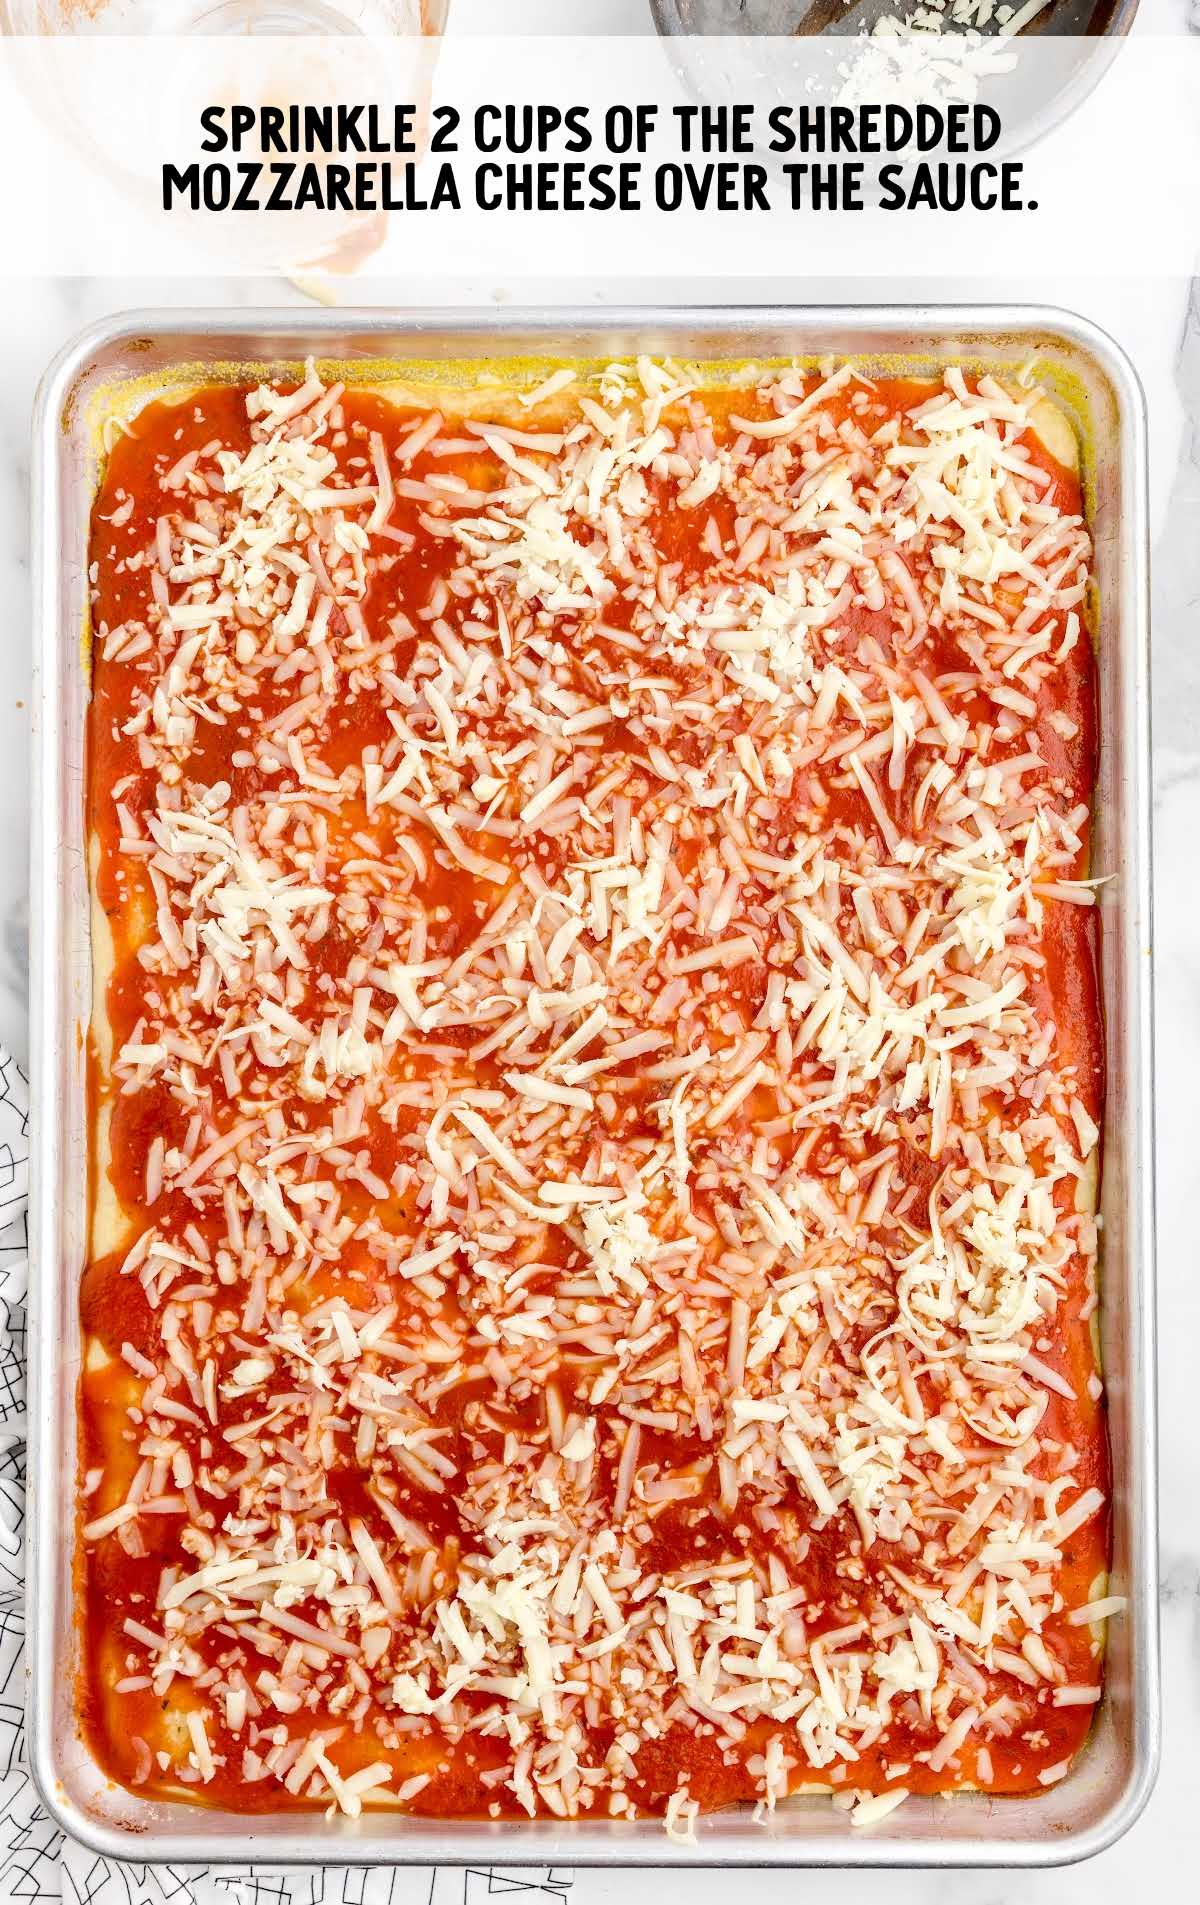
STEP FOUR: Sprinkle two cups of the shredded mozzarella cheese over the sauce.
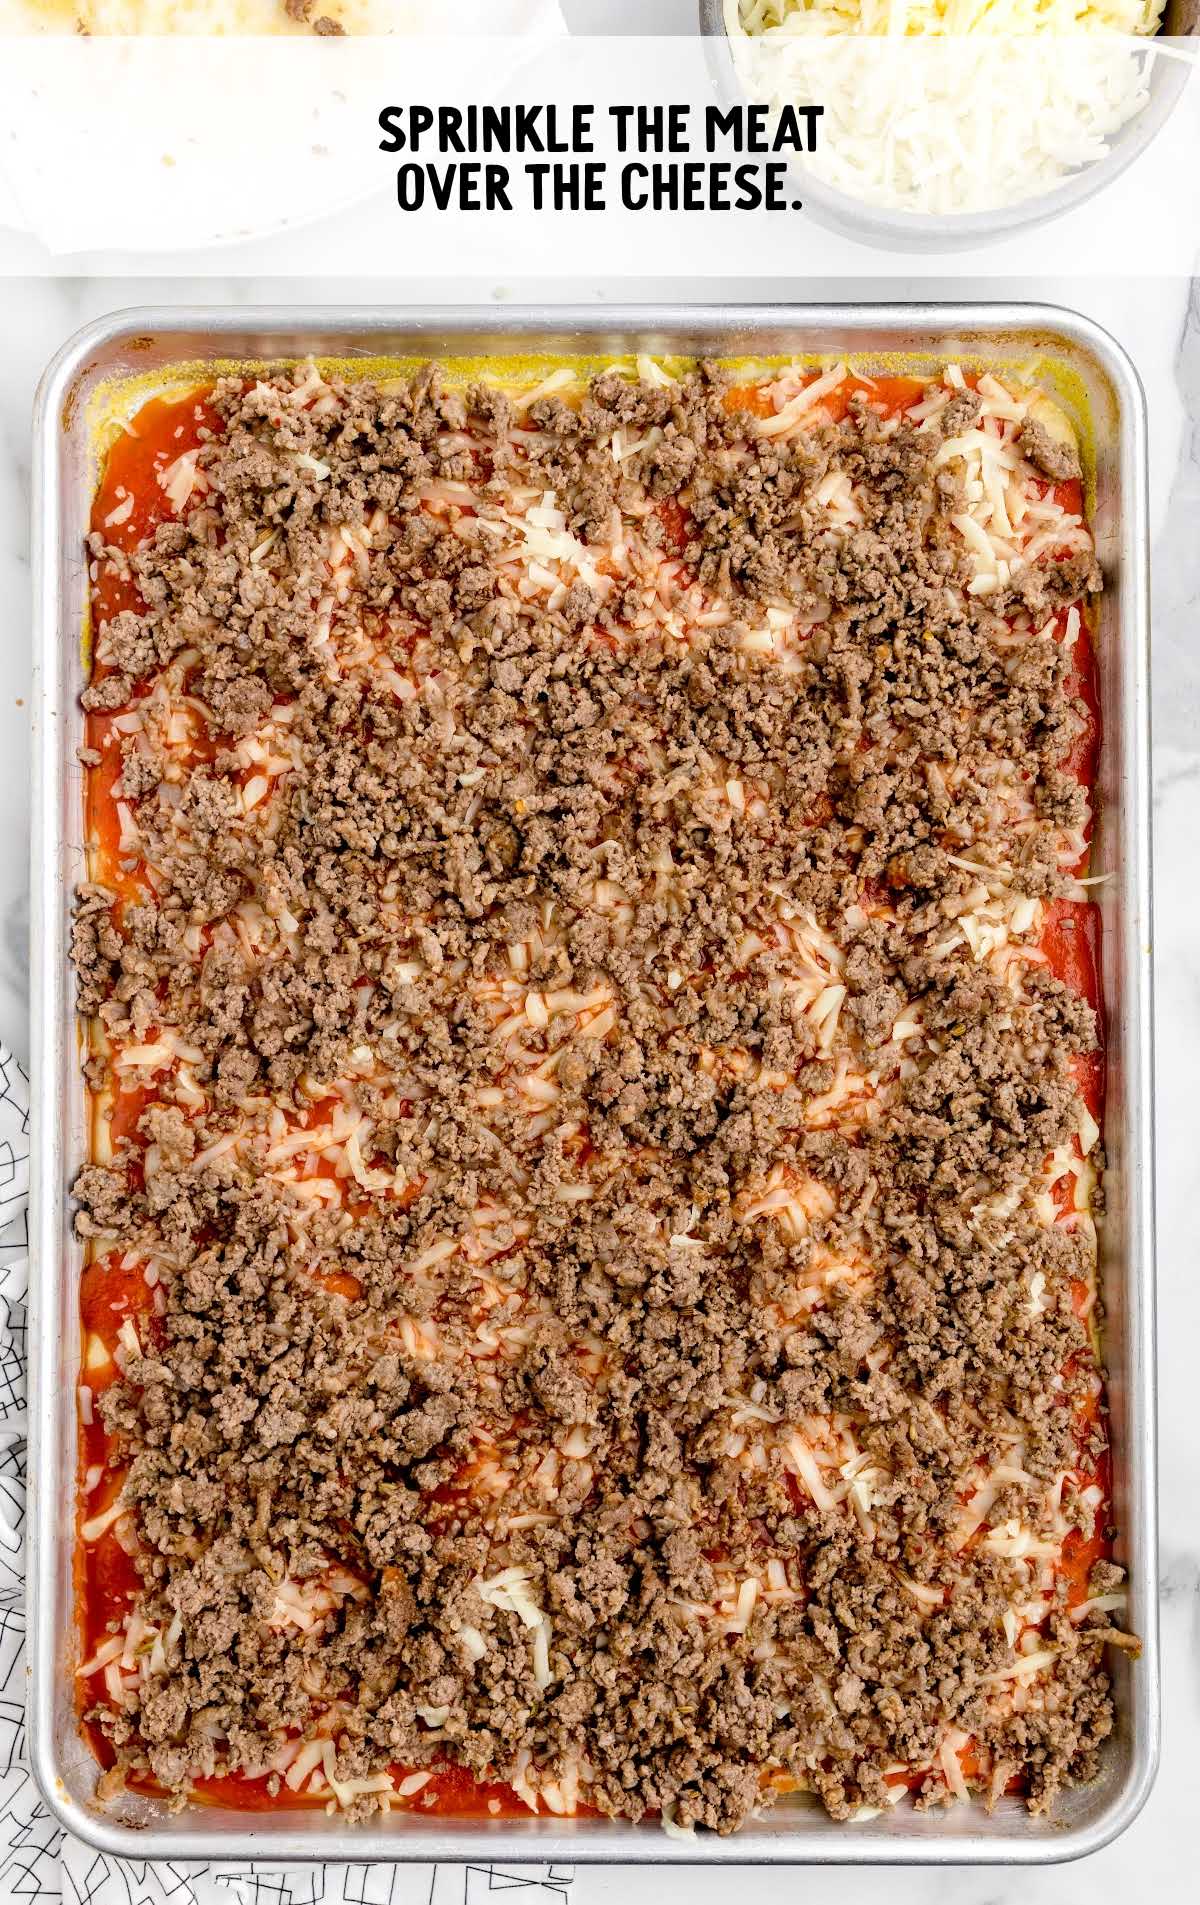
STEP FIVE: Next, evenly sprinkle the cooked meat topping over the cheese.
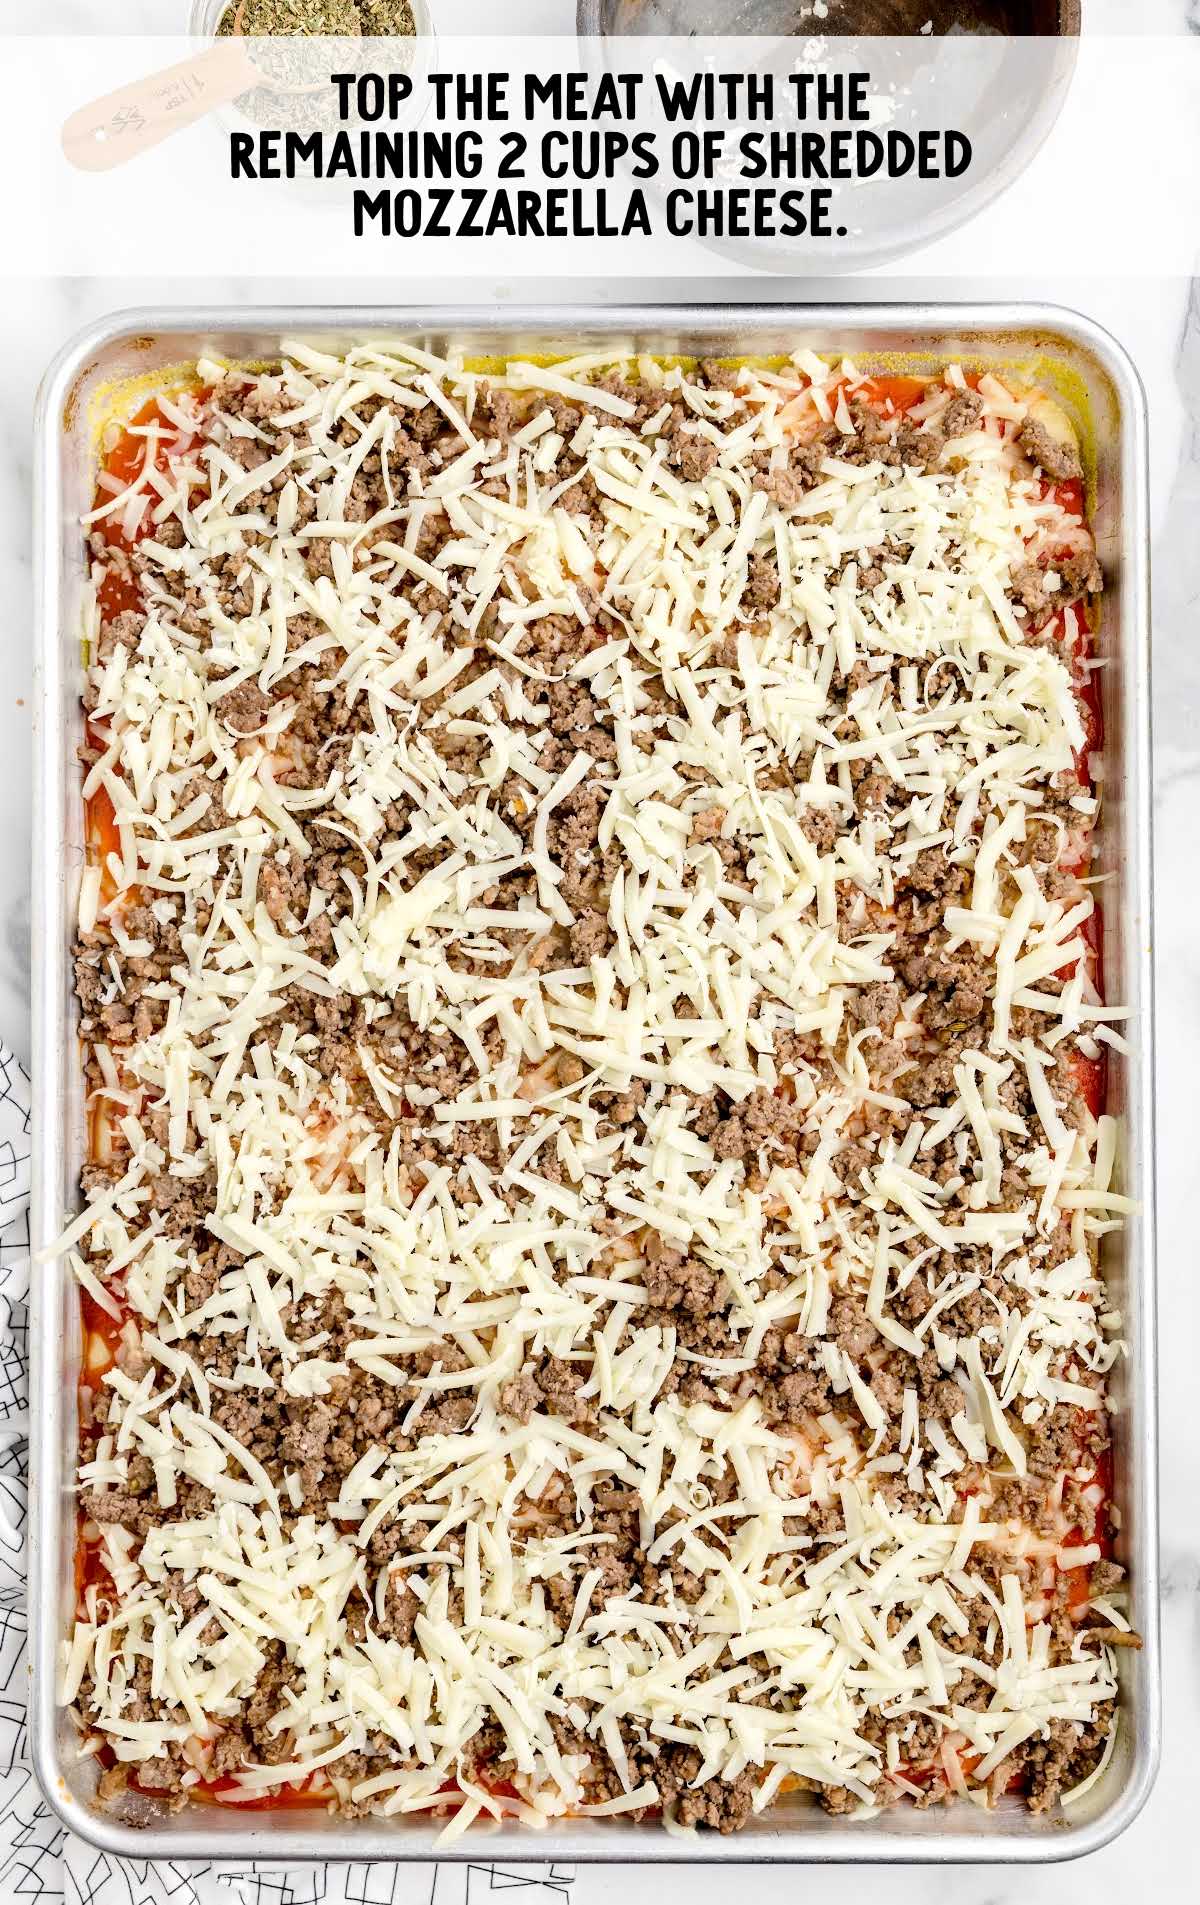
STEP SIX: Top the meat with the remaining two cups of shredded mozzarella cheese.
STEP SEVEN: Sprinkle the dried Italian seasoning over the cheese.
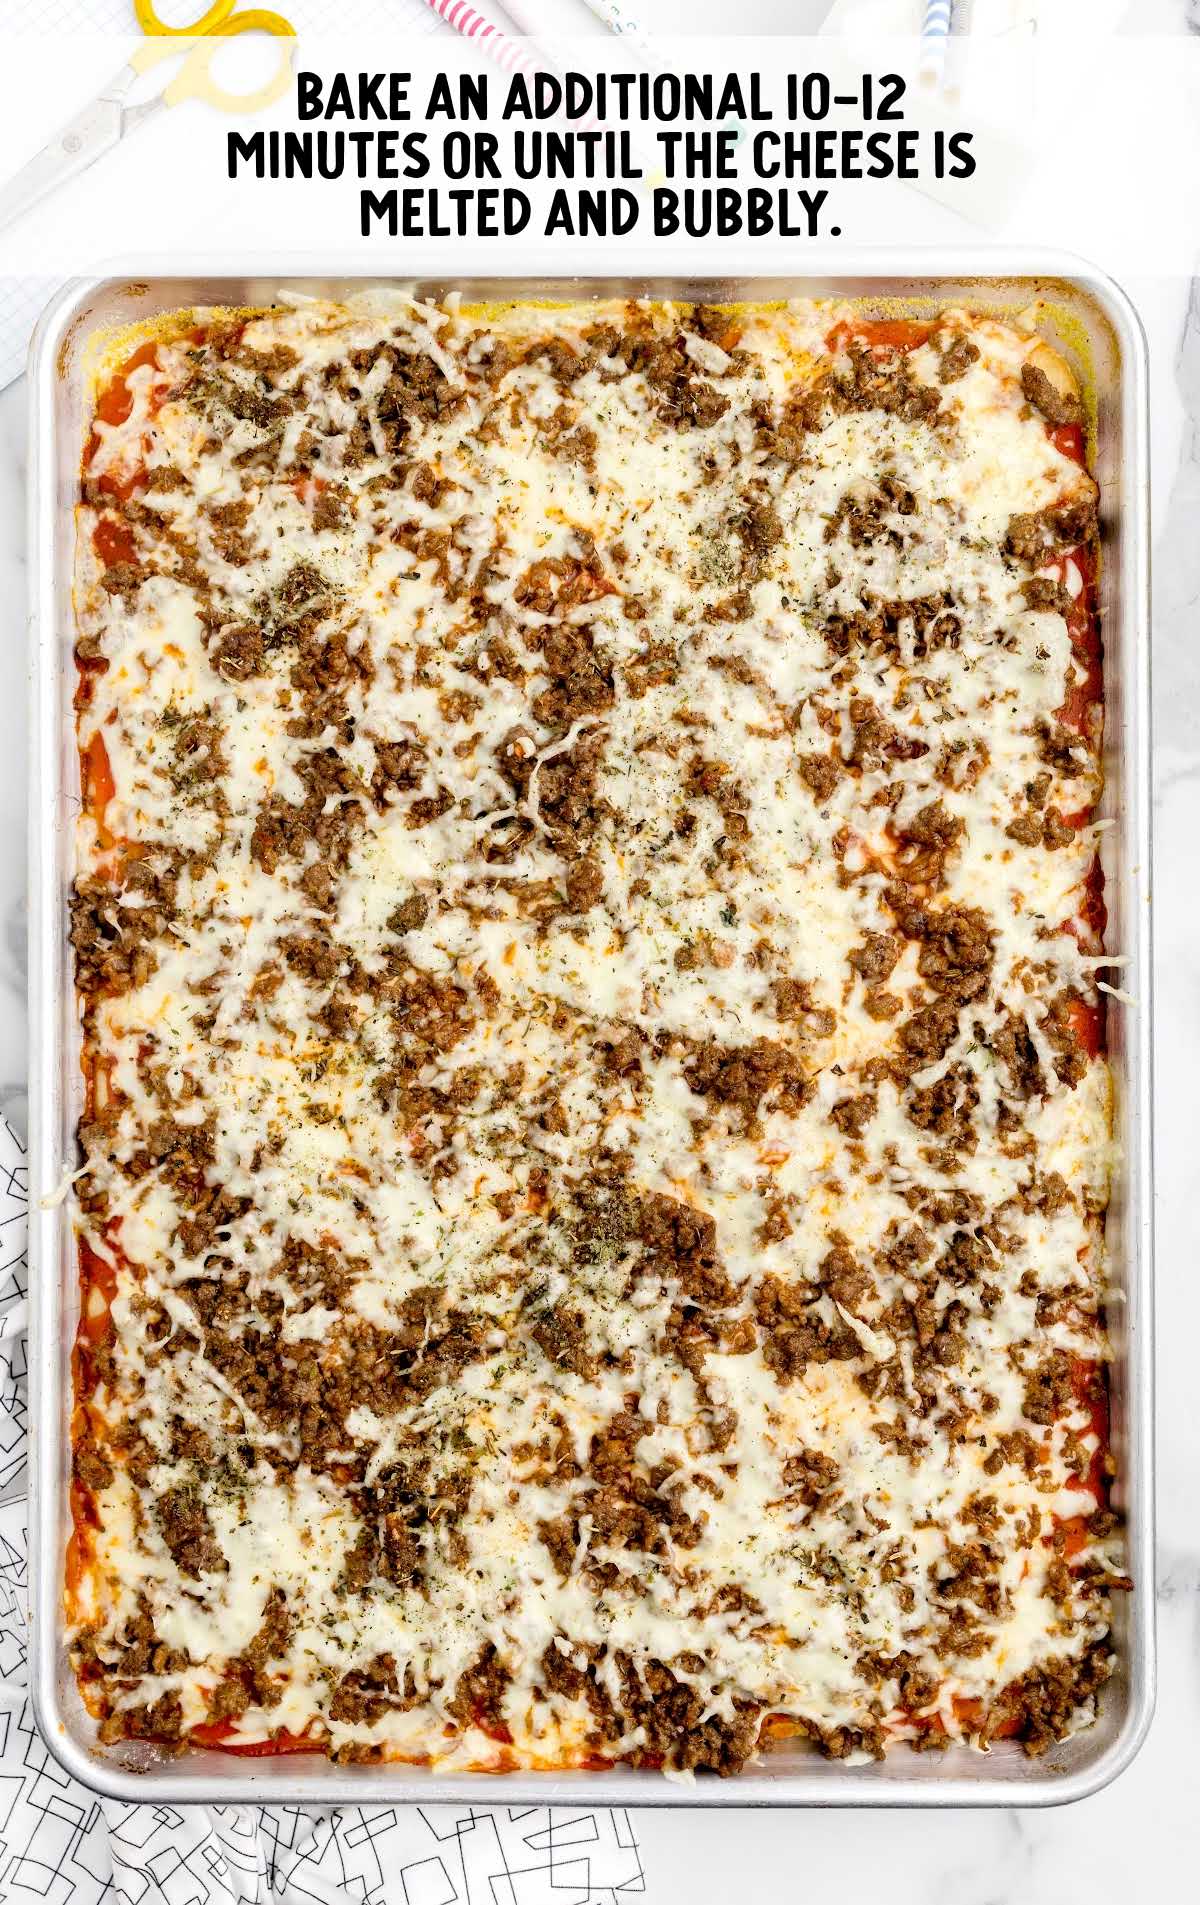
STEP EIGHT: Return the pizza to the oven and bake, on the middle oven rack, for an additional 10 to 12 minutes or until the cheese is melted and bubbly.
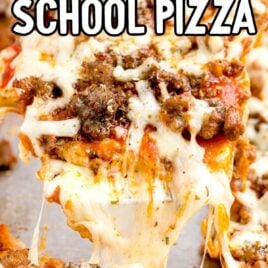
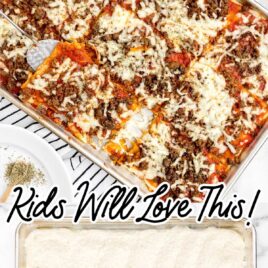
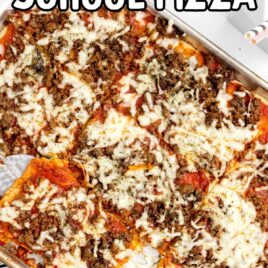
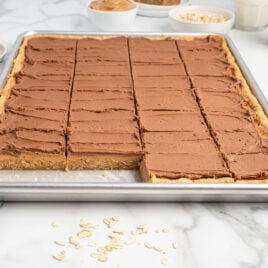
Carefully slice the pizza into 12 rectangular pieces.
PRO TIP:
If you have really small children, you can slice the pizza into smaller squares to make it more manageable.
How To Serve
This old-school rectangle pizza will be a hit with the kids if you send it in their school lunches. Add chocolate milk to drink, and it will be just like the old days.
Don’t forget a couple of Snickerdoodle cookies for dessert, and those hungry tummies will be happy.
For more school lunch classics, check out our lunch lady brownies. For another nostalgic recipe, our orange Julius will take you right back to a hot summer day. Find dozens of recipes that will remind you of childhood on my copycat recipes page.
MORE PIZZA RECIPES
Storage
IN THE FRIDGE: Store any leftovers of this rectangle school lunch pizza recipe in an airtight container in the refrigerator for up to two days.
IN THE FREEZER: You can freeze the pizza for up to two months.
Bake the crust as directed above, spread the sauce, and add the meat and cheese, but do not bake it. Allow it to rest and completely cool.
Cover with plastic wrap and then with aluminum foil.
When you are ready to bake, uncover the pizza and bake at 425°F until the topping is bubbly and slightly golden brown.
Slice into the rectangular shape slices and serve as directed above.
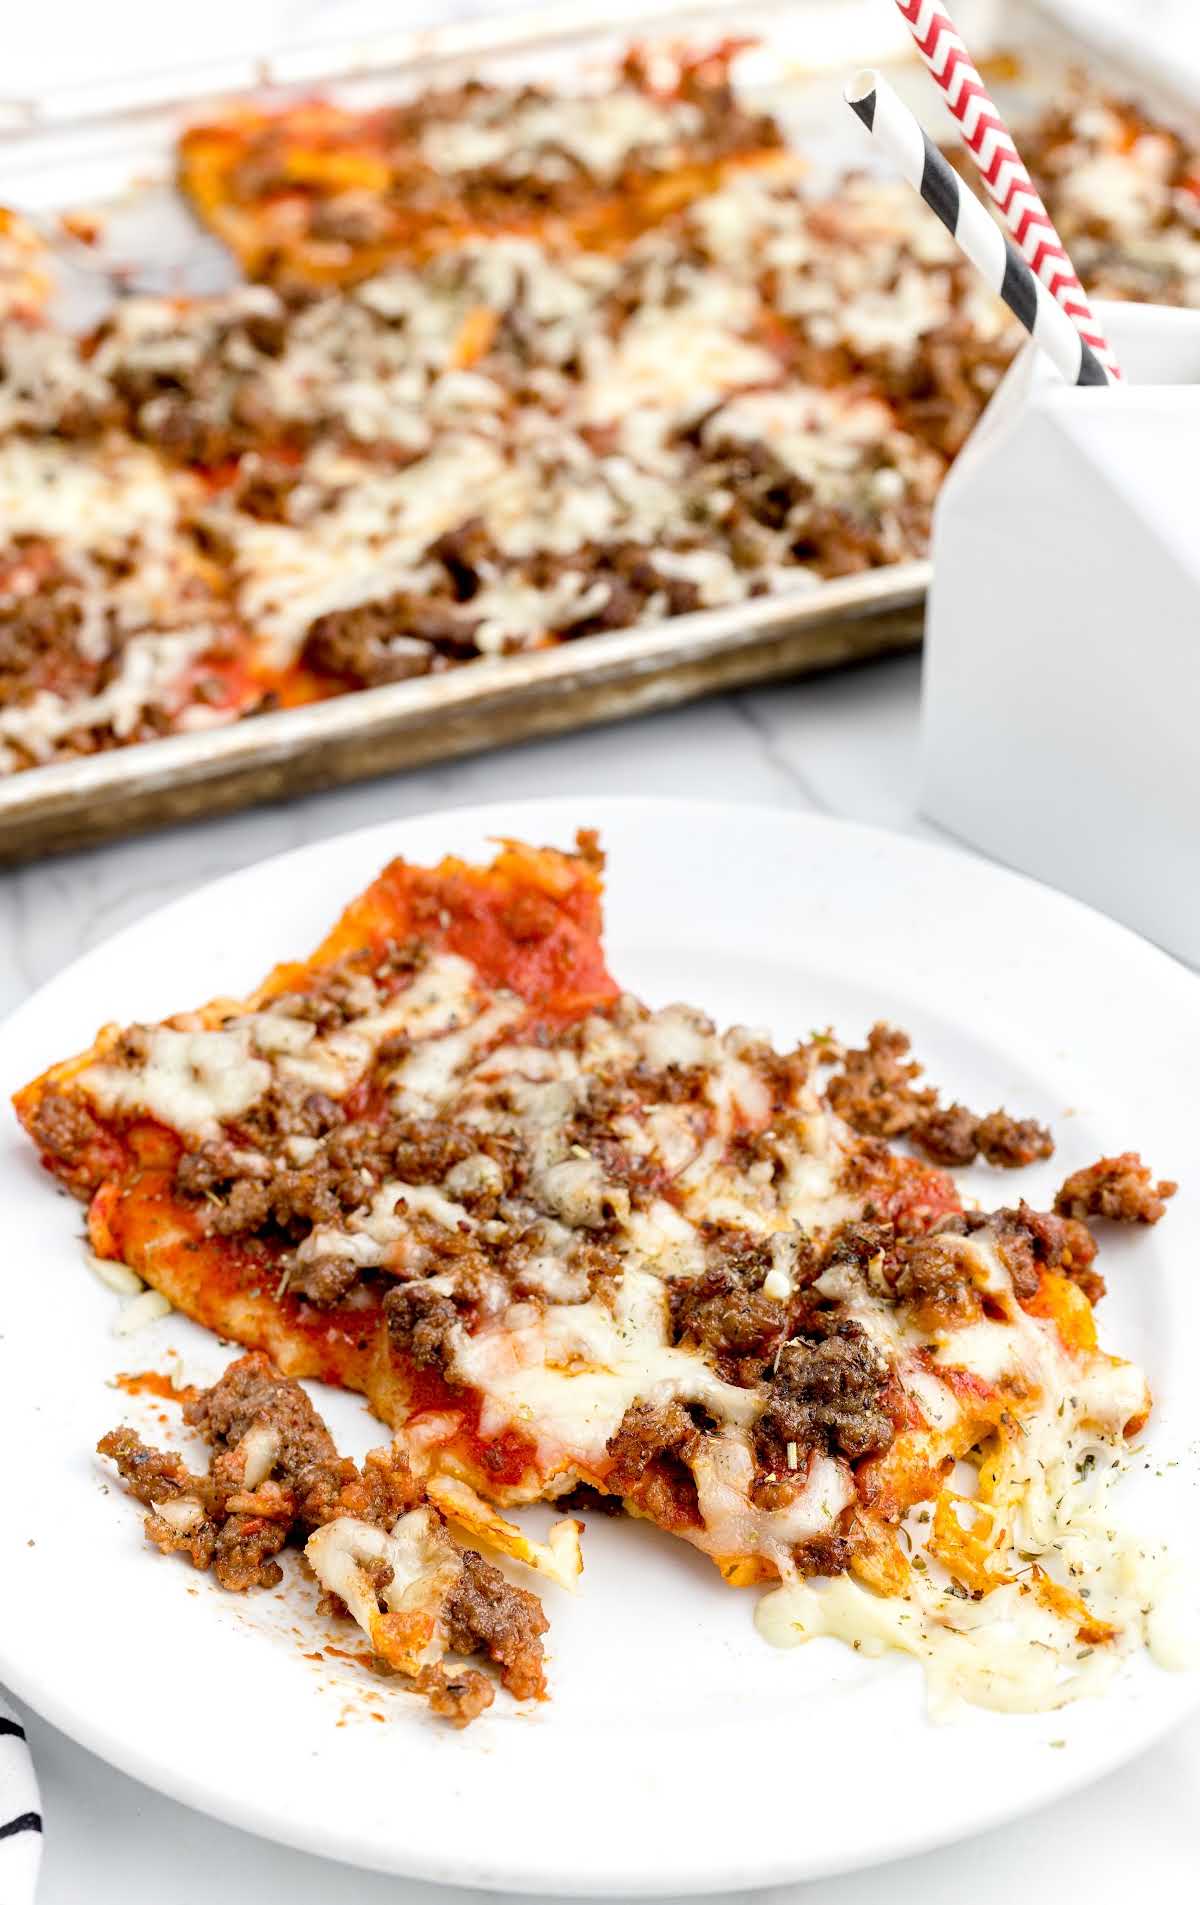
This school cafeteria pizza recipe tastes exactly the same as you remember it. A thin crisp crust, loaded with tomato sauce, meat toppings, and ooey-gooey melted cheese is the perfect lunch choice.
Frequently Asked Questions
This public school rectangle pizza can be frozen either before or after baking. If you’d like to wait to bake it, you can assemble the pizza, cover it, and freeze it until you are ready to bake it.
This cheesy pizza is entirely customizable. Add whichever toppings you like, and it will be a tasty lunch option.
Leftovers can be stored in the fridge for two days or in the freezer for up to two months.


Rectangle School Pizza
Ingredients
Crust
- 2 tablespoons yellow cornmeal
- 2¾ cups unbleached all-purpose flour
- ¾ cup instant nonfat dry milk powder (Nestle Carnation brand used)
- 2½ tablespoons granulated sugar
- 2½ teaspoons instant yeast, from a 0.25-ounce packet (Red Star Platinum brand used)
- 2 teaspoons fine sea salt
- 2 tablespoons olive oil, extra virgin
- 2 cups warm water (105°-110°F)
Toppings
- ½ pound lean ground beef
- ½ pound ground mild Italian sausage
- 14 ounces jar pizza sauce, yields about 1½ cups (MIDS brand used)
- 16 ounces block whole milk mozzarella cheese, shredded (yields about 4 cups)
- 1 teaspoon dried Italian seasoning blend
Instructions
Crust
- Lightly spray an 18×13-inch half-sheet pan with non-stick baker’s spray. Sprinkle the yellow cornmeal evenly over the sprayed surface and set aside. This will prevent the crust from sticking when baked.
- In the bowl of a stand mixer fitted with the paddle attachment, add the all-purpose flour, dry milk powder, granulated sugar, instant yeast, and salt. Whisk to combine.
- With the mixer on low, drizzle in the olive oil and warm water into the dry ingredients until well combined. Mix for an additional 2-3 minutes or until you have a fairly smooth pourable batter. It should be the consistency of a thick pancake batter. A few small lumps in the batter are fine.
- Pour the batter into the prepared pan. Carefully spread the batter to an even layer being sure it covers the entire surface of the baking sheet.
- Allow the dough to rest in the pan for 20 minutes or until small surface bubbles start to appear. This ensures your yeast is active and your crust will bake and rise properly.
- Preheat the oven to 475°F. Once the dough has rested, use the tines of a fork to poke holes in the dough to help prevent large bubbles from rising as the crust bakes.
- Bake on the center rack for 10 minutes. The edges should just barely be turning a pale golden color and the center should be fully set. Remove the par-baked crust from the oven and set aside. While the crust is baking you can prepare the toppings.
Toppings
- In a large (10-inch) skillet over medium-high heat, cook the ground beef and mild Italian sausage for 6-8 minutes or until browned and no pink remains. Transfer the cooked meats to a paper towel lined plate to drain off the excess grease.
- Once the crust has baked, spread the pizza sauce evenly over the entire surface of the crust.
- Sprinkle half (about 2 cups) of the shredded mozzarella cheese evenly over the sauce.
- Add the meat evenly over the first layer of cheese, then top with the remaining (about 2 cups) shredded mozzarella cheese.
- Sprinkle the dried Italian seasoning evenly over the top layer of cheese, then bake on the middle rack for 12-14 minutes or until the cheese is melted, bubbly, and lightly browned.
- Remove the baked pizza from the oven and let it cool for 3-5 minutes before slicing and serving.
Video
Notes
- You can substitute, or add, diced pepperoni or any other toppings if desired. Do not add more than another ½ cup of additional toppings to ensure you do not overload the crust when baked and sliced.
- The meat topping can be omitted completely if you want to serve a cheese only pizza.
Nutrition


Comments
Gloria says
This brings back fun memories!
Jeannette Shields says
Can this be frozen…and/or halved? I live alone and it would take me many days to eat this. Thank you for the recipe.
Layne Kangas says
Hi, Jeannette – yes, when you hit “print” on the recipe card, you can adjust the number of servings and it will adjust the ingredients. You could also freeze to warm up later! We warm ours up in the air fryer or toaster oven. Enjoy!
Leticia Martinez says
Thank you Great memories ! one more school lunch dish if you have biscuits mashed potatoes with turkey gravy on top so good thank you
Susan says
Can this recipe be made in a bread machine?
Amy Tandiko says
Hi Susan, we haven’t tried it that way! If you give it a try, please let us know.