January 19, 2024
Review RecipePeanut Butter Marshmallow Cups
Table of Contents
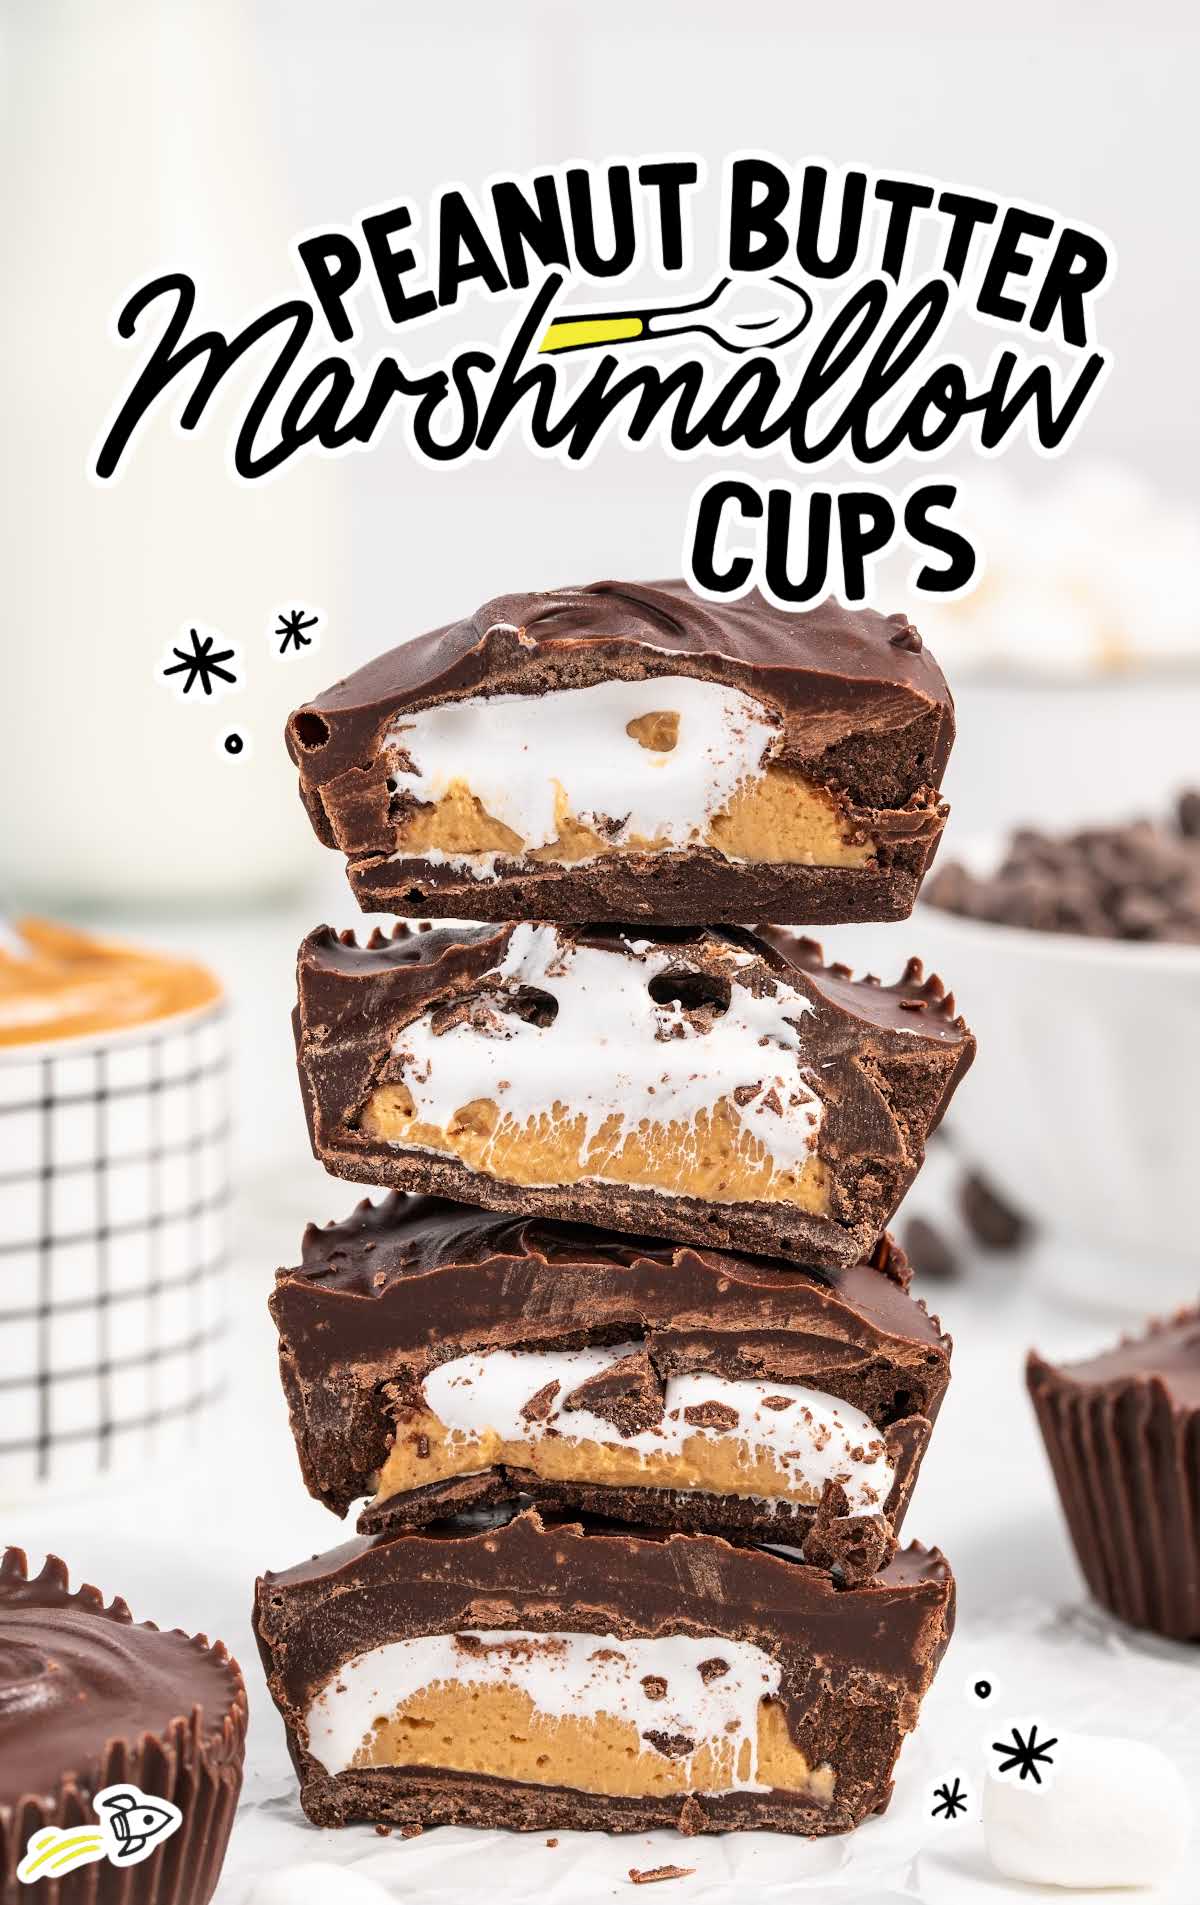
Indulge in the sweet delight of our peanut butter marshmallow cups. This heavenly treat combines the richness of peanut butter with the fluffy sweetness of marshmallows; all encased in a luscious chocolate shell.
Peanut Butter Marshmallow Cups Ingredients
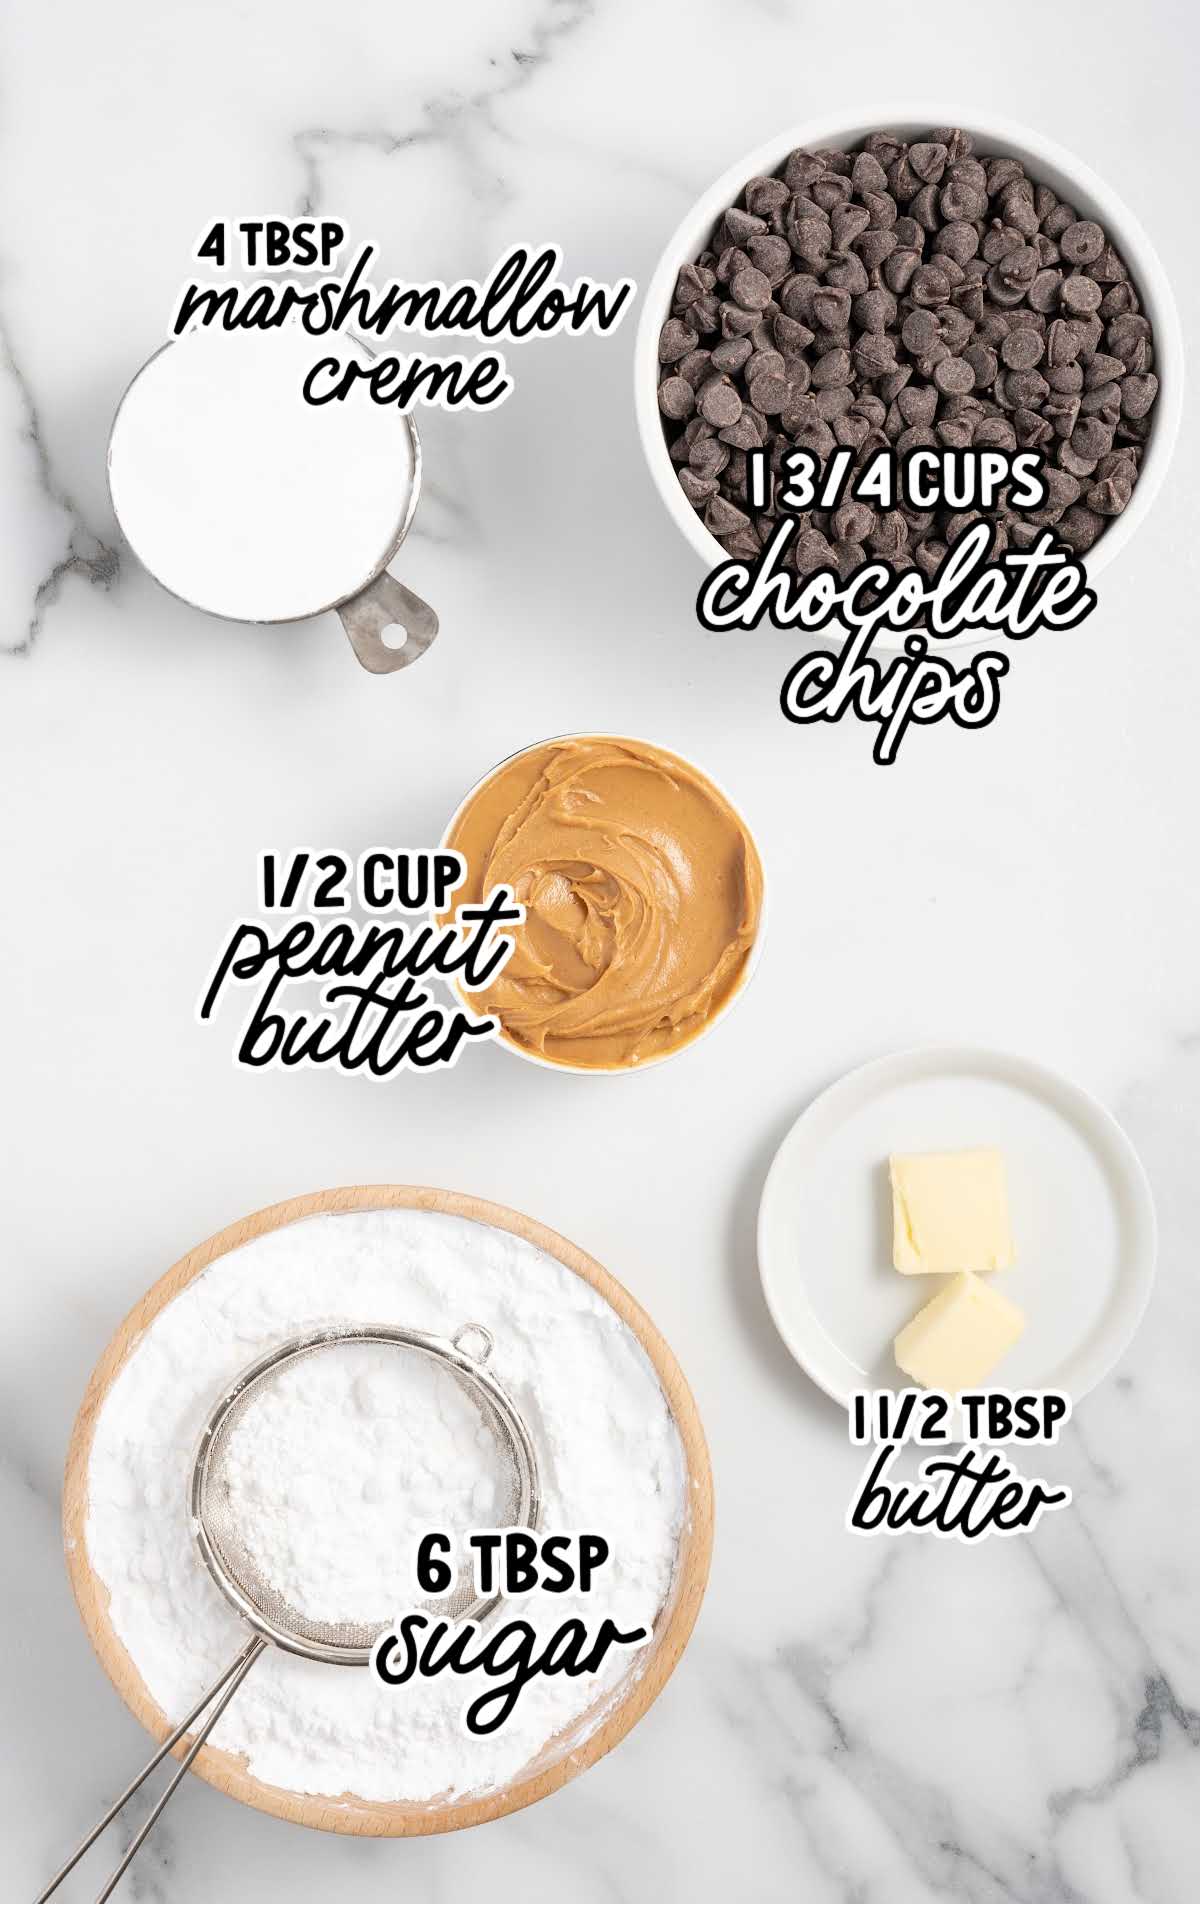
The magic of our peanut butter marshmallow cups lies in the simplicity of their ingredients.
The semi-sweet chocolate chips form the outer shell of the cups, providing a rich and decadent taste.
The chocolate perfectly complements the creamy peanut butter and marshmallow filling.
Here’s what you’ll need:
- 1¾ cups of semi-sweet chocolate chips, divided into ¾ cup and 1 cup
- ½ cup of creamy peanut butter
- 6 tablespoons of powdered sugar
- 1½ tablespoons of unsalted butter, room temperature
- 4 tablespoons of marshmallow creme
Substitutions And Additions
SEMI-SWEET CHOCOLATE CHIPS: You can substitute semi-sweet chocolate chips with milk chocolate or dark chocolate chips for a different flavor profile.
Just remember to use a good quality brand for the best results.
CREAMY PEANUT BUTTER: You can use your favorite brand of traditional smooth creamy peanut butter in this recipe. JIF, Skippy, and Peter Pan are all fan favorites.
I do not suggest using “natural” peanut butter as they have more oils and will not yield the desired results for this recipe.
If you have a favorite nut butter, such as almond or cashew, you can substitute that only if it is the same consistency as traditional peanut butter.
MARSHMALLOW CREME: Marshmallow fluff can be used in place of marshmallow creme. It works equally well in this recipe.
How To Make This Peanut Butter Marshmallow Cups Recipe
Creating these peanut butter marshmallow cups is a fun process.
Let’s walk through the steps together.
OUR RECIPE DEVELOPER SAYS
Make sure your peanut butter is at room temperature for easy mixing and your chocolate chips are ready to be melted.
STEP ONE: Line 12 standard-sized muffin cups with paper liners. Set aside.
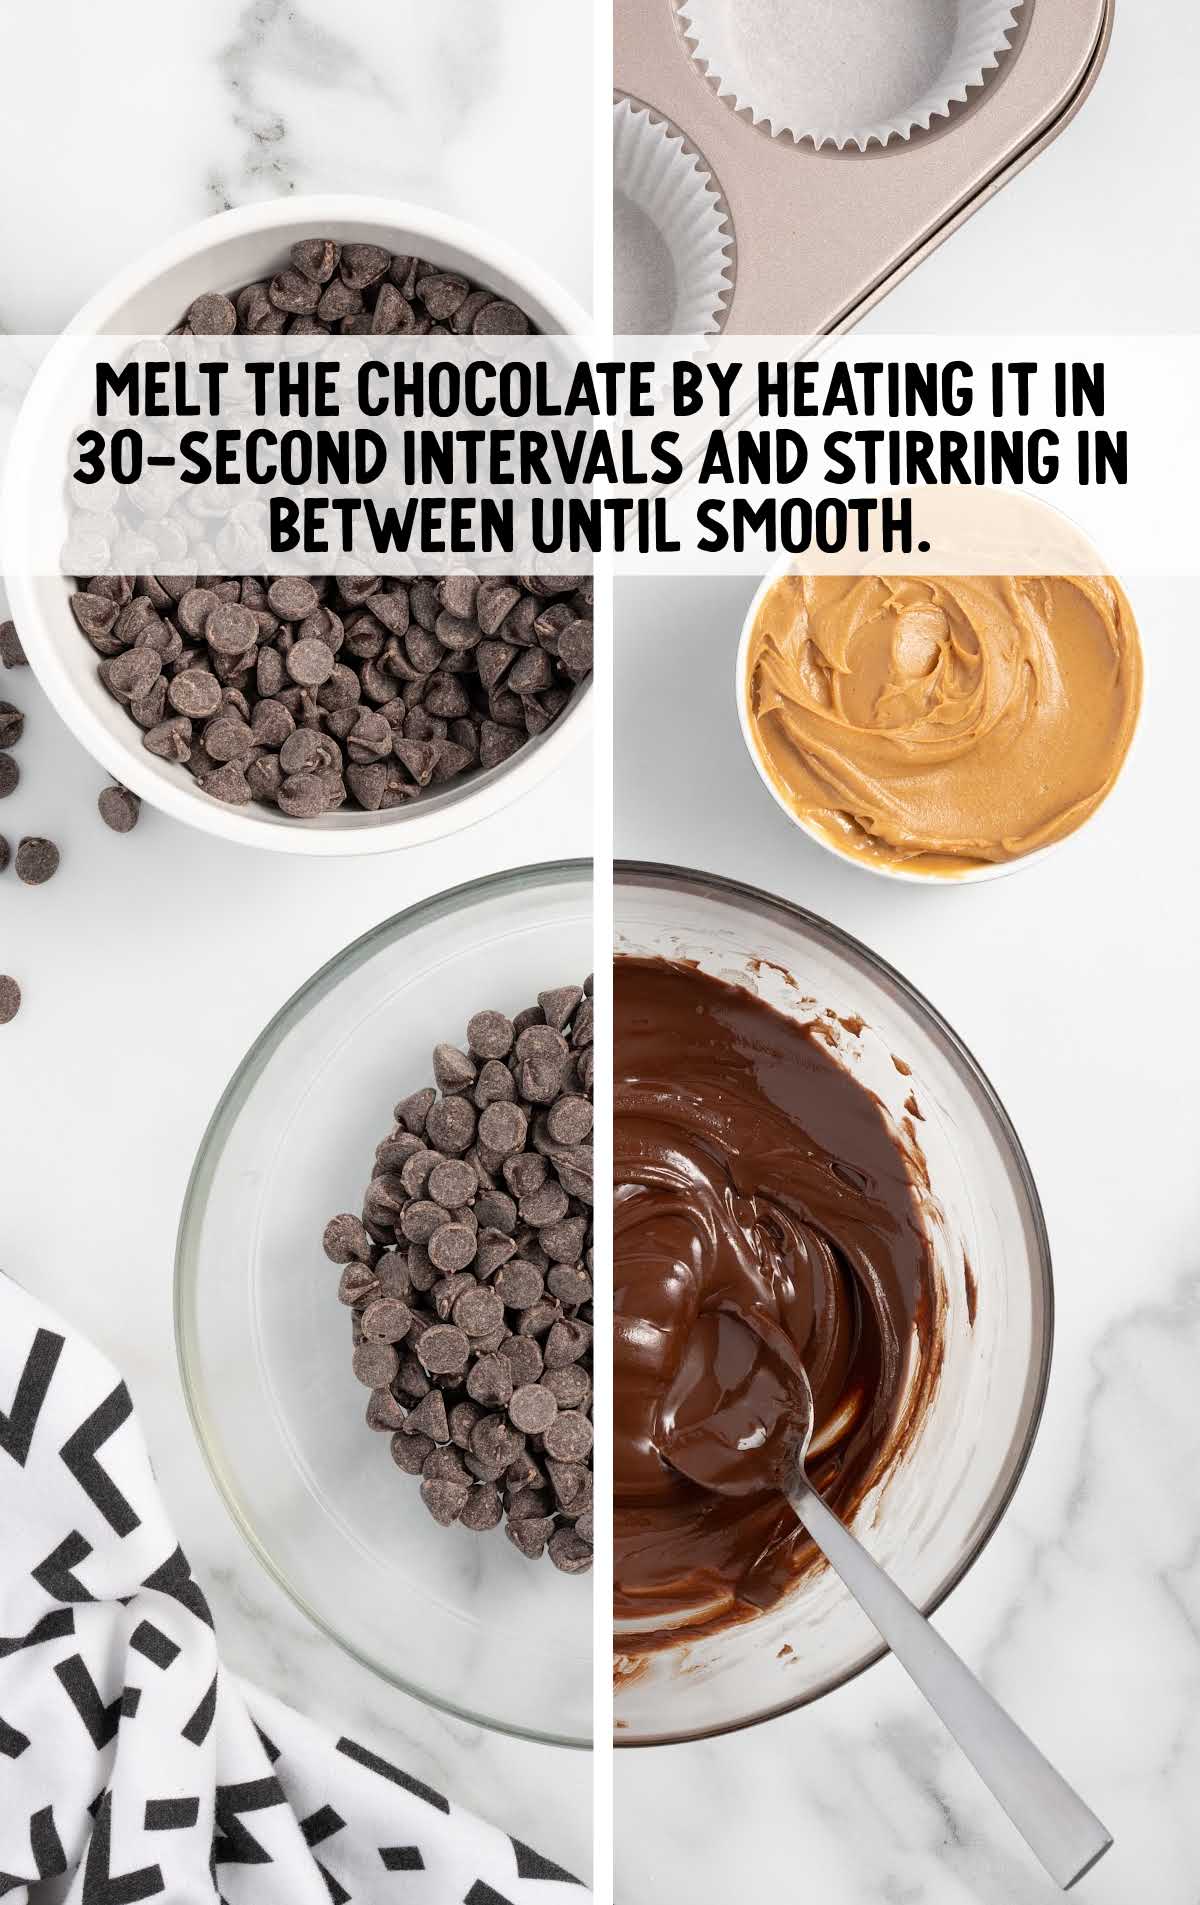
STEP TWO: Place ¾ cup semi-sweet chocolate chips in a small microwave-safe bowl.
Melt the chocolate by heating it in 30-second intervals and stirring in between until smooth.
Depending on how your microwave heats, this should take 1½ to two minutes.
STEP THREE: Scoop about ½ tablespoon of melted chocolate into each cupcake liner.
This can be done by scooping the chocolate with a small spoon and scraping it off with another.
You may need to use a spoon to gently spread the chocolate into an even layer, being careful not to get any on the upper sides of the liner.
PRO TIP:
Be sure not to rush the chilling process. Each layer needs to be really firm before adding the next layer to ensure that the layers stay separate.
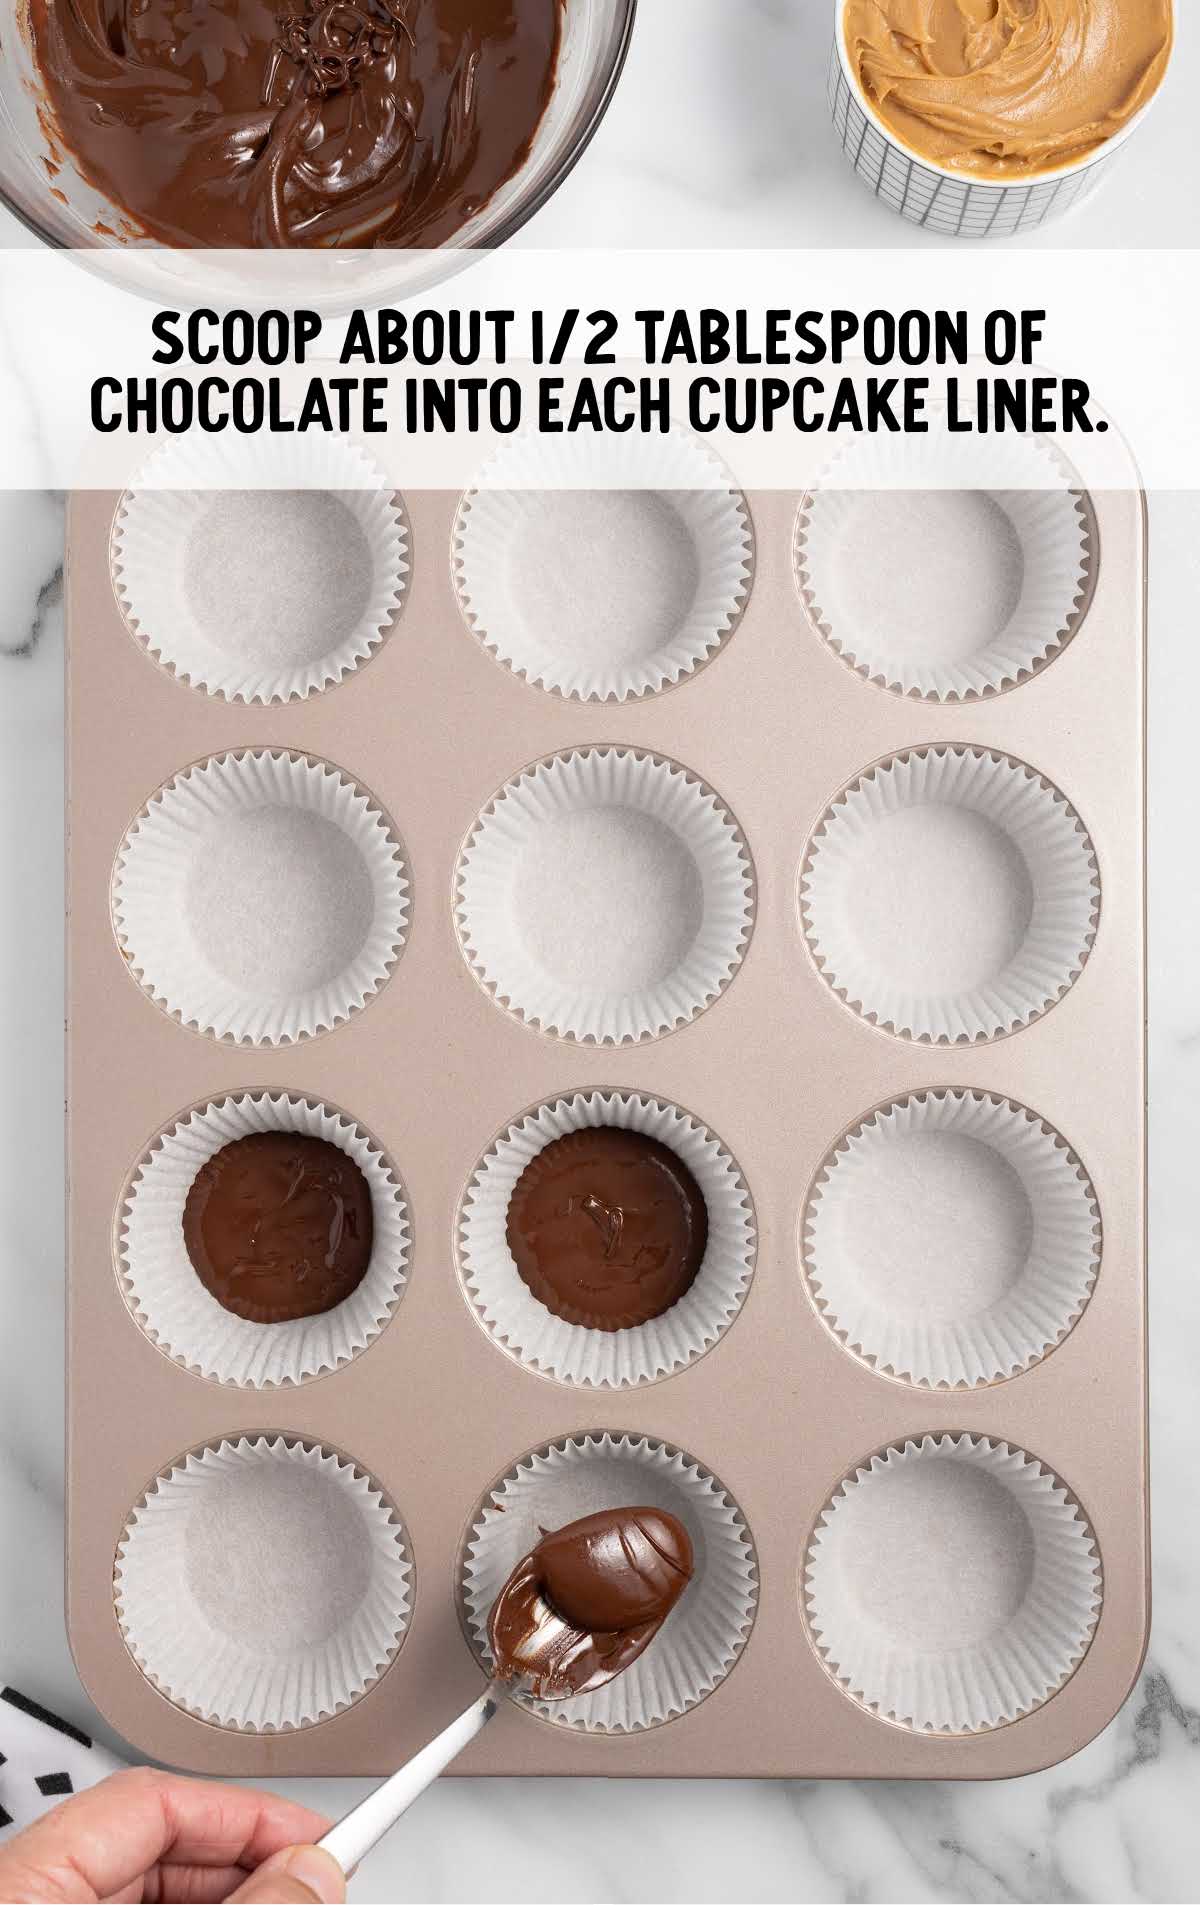
STEP FOUR: Freeze the chocolate for ten minutes.
PRO TIP:
The freezing step is crucial as it allows the chocolate to set and form a solid base for the peanut butter filling.
STEP FIVE: While the chocolate is freezing, prepare the peanut butter filling.
Measure the peanut butter, powdered sugar, and unsalted butter into a medium mixing bowl.
Using a handheld mixer, on medium speed, beat until the peanut butter mixture is smooth.
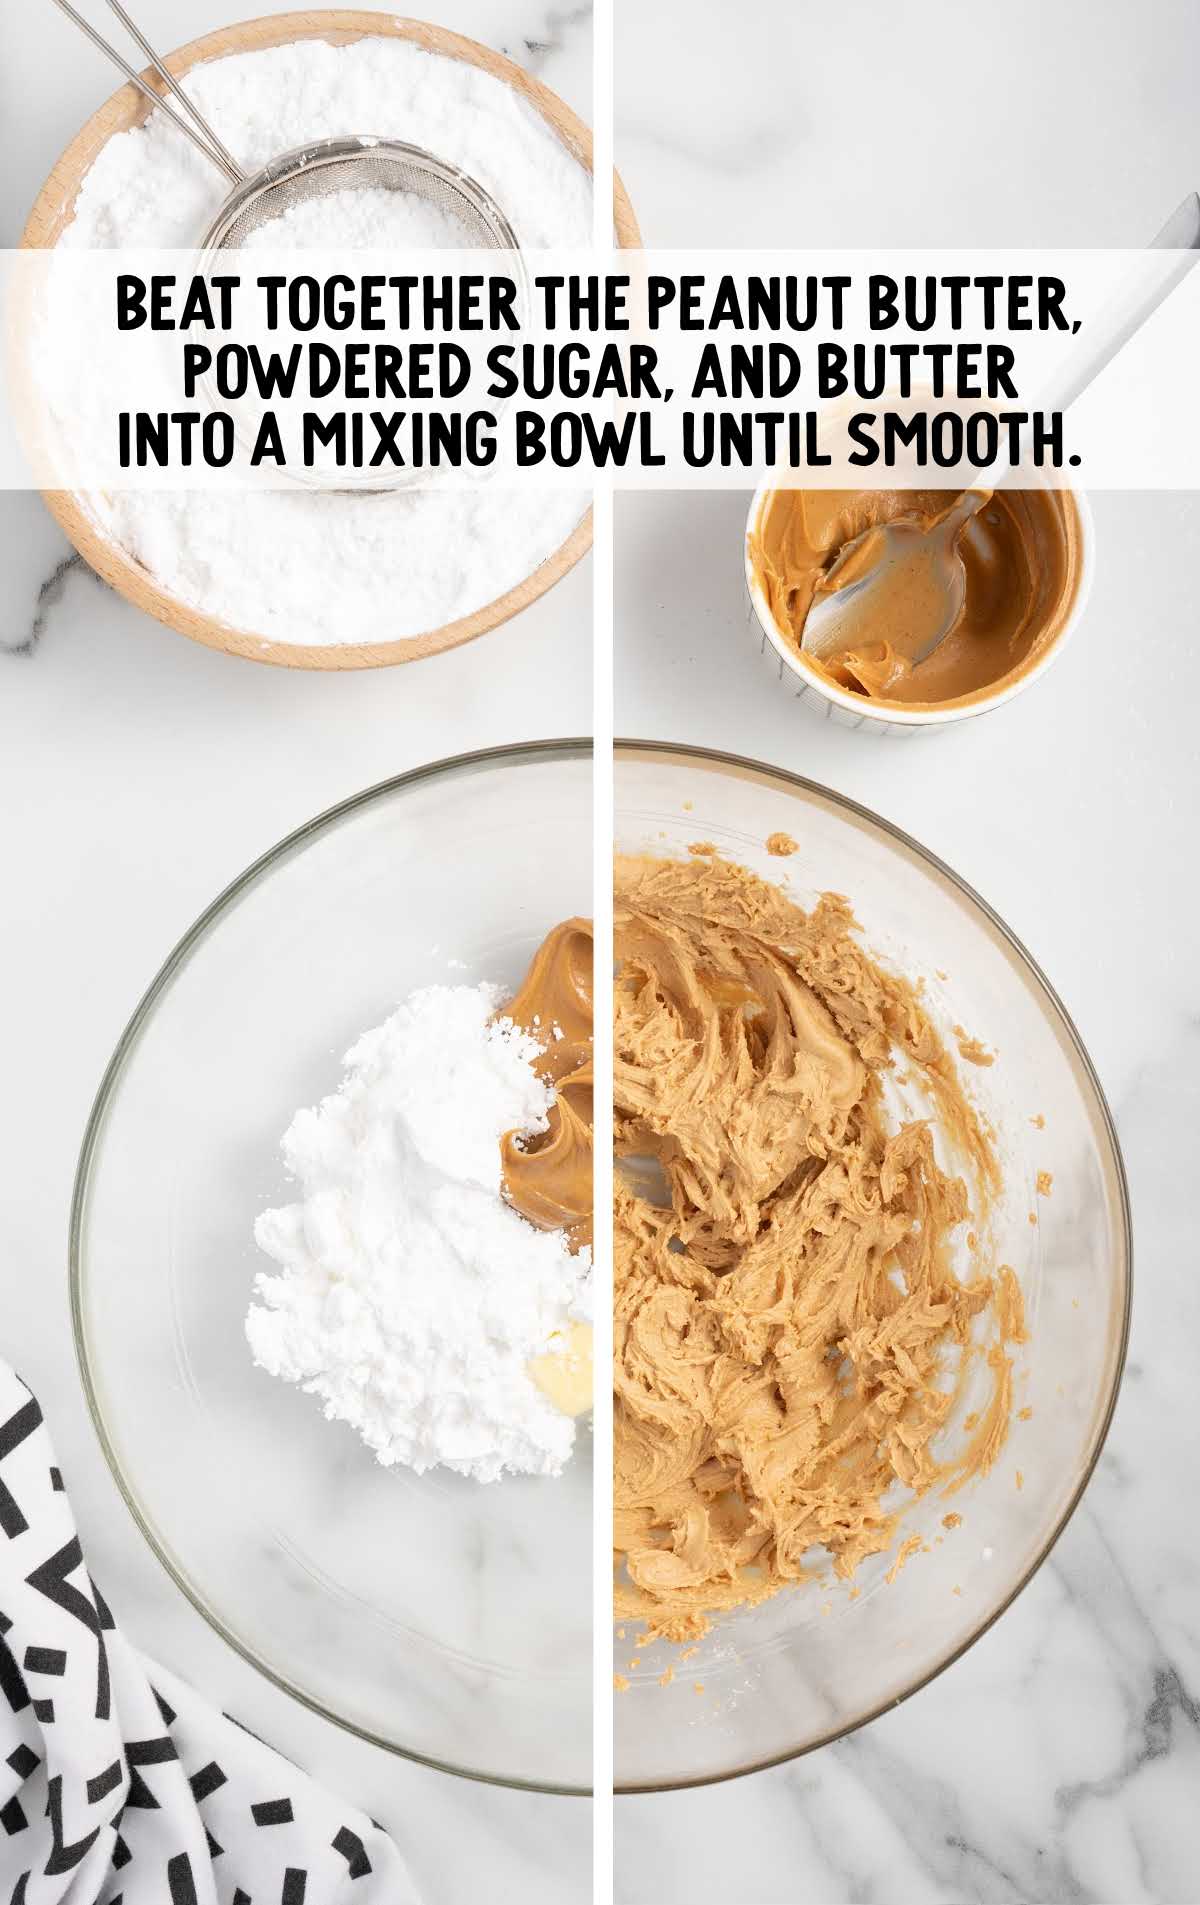
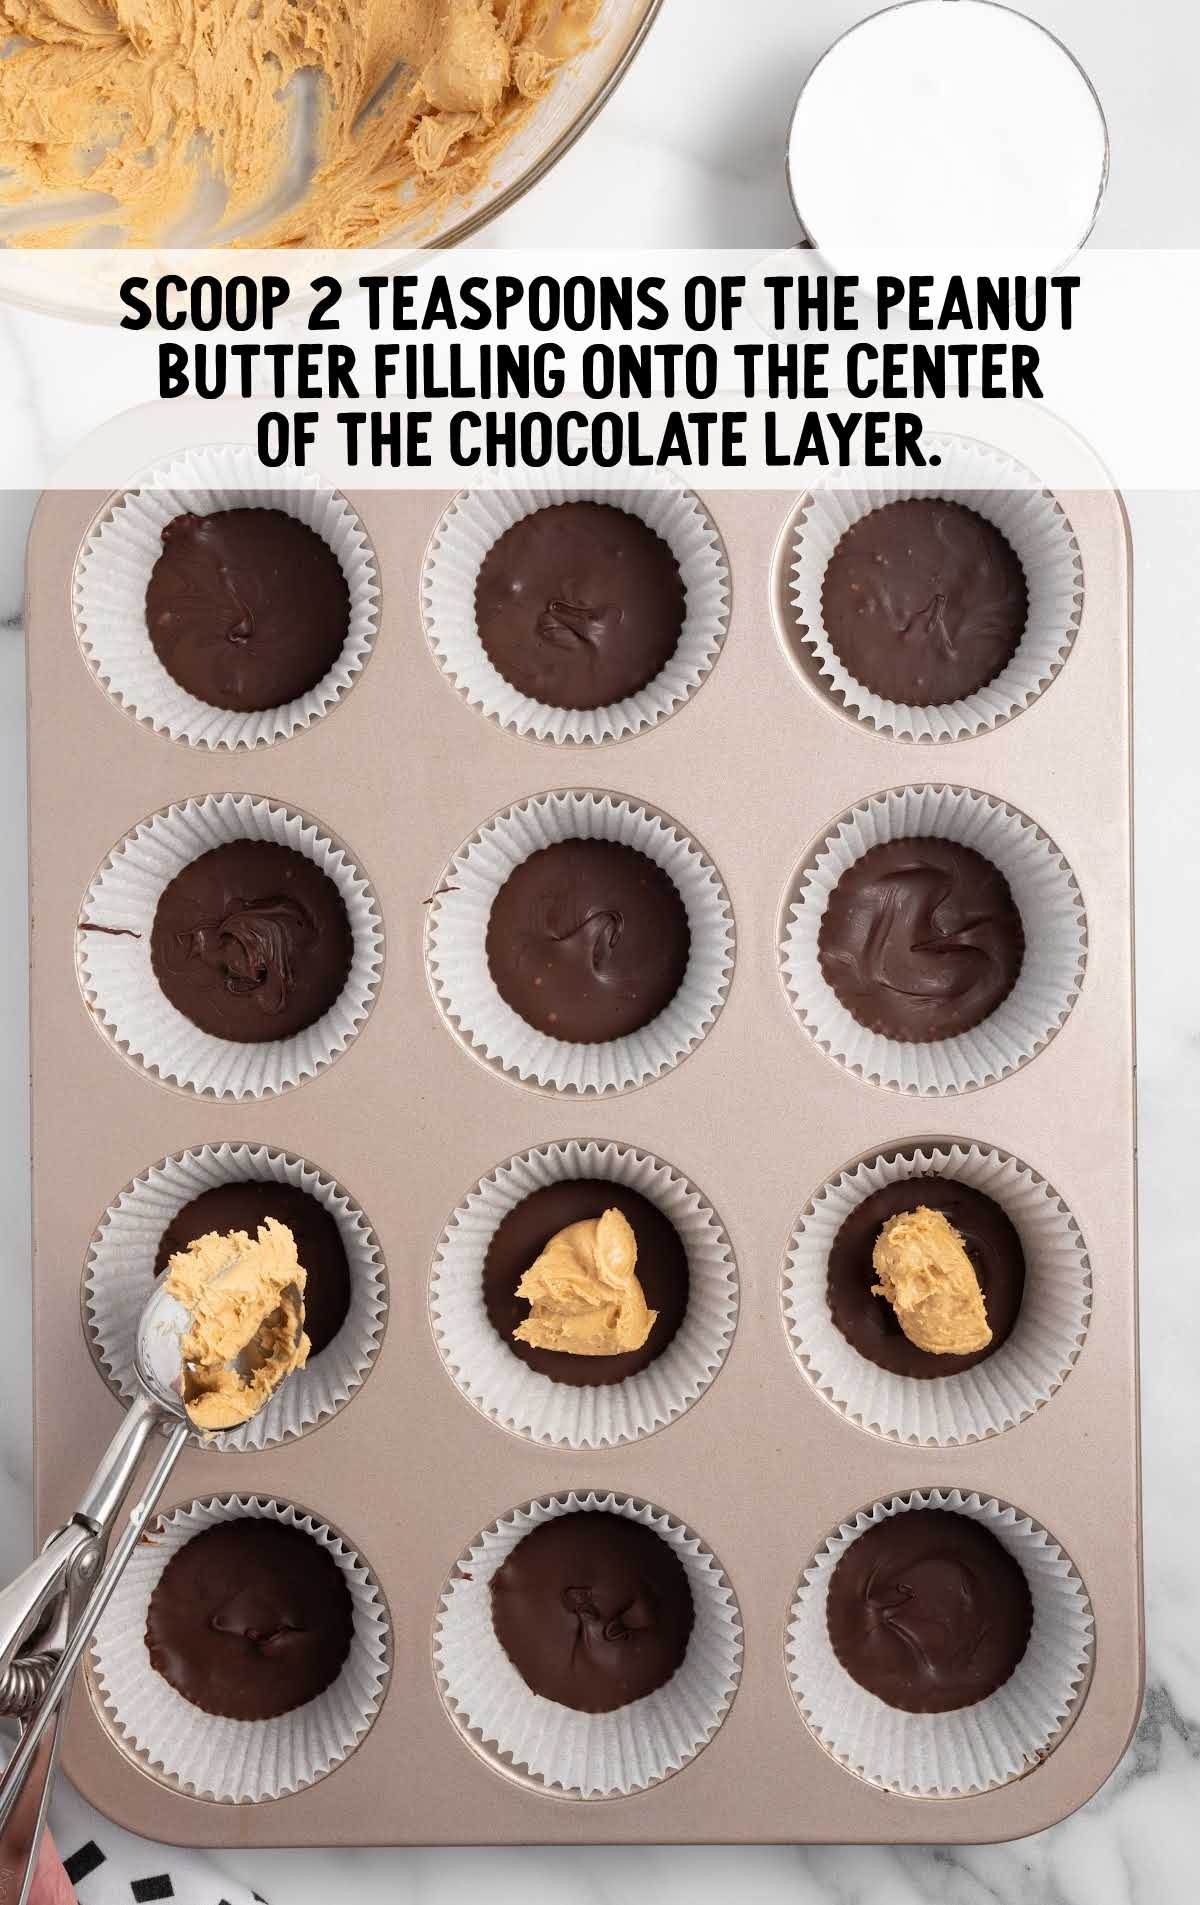
STEP SIX: Scoop two teaspoons of the peanut butter filling onto the center of the chocolate layer.
Using a spoon, gently flatten and spread the filling into an even layer. Be sure that the filling does not touch the sides of the cupcake liner.
Freeze for an additional ten minutes.
PRO TIP:
A one-inch mini cookie scoop typically holds one teaspoon.
This is a great tool for scooping out the peanut butter and marshmallow fillings.
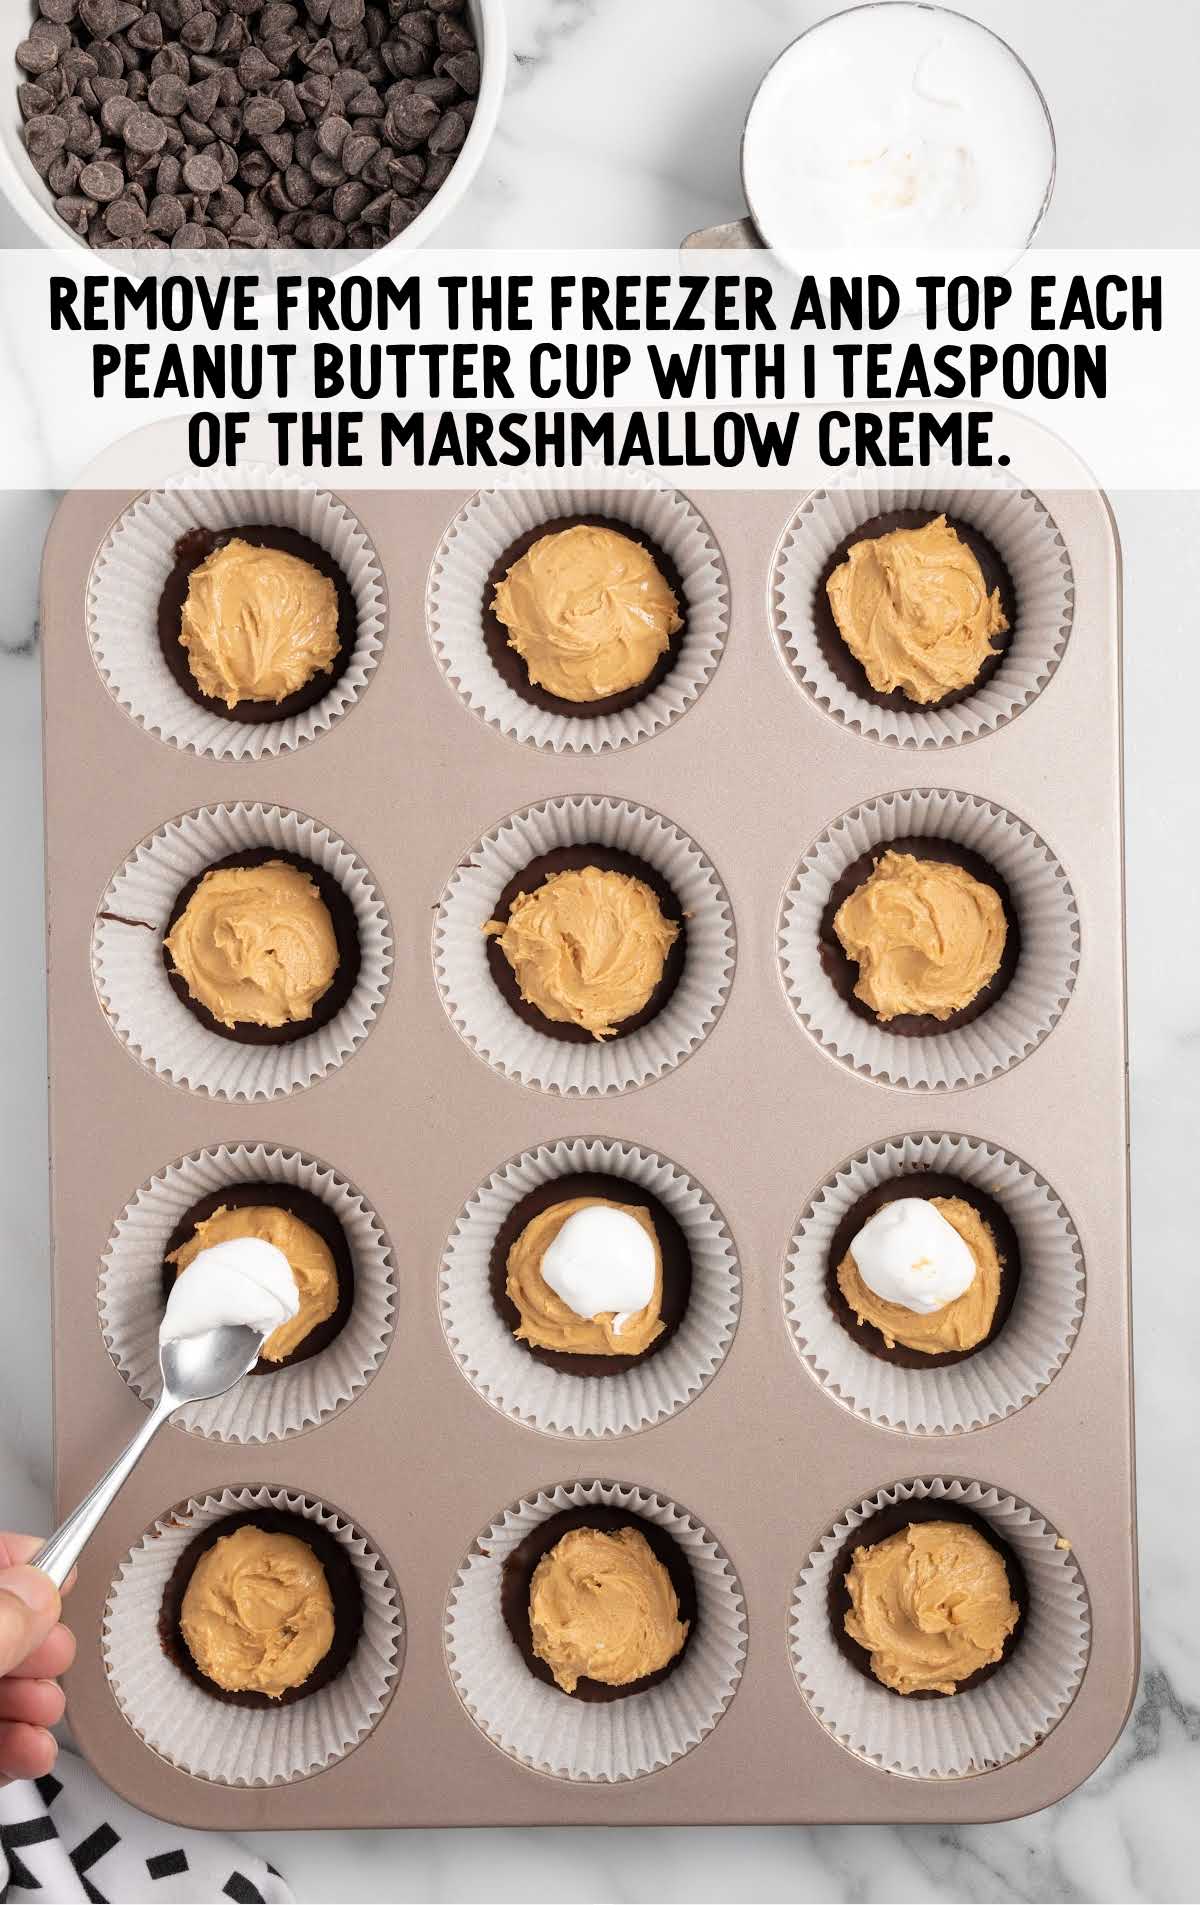
STEP SEVEN: Remove from the freezer and top each peanut butter cup with one teaspoon of the marshmallow creme.
Be sure to keep the marshmallow creme in the center of the peanut butter cup.
Lightly wet your fingertip and smooth down the marshmallow creme.
Freeze again for another ten minutes.
STEP EIGHT: Just before your marshmallow creme layer is done freezing, melt the remaining one cup of semi-sweet chocolate chips.
You can use the same bowl from Step Two and the same method as explained in Step Two.
STEP NINE: Using the two-spoon method from Step Three, cover the peanut butter and marshmallow creme with the melted chocolate.
You will need to use the back of one spoon to push the melted chocolate all the way to the edges and completely cover the top.
PRO TIP:
You must work quickly adding the final chocolate layer so that the marshmallow creme doesn’t warm up too much and seep up through the top layer of chocolate.
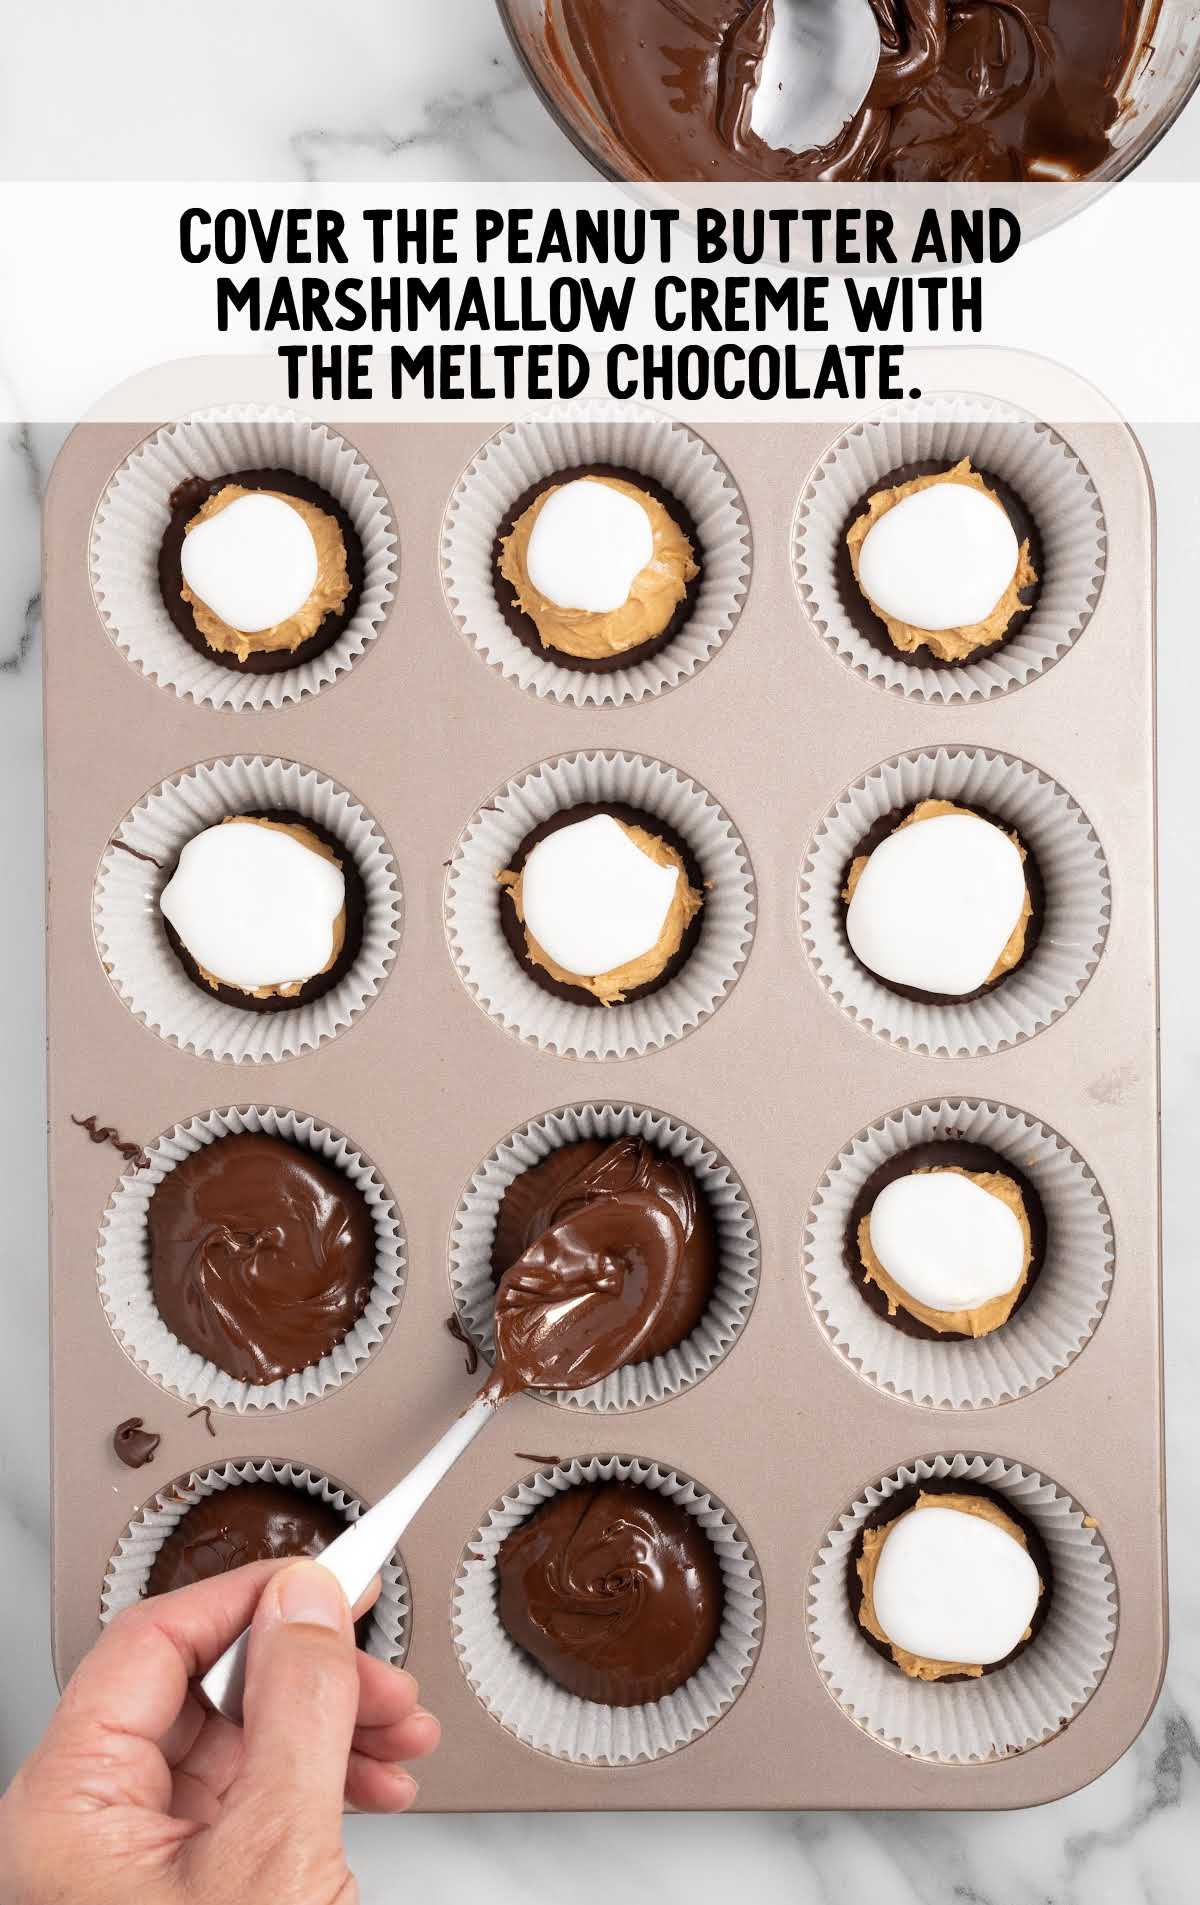
STEP TEN: Freeze the peanut butter chocolate cups for a final ten minutes to set and harden the top layer of chocolate.
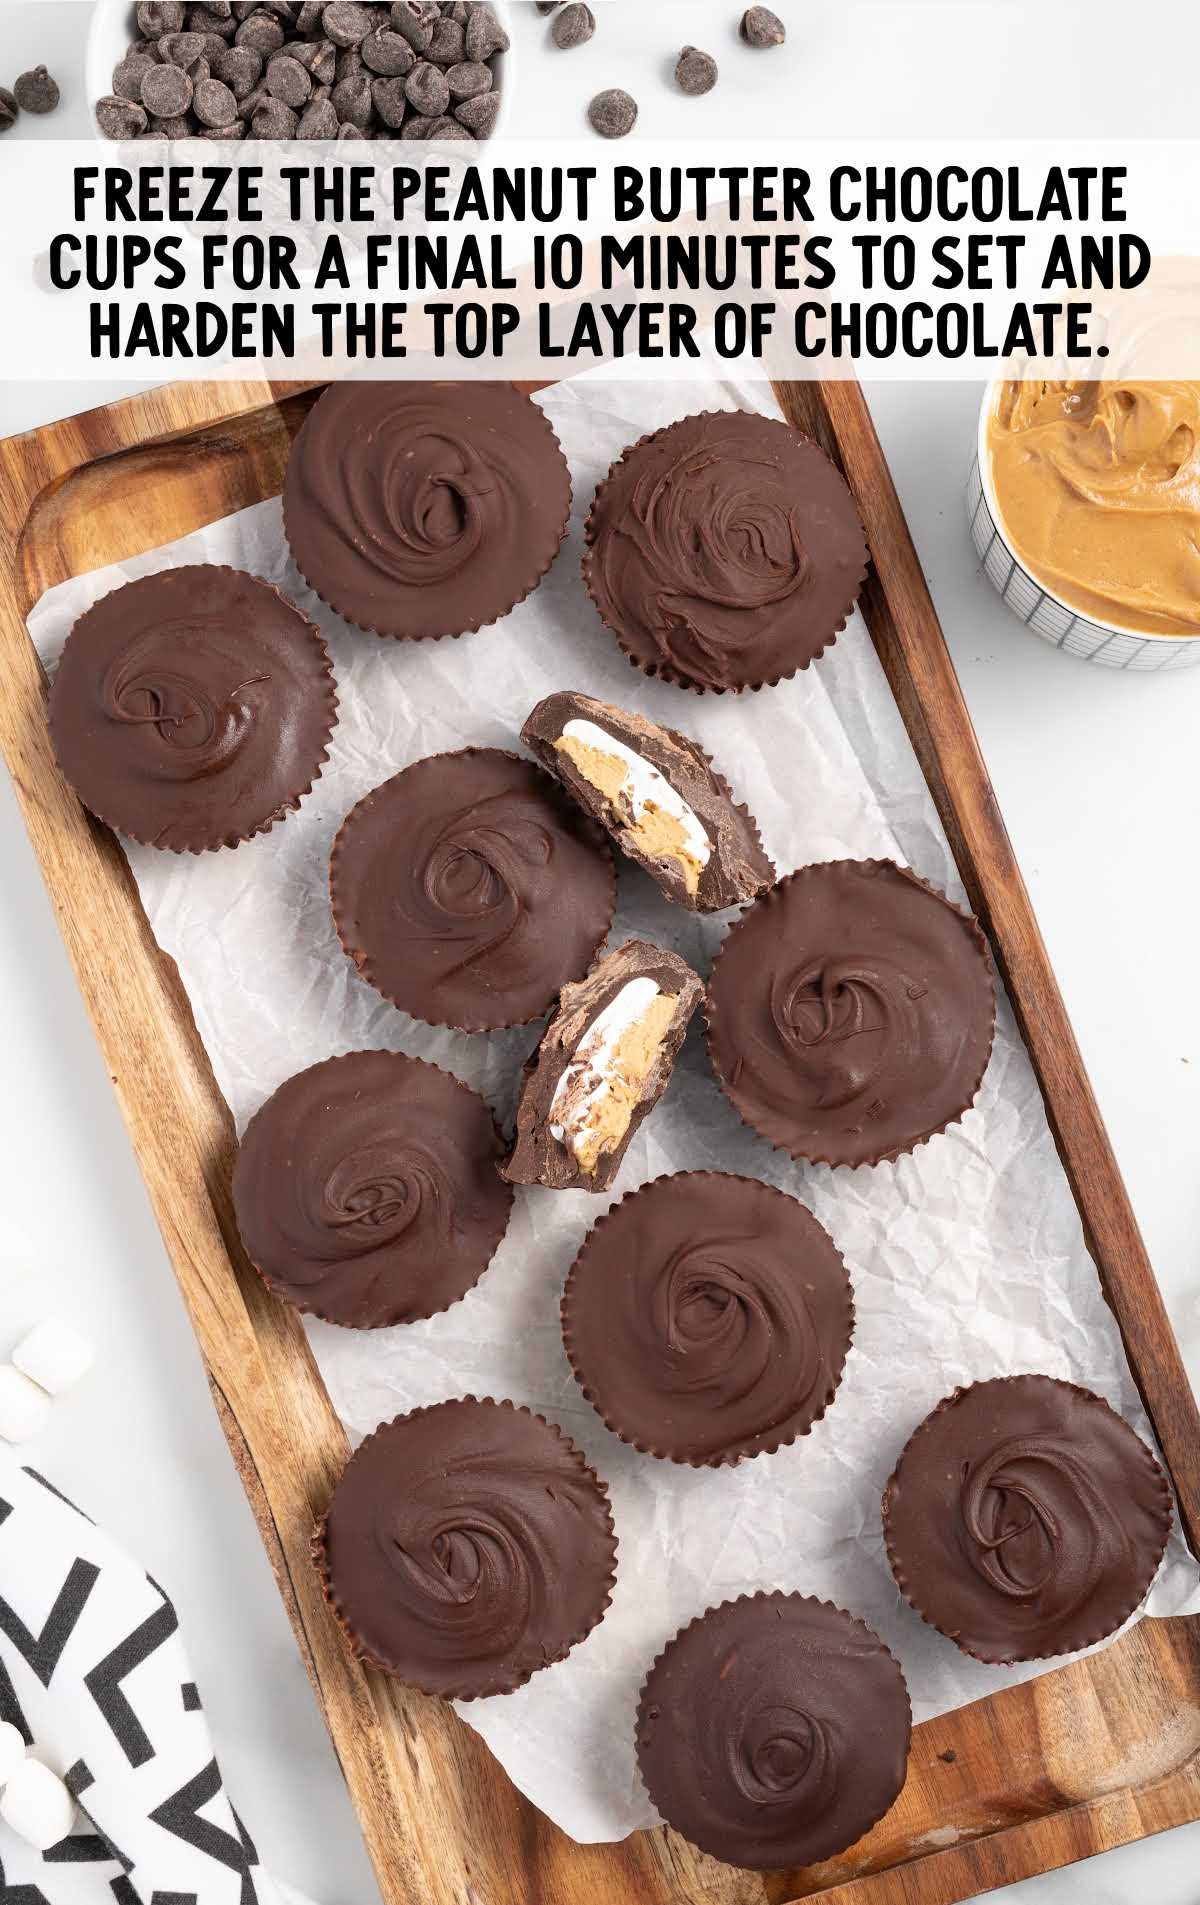
How To Serve
Our homemade chocolate peanut butter cups are a delicious treat that can be served as a sweet snack or dessert.
They would be ideal for a dessert platter for parties and gatherings.
Pair these cups with a glass of cold milk for a classic combination. The creamy milk complements the rich flavors of the peanut butter and chocolate, making for a satisfying treat.
Serve these cups alongside an overnight fruit salad for a balanced dessert. The freshness of the fruit contrasts beautifully with the richness of the cups.
Include these cups in a dessert buffet. Their unique flavor and attractive appearance make them a standout addition to any dessert spread.
Don’t forget to check out our chocolate peanut clusters and buckeyes for two more decadent confections.
MORE DESSERT RECIPES
Storage
Our peanut butter marshmallow cups are not only delicious but also easy to store. Here’s how you can do it:
MAKE AHEAD: These cups can be made ahead of time. Simply follow the recipe, let the cups set in the freezer, and then store them in an airtight container.
They’re perfect for when you’re expecting guests or just want a sweet treat on hand.
IN THE FRIDGE: Store these cups in an airtight container in the refrigerator for up to two weeks. This will keep them fresh and maintain their texture.
IN THE FREEZER: For longer storage, you can keep these cups in the freezer.
Place them in an airtight container, and they will last for up to two months.
Remember to thaw them in the refrigerator before serving.
REHEATING: You can serve at room temperature by setting them on the counter prior to serving.
They will keep at room temperature for a couple of hours but should be refrigerated for longer storage.
Why We Love This Recipe
Our peanut butter marshmallow cups are a favorite for many reasons.
FLAVOR: The combination of creamy peanut butter, fluffy marshmallow, and rich chocolate creates a symphony of flavors that is simply irresistible.
VERSATILITY: These cups are perfect for various occasions, from casual get-togethers to festive holiday gatherings. They’re also a great gift idea.
EASY TO MAKE: Despite their fancy appearance, these cups are surprisingly easy to make. The recipe involves simple steps and common ingredients, making it accessible to everyone.
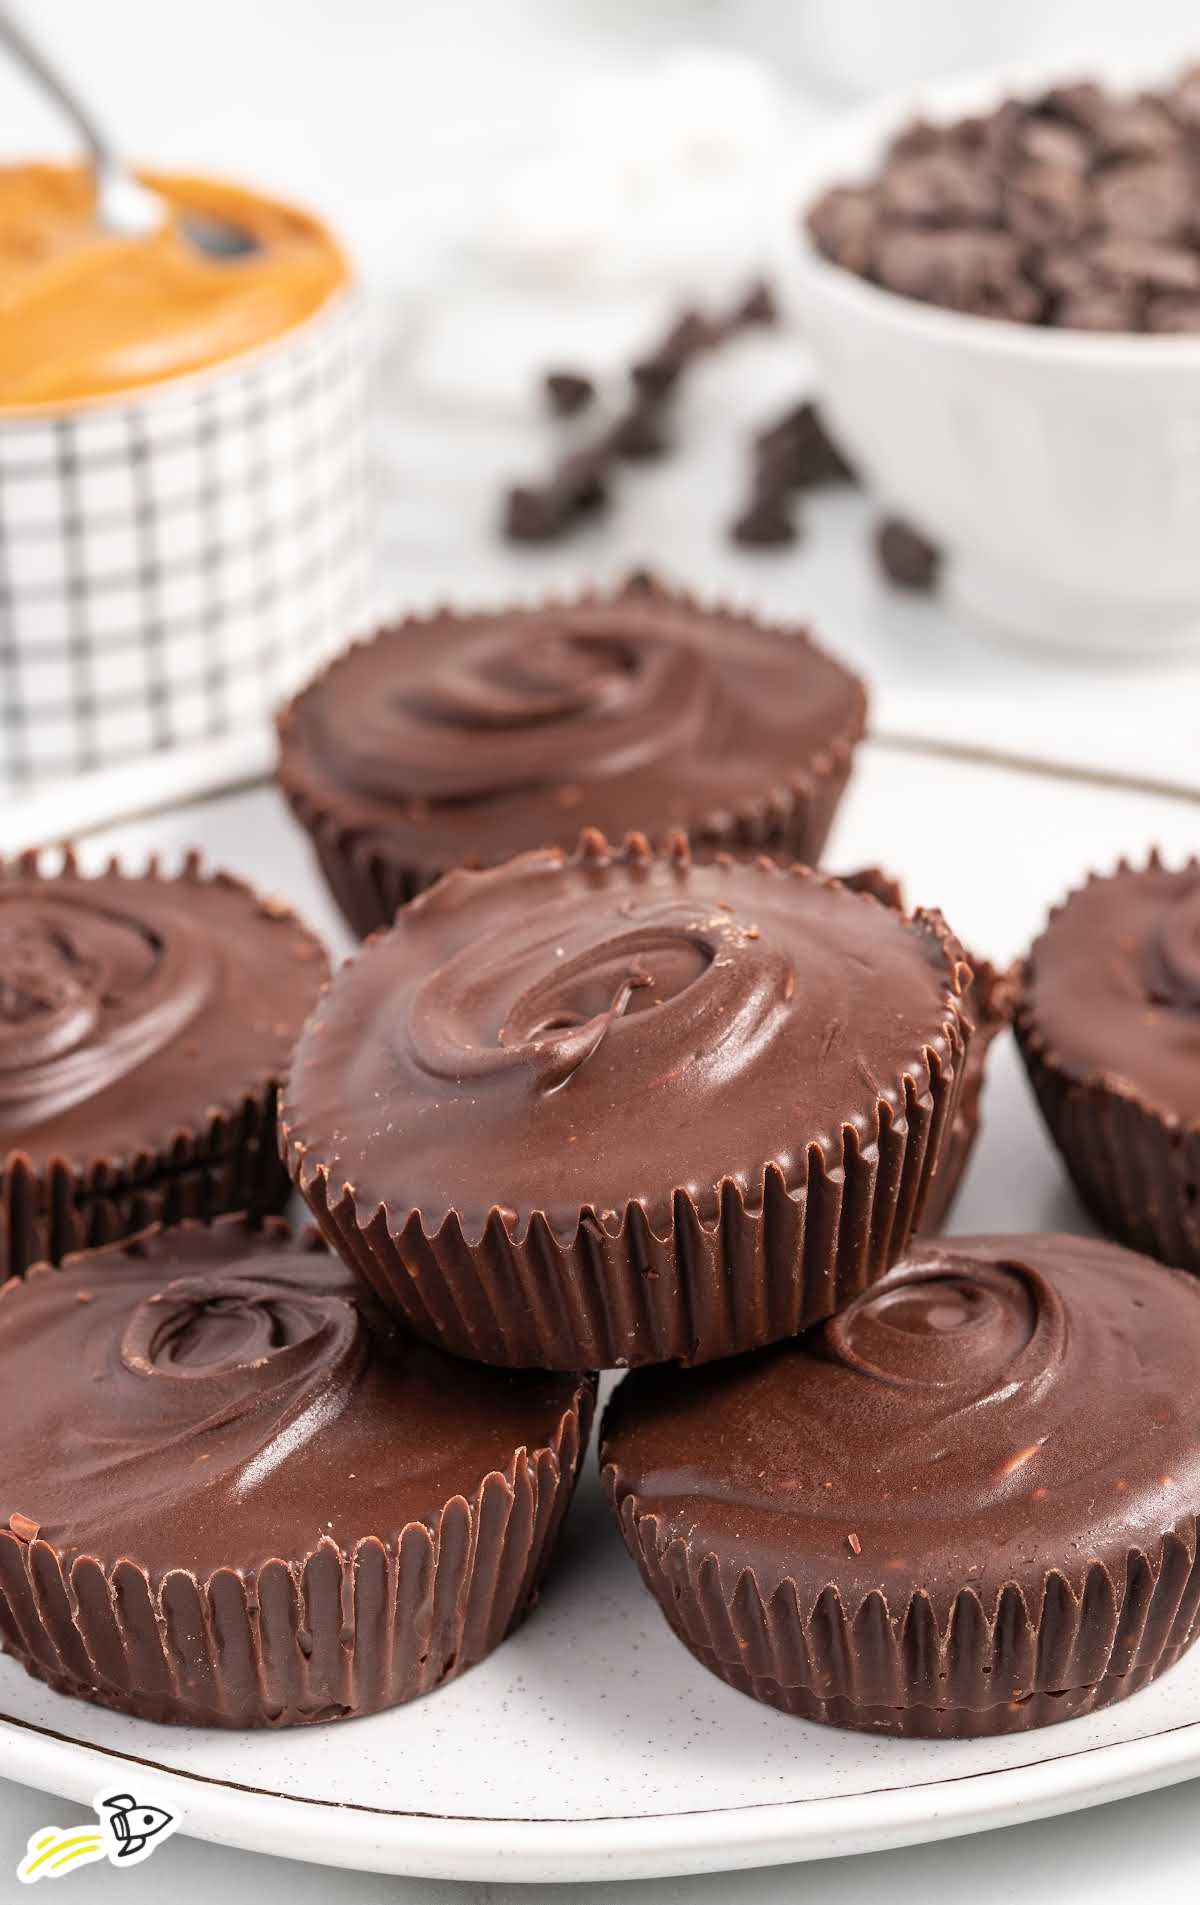
Our peanut butter marshmallow cups are a delightful treat that combines the creamy richness of peanut butter, the fluffy sweetness of marshmallows, and the decadent taste of semi-sweet chocolate. Whether you’re serving them at a party or enjoying them as a sweet snack, these cups are sure to impress.
Frequently Asked Questions
We recommend using traditional creamy peanut butter for this easy recipe. Natural peanut butter has more oils and may not yield the desired results.
You can substitute the semi-sweet chocolate chips with milk chocolate or dark chocolate chips. Just remember to use a good quality brand for the best results.
These cups can be made ahead of time and stored in the refrigerator or freezer. Just remember to thaw them in the refrigerator before serving.
These cups can be stored in the refrigerator for up to two weeks or in the freezer for up to two months.
Marshmallow fluff can be used in place of marshmallow creme. It works equally well in this recipe.
More Recipes You’ll Love
- Homemade Peanut Butter Cups
- No-Churn Cotton Candy Ice Cream
- Peanut Butter Cookie Dough
- Peanut Butter Chocolate Dessert
- Chocolate Peanut Butter Crazy Cake
- Mini Cinnamon Roll Recipes

Peanut Butter Marshmallow Cups
Ingredients
- 1¾ cups semi-sweet chocolate chips, divided into ¾ cup and 1 cup (Ghirardelli brand 12-ounce bag)
- ½ cup creamy peanut butter, Reese’s brand
- 6 tablespoons powdered sugar
- 1½ tablespoons unsalted butter, room temperature
- 4 tablespoons marshmallow creme, Jet-Puffed brand
Instructions
- Line 12 standard-sized muffin cups with cupcake liners. Set aside.
- In a small microwave-safe bowl, place ¾ cup semi-sweet chocolate chips. Melt the chocolate by heating it in 30-second intervals and stirring in between until the chocolate is smooth. Depending on how your microwave heats, this should take 1½ to 2 minutes.
- Scoop out about ½ tablespoon of melted chocolate into each cupcake liner. This can be done by scooping the chocolate with a small spoon and scraping it off with another. You may need to use a spoon to gently spread the chocolate into an even layer, being careful not to get any on the upper sides of the paper liners.
- Freeze the chocolate for 10 minutes.
- While the chocolate is freezing, prepare the peanut butter filling. Measure the peanut butter, powdered sugar, and unsalted butter into a medium mixing bowl. Using a handheld mixer, on medium speed, beat until the peanut butter mixture is smooth.
- Scoop 2 teaspoons of the peanut butter filling onto the center of the chocolate layer. Using a spoon, gently flatten and spread the filling into an even layer, being sure that the filling does not touch the sides of the cupcake liner. Freeze for an additional 10 minutes.
- Remove from the freezer and top each peanut butter cup with 1 teaspoon of the marshmallow creme, being sure to keep the marshmallow creme in the center of the peanut butter cup. Lightly wet your fingertip and smooth down the marshmallow creme. Freeze again for another 10 minutes.
- Just before your marshmallow creme layer is done freezing, melt the remaining 1 cup of semi-sweet chocolate chips (using the same bowl from step 2) in the same way as explained in step 2.
- Using the two-spoon method from step 3, cover the peanut butter and marshmallow creme with the melted chocolate. You will need to use the back of one spoon to push the melted chocolate all the way to the edges and completely cover the top.
- Freeze for a final 10 minutes to set and harden the top layer of chocolate.
Notes
- Make sure your peanut butter is at room temperature for easy mixing and your chocolate chips are ready to be melted.
- Be sure not to rush the chilling process. Each layer needs to be really firm before adding the next layer to ensure that the layers stay separate.
- The freezing step is crucial as it allows the chocolate to set and form a solid base for the peanut butter filling.
- A 1-inch mini cookie scoop typically holds 1 teaspoon (depending on the brand). This is a great tool for scooping out the peanut butter and marshmallow fillings.
- You must work quickly adding the final chocolate layer so that the marshmallow creme doesn’t warm up too much and seep up through the top layer of chocolate.
Nutrition
Even More Recipes You’ll Love
Dessert Recipes
- Cherry Kool-Aid Pie
- Cranberry Pecan Oatmeal Cookies
- Arkansas Possum Pie
- Cookie Dough Fudge
- Blueberry Bread
- Peanut Butter Rice Krispie Treats
- Recipe for Chocolate Chip Cupcakes
- How to Make a Strawberry Mousse
- Apple Cinnamon Granola
- Limoncello Cake
- Pineapple Dump Cake
- Cinnabon Cinnamon Rolls Recipe
Sweet Treat Recipes
- Chocolate Peanut Butter Cookies
- Peanut Butter Marshmallow Squares
- S’mores Lasagna
- Blueberry Cupcakes
- Peanut Marshmallow Clusters
- Peanut Butter Ritz Crackers Dipped in White Chocolate
- Reese’s Peanut Butter Cup Pie
- Peanut Butter Pretzel Magic Bars
- Ice Cream Cone Cupcakes
- Chocolate Chip Marshmallow Cookies
- Homemade Nutter Butters



Comments
Grammy says
Excellent sweet treat!! I was wondering if anyone has made these using a mini muffin pan instead as may people (not me!) said it was too rich and sweet and the cup was too much. I will definitely make again!