June 13, 2024
Review RecipePeanut Butter Cup Ice Cream
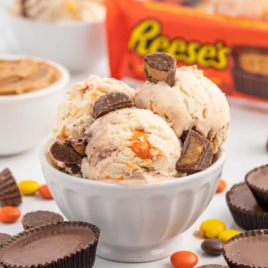
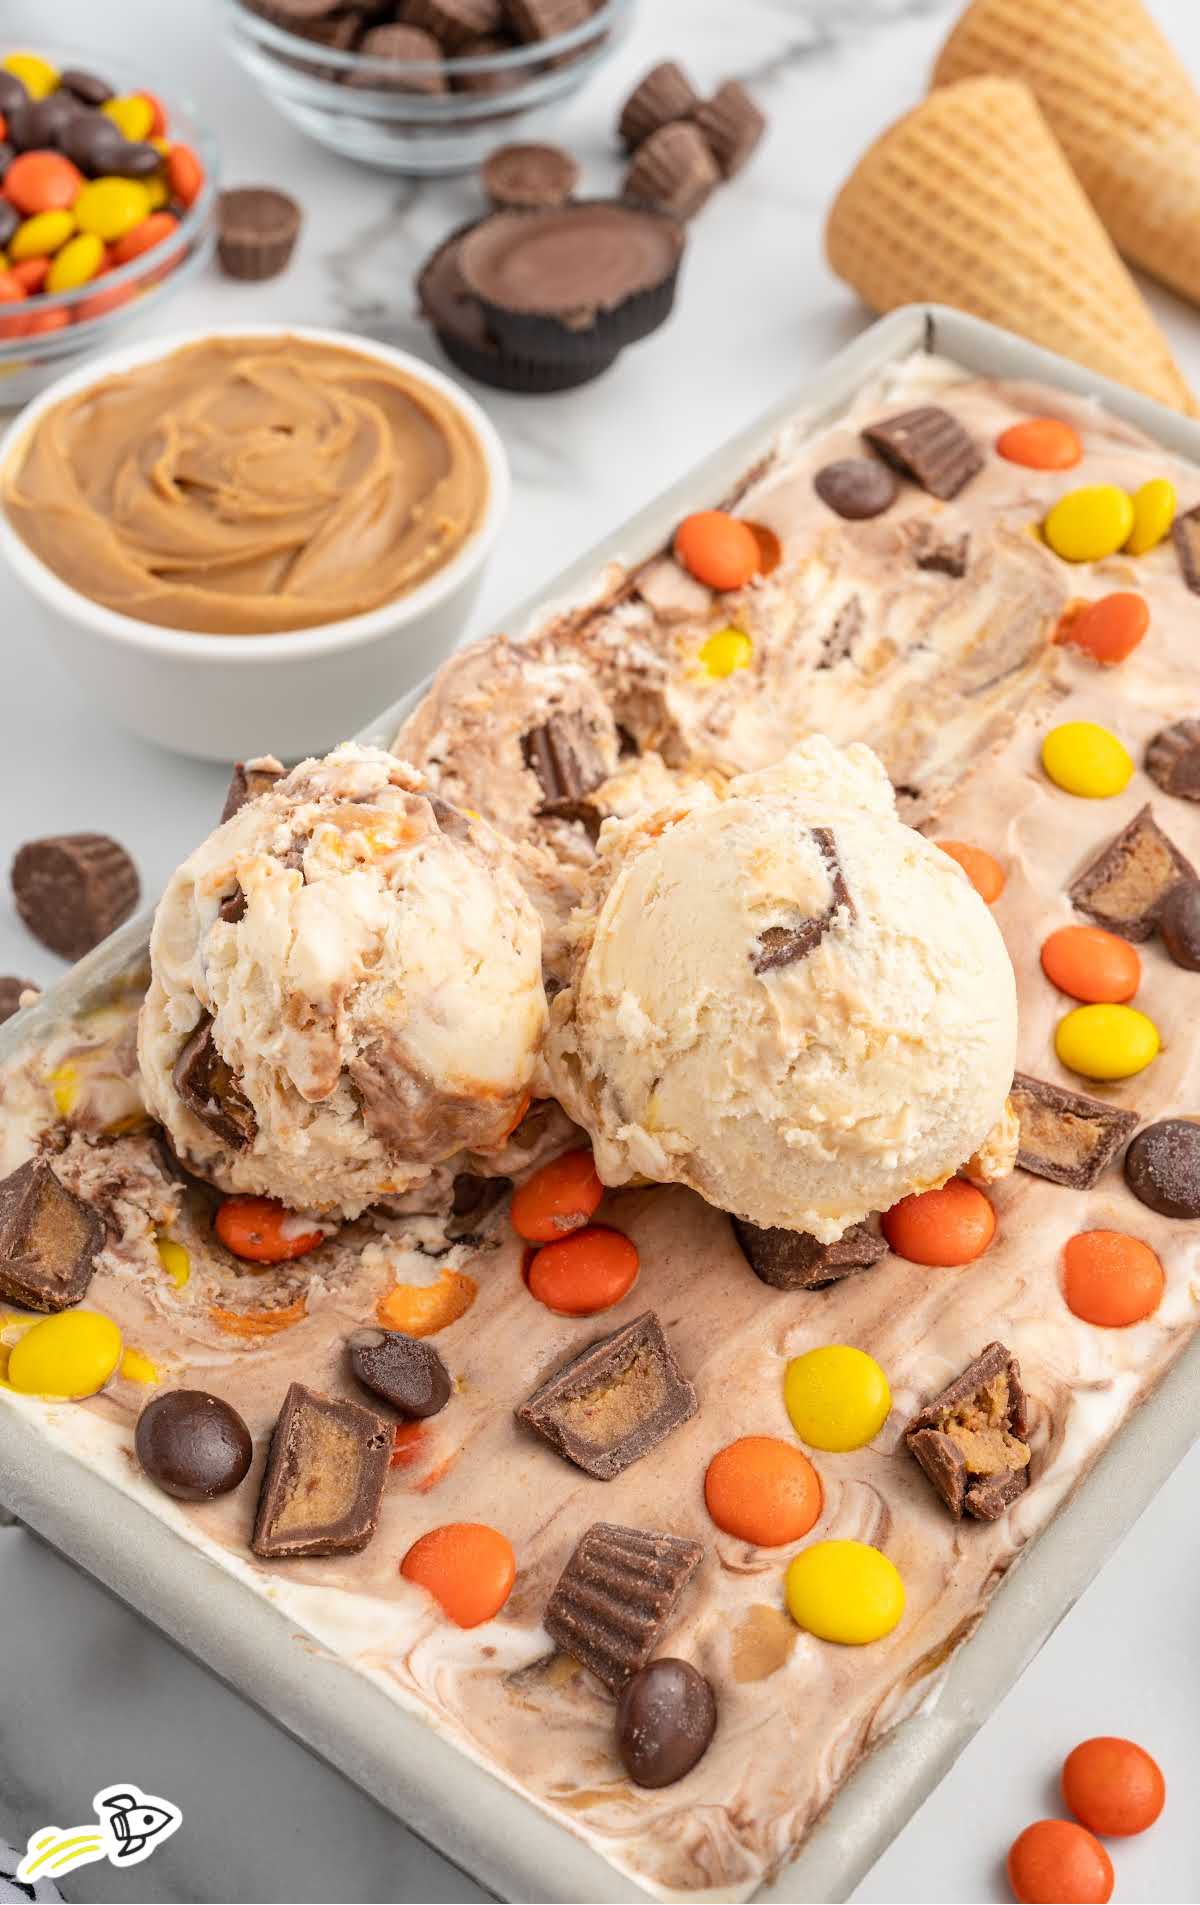
Peanut Butter Cup Ice Cream blends creamy peanut butter with rich chocolate and Reese's Peanut Butter Cups. The perfect indulgence on a hot day or cozy night in.
Jump to Recipe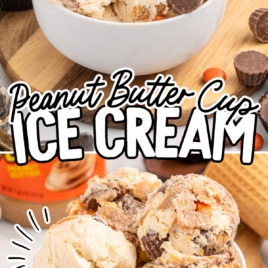
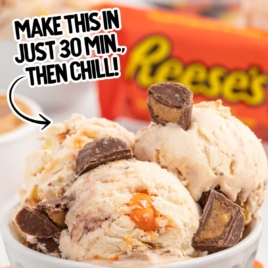
Table of Contents
- Peanut Butter Cup Ice Cream Ingredients
- Reese’s Cup Ice Cream Substitutions and Additions
- How To Make Peanut Butter Cup Ice Cream
- Troubleshooting
- How To Serve Peanut Butter Cups Ice Cream
- How To Store Homemade Peanut Butter Ice Cream
- Why This Peanut Butter Cup Ice Cream Is The Best
- Frequently Asked Questions
- Homemade Ice Creams You’ll Love
- JUMP TO RECIPE
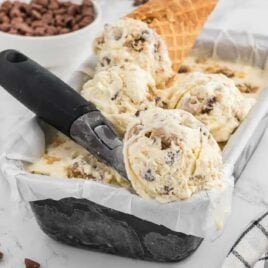
This Peanut Butter Cup Ice Cream is a peanut butter lovers dream! No churning necessary! Stir together this homemade ice cream full of chunks of peanut butter cups, then go ahead and drizzle with plenty of chocolate sauce on top for a cool and creamy treat that’s beyond yummy.
The hardest part about this recipe is waiting for the ice cream to freeze so you can dig in. Eaten in a cup or a cone, this recipe is sure to become a new favorite, and you don’t need any fancy equipment. That’s right, no ice cream machine needed!
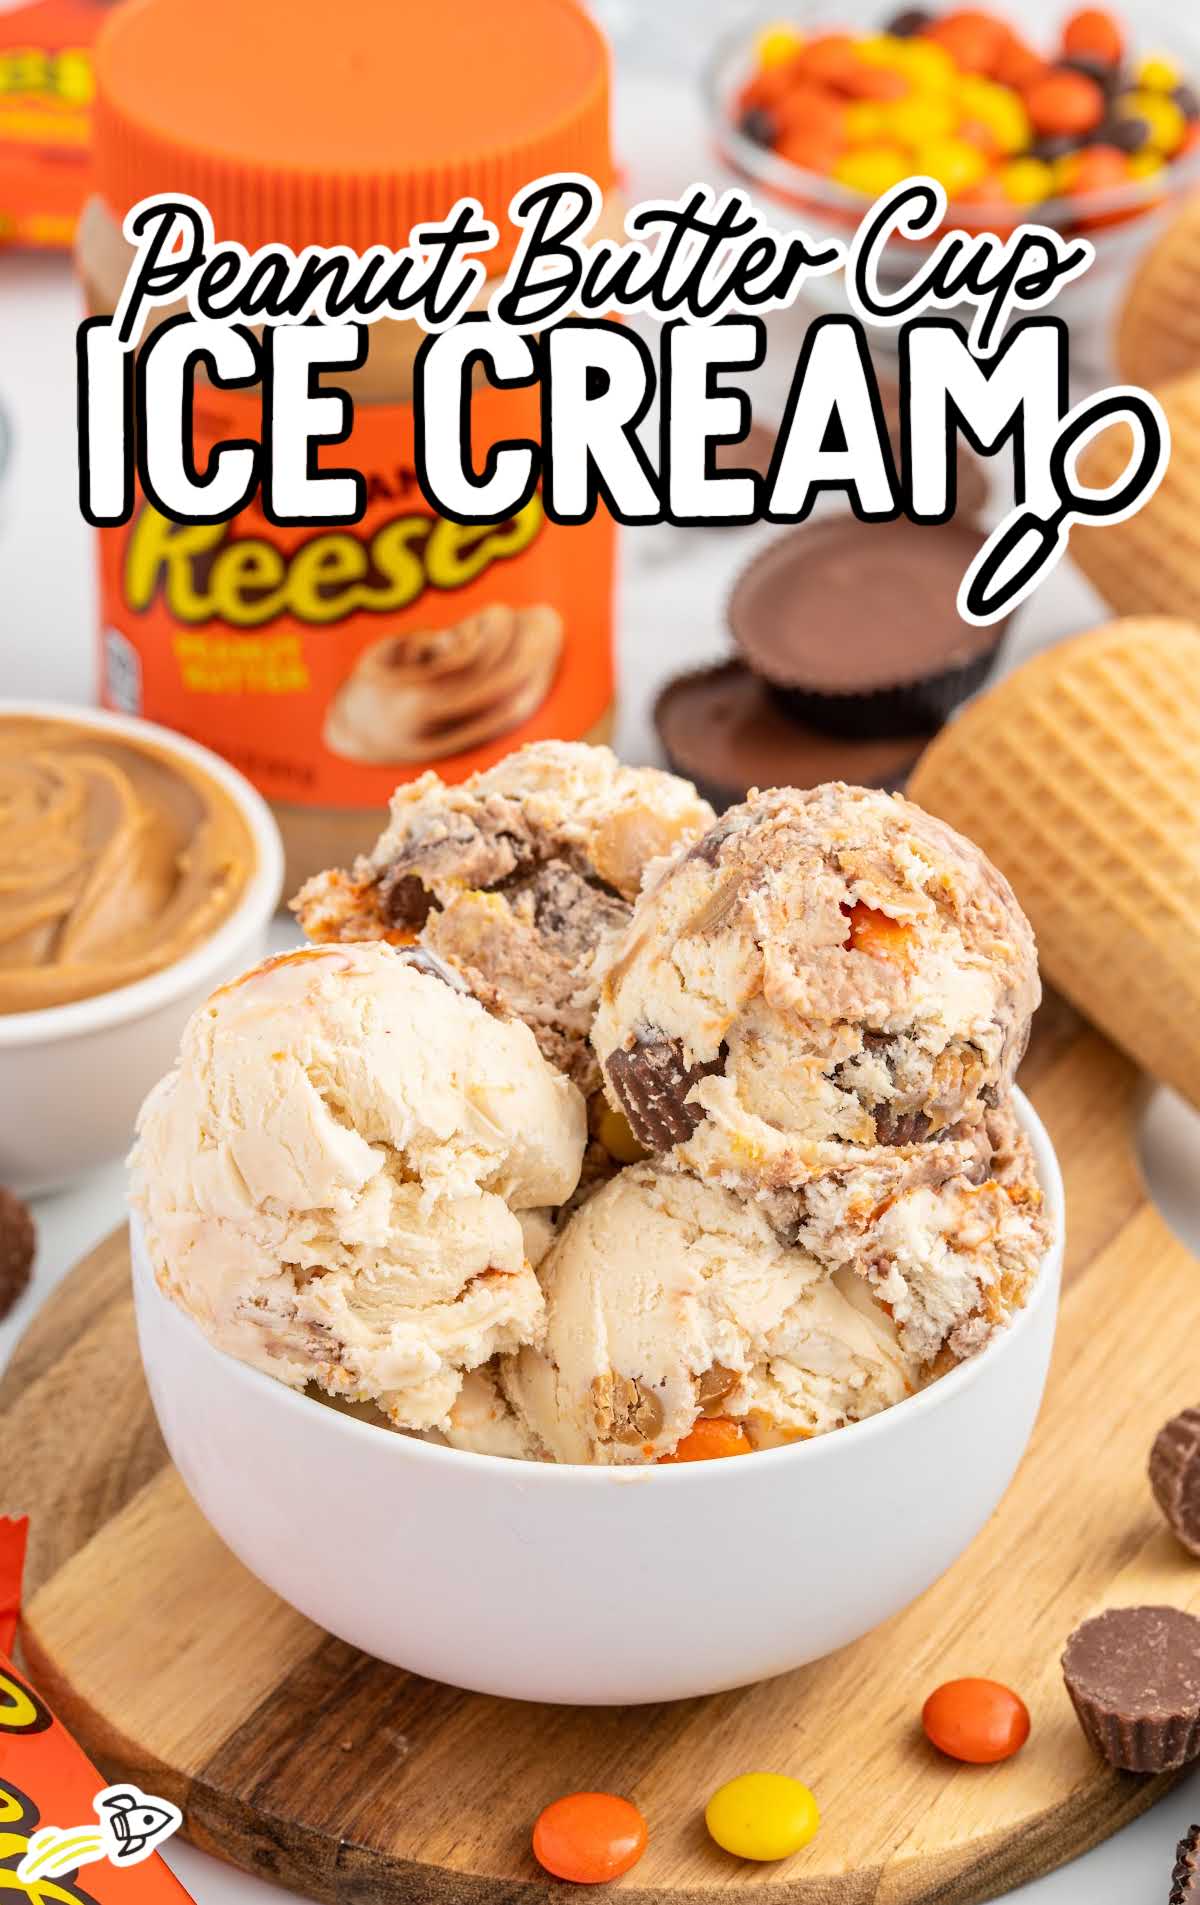
Peanut Butter Cup Ice Cream Ingredients

Like all great ice cream, this homemade peanut butter cup ice cream recipe is made from simple ingredients, and embellished with all our favorite goodies, like peanut butter cups, Reese’s Pieces, and chocolate sauce.
You’ll Need:
- ½ cup creamy peanut butter, divided (We used Reese’s brand peanut butter)
- 1 (14-ounce or 396-gram) can of sweetened condensed milk
- 2 teaspoons pure vanilla extract
- ¼ teaspoon table salt
- 2 cups cold heavy cream
- ¾ cup Reese’s unwrapped mini peanut butter cups, sliced in half (divided into ½ cup and ¼ cup)
- ¾ cup Reese’s pieces candies (divided into ½ cup and ¼ cup)
- 3 tablespoons chocolate syrup
Reese’s Cup Ice Cream Substitutions and Additions
Creamy Peanut Butter: We don’t recommend you substitute creamy peanut butter with natural peanut butter. Natural nut butter has too much oil in it and might cause your ice cream to separate.
Sweetened Condensed Milk: For a dairy-free option, coconut condensed milk is an excellent substitute and is available at most grocery stores. It will give your ice cream a hint of a coconut taste, which we feel pairs nicely with the peanut butter flavor.
Table Salt: For a hint of gourmet flair, try using sea salt instead. It can really enhance the natural flavors of the ice cream.
Cold Heavy Cream: If you need to avoid dairy, try whipping chilled full-fat coconut cream instead. Just keep in mind it will give your ice cream a subtle coconut flavor.
While we prefer homemade whipped cream in this recipe, you can try using Cool Whip if you need to save time.
Reese’s Mini Peanut Butter Cups: For a less sweet option, dark chocolate chunks can be used instead of Reese’s. You can also substitute with any size of Reese’s peanut butter cups. Just cut them as needed into the right sized pieces.
Reese’s Pieces: Substitute with chopped nuts like almonds or pecans for a bit of crunch.
Chocolate Syrup: If you don’t want extra chocolate on your ice cream, try drizzling peanut butter sauce or caramel instead.
How To Make Peanut Butter Cup Ice Cream
Ready to whip up something irresistibly smooth and delightfully chunky? This easy ice cream recipe combines rich, creamy peanut butter ice cream with the crunchy, sweet bites of your favorite candy.
STEP ONE: Before anything else, ensure you have all your equipment ready. Place your mixing bowl and whisk or beaters for an electric mixer in the freezer, along with a 9×5 metal loaf pan.
PRO TIP: If you’re looking for an easier cleanup or need to remove the ice cream easily from the pan, line your loaf pan with plastic wrap before you start.
STEP TWO: Place ¼ cup of the creamy peanut butter in a microwave-safe bowl. Heat it for 10-15 seconds in the microwave, then stir well until it’s smoothly melted.
PRO TIP: After melting the peanut butter, check its consistency. If it seems too thick, you can add a teaspoon of coconut oil and stir thoroughly. This will help achieve a smoother consistency that’s easier to swirl into the ice cream later.
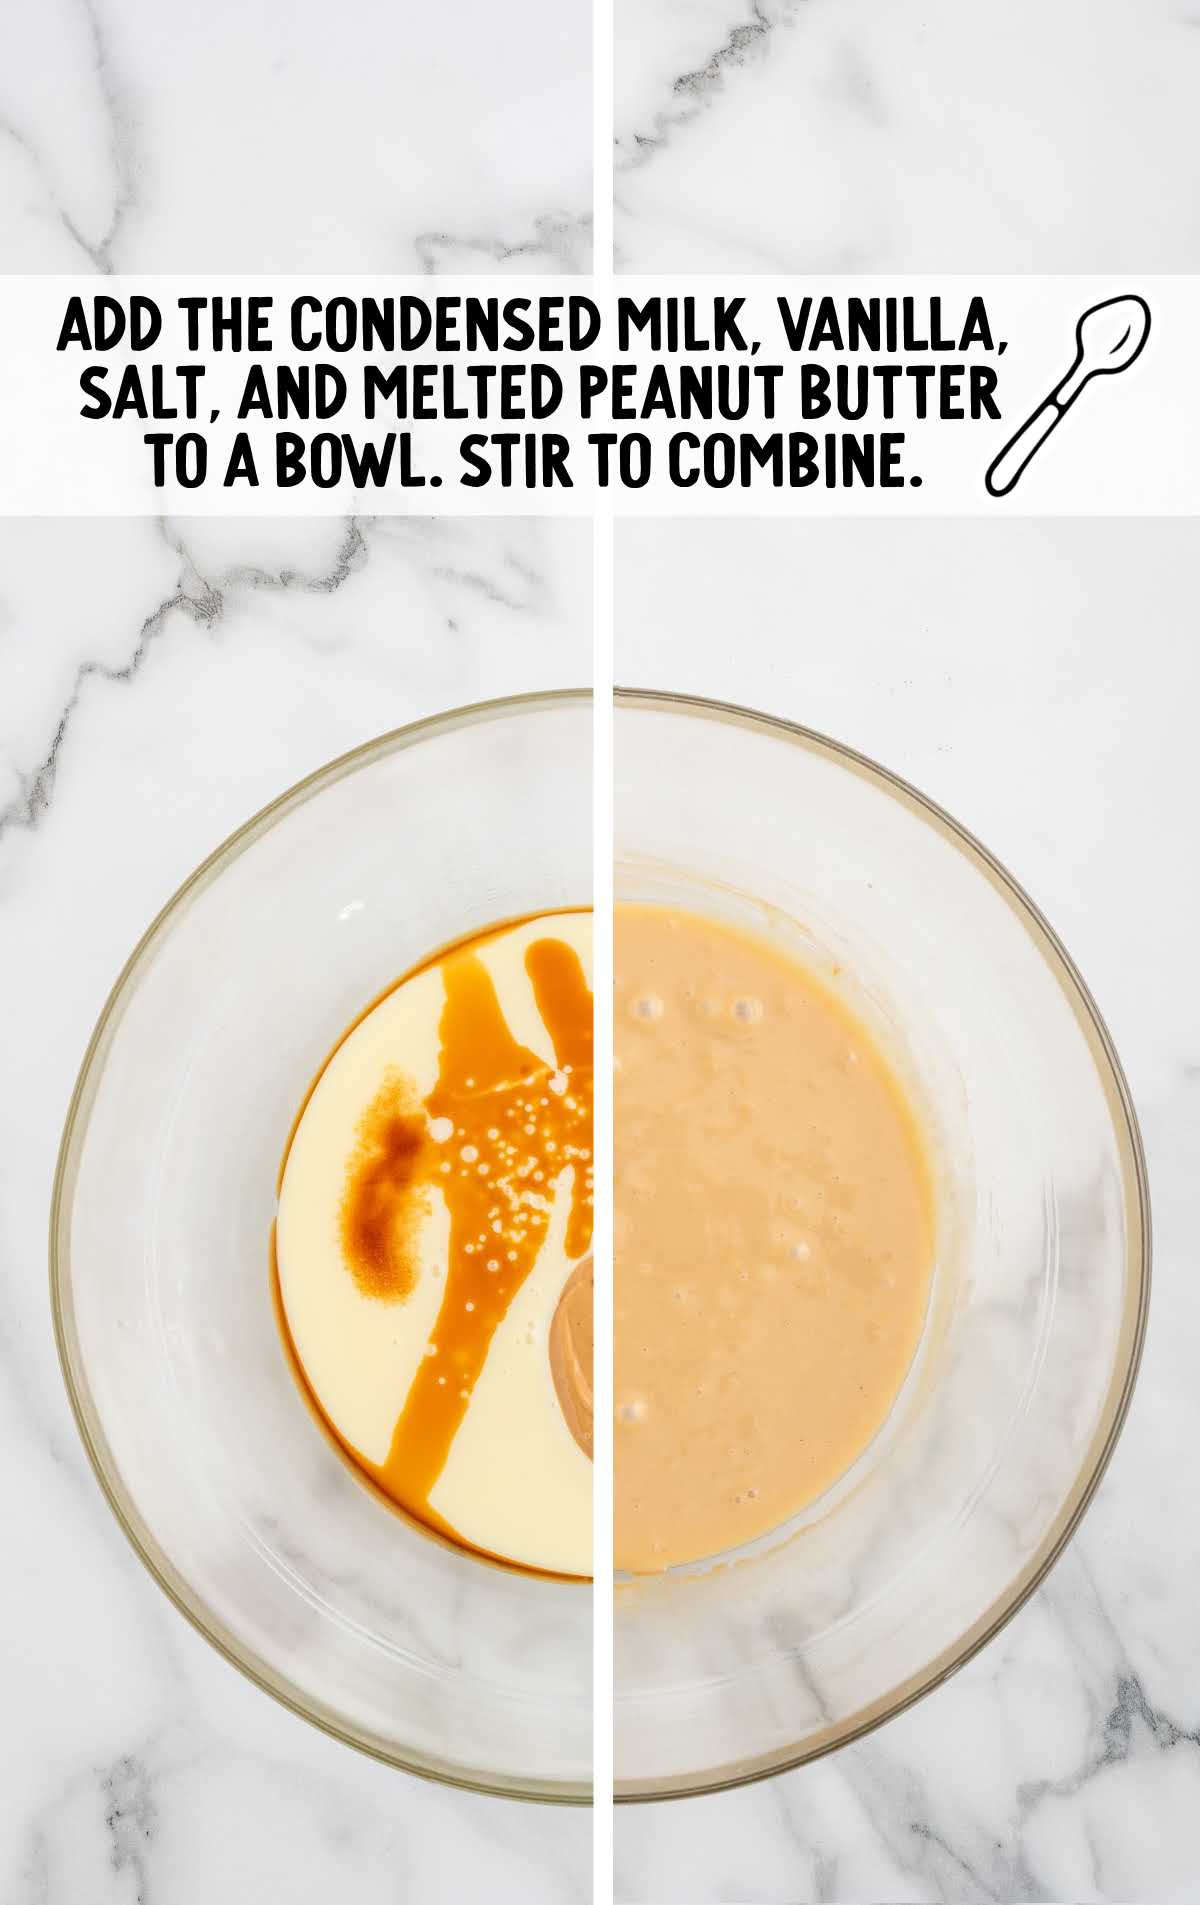
STEP THREE: In a large bowl, mix the melted peanut butter with sweetened condensed milk, vanilla extract, and salt. Stir these together until you have a consistent, smooth mixture.
PRO TIP: Using a whisk for this step can help prevent any lumps and ensure a creamy texture.
STEP FOUR: Remove the chilled mixing bowl and whisk or beaters from the freezer. Pour in the cold heavy cream and beat on high speed until stiff peaks form.
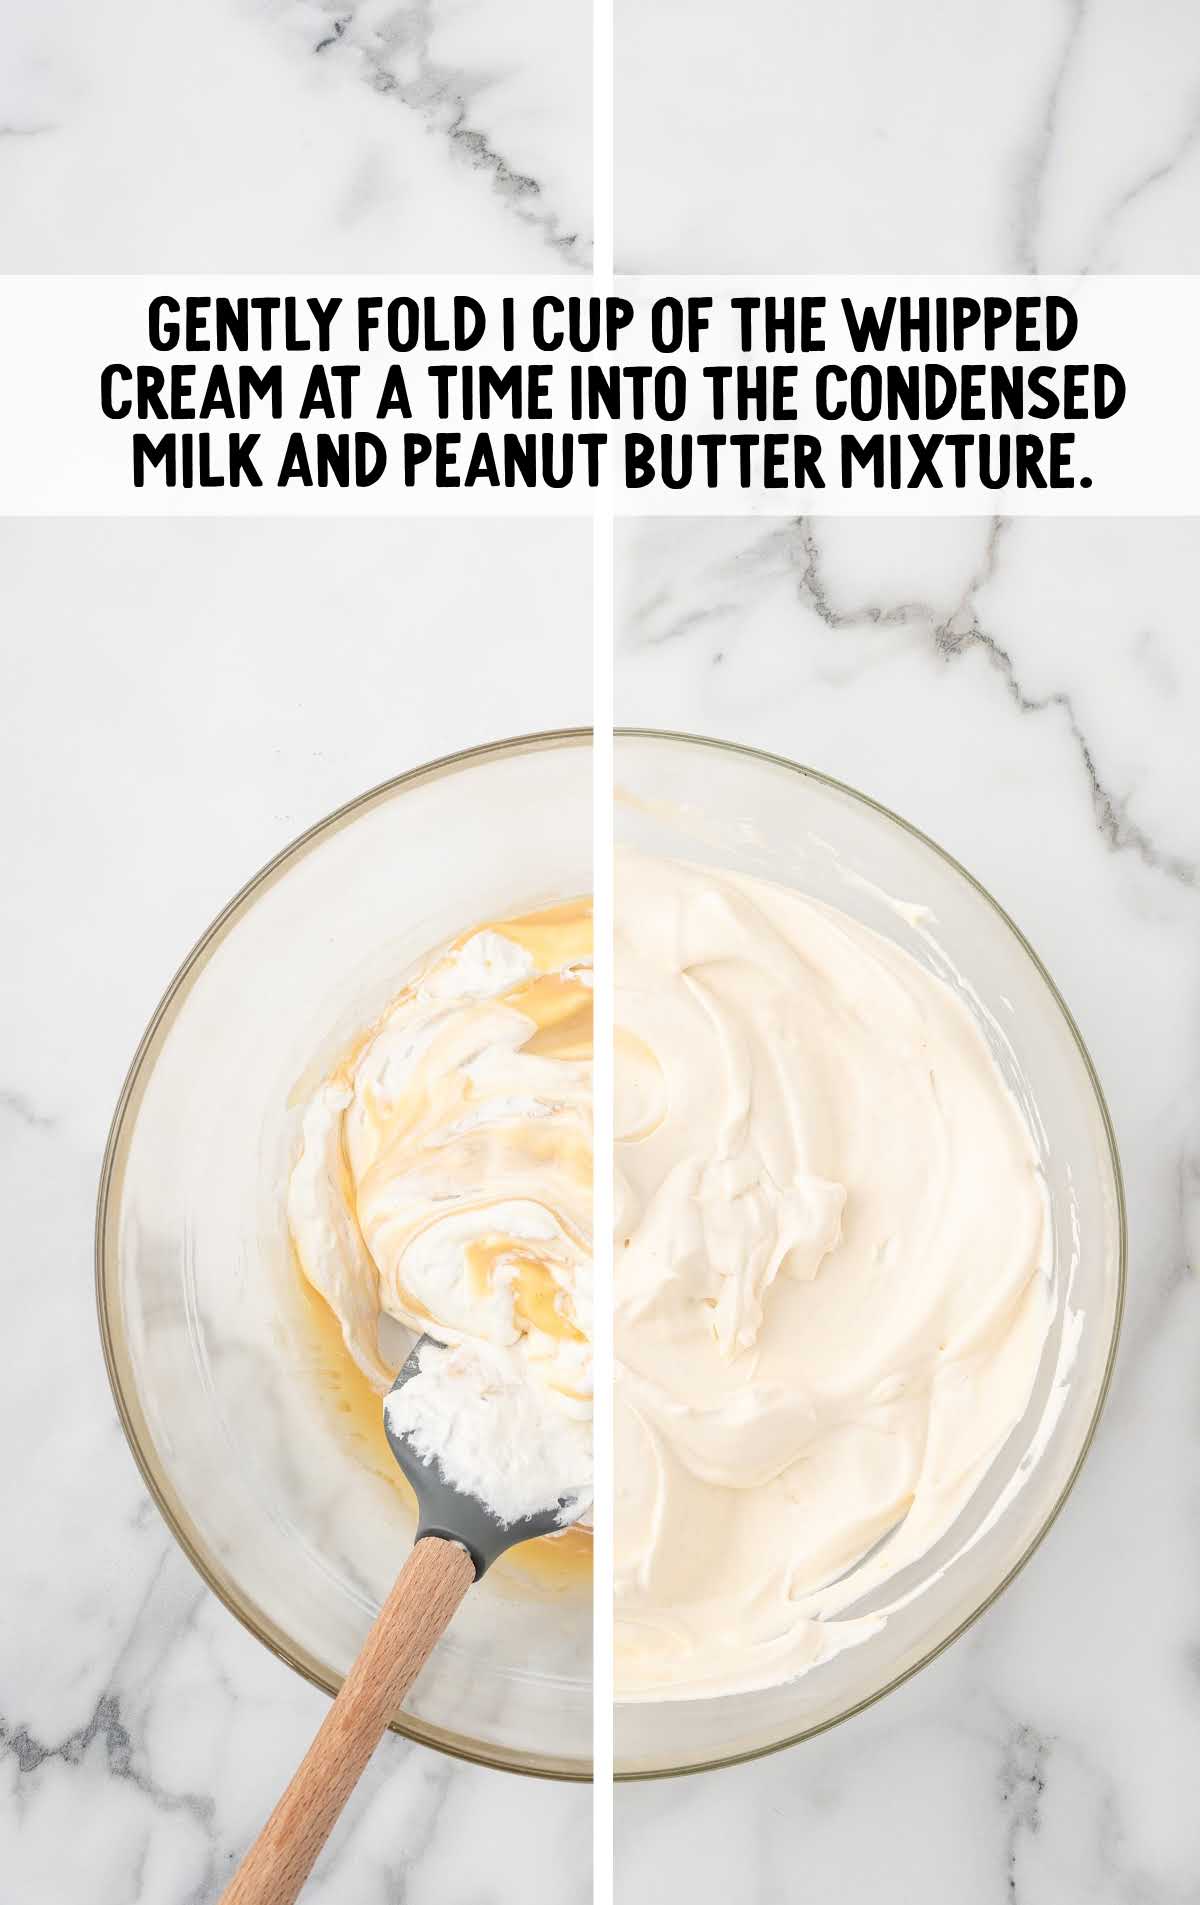
STEP FIVE: Gently fold the whipped cream into your peanut butter mixture. Do this gradually, adding one cup of whipped cream at a time to avoid deflating the air you’ve whipped into it.
PRO TIP: If you stir too quickly or aggressively, you can end up with a soupy mixture that doesn’t make a light and creamy ice cream.
STEP SIX: Take the prepared loaf pan out of the freezer. Spoon the ice cream mixture evenly into the pan. Cover it with aluminum foil and freeze for 2 hours.
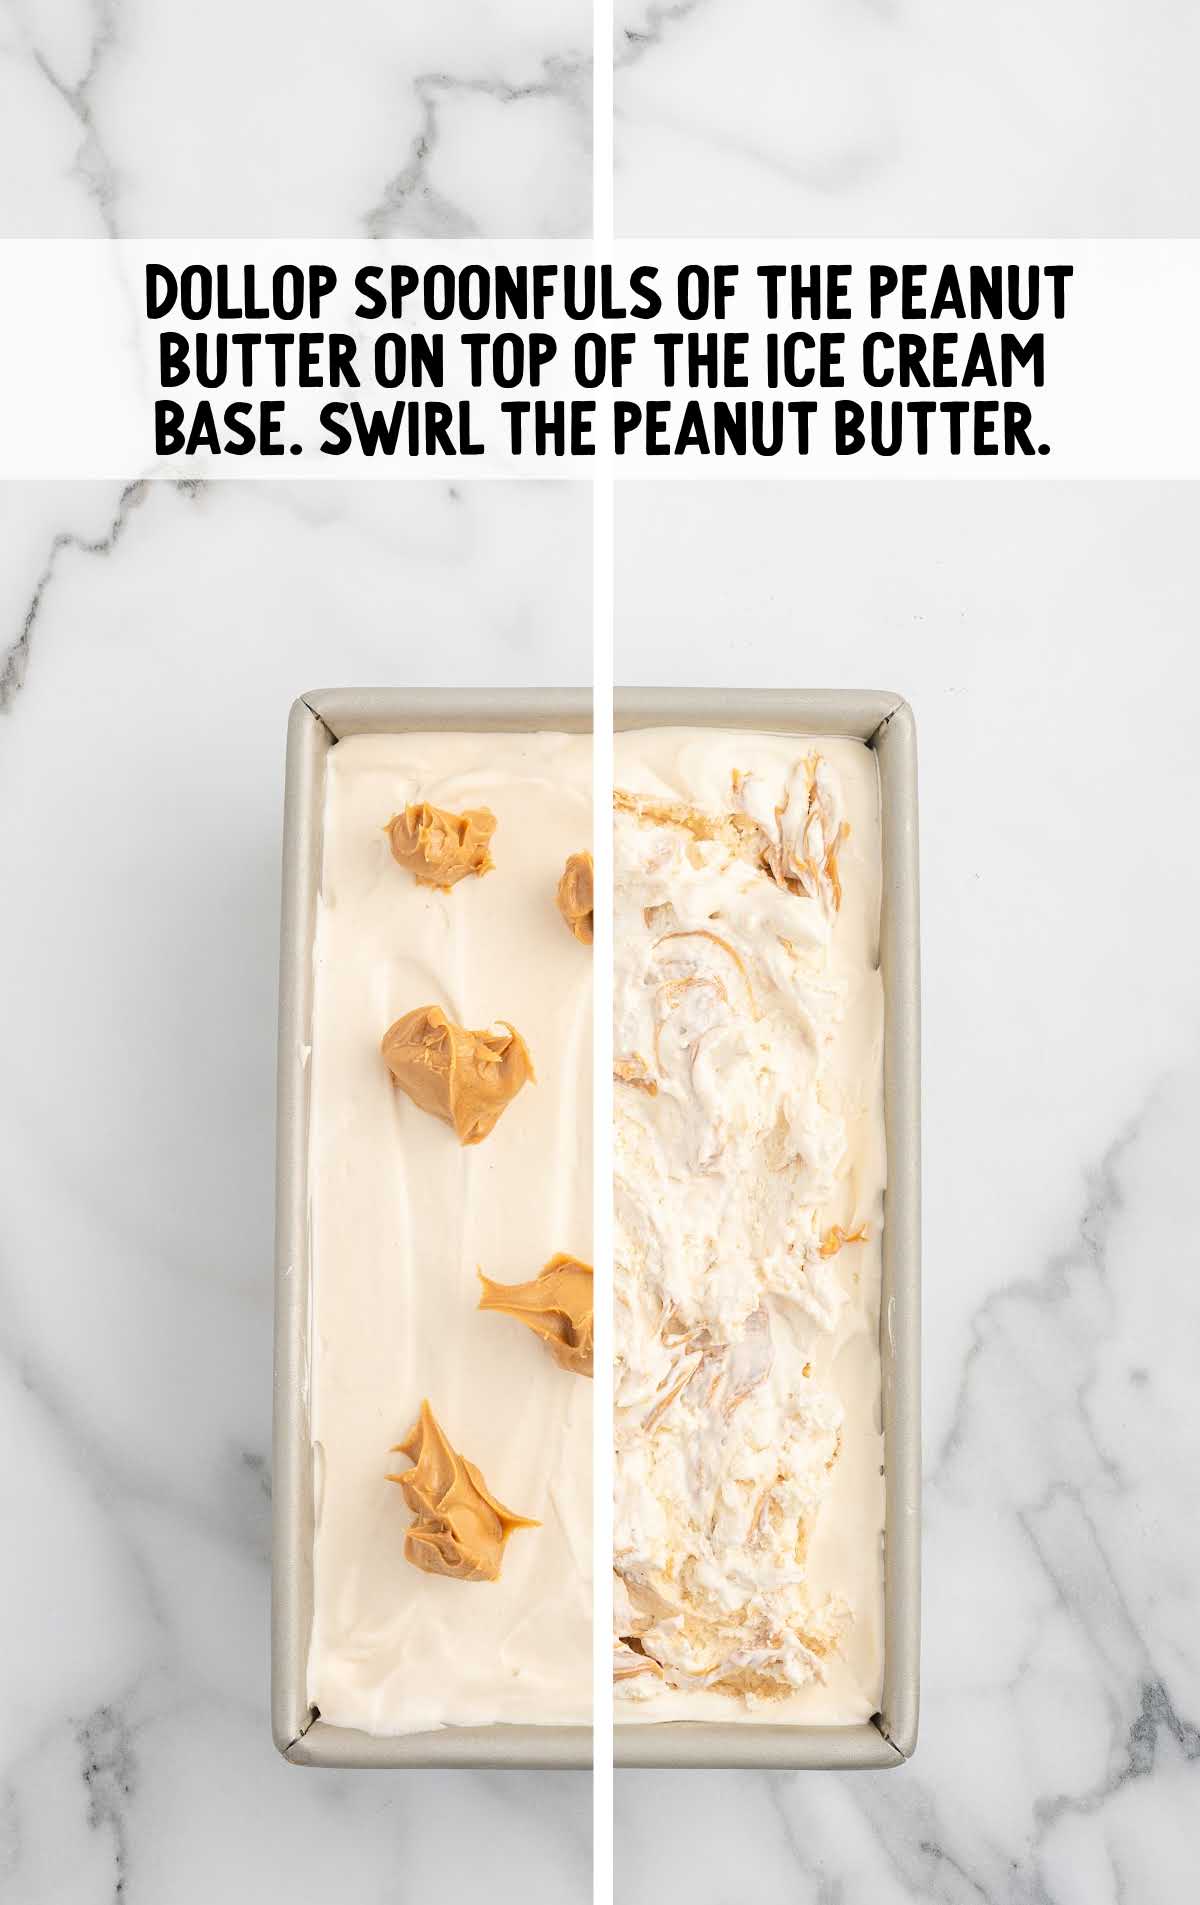
STEP SEVEN: After the first freeze, remove the ice cream from the freezer. Dollop small spoonfuls of the remaining peanut butter over the ice cream base, then use a knife to create a peanut butter swirl throughout the mixture.
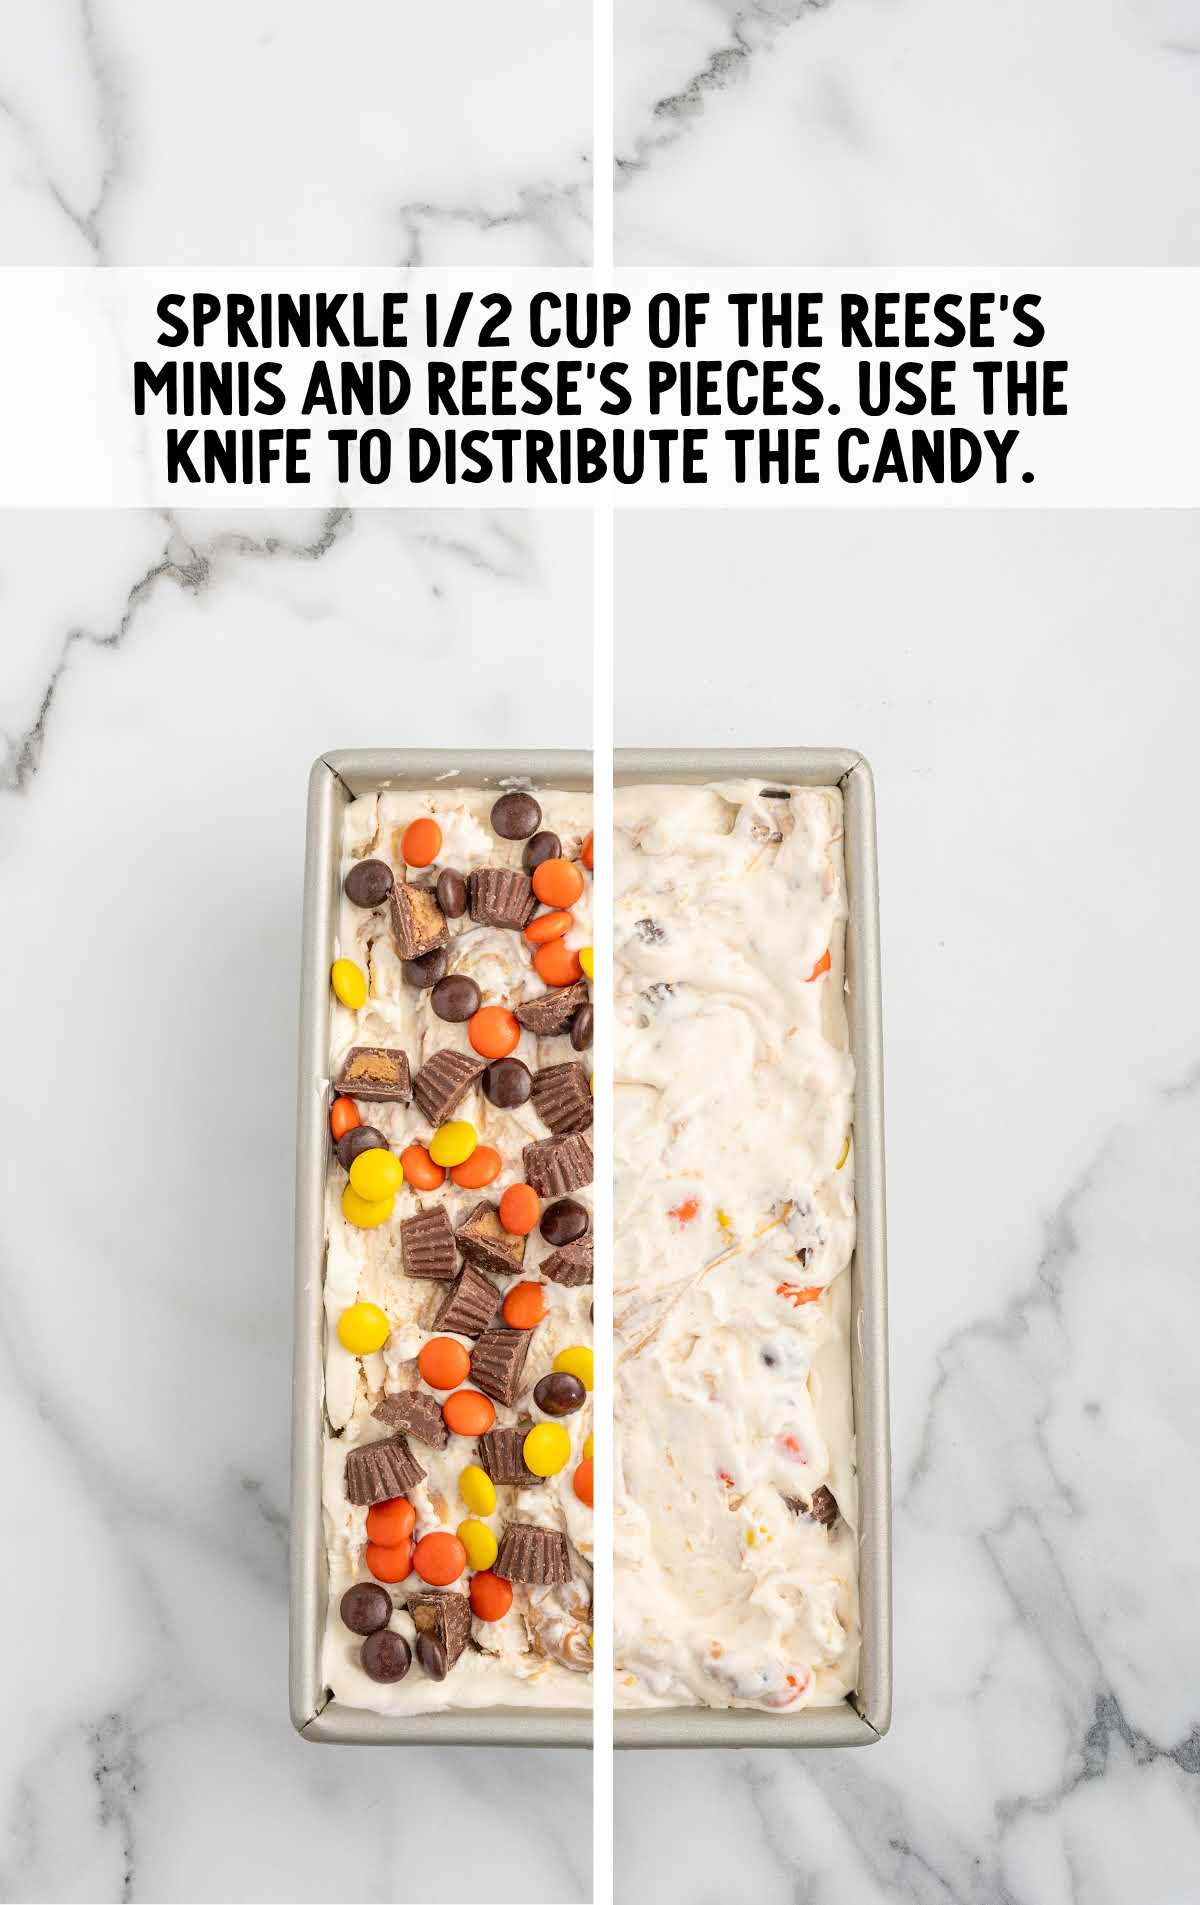
STEP EIGHT: Sprinkle half a cup of the chopped peanut butter cups and Reese’s Pieces over the top.
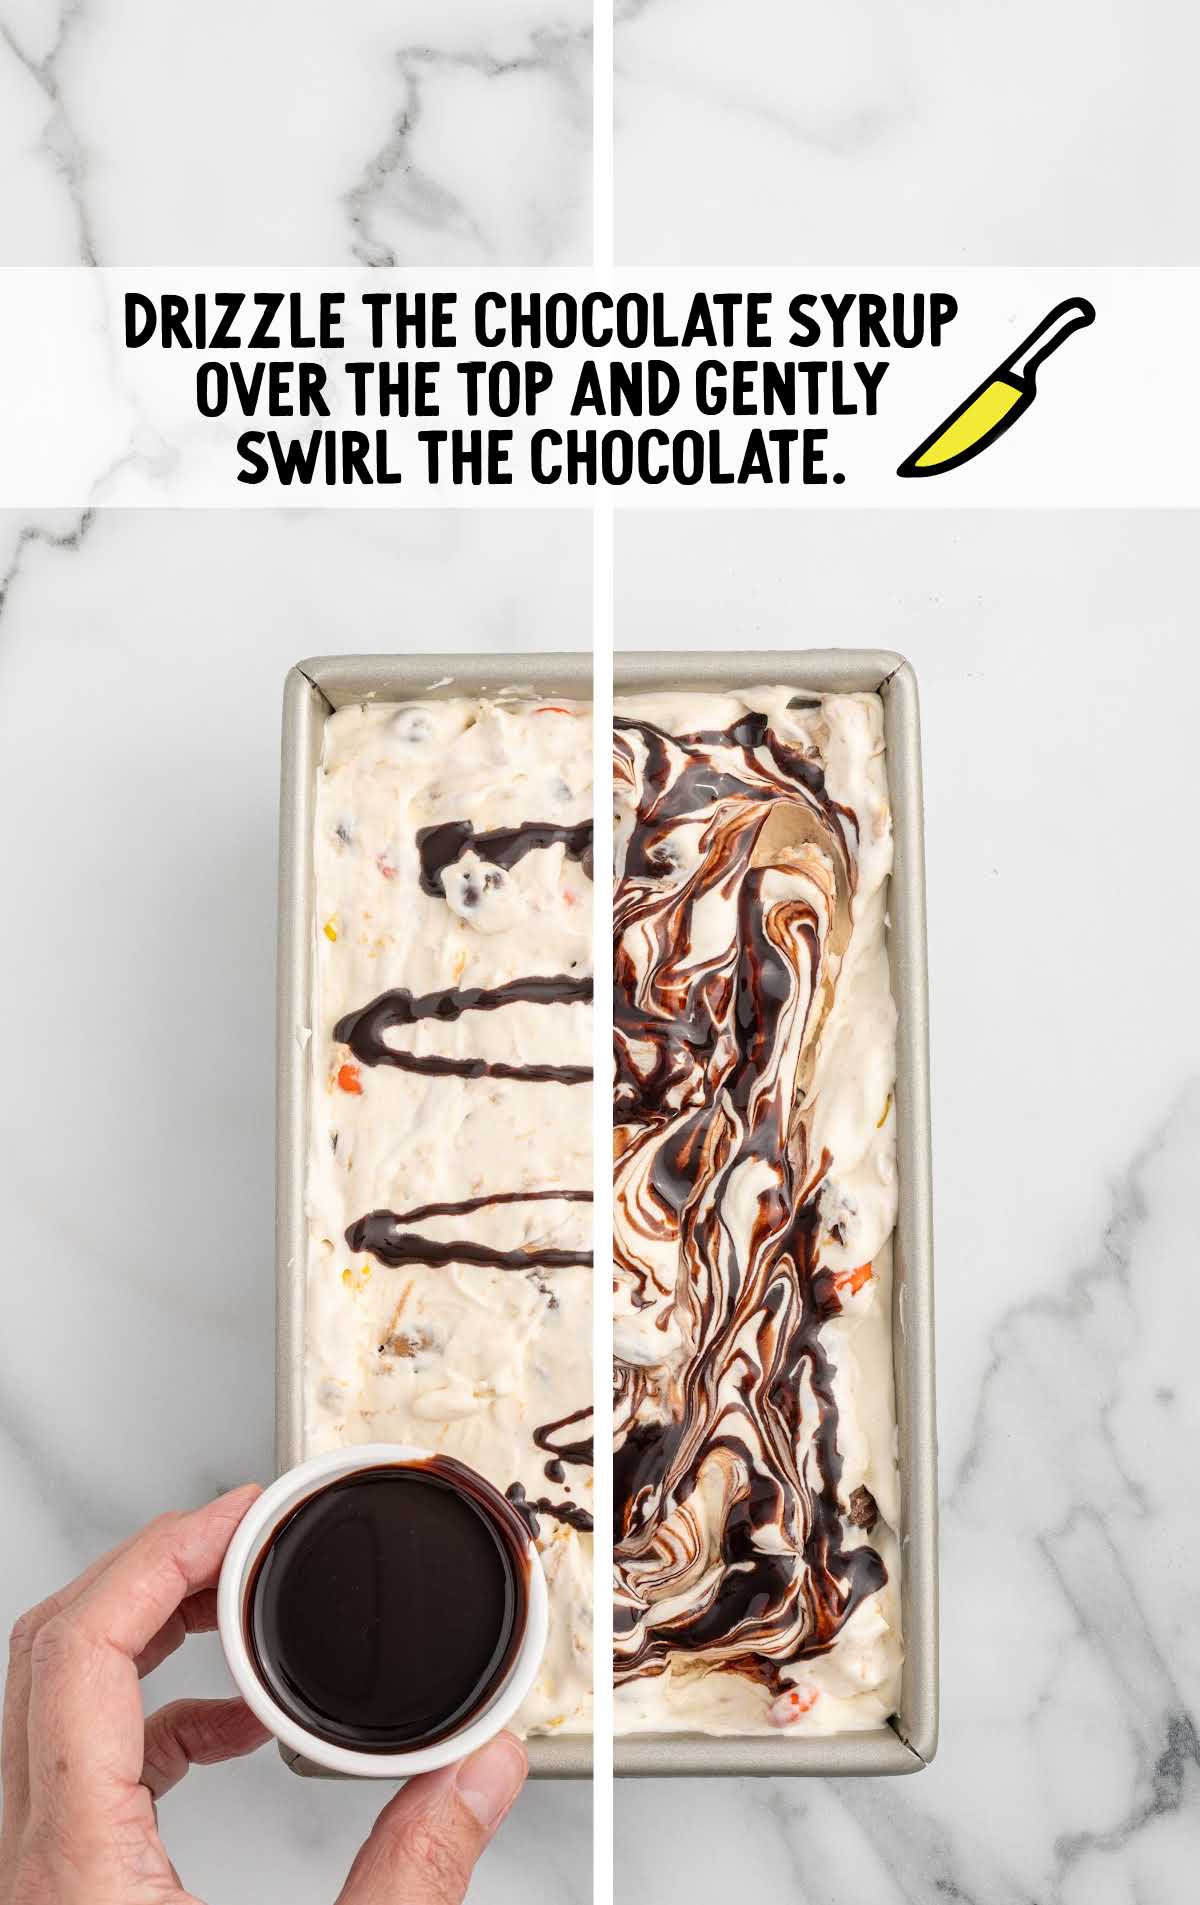
Then drizzle with chocolate syrup. Use a knife to gently swirl these toppings into the ice cream, creating marbled patterns and distributing the candy evenly.
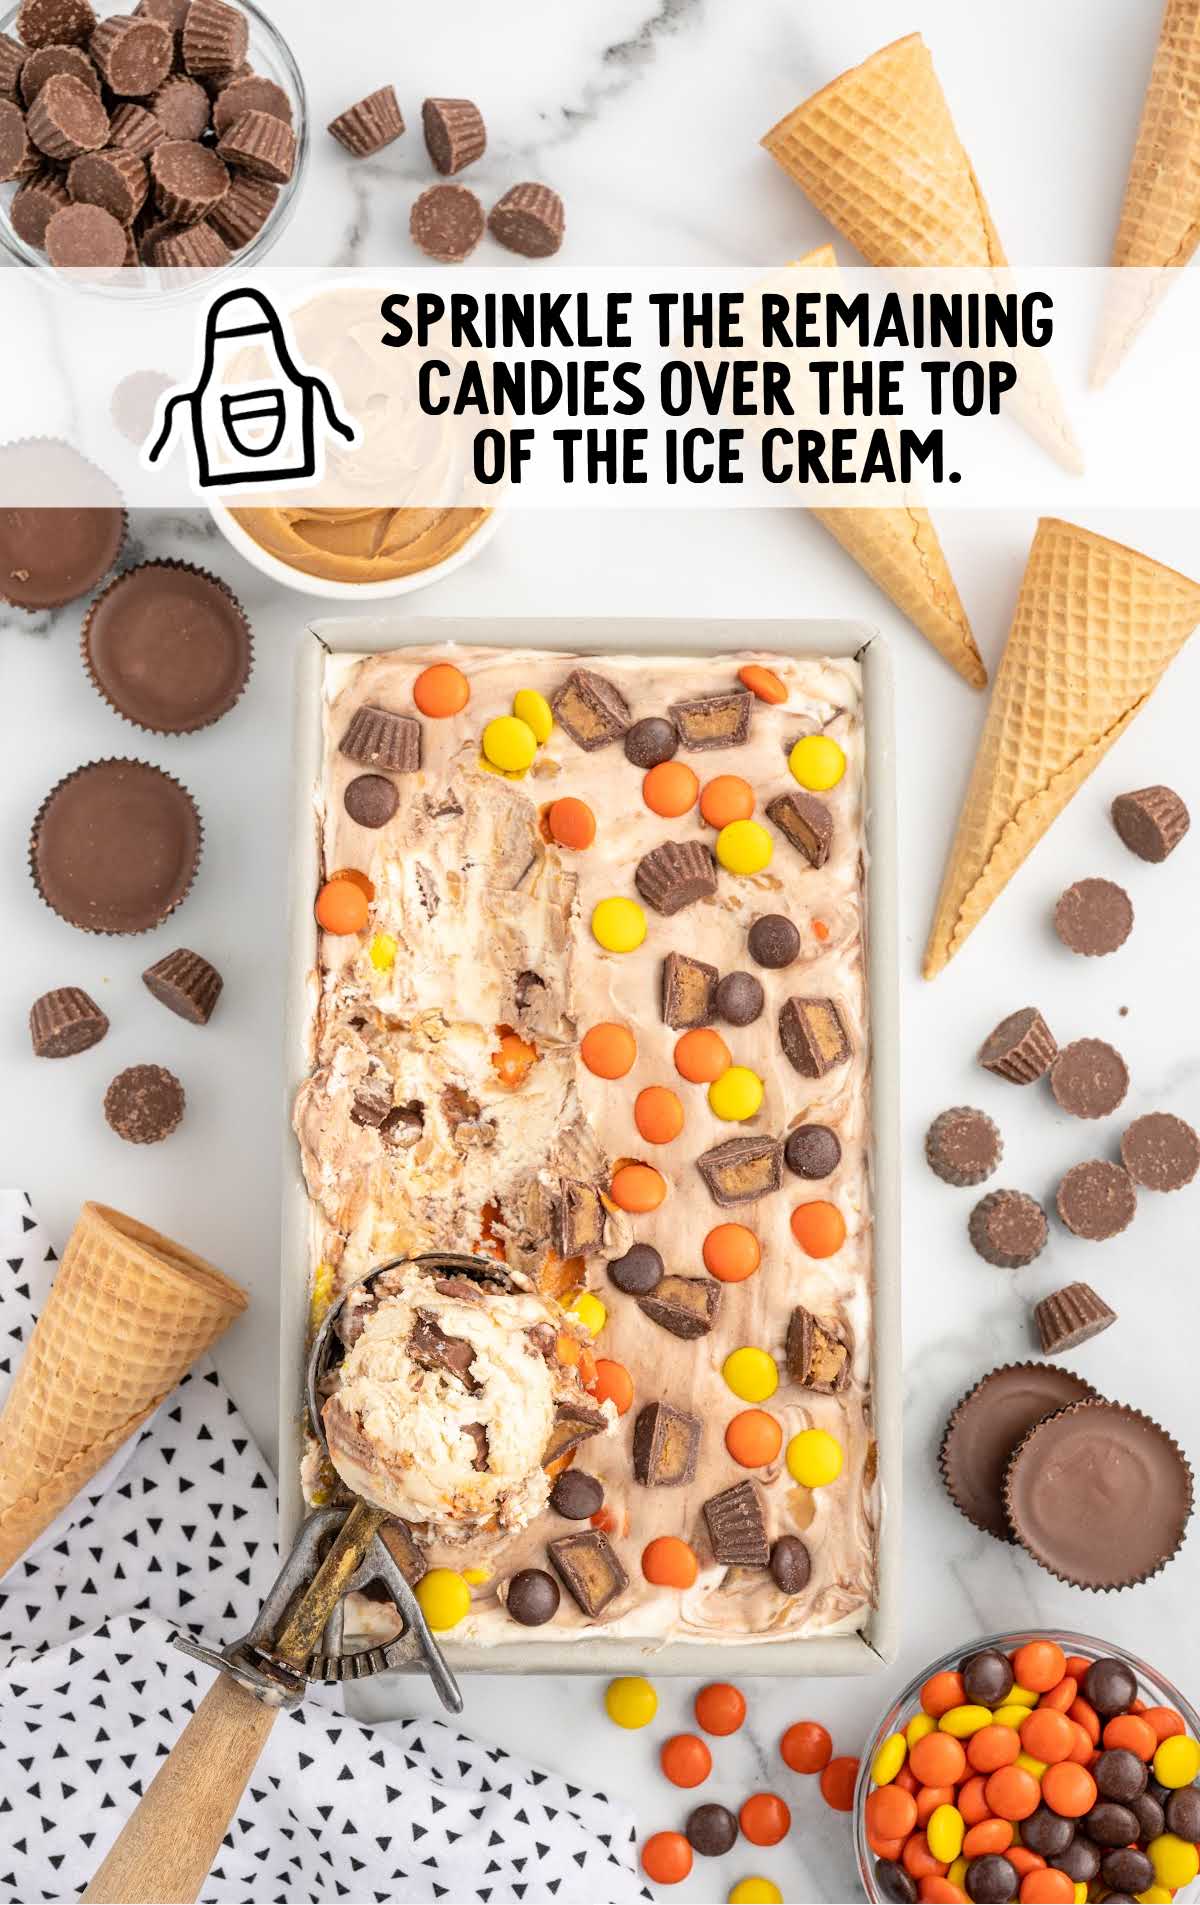
STEP NINE: Smooth the top with an offset spatula or knife, then sprinkle the remaining candy over the top. Cover again with aluminum foil and place it back in the freezer for an additional 3 hours.
STEP TEN: Once fully set, remove the foil, scoop out your deliciously chunky Peanut Butter Cup Ice Cream, and enjoy every peanut buttery, chocolate-packed bite!
PRO TIP: Let the ice cream sit at room temperature for about 5 minutes before scooping. This makes it easier to scoop and enhances the flavors.
Troubleshooting
This recipe should come together nicely, but if it’s your first time making ice cream at home, here are some possible issues you might run into, and how to fix them:
The ice cream is too icy and lacks creaminess.
Make sure you’re using full-fat ingredients, especially the heavy cream, to enhance the creaminess and reduce iciness.
The peanut butter isn’t mixing well into the base and forms clumps.
Fully melt the peanut butter and let it cool slightly before adding it to the mixture so it combines fully.
The whipped cream deflates when folded into the peanut butter mixture, resulting in a less airy texture.
Very gently, fold (don’t stir) the whipped cream into the base using a wide spatula and make sure to do it gradually, in stages, to preserve the air bubbles. Don’t overmix. A few streaks are ok.
The peanut butter cups and Reese’s Pieces sink to the bottom instead of being distributed throughout.
Partially freeze the ice cream for about an hour before adding the candy pieces to prevent them from sinking. If they’re still sinking, freeze for a bit longer.
The ice cream doesn’t set properly and remains too soft.
Make sure the ice cream mixture is cold before you start churning, and ensure your freezer is set to the coldest setting for the initial freeze.
How To Serve Peanut Butter Cups Ice Cream
After carefully crafting your Reeses peanut butter ice cream in your own kitchen, the next step is just as exciting—deciding how to serve it! Here are a few ideas:
Classic Sundae Style: Serve scooped high in a frosty glass bowl, drizzled with warm peanut butter and topped with whipped cream. Yum!
Ice Cream Sandwiches: Sandwich scoops of Peanut Butter Cup Ice Cream between freshly baked chocolate chip or peanut butter cookies for a fun and indulgent treat.
You can break out your homemade dessert on family movie night along with other peanut butter cup treats like chocolate peanut butter dessert cups and peanut butter cup brownies.
This ice cream is also perfect for warm summer days as an easy-to-share treat after a cookout.
Serve on the side of a chocolate peanut butter birthday cake and make the Reese’s lover in your life feel loved! Kids and adults alike will adore this real peanut butter ice cream!
MORE PEANUT BUTTER RECIPES
How To Store Homemade Peanut Butter Ice Cream
Here’s how to make sure your ice cream stays fresh and creamy!
MAKE AHEAD: Reese’s peanut butter ice cream is perfect for making ahead of time. Follow the recipe steps to prepare the ice cream, then cover the container tightly with aluminum foil. For the best texture, serve within a week, and as a bonus, the flavors will be even yummier after they’ve had a chance to meld together.
IN THE FRIDGE: We don’t recommend storing ice cream in the fridge, as it will melt.
IN THE FREEZER: Store this ice cream your freezer or deep freeze for up to two months. Make sure it’s well wrapped in aluminum foil, and place it in a Ziploc bag for extra protection against freezer burn.
Why This Peanut Butter Cup Ice Cream Is The Best
Peanut butter, chocolate, and peanut butter cups. Does it get any better?
Here’s why we love this recipe:
Reese’s Peanut Butter Cups, Of Course! Anytime we make desserts using Reese’s, the recipe quickly becomes one of our all-time favorites! Who doesn’t love the famous combination of sweetened peanut butter and rich chocolate?
Perfect Blend of Sweet and Salty: The flavor of this ice cream is beyond delicious. We love the way the salty peanut butter and sweetened condensed milk combine to create the perfect taste combination.
No Special Equipment Needed: Unlike regular ice cream recipes that require an ice cream maker, our no-churn Peanut Butter Cup Ice Cream can be made with just a few simple kitchen tools.
Frequently Asked Questions
What should I do if my ice cream hasn’t set after the initial two-hour freeze?
If it’s too soft, leave it in the freezer for an additional hour or two. Freezing times can vary depending on the temperature of your freezer.
Why do I need to freeze the mixing bowl and beaters before whipping the cream?
Chilling these items helps keep the cream cold, which is essential for it to whip properly and hold its shape when folded into the other ingredients.
Can I add extra toppings into the ice cream mix?
Absolutely! Feel free to customize by adding nuts, chocolate chips, or even swirls of caramel or jam before the final freeze.
Is it necessary to use a metal loaf pan, or can I use another type of container?
While a metal loaf pan is ideal for quick freezing and even cold distribution, you can use any freezer-safe container, though the freezing time may vary slightly.
What can I substitute for Reese’s peanut butter cups if I don’t have them?
You can substitute them with any similar chocolate and peanut butter candy, or even chopped chocolate bars and a sprinkle of peanuts for a similar taste and texture. For an extra indulgent treat, try adding chunks of our edible peanut butter cookie dough.
Can I use natural peanut butter in this recipe?
Yes, natural peanut butter can be used, but we don’t recommend it. It may separate or be less creamy.
A peanut butter lover’s dream ice cream! This Peanut Butter Cup Ice Cream recipe is the easiest, ultra-yummy way to enjoy all the flavors of Reese’s in a cool and creamy homemade treat.
Homemade Ice Creams You’ll Love
- Kool Aid Ice Cream
- Red Velvet Ice Cream
- Cookie Dough Ice Cream
- Birthday Cake Ice Cream
- Mint Chocolate Ice Cream Cake


Peanut Butter Cup Ice Cream
Peanut Butter Cup Ice Cream blends creamy peanut butter with rich chocolate and Reese’s Peanut Butter Cups. The perfect indulgence on a hot day or cozy night in.
Prep Time 30 minutes
Total Time 5 hours 30 minutes
Servings 6 cups
Ingredients
- ½ cup creamy peanut butter, divided (We used Reese’s brand peanut butter)
- 14 ounces sweetened condensed milk (396-gram can)
- 2 teaspoons pure vanilla extract
- ¼ teaspoon table salt
- 2 cups cold heavy cream
- ¾ cup Reese’s unwrapped mini peanut butter cups, sliced in half (divided into ½ cup and ¼ cup) (You can substitute quartered Reese’s miniatures or chopped full-size Reese’s cups)
- ¾ cup Reese’s pieces candies, divided into ½ cup and ¼ cup
- 3 tablespoons chocolate syrup
Instructions
- Place a medium-sized mixing bowl (3-4 quarts, metal or glass) in the freezer. If using a stand mixer, place the wire whisk attachment in the freezer with the mixing bowl. If you are using a handheld mixer, place the beaters in the freezer.
- Place a metal 9×5 loaf pan in the freezer as well. Freeze the loaf pan, mixing bowl, and whisk (or beaters) for 30 minutes. (For easy cleanup, you can line the loaf pan with plastic wrap)
- Add ¼ cup of the peanut butter to a microwave-safe bowl. Heat in the microwave for 10-15 seconds, stirring well until melted.
- Add the sweetened condensed milk, vanilla, salt, and melted peanut butter to a medium-sized mixing bowl (3-4 quarts). Stir to combine.
- Remove the mixing bowl and whisk or beaters from the freezer. Pour in the cold heavy cream. Beat the cream on high speed until stiff peaks form.
- Gently fold 1 cup of the whipped heavy cream at a time into the sweetened condensed milk and peanut butter mixture.
- Remove the loaf pan from the freezer. Evenly spoon the whipped cream mixture into the loaf pan. Cover the loaf pan with aluminum foil and place it back in the freezer for 2 hours.
- Remove the foil-covered loaf pan from the freezer. Dollop small spoonfuls of the peanut butter on top of the ice cream base. Use a knife to gently swirl the peanut butter.
- Sprinkle ½ cup of the sliced Reese’s minis and Reese’s Pieces. Use the knife to distribute the candy.
- Drizzle the chocolate syrup over the top and use the knife to gently swirl the chocolate. Use an offset spatula or a knife to smooth the top.
- Finally, sprinkle the remaining candies over the top of the ice cream. Cover the loaf pan with the aluminum foil and freeze for an additional 3 hours. Remove the foil before scooping and serving.
Notes
- If you’re looking for an easier cleanup or need to remove the ice cream easily from the pan, line your loaf pan with plastic wrap before you start.
- After melting the peanut butter, check its consistency. If it seems too thick, you can add a teaspoon of coconut oil and stir thoroughly. This will help achieve a smoother consistency that’s easier to swirl into the ice cream later.
- If you stir your peanut butter and whipped cream too quickly or aggressively, you can end up with a soupy mixture that doesn’t make a light and creamy ice cream.
- Let the ice cream sit at room temperature for about 5 minutes before scooping. This makes it easier to scoop and enhances the flavors.
Nutrition
Calories: 770kcal | Carbohydrates: 65g | Protein: 16g | Fat: 52g | Saturated Fat: 28g | Polyunsaturated Fat: 5g | Monounsaturated Fat: 16g | Cholesterol: 112mg | Sodium: 355mg | Potassium: 558mg | Fiber: 2g | Sugar: 59g | Vitamin A: 1344IU | Vitamin C: 2mg | Calcium: 270mg | Iron: 1mg
Have You Tried This Recipe?Follow me on Pinterest @spaceshipslb


Leave a Comment