


Our Strawberry Crunch Cheesecake Cones take the classic strawberry shortcake to new heights with a rich, creamy cheesecake filling and a perfectly crunchy coating. The tangy cheesecake blends beautifully with sweet, juicy strawberries, while the Golden Oreo-strawberry crumb adds just the right crunch. Held together by a crisp, buttery waffle cone, this dessert delivers all the nostalgic flavors of a strawberry shortcake ice cream bar, but with a luxurious cheesecake twist.

Let’s Dish: About This Waffle Cone
Main Ingredients: Golden Oreo cookies, cream cheese, white chocolate, strawberry gelatin, waffle cones, heavy cream, strawberries.
Quick Steps: Bake strawberry crunch, dip cones, prepare cheesecake filling, assemble.
Total Time & Yield: 55 minutes; serves 6.
Why This Recipe
- We also enhance the crunch with a blend of Golden Oreos and strawberry gelatin, ensuring that the topping has the right texture and sweetness.
- Many recipes focus on a no-bake approach but overlook the importance of setting the cheesecake filling. Our method ensures a perfectly chilled, smooth cheesecake that’s never too soft.
- This recipe’s easy-to-follow steps allow you to enjoy a freshly prepared dessert without the risk of soggy cones, thanks to the careful assembly process right before serving
Strawberry Cheesecake Waffle Cones Ingredients
Famous from Tiktok – make your own cheesecake cones from a simple no bake cheesecake filling and homemade strawberry crunch topping (the same one we use for our famous Strawberry Crunch Cheesecake and Strawberry Crunch Cake recipes). They’re made from all the most delicious ingredients!
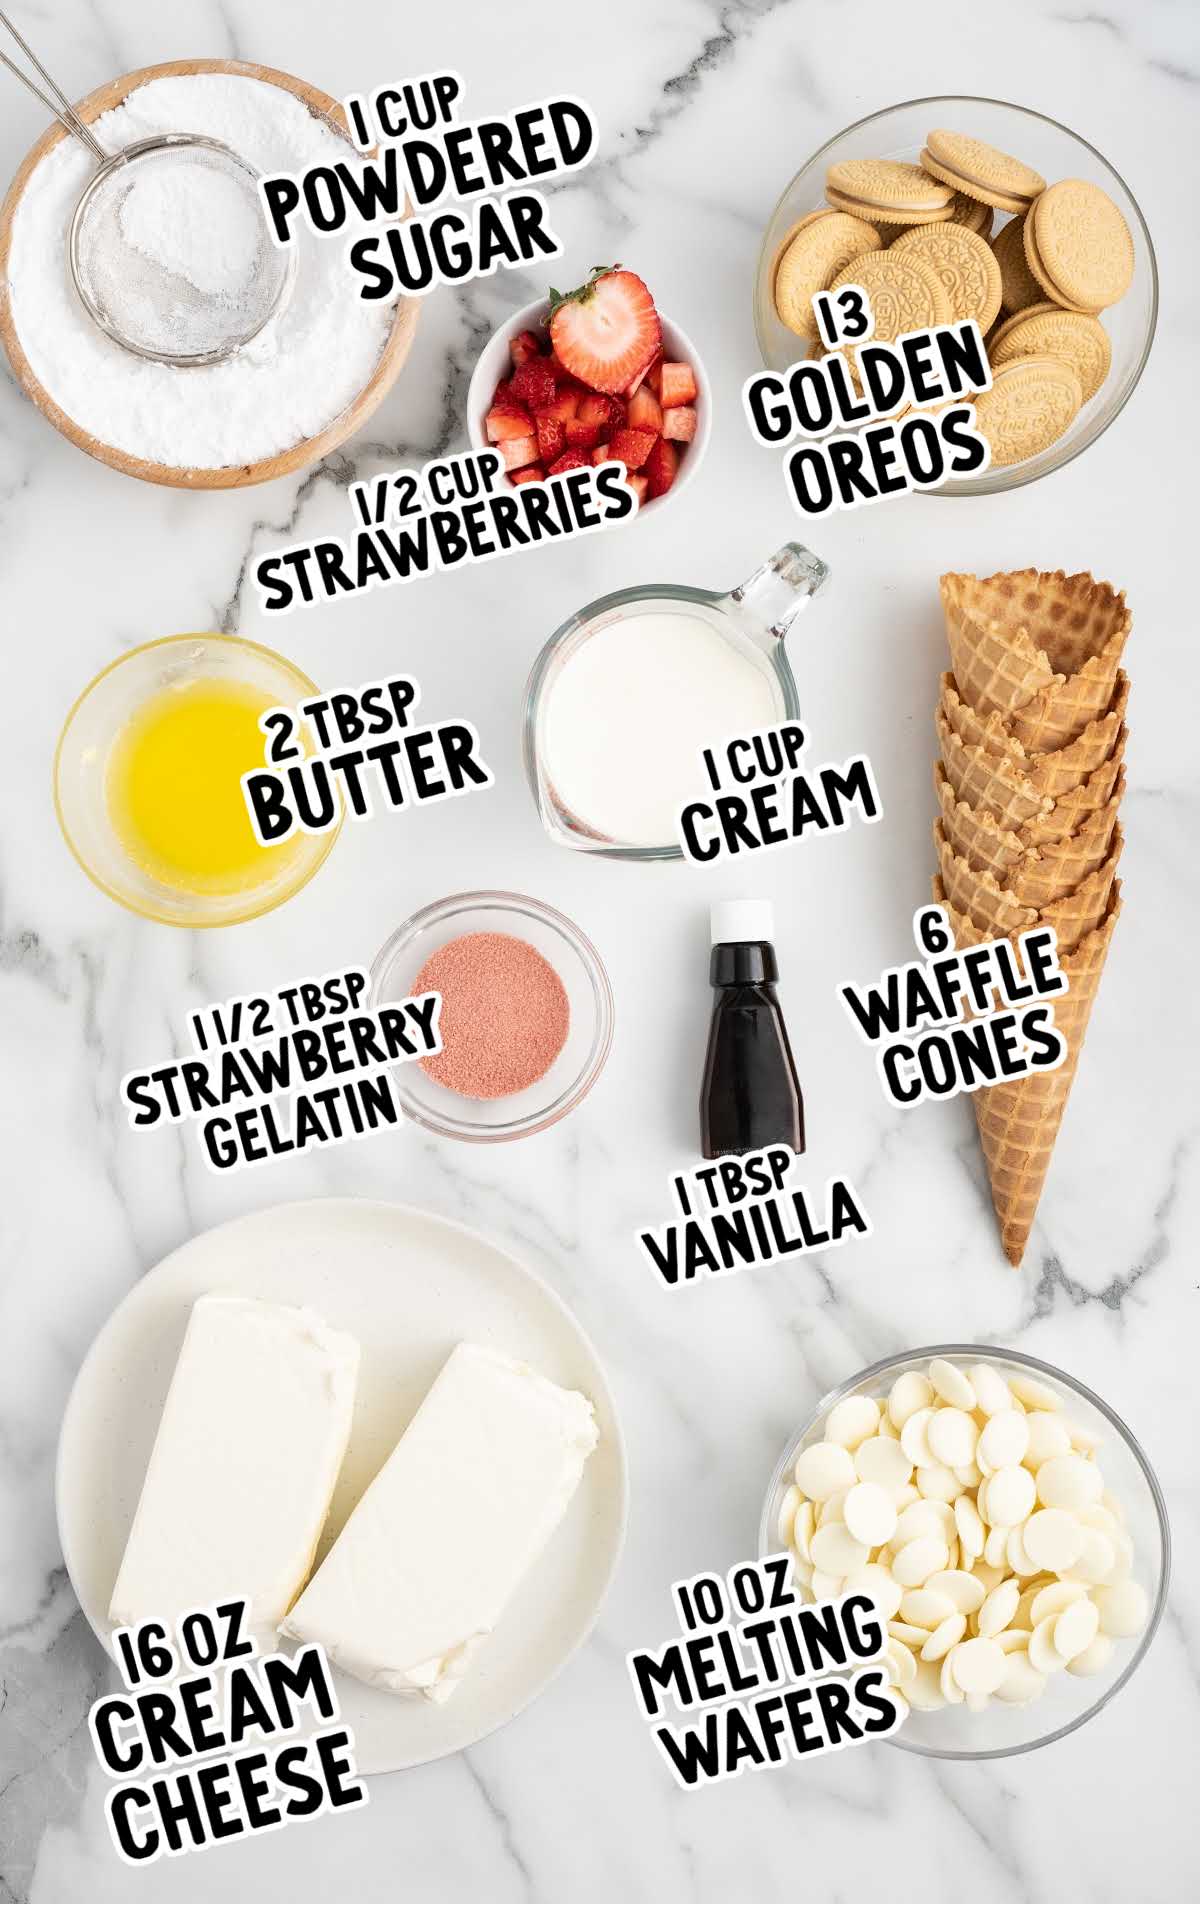
You’ll Need:
- 13 golden Oreo cookies
- 2 tablespoons unsalted butter, melted
- 1½ tablespoons strawberry gelatin powder
- 10 ounces white chocolate melting wafers (We used Ghirardelli brand)
- 6 waffle cones
- 1 cup heavy cream
- 16 ounces block-style cream cheese, room temperature
- 1 tablespoon vanilla extract
- 1 cup powdered sugar, sifted
Strawberry Cheesecake Cones Substitutions and Additions
If you’re looking to put your own twist on our Strawberry Crunch Cheesecake Cones recipe, we’ve got you covered with a variety of substitution and addition options.
White Chocolate Melting Wafers: For a darker chocolate flavor, swap the white chocolate wafers with dark chocolate melting wafers. This will transform the flavor of the cones from creamy to rich and chocolatey. You can also experiment with other flavors of colors. Wilton makes strawberry candy melts for even more strawberry flavor! You can use flavored almond bark, too. The choice is up to you.
Cream Cheese: We used regular full-fat cream cheese, but low-fat will also work. We haven’t tried it, but we think flavored cream cheese, like strawberry or blueberry, would be yummy, too!
Strawberry Crunch: Raise the crunch factor by incorporating chopped nuts such as almonds or pecans into the strawberry crunch mixture. The flavor should compliment the strawberry flavor well.
Freeze-dried Strawberries – For an extra yummy filling, crush freeze-dried strawberries and fold them gently into the filling when you add your whipped cream. You can also sprinkle some crushed freeze-dried berries on top of the finished cones for an extra burst of strawberry flavor.
Heavy Cream: For a lighter alternative, substitute the heavy cream with whipped coconut cream. However, you’ll need to chill it a can overnight before whipping it.
Waffle Cones: Get creative with the cone base by using chocolate-dipped waffle cones instead of plain waffle cones. You’ll still have to dip the cones in more chocolate to make the strawberry crunch stick, but you’ll end up with double-coated chocolate cones. Yum!
Jumbo Waffle Cones: This recipe is written for use with the standard-sized waffle cones you can buy in your local grocery store where all other ice cream toppings and cones are found. If you make your own cones or buy the “jumbo” sized cones (like what you may find in a gourmet ice cream shop), then this will most likely only yield three servings and not six.
Fresh Strawberries: Give your stuffed cones even more fruity flavor by adding fresh fruit to the filling. Try incorporating diced bananas, raspberries, or blueberries for a mixed berry cheesecake cone flavor. If you add fresh fruit to your filling, carefully fold it in with a spatula, and make sure your piping bag is cut large enough for the chunks of fruit to pass through.
How to Make Strawberry Crunch Cheesecake Cones
This recipe has four easy steps: First, bake the strawberry crunch crumble. Then, dip your cones and coat them in the yummy crumble to decorate the rims. Then, beat together a quick and easy cream cheese filling. Finally, stuff your cones with the filling and add a garnish. Voila! You’ll have strawberry crunch cheesecake waffle cones, ready to serve!
STEP ONE: Preheat your oven to 350°F and line a rimmed baking sheet with parchment paper to prepare to bake the strawberry crunch. Gather your ingredients and measure them so they’re ready for use. You can also remove your cream cheese from the fridge so it begins to soften. Melt your butter and allow it to cool slightly.
STEP TWO: While the oven preheats, you can crush your Golden Oreos. In the bowl of a food processor, add the golden Oreo cookies and pulse for 30 seconds or just until you get small crumbs. However, they should NOT pulverized into fine crumbs. You should still have some texture to the cookie crumbles. Transfer the cookie crumbs to a medium-sized mixing bowl.
STEP THREE: In a small bowl, stir together the melted butter and strawberry Jell-O powder until the powder is dissolved and fully combined with the butter.
STEP FOUR: Add the melted butter and strawberry Jello mixture to the bowl with the cookie crumbs. Use a rubber spatula to combine, making sure you scrape the bottom of the bowl as you mix. The cookie crumbs won’t turn completely pink. You’ll still have some of the cookie crumbs that aren’t coated. That is perfect because it will show the contrast of colors.
STEP FIVE: Spread the mixture onto the prepared baking sheet and spread it into a thin layer. Bake until golden brown and crunchy. Keep an eye on the strawberry crunch as it bakes so it doesn’t burn. Once it’s baked, remove the baking tray from the oven and allow the strawberry topping to cool completely. If any large chunks formed during baking, you can break them up into smaller pieces.
STEP SIX: Pour the cookie crumbs into a bowl, then remove two tablespoons of the mixture. Set aside for garnishing your cones later.
PRO TIP: You can reuse your parchment-lined baking sheet to place your waffle cones on after they’ve been dipped in melted chocolate, so don’t discard it yet.
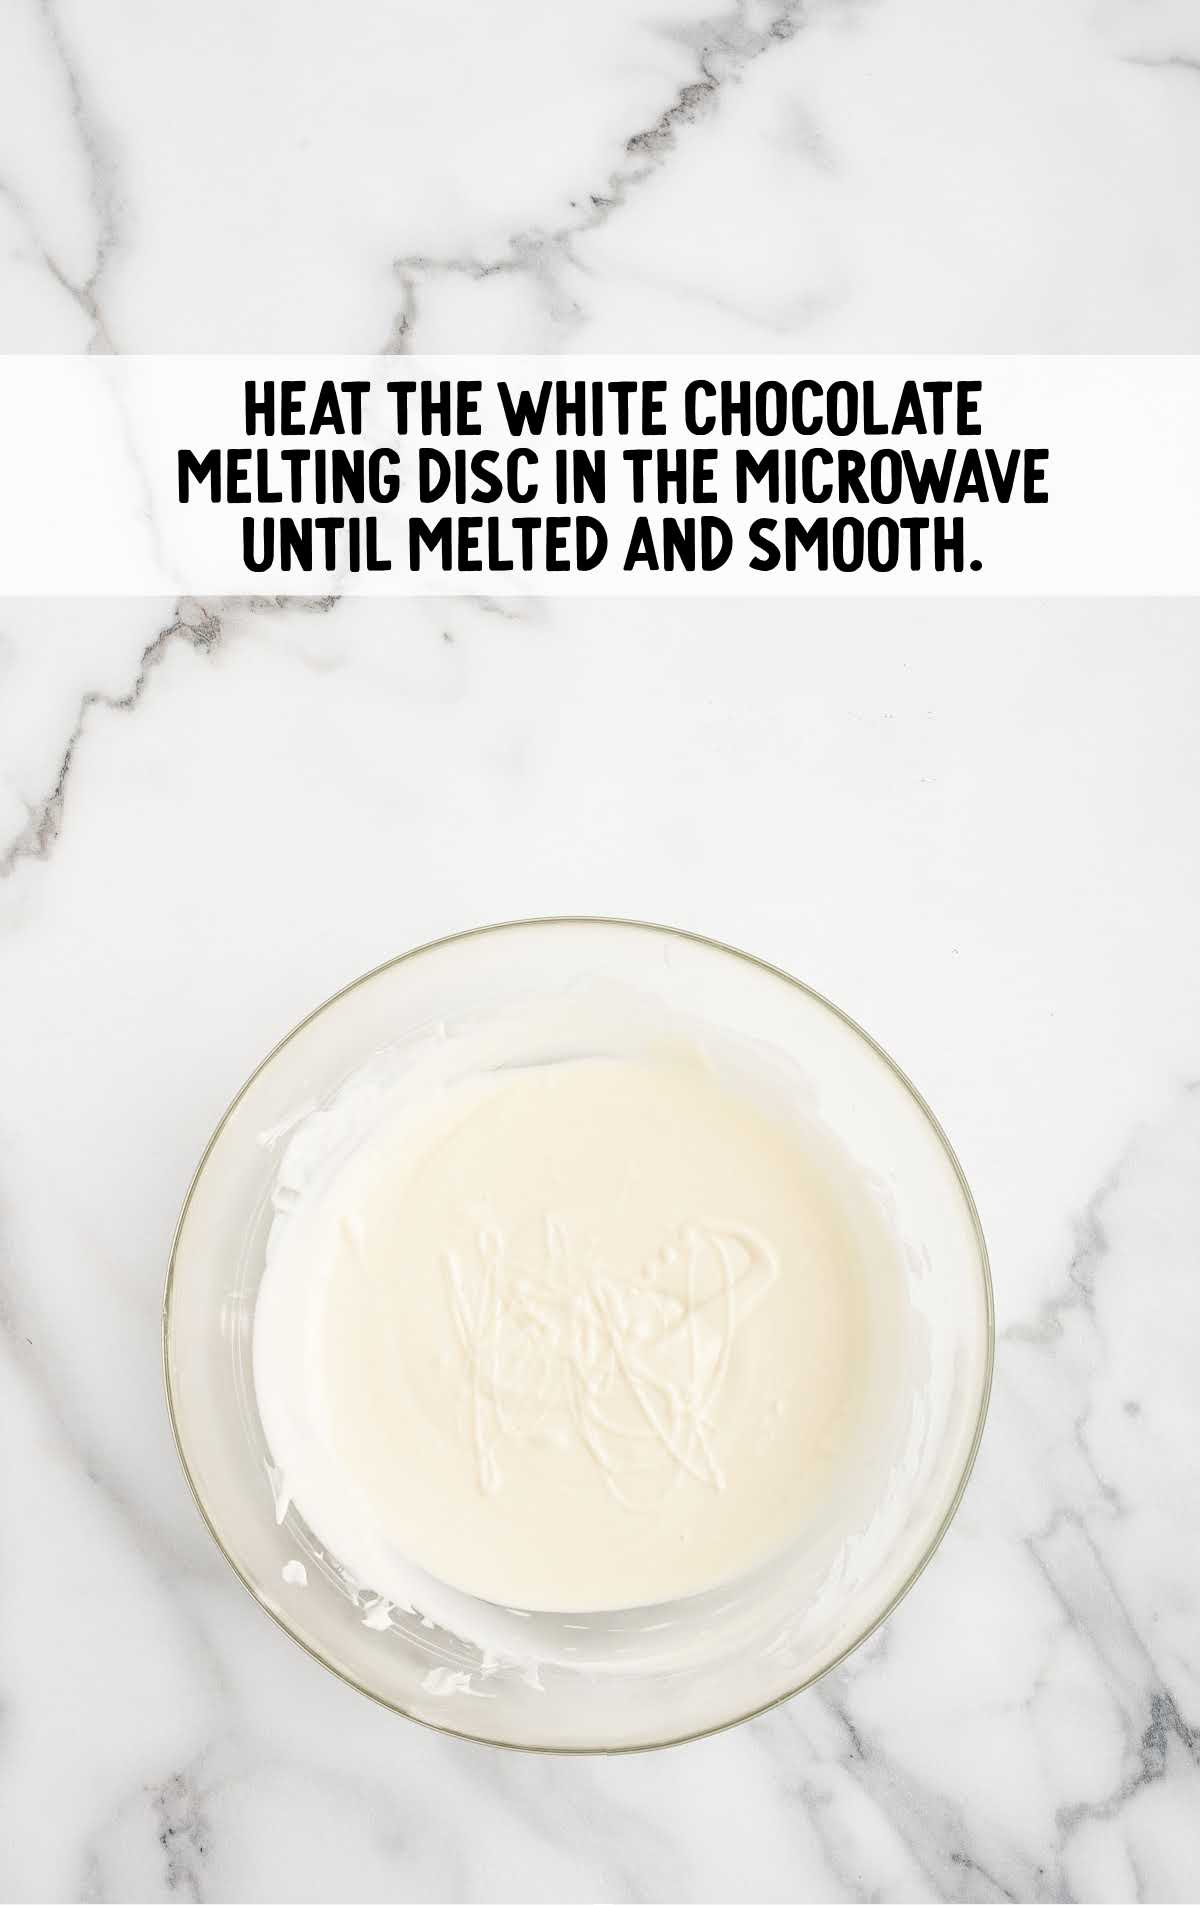
STEP SEVEN: In another medium, microwave-safe bowl, add the white chocolate melting wafers and heat at 50% for 1 minute. Stir, then heat again in 30-second intervals until the white chocolate is fully melted and smooth. Stir the white chocolate between each interval, and make sure the chocolate doesn’t burn.
PRO TIP: We used Ghirardelli brand, but if you use a different baking chocolate, you may need to refer to the melting instructions on the package.
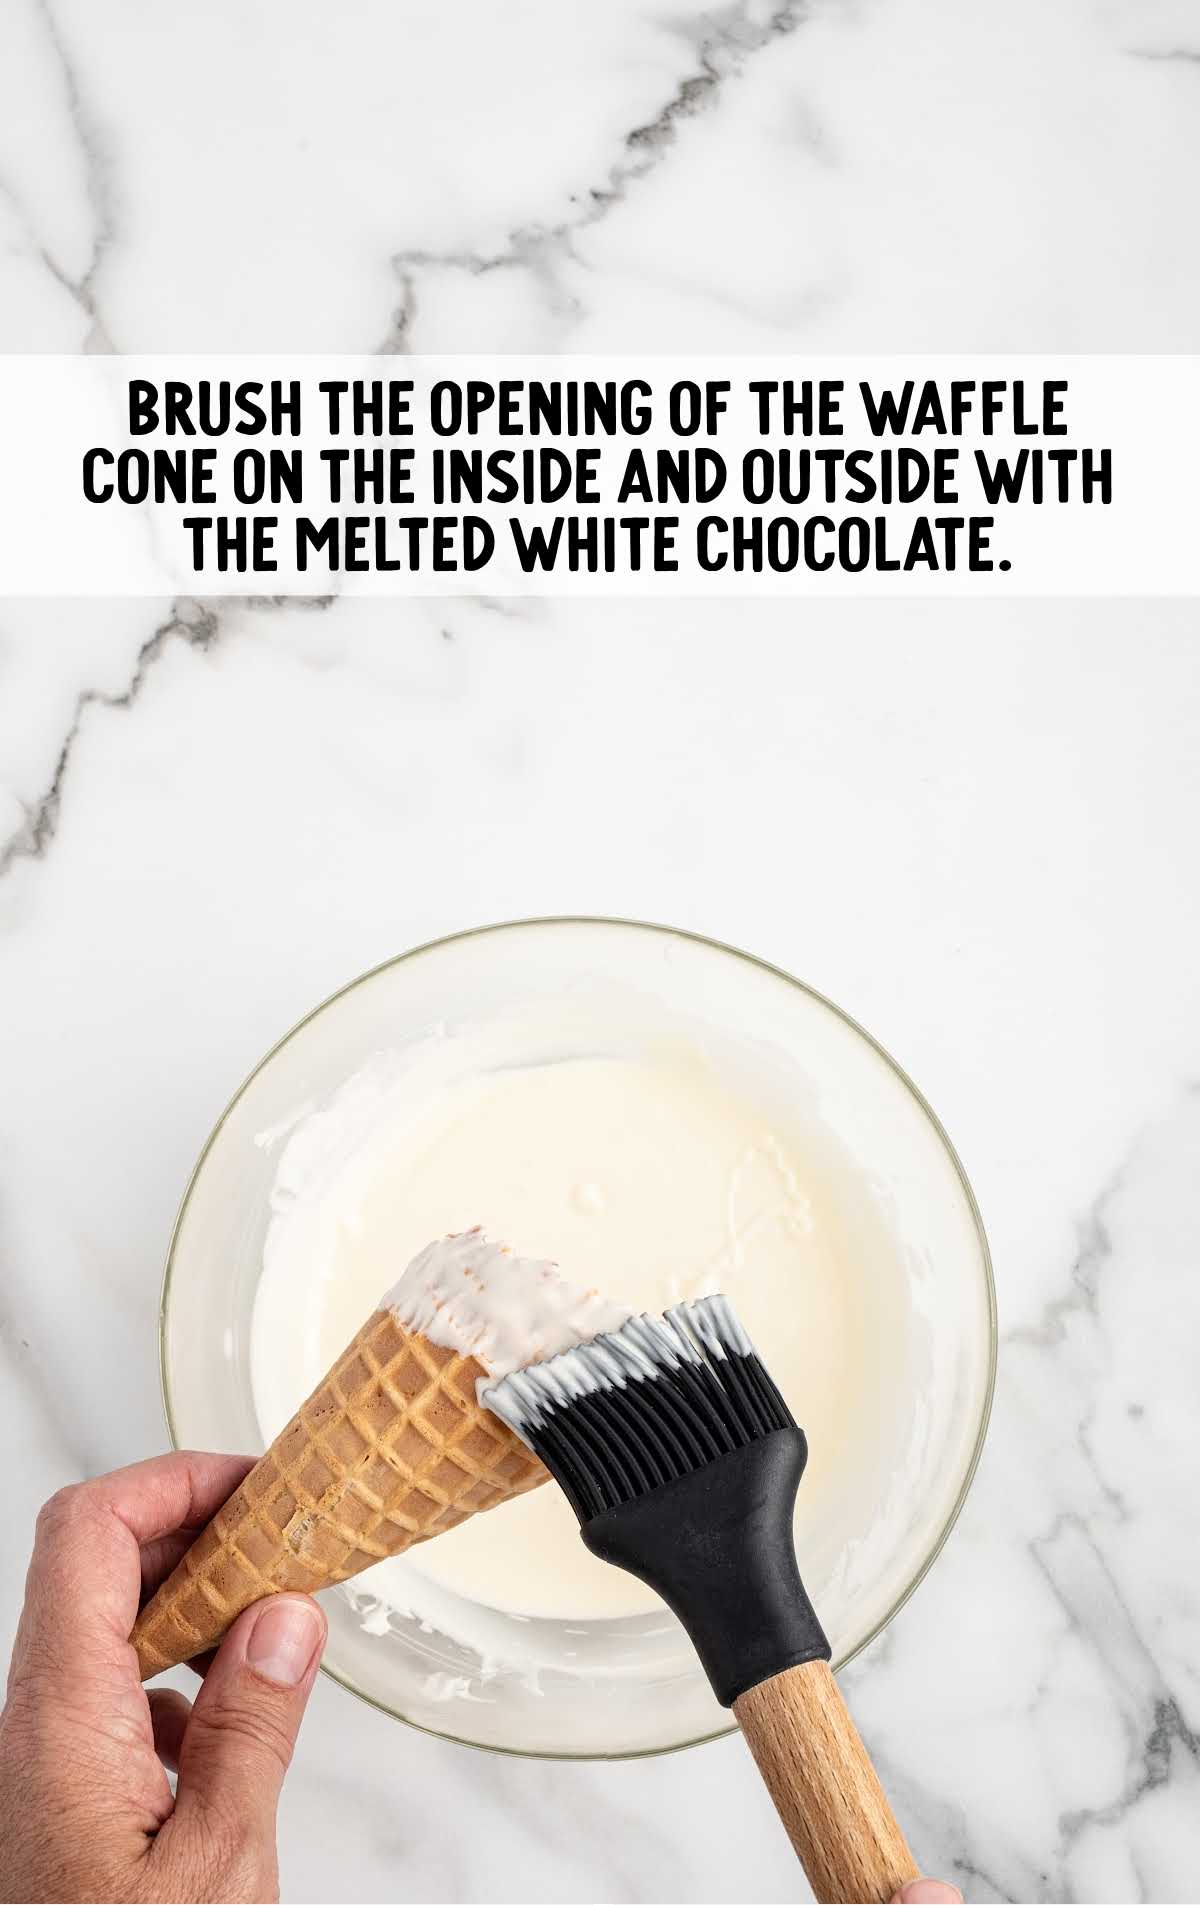
STEP EIGHT: Decorate each waffle cone by brushing them with the melted white chocolate. Use a silicone pastry brush to apply 1½ – 2 inches of the chocolate to the opening of one waffle cone. Apply the chocolate on both the inside and the outside of the cone.
STEP NINE: Now, hold the white chocolate-coated waffle cone over the bowl of strawberry cookie crunch and sprinkle it so that it covers the white chocolate on the cone. Rotate the cone to ensure that all sides of the cone get evenly coated. Set the decorated waffle cone onto the parchment-lined baking sheet.
PRO TIP: We find the best way to get the cookie crunch to stick is to use clean hands to sprinkle it over the white chocolate while it’s still very wet. Pat it very gently to help it settle into the wet chocolate.
STEP TEN: Repeat steps eight and nine until you’ve decorated all six of the waffle cones with the white chocolate and strawberry crunch.
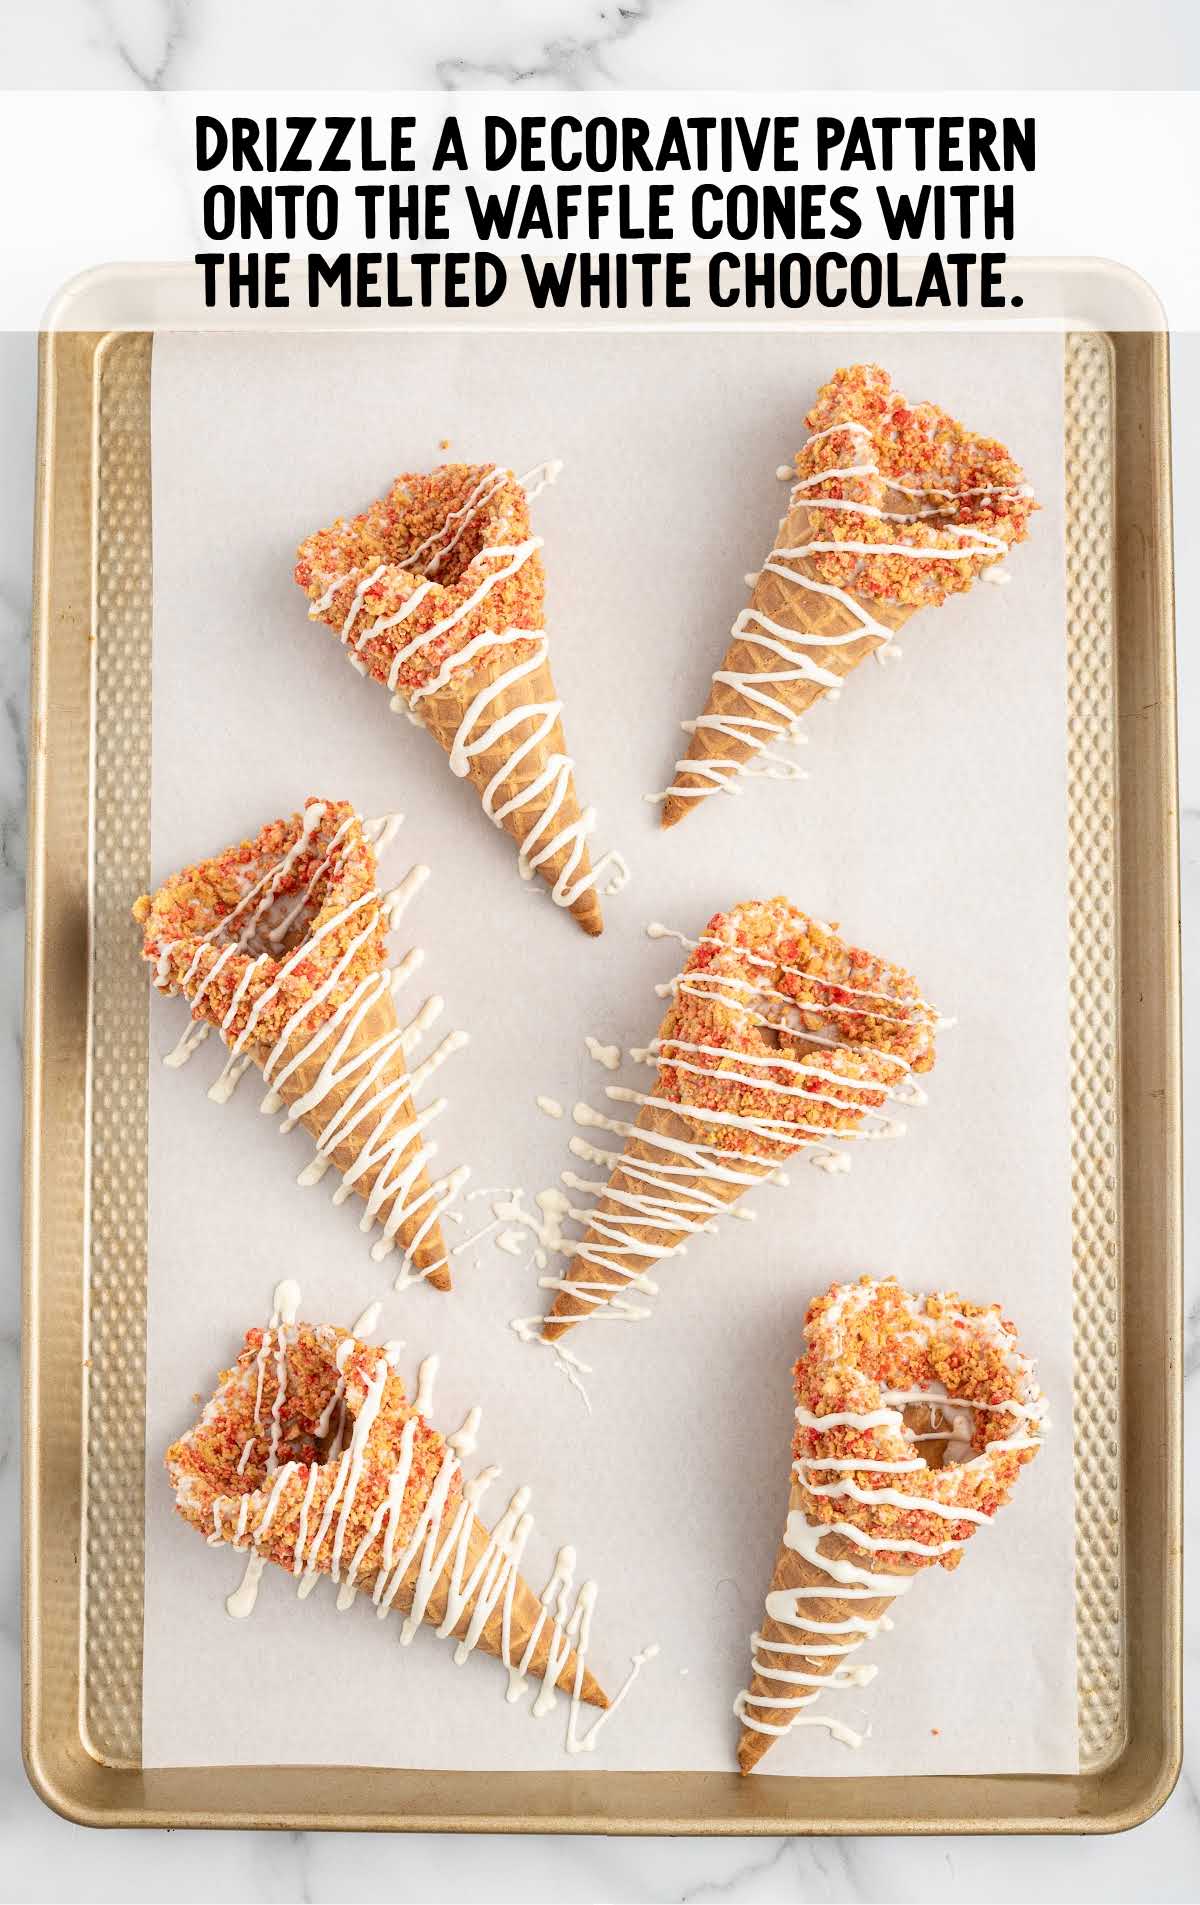
STEP ELEVEN: Any remaining white chocolate can be transferred to a small piping bag. Cut a very small hole in the tip and use it to drizzle a decorative pattern onto the waffle cones as they’re lying on the baking sheet. Allow the waffle cones to sit undisturbed for at least 30 minutes, or until the white chocolate has hardened completely before you fill them. While the white chocolate hardens, you can make the cheesecake filling.
STEP TWELVE: To make the cream cheese mixture for filling the cones, start by adding the heavy whipping cream to a large mixing bowl. Using an electric mixer on medium-high speed, beat the heavy whipping cream until stiff peaks form. Place the whipped cream in the fridge to stay cold.
PRO TIP: Start your mixer on low speed and work your way up to a higher speed slowly. This helps prevent the cream from splattering out of the bowl before it has a chance to start to thicken up.
STEP THIRTEEN: In a separate large bowl, beat the softened cream cheese at medium speed for a few minutes, until the cream cheese is smooth and creamy.
STEP FOURTEEN: Add the vanilla extract and powdered sugar to the cream cheese and mix again, until the mixture is fully incorporated and smooth.
STEP FIFTEEN: Add the whipped cream to the cream cheese mixture. Using a silicone or rubber spatula, gently fold the mixture together until no streaks remain. It should be fluffy and smooth.
PRO TIP: Be sure to fold the whipped cream into the cream cheese mixture gently so you don’t deflate the whipped cream.

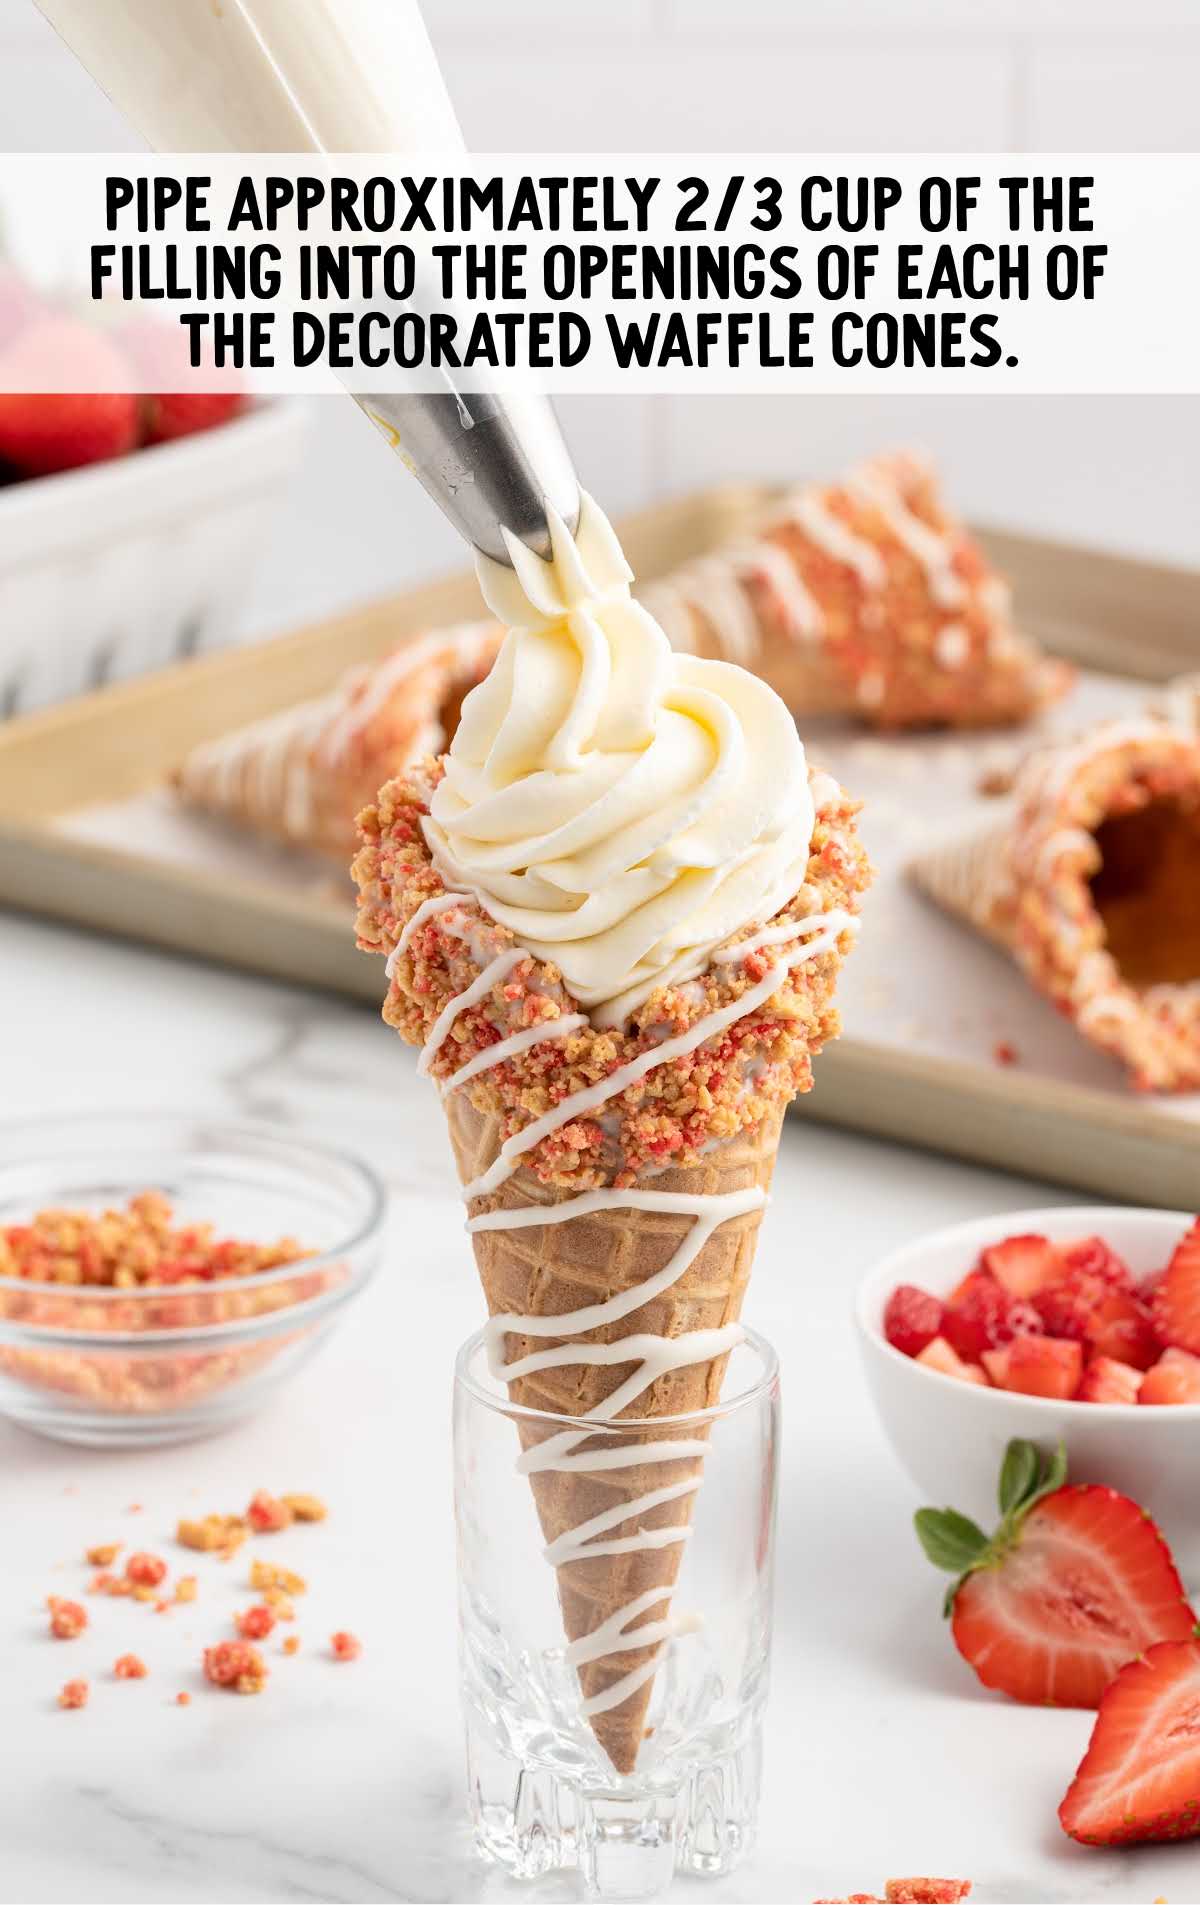
STEP SIXTEEN: Check to be sure your white chocolate decorated cones are hardened. If they need more time to solidify, allow them more time to rest. Meanwhile, transfer the cream cheese filling into a large piping bag fitted with a large piping tip. Once the chocolate on the cones is fully set, pipe approximately 2/3 cup of the filling into each of the decorated waffle cones.
PRO TIP: For the prettiest look, try to make your whipped filling look like ice cream.
PRO TIP: If your filling is a bit too runny or thin to pipe, you can pop the piping bag in the refrigerator for a little while to firm it up.
STEP SEVENTEEN: Garnish each of the Strawberry Crunch Cheesecake Cones with a sprinkle of the reserved strawberry cookie crunch, and a few freshly chopped strawberries. Serve immediately.

How To Serve Strawberry Crunch Cones
There are plenty of reasons to love these yummy Strawberry Cheesecake Crunch Cones, and many occasions where they are a huge hit!
Birthdays and BBQs: Of course, you can serve them at birthday celebrations. You can also make these for a special treat after a backyard BBQ with other favorite desserts like Lemon Fluff.
Campfires: Enjoy biting into these cheesecake stuffed waffle cones while sitting around an evening campfire alongside more campfire favorites like Campfire Cinnamon Rolls, and Campfire Dessert Pizza.
Celebrations: These crunchy cones are a treat at bridal or baby showers, especially when offered alongside other strawberry-themed desserts like Strawberry Crunch Cupcakes, Strawberry Fudge, and Strawberry Truffles. Serve with Strawberry Mojitos and Strawberry Lemonade for a complete strawberry feast!
MORE STRAWBERRY DESSERT RECIPES
How To Store Strawberry Shortcake Cones
Strawberry Shortcake Cones are best made fresh. We don’t recommend you fill them until you’re ready to enjoy them. However, you can make the individual components ahead. Here’s how:
MAKE AHEAD: If you want to make these strawberry stuffed waffle cone ahead of time, you can make the strawberry crunch and the cream cheese filling ahead of time. Store in the fridge for up to 2 days before you assemble your cones. You can also decorate your cones ahead and store them in an airtight container for up to 2 days. But assemble your cones just before serving for the best results. Otherwise, you cones can get soggy. Let your refrigerated filling sit at room temperature for 15-20 minutes before you try to pipe it.
IN THE FRIDGE: If you do need to store your cones for a short period of time, place them on a tray and cover with plastic wrap. Store in the fridge for up to a few hours before your event, but again, we recommend serving them immediately after assembly.
IN THE FREEZER: If you have leftover strawberry crunch-coated cones, you can freeze them for another day, or use them to scoop ice cream into! Go ahead and place them in a large zipper bag and freeze for up to 2 months.
Why These Strawberry Crunch Cheesecake Cones Are the Best
You’ll fall in love with how pretty your these stuffed waffle cones look when you’re done. And then, you’ll fall in love all over again when you take your first bite!
Reasons We Love This Recipe:
Irresistible Flavor Combination: Our Strawberry Crunch Cheesecake Cones bring together the irresistible flavors of creamy cheesecake, sweet strawberries, and crunchy Oreo cookie crust in every bite. What’s not to love?
Fun and Festive Presentation: Serving cheesecake in a waffle cone not only adds a fun and playful twist to a classic dessert but also makes it perfect for parties! So beautifully presented, plus, no fork or plates needed!
Easy to Make and Share: Despite their impressive appearance, our Strawberry Crunch Cheesecake Cones are surprisingly easy to make! Individual servings make them easy to serve at any occasion.
Frequently Asked Questions
Absolutely! You can easily scale down the recipe to make mini cheesecake cones for parties or gatherings. Simply adjust the ingredient quantities accordingly and use smaller waffle cones for bite-sized treats that are perfect for sharing.
To prevent the cheesecake filling from softening the waffle cones, make sure the cones are completely cooled before filling them. You can also make extra white chocolate and coat the inside of the cones entirely to create a barrier between the filling and the cone.
Yes, you can use any type of chocolate you prefer for coating the waffle cones. Whether it’s dark, milk, or semi-sweet chocolate, feel free to use your favorite for a personalized touch to the recipe.
Once assembled, the cheesecake cones are best enjoyed immediately to prevent the waffle cones from becoming soggy. However, if stored properly in the refrigerator, they can last for a few hours without compromising the taste and texture too much.
While fresh strawberries are recommended for garnishing to maintain the texture and flavor, you can use frozen strawberries as an alternative. Thaw and drain them well, and try to pat off as much of the excess moisture as possible.
Yes, you can substitute regular Oreos for golden Oreos if you prefer. Keep in mind that regular Oreos will make your strawberry crunch more chocolatey, and it will change the overall flavor of the dessert.
Our Strawberry Crunch Cheesecake Cones are an easy treat to make! Reminiscent of ice cream cones, but with a fun cheesecake twist, these pretty desserts are wonderful to serve at any party or summer party.

More Recipes You’ll Love


Strawberry Crunch Cheesecake Cones
Ingredients
For the Decorated Cones
- 13 golden Oreo cookies
- 2 tablespoons unsalted butter, melted
- 1½ tablespoons strawberry gelatin powder
- 10 ounces white chocolate melting wafers, Ghirardelli brand
- 6 waffle cones
For the Cheesecake Filling
- 1 cup heavy cream
- 16 ounces block-style cream cheese, room temperature
- 1 tablespoon vanilla extract
- 1 cup powdered sugar, sifted
For the Garnish
- ½ cup diced fresh strawberries
- 2 tablespoons strawberry crunch, this will be reserved from what is made for decorating the cones
Instructions
To Make The Strawberry Crunch
- Preheat oven to 350°F. Line a rimmed baking sheet with parchment paper. Set aside.
- In the bowl of a food processor, add the golden Oreo cookies and pulse for 30 seconds or just until you get small crumbs but NOT pulverized into fine crumbs. You still want to have a little texture to the cookie crumbs. Transfer the cookie crumbs to a medium-sized bowl.
- In a small bowl, stir together the melted butter and strawberry gelatin powder until the powder is dissolved and fully combined with the butter.
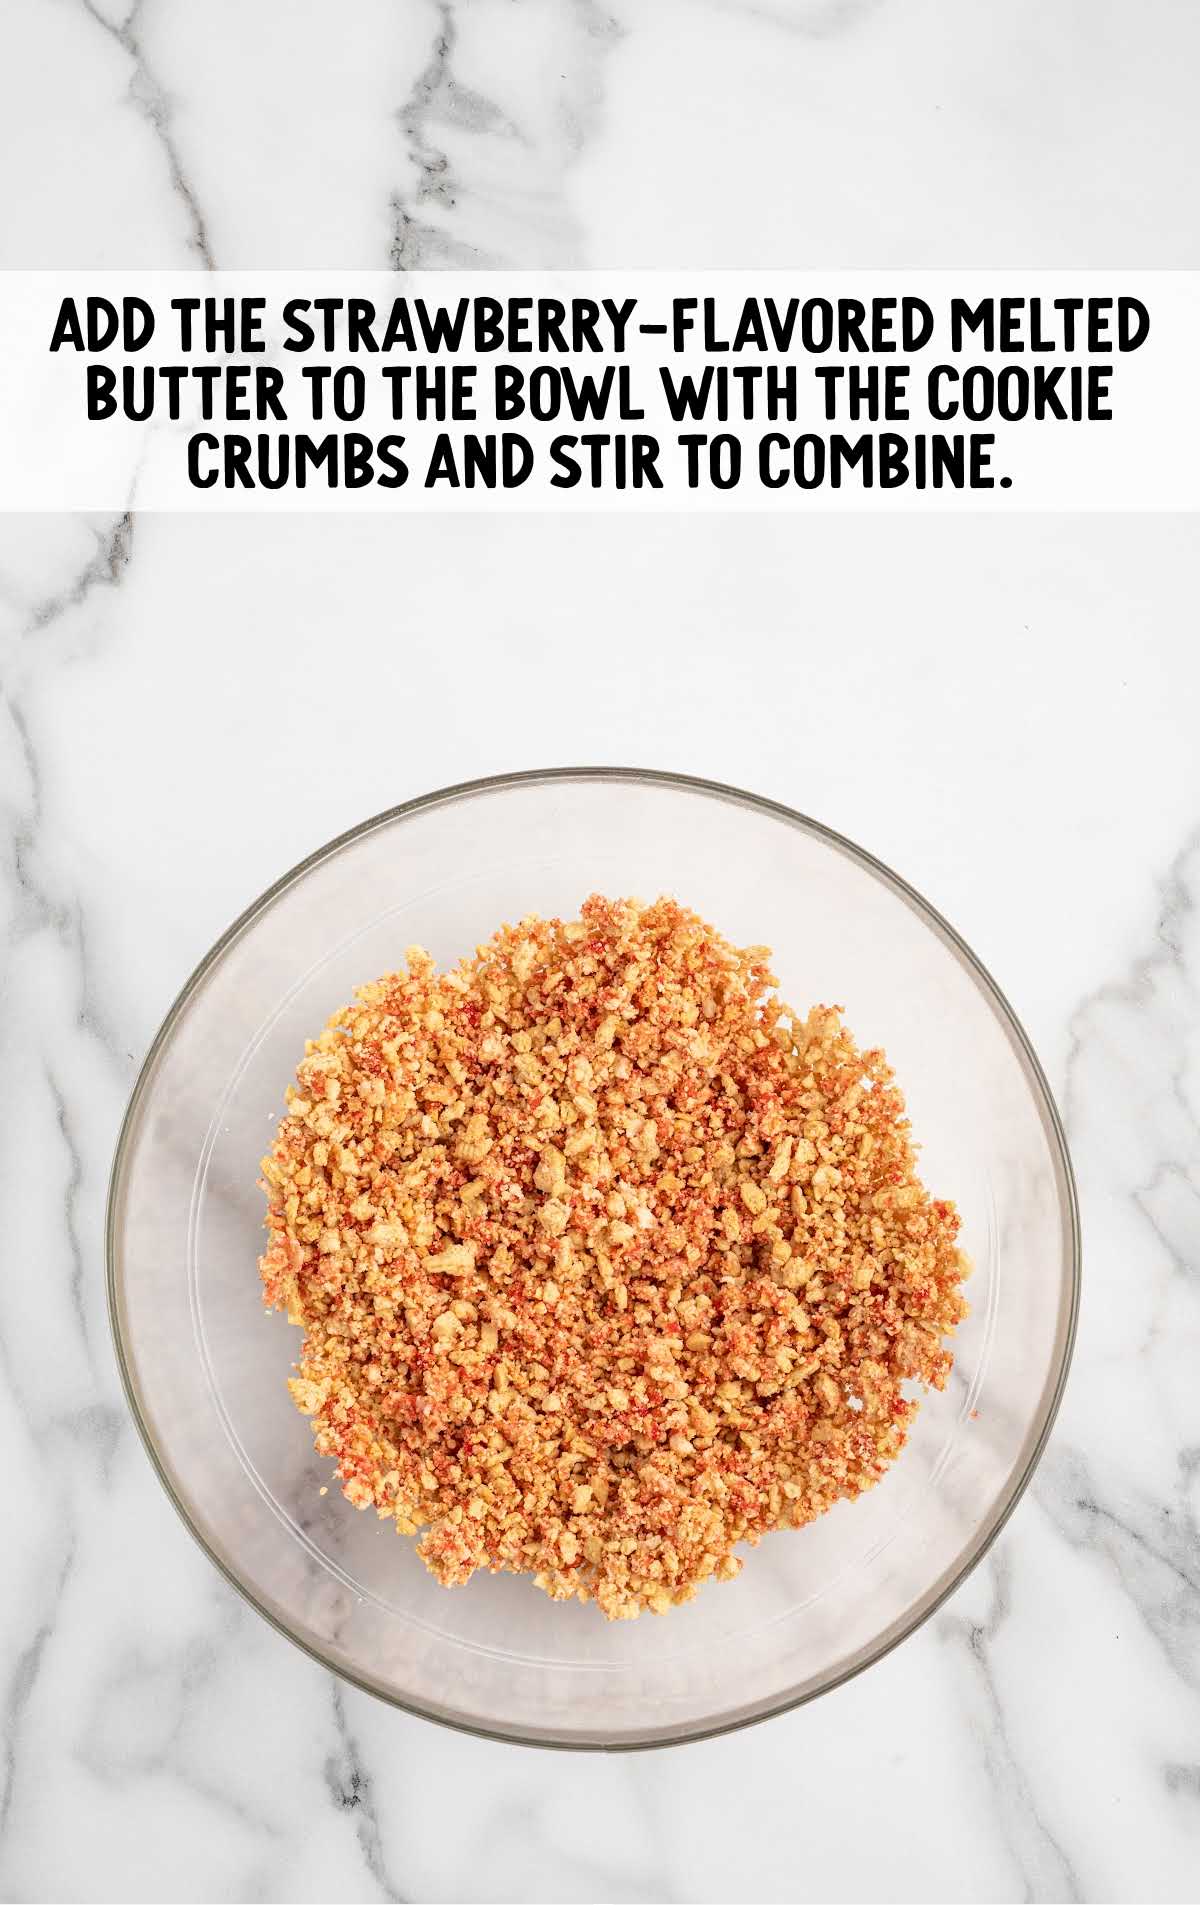
- Add the strawberry-flavored melted butter to the bowl with the cookie crumbs and stir to combine. You will note that the cookie crumbs will not completely turn pink but that you will still have some of the cookie crumbs that are not coated. That is what you are looking for as you want to see a contrast of colors.
- Transfer the strawberry cookie crunch to the prepared baking sheet and spread it out into a thin layer. Bake for 10 minutes. Once baked, remove from the oven and allow the strawberry cookie crunch to cool completely. You may need to break up any large chunks that may have formed when baked.
- Once completely cooled, transfer the cookie crumbs to a bowl. Remove 2 tablespoons of the strawberry cookie crunch and set aside to use as garnish for the strawberry crunch cheesecake cones. Note: You will re-use the parchment-lined rimmed baking sheet to place the waffle cones onto once they have been coated with the white chocolate and strawberry crunch.
To Decorate the Cones
- In another medium, microwave-safe bowl, add the white chocolate melting disc and heat at 50% for 1 minute. Stir, then heat again in 30-second intervals until the white chocolate has melted and smooth. Be sure to stir the white chocolate between heating to ensure you do not burn the white chocolate.
- To decorate the waffle cones, you will hold one cone and, using a silicone pastry brush, brush the 1½-2 inches of the opening of the waffle cone on the inside and outside with the melted white chocolate.
- Next, you will hold the white chocolate-coated waffle cone over the bowl of strawberry cookie crunch and sprinkle the crunch so that it covers the white chocolate on the cone. The best way to do this is to use your hands to sprinkle, then gently pat it onto the white chocolate to help it stick. You will rotate the cone to ensure that all the sides on the cone get evenly coated. Place the decorated waffle cone onto the parchment-lined baking sheet that was used to bake the strawberry cookie crunch.
- Repeat steps 8 and 9 until you have decorated all 6 of the waffle cones with the white chocolate and strawberry crunch.
- Transfer all the remaining melted white chocolate to a small piping bag with the tip cut off, and use that to drizzle a decorative pattern onto the waffle cones as they are lying on the baking sheet. Allow the decorated waffle cones to sit undisturbed for at least 30 minutes or until the white chocolate has hardened before filling with the cheesecake filling. While the white chocolate is hardening, you can make the cheesecake filling.
To Make the Cheesecake Filling
- To make the cheesecake filling, add the heavy whipping cream to a large mixing bowl and beat, using a handheld mixer on medium-high speed, for 2-3 minutes or until stiff peaks form. You will want to start on low and work your way to medium-high speed to prevent splattering the loose heavy cream out of the bowl before it has a chance to start to thicken up. Place in the refrigerator to stay cold while you proceed with making the rest of the filling.
- In a separate large mixing bowl, add the room temperature cream cheese and beat, using a handheld mixer on medium speed, for 2-3 minutes or until the cream cheese is smooth and creamy.
- Add the vanilla extract and powdered sugar and mix again until fully incorporated and smooth.
- Add the whipped heavy cream to the bowl of the cream cheese and gently fold the mixture until no streaks of whipped cream remain. The cheesecake mixture should be fluffy and smooth.
To Make the Stuffed Cones
- Transfer the cheesecake filling to a large piping bag fitted with a large piping tip, and pipe approximately ⅔ cup of the filling into the openings of each of the decorated waffle cones. Be sure that the white chocolate has hardened completely before adding the cheesecake filling. Your cheesecake filling piped into the cones should resemble the look of ice cream.
- Garnish each of the strawberry crunch cheesecake cones with a sprinkle of the reserved (2 tablespoons) strawberry cookie crunch and a few of the diced fresh strawberries.
- You can reuse your parchment-lined baking sheet twice: Once to bake your strawberry crunch, and once to place your waffle cones on after they’ve been dipped in melted chocolate.
- We used Ghirardelli brand white chocolate melting wafers, but if you use a different baking chocolate, you may need to refer to the instructions on the package for proper melting.
- We find the best way to get the cookie crunch to stick to the cone is to use clean hands to sprinkle it over the white chocolate while it’s still very wet. Pat it very gently to help it settle into the wet chocolate.
- When making your whipped cream, begin with your mixer on low speed and work your way up to a higher speed slowly. This helps stop the cream from splattering out of the bowl before it has a chance to start to thicken up.
- Be sure to fold the whipped cream into the cream cheese mixture gently so you don’t deflate the whipped cream.
- For the prettiest looking cones, try to make your whipped cream cheese filling look like ice cream as you pipe it.
- If your cream cheese filling is a bit too runny or thin to pipe, you can pop the piping bag in the refrigerator for a little while to firm it up.
Notes
- Start your mixer on low speed and work your way up to a higher speed slowly. This helps prevent the cream from splattering out of the bowl before it has a chance to start to thicken up.
- Be sure to fold the whipped cream into the cream cheese mixture gently so you don’t deflate the whipped cream.
- For the prettiest look, try to make your whipped filling look like ice cream.
- If your filling is a bit too runny or thin to pipe, you can pop the piping bag in the refrigerator for a little while to firm it up.
- You can reuse your parchment-lined baking sheet to place your waffle cones on after they’ve been dipped in melted chocolate, so don’t discard it yet.
- We used Ghirardelli brand, but if you use a different baking chocolate, you may need to refer to the melting instructions on the package.
- We find the best way to get the cookie crunch to stick is to use clean hands to sprinkle it over the white chocolate while it’s still very wet. Pat it very gently to help it settle into the wet chocolate.
Nutrition


Comments
Anit says
Looks delicious
Laura Miller says
I made these today and sold them all at a bake sale fundraiser. Everyone loved them. Thanks for the recipe and tips.