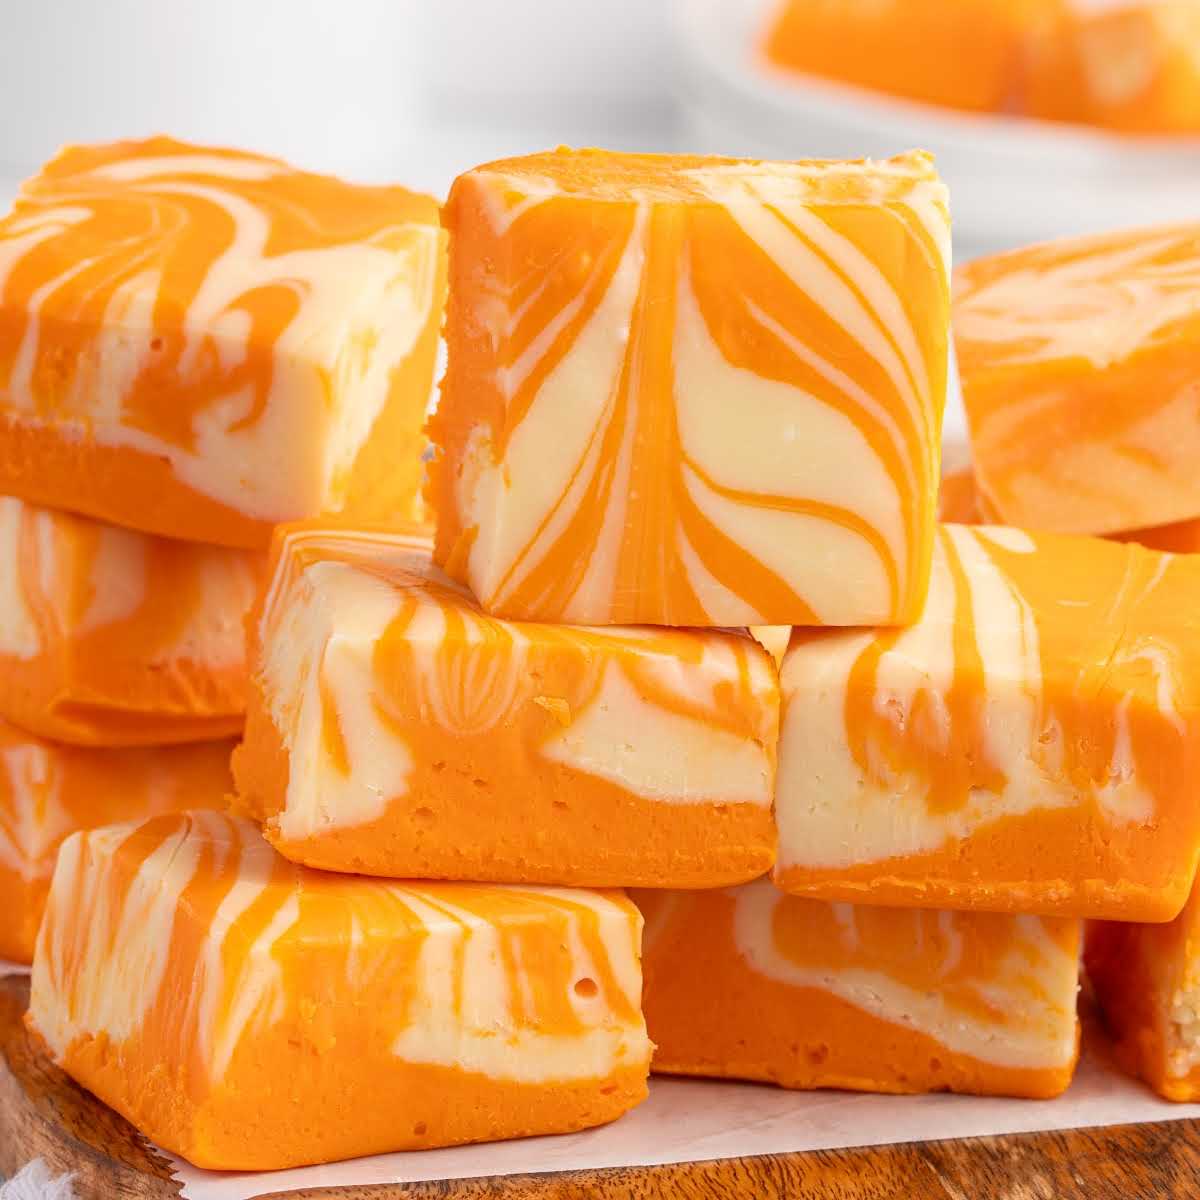
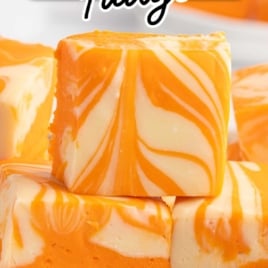
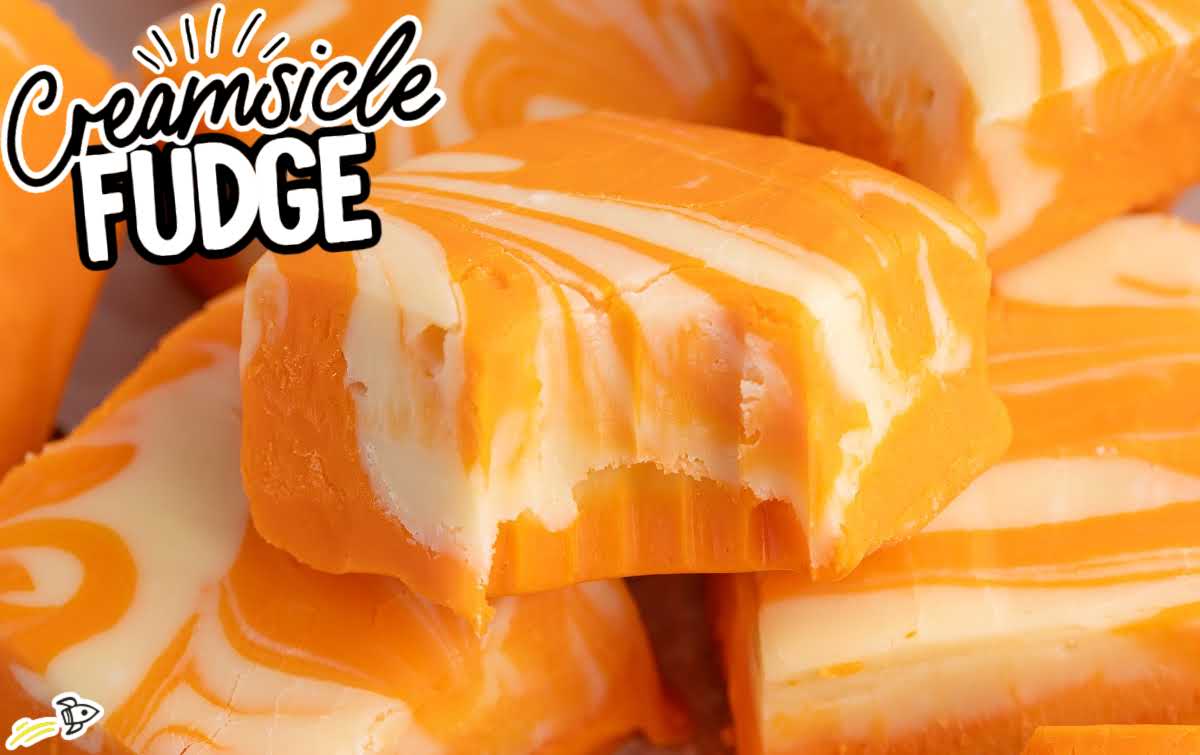
Orange and vanilla belong together in a familiar way, like the center of a frozen creamsicle just beginning to soften. This orange creamsicle fudge captures that perfect blend of pure nostalgia and sunshine.
Best of all? You only need five ingredients to recreate this childhood classic in your microwave.
A Better, Easier Way To Make Fudge

I’ve spent enough time hovering over a boiling pot to know that traditional stovetop fudge is a gamble; one degree off on your candy thermometer and you’re left with a grainy mess.
But let’s be real: a microwave isn’t a magic wand. If you just throw things in and hit ‘start,’ you’re going to end up with scorched, seized chocolate.
After throwing out more ruined ingredients that I care to admit, I realized that the “magic” isn’t just the microwave—it’s a balance between specific ingredients and the heat.
- The secret to the smooth texture lies in the sweetened condensed milk. It binds everything together into a thick, fudgy consistency without the need for boiling sugar.
- I learned the hard way that using high-quality white chocolate bars is a non-negotiable here. They contain more cocoa butter than standard white chocolate chips, so they melt into a glossy, fluid silk.
- By using short, controlled bursts in the microwave, you ensure the chocolate never overheats. It’s the only way to make sure the chocolate doesn’t overheat or seize, which is how you get that perfect melt-in-your-mouth texture.
Ingredient Notes
For this recipe, you will need:
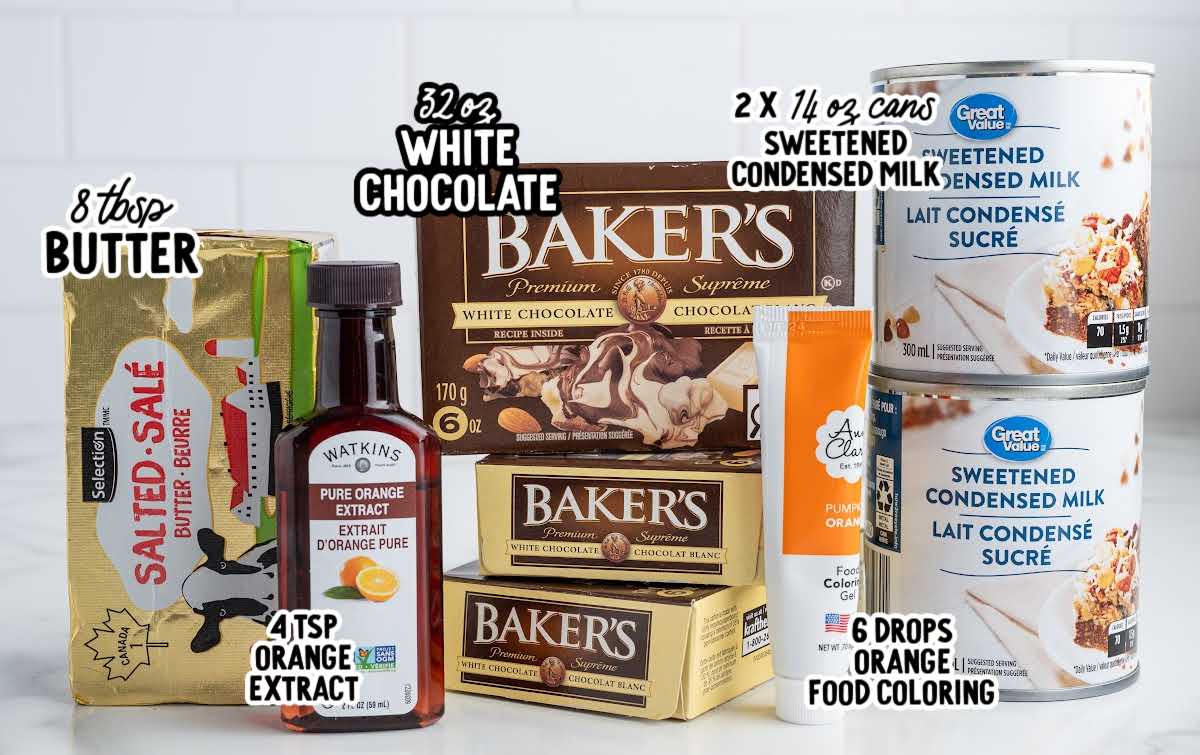
White Chocolate Bars: White chocolate chips contain stabilizers that resist melting and make them great for cookies but not for making fudge. White chocolate bars melt down beautifully, providing your fudge its signature smooth texture.
Orange Extract: This extract is strong. Add it, taste, then decide if more is needed. A small amount goes a long way, and too much can push the flavor from softly orange to sharp.
Food Coloring: I highly recommend gel food because it gives even color without adding extra liquid. Remember that the color will deepen slightly as the fudge firms up, so stop just before you hit your ideal shade.
Food Coloring Tip
If you’re using red and yellow food coloring instead of orange gel, start with yellow and add red a drop at a time. Red is very strong and can quickly overpower the color if added too fast.
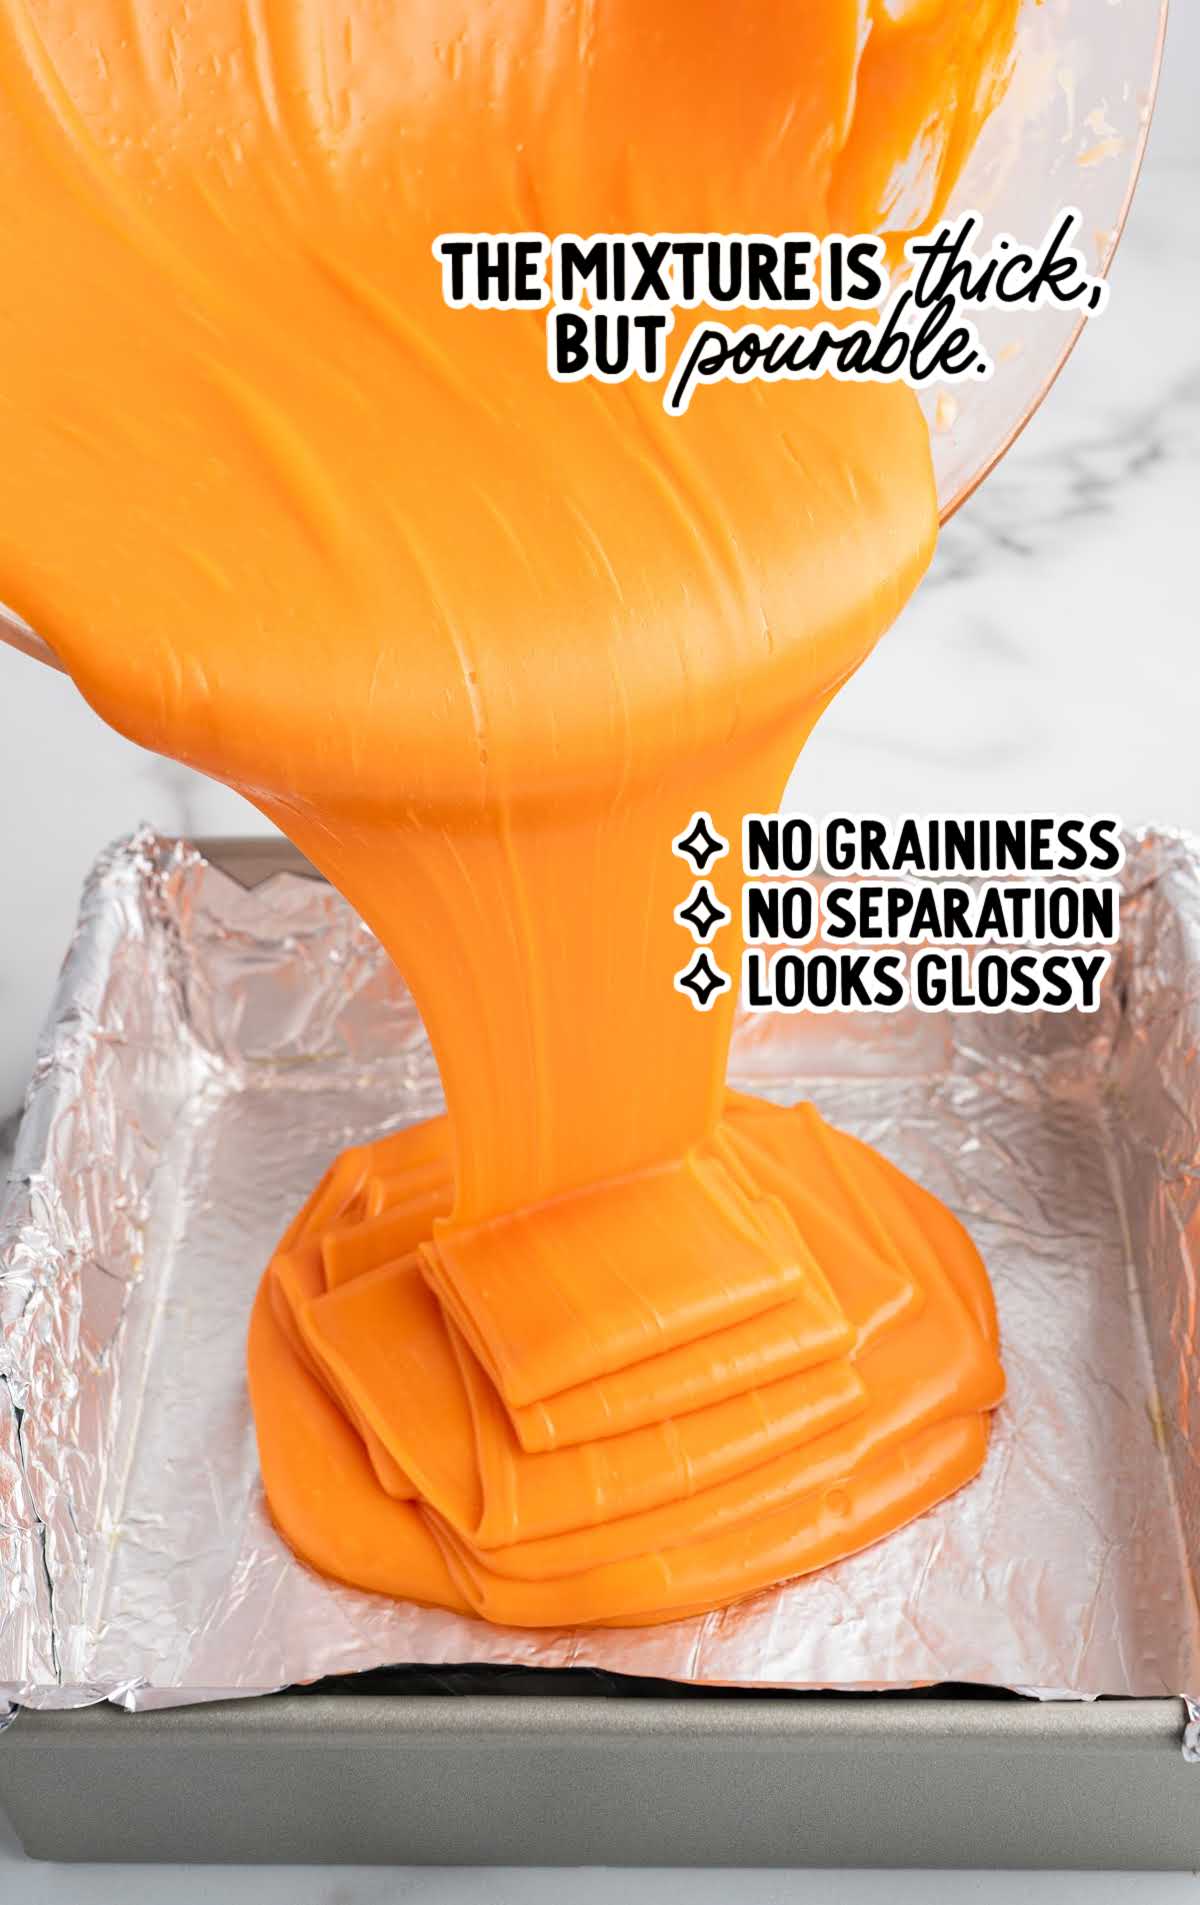
Start With A Smooth Base
The process starts by melting your chocolate, milk, and butter until the mixture moves like heavy cream. You’re looking for a creamy, glossy mixture with no lumps.
Once the base is glossy, set aside a portion of the white fudge before tinting the remaining batch.
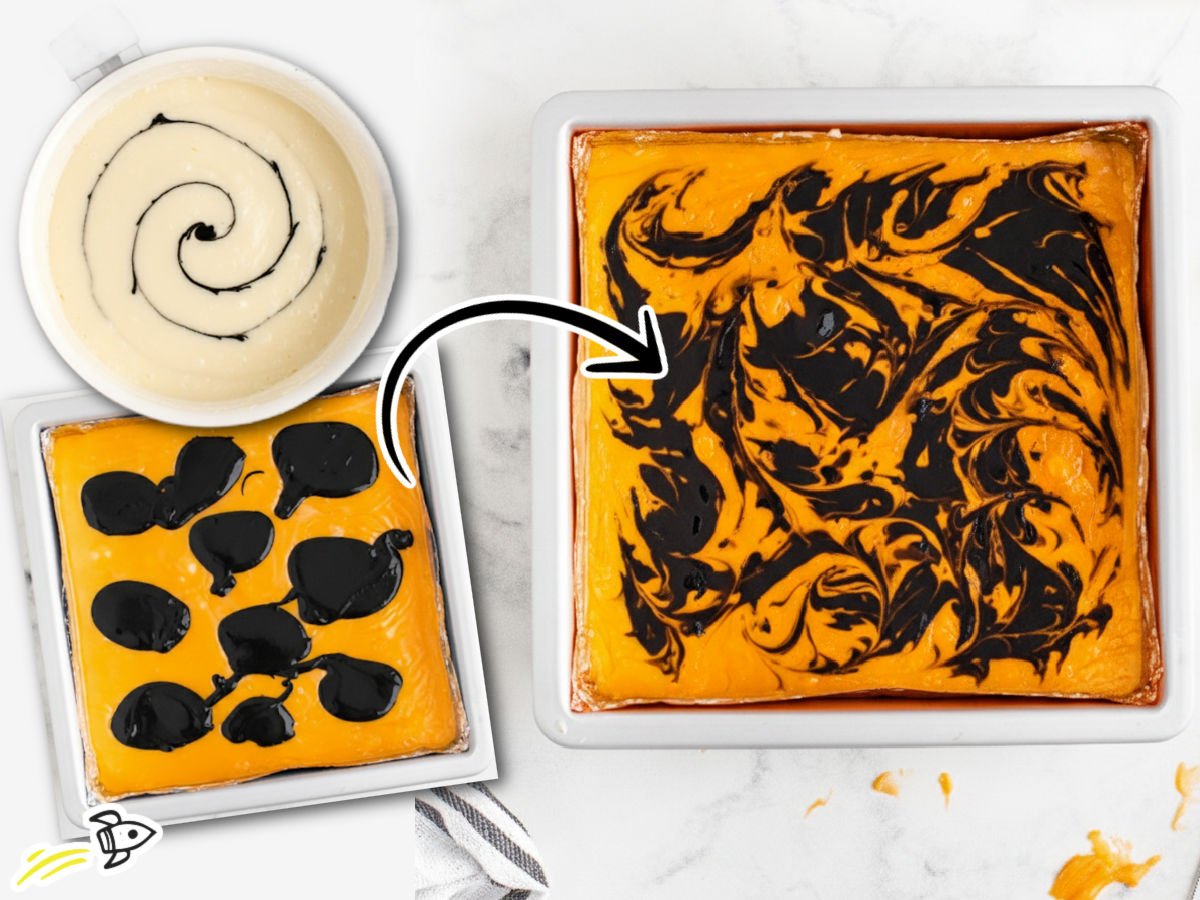
Getting The Swirl Right
To get that stunning, artisanal look, spoon the white fudge onto the orange rather than pouring it. Pouring can cause the colors to muddy, but spooning ensures those distinct pockets of flavor remain.
Move your tool all the way to the bottom of the pan so the pattern is visible through the entire slice.
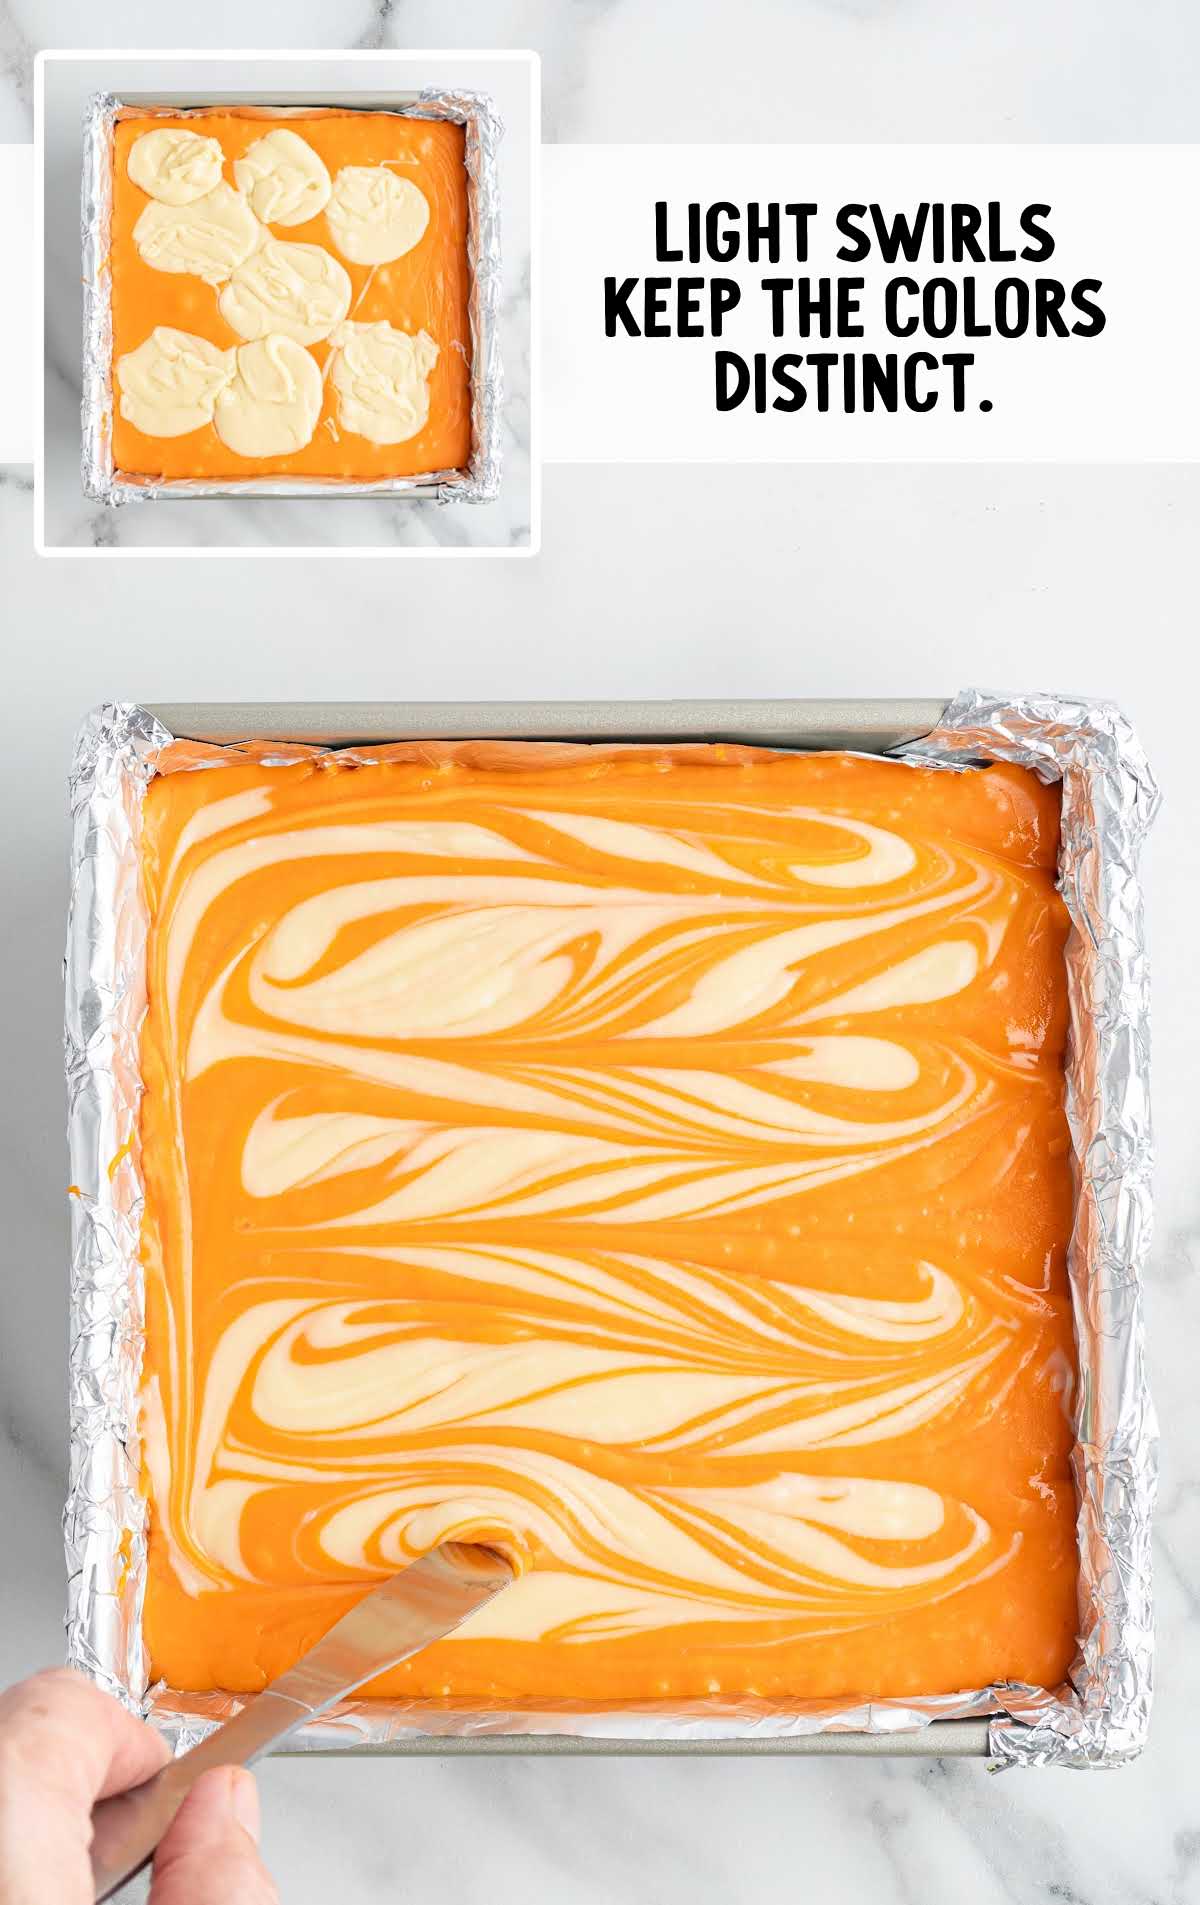
When swirling the two together, keep your movements minimal. A few slow passes with a knife will create clean, marbled ribbons without muddying the colors. Overmixing will create a solid peach color.
Finally, give the pan a few firm taps on the counter to settle the mixture and pop any hidden air bubbles.
Chill Uncovered for a Smooth Finish
Once the fudge is swirled and tapped to release air bubbles, refrigerate it uncovered. This prevents condensation from forming on the surface, which can cause streaking or a sticky top.
Creamsicle fudge needs at least four to five hours in the refrigerator to reach the correct consistency.
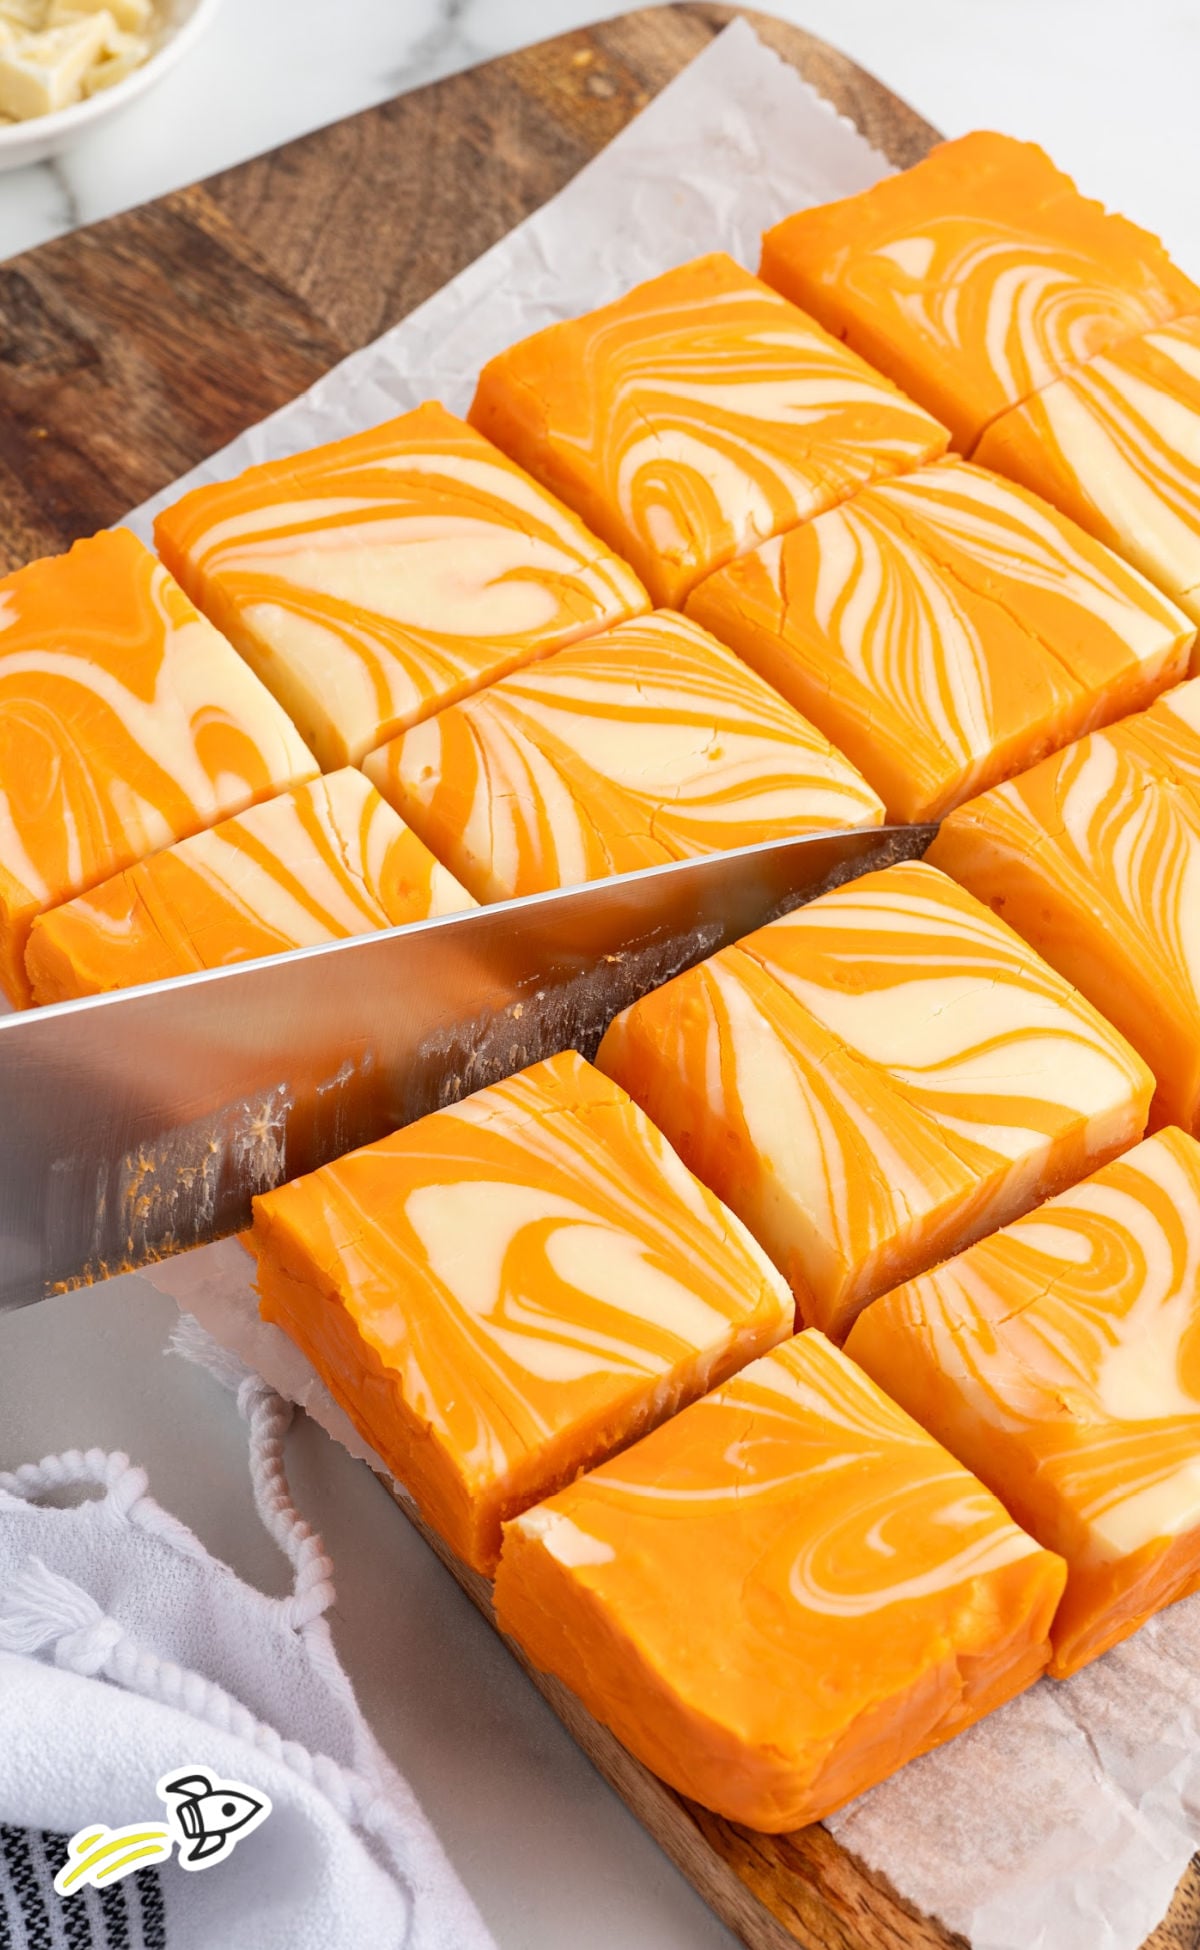
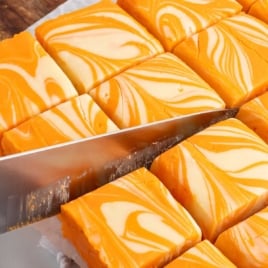
When you are ready to serve, use a long, sharp knife. For clean, sharp edges, wipe your blade with a warm, damp cloth between every cut. This keeps the colors crisp and prevents sticking.
Bright citrus and creamy vanilla come together in a smooth, nostalgic bite. Check out more of our best Christmas candy recipes.

Creamsicle Fudge
Ingredients
- 32 ounces white chocolate baking bars (8 4-ounce bars)
- 28 ounces sweetened condensed milk (two 14-ounce cans)
- 8 tablespoons butter, cut into 8 pats of butter
- 4 teaspoons orange extract
- 6 drops Orange gel food coloring, or yellow and red food coloring
Instructions
- Line an 8×8 pan with foil. Spray with nonstick spray.
- In a medium size bowl add the white chocolate bars with the sweetened condensed milk and the butter. Microwave on high for 1 minute, remove from the microwave and stir. Repeat in 30 second bursts until smooth and creamy.
- Add the orange extract and taste, add more if needed to reach the desired taste.
- Remove 2 cups of the mixture to a separate bowl. This will remain white.
- To the remaining fudge add the food coloring, add more if needed to reach the desired orange color. (I used Wilton gel yellow and red).
- Pour the orange fudge into the prepared pan and level it out.
- Drop the white fudge by spoonfuls in a random pattern onto the orange fudge.
- Using a knife or wooden skewer, make swirl patterns.
- Tap the pan on the counter a couple times to remove bubbles. If needed, use a toothpick to pop large bubbles.
- Refrigerate uncovered for 4 to 5 hours until set.
- Remove the fudge from the pan and peel the foil back. Cut into squares to serve!
Notes
How to Store for Freshness
Once the fudge has finished its initial 5-hour chill and you have sliced it into squares, transfer them to an airtight container. If you are stacking the squares, place a sheet of parchment or wax paper between layers. This prevents the marbled surfaces from sticking together or smudging.- Refrigeration: Keep the container in the refrigerator for up to two weeks. While the fudge is stable at room temperature for serving, storing it in the cold preserves that “tight” crumb and keeps the orange flavor bright.
- Room Temperature: If you are displaying the fudge on a dessert table, it will hold its shape perfectly for several hours. However, if your kitchen is particularly warm, the white chocolate may soften slightly, so it is best to bring it out just before serving.
Long-Term Freezing
This recipe freezes exceptionally well. To freeze, wrap the entire block (or individual squares) tightly in plastic wrap, then place it inside a heavy-duty freezer bag. It will stay fresh for up to three months. The Thawing Secret: When you are ready to eat it, move the fudge from the freezer to the fridge overnight. Thawing it slowly prevents condensation from forming on the surface, which can make the sugar feel tacky or sticky.Nutrition
If your fudge hasn’t firmed up, it usually means it needs more time to chill or the white chocolate lacked enough cocoa butter. Ensure you are using the full weight of baking bars. A quick hour in the freezer can often save a soft batch before cutting.
Absolutely. This fudge freezes like a dream. Wrap the squares tightly to prevent freezer burn and thaw them in the fridge when you are ready for a treat. The texture remains perfectly creamy.
I recommend making two separate batches instead. When you double the volume in one bowl, the microwave cannot heat the mixture evenly. You risk burning the edges while the center stays cold.

Making Seasonal Fudge With This Recipe
One of the best parts about this fudge is how easy it is to make it fit any season. The best part? You don’t have to adjust the recipe — just play with the accent color for a fresh look year-round.
- For Christmas colors, you’ll want to check out our Christmas fudge recipe.
- For summer, a touch of bright pink makes the fudge pop.
- For fall and winter, keep the signature orange base and pair it with a deep chocolate.
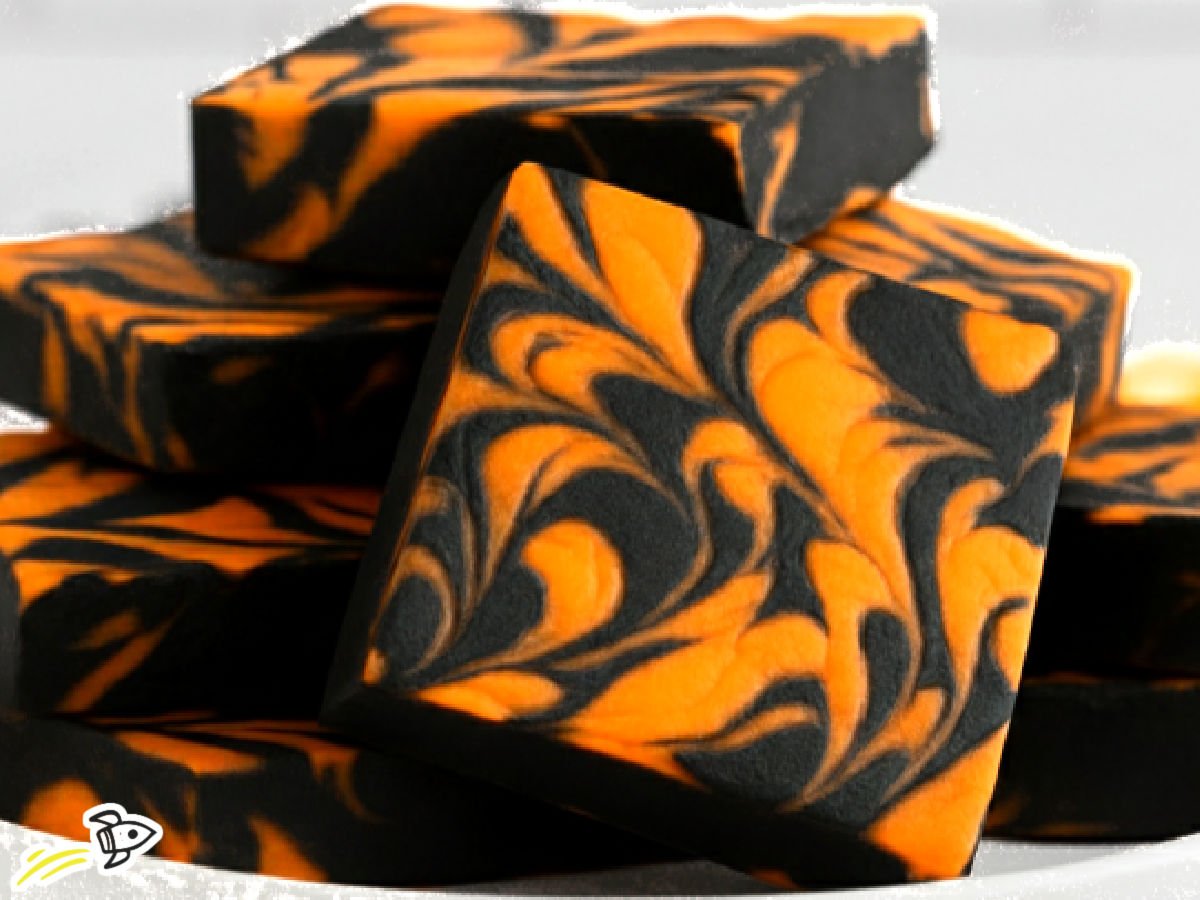
- For Halloween, swirl in black gel food coloring with the orange for a bold, spooky look.
It’s the same smooth, citrusy fudge you love, just dressed up for the season.
More Fudge Recipes


Comments
Penny Snyder says
You say to divide the sweetened condensed milk, but it doesn’t say if you put it all in or what
.
Layne Kangas says
That was kind of confusing, I’m sorry. I just updated so hopefully it makes more sense now 🙂 Enjoy!
Robin Radway says
Everyone absolutely loved the Creamsicle fudge!! Our new favorite & east to make!!!
elissa says
a definite 5 for me I adjusted for more orange flavor and doubled the recipe for extra thick fudge. I sell to local country stores. Amazing … a dreamsicle! Elissa.e
Terry Shutts says
when I made this fudege, it wouldn’t set. what did I do wrong ?
Layne Kangas says
Usually, if it doesn’t set, it’s because it wasn’t hot enough when making.
Becky says
Do you heat it to soft ball stage at any point? The only heating directions is on low heat.
Layne Kangas says
Nope, this one is a little different. If you follow the recipe, it should turn out perfect for you! Enjoy 🙂
shannon says
I wonder a brand of extract you are using for these sweet treats. I need a pepperment , a orangee, a sherry and a limon.. Can help please….
Layne Kangas says
I typically use McCormick or store brand! Enjoy 🙂
Sarah says
We love this fudge – rich, creamy, and yummy!
Danell says
Looks yummy
lynn Doane says
summer is coming.
Sherri S says
This is a must share recipe.
Super sweet, and just a special treat.
Deborah says
This fudge came out great, and was delicious, will be making again. Thank You!