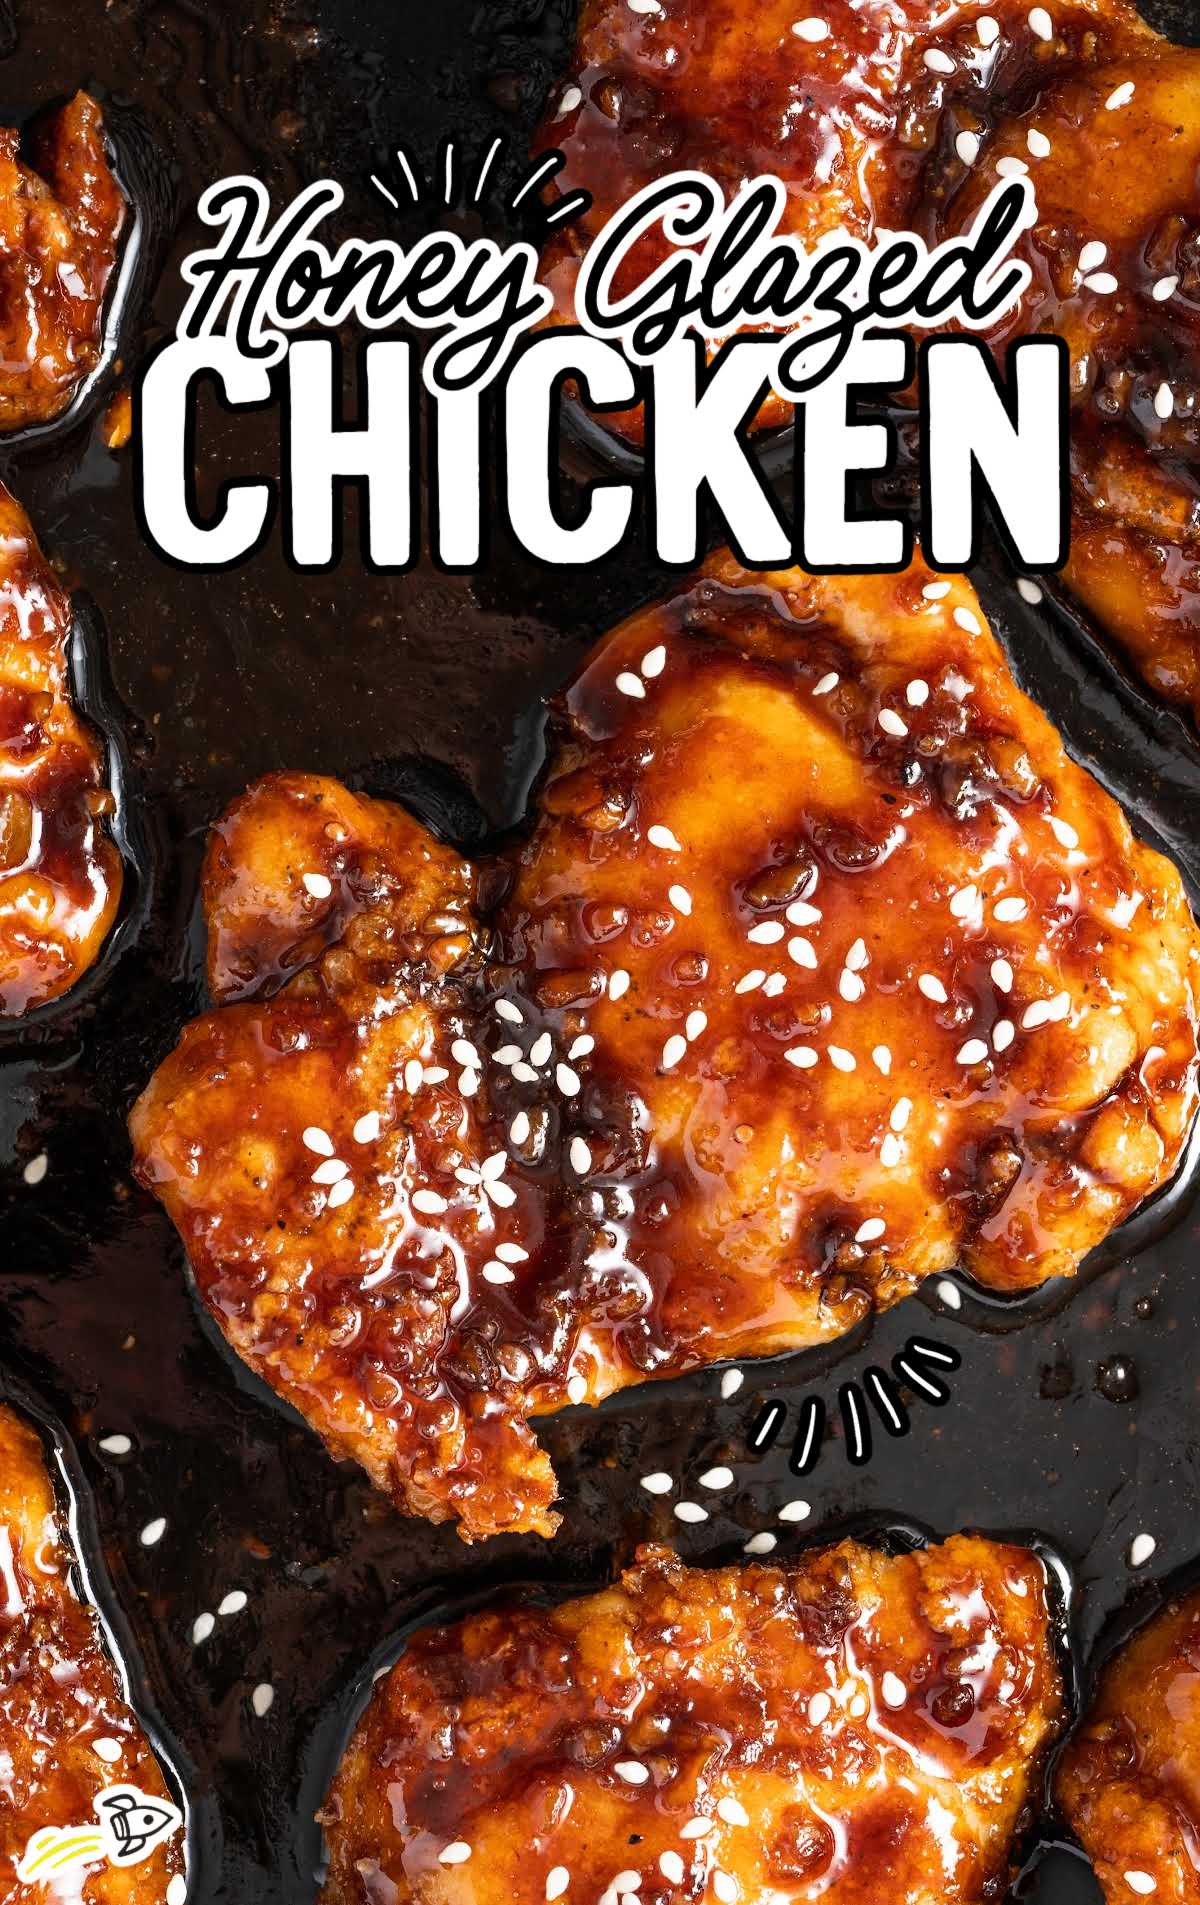
Honey glazed chicken offers the perfect blend of savory and sweet. The tender, juicy chicken and caramelized honey glaze create a mouthwatering flavor combination that’s hard to resist.
Honey Glazed Chicken Ingredients
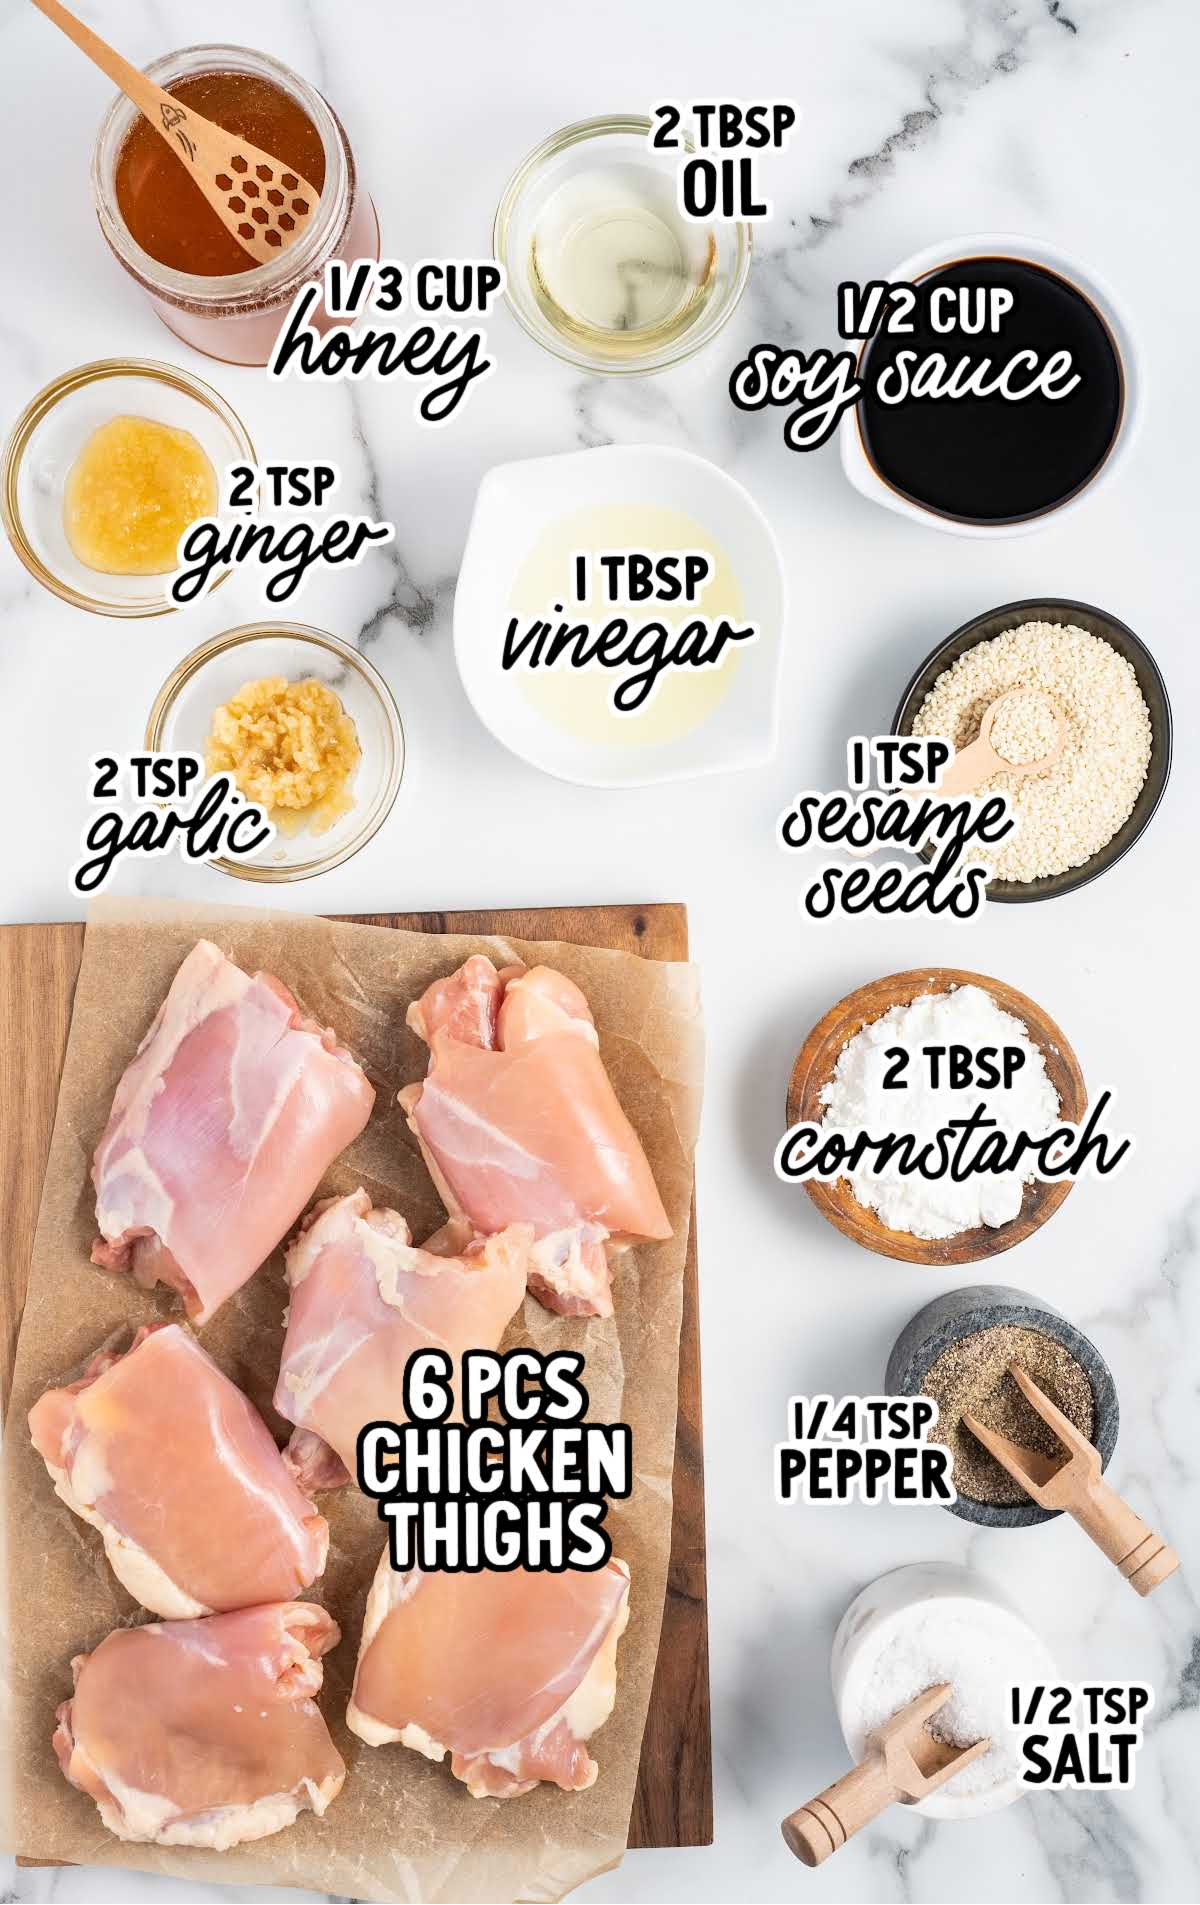
In this honey chicken recipe, boneless skinless chicken thighs are the star. They’re seasoned with just a pinch of salt and black pepper.
The glaze, made with honey, low-sodium soy sauce, rice wine vinegar, minced garlic, and grated ginger, brings a perfect balance of sweetness and tanginess to the dish.
To make this honey-glazed chicken recipe, you will need:
- 6 pieces (approximately 2 pounds) of boneless skinless chicken thighs
- ½ teaspoon of salt
- ¼ teaspoon of black pepper
- 2 tablespoons of cornstarch
- ⅓ cup of honey (clover or wildflower)
- ½ cup of low-sodium soy sauce
- 1 tablespoon of seasoned rice wine vinegar
- 2 teaspoons of minced garlic
- 2 teaspoons of grated ginger
- 2 tablespoons of canola oil
- ½ to 1 teaspoon sesame seeds, optional garnish
Substitutions And Additions
CORNSTARCH: If you don’t have cornstarch, you can use all-purpose flour as a substitute in this easy recipe. Keep in mind that the texture of the sauce may differ slightly.
HONEY: Clover or wildflower honey is recommended for this honey-glazed chicken thighs recipe.
However, you can also try using other varieties, such as acacia or orange blossom honey, for a different flavor profile.
LOW-SODIUM SOY SAUCE: If you prefer a less salty option, you can use reduced-sodium soy sauce or even tamari as a gluten-free alternative.
RICE WINE VINEGAR: If you don’t have seasoned rice wine vinegar, you can substitute it with mirin or dry sherry, which will provide a similar sweet and tangy taste.
Plain rice vinegar or white vinegar can’t be used in this recipe as they won’t give you the flavor you are looking for.
MINCED GARLIC & GINGER: If you’re short on time or don’t have fresh ginger and fresh garlic available, you can use pre-minced garlic and ginger paste.
However, fresh ingredients will yield the best flavor in this easy chicken recipe.
CANOLA OIL: Feel free to substitute canola oil with other neutral-tasting oils like vegetable or sunflower oil for this easy honey-glazed chicken.
HEAT: To add a touch of heat, you can include a pinch of red pepper flakes or a drizzle of sriracha sauce to the honey glaze.
LIME JUICE: For a burst of freshness, squeeze a bit of fresh lime juice over the honey-glazed chicken before serving.
CHICKEN: If you prefer bone-in chicken, you can use bone-in, skin-on chicken thighs and adjust the cooking time accordingly.
If you do not like dark meat, you can also substitute boneless skinless chicken breast cutlets for the chicken thighs.
Be sure that your chicken cutlets are of similar size and thickness to ensure even cooking. You may not need to cook the chicken breast for quite as long as the dark meat thighs.
GARNISH: For a garnish alternative, try sprinkling chopped green onions or cilantro on top of the chicken.
How To Make This Honey Glazed Chicken Recipe
OUR RECIPE DEVELOPER SAYS
If you want to enhance the flavor of the dish, you can marinate the chicken thighs in the honey sauce for 30 minutes to an hour before cooking.
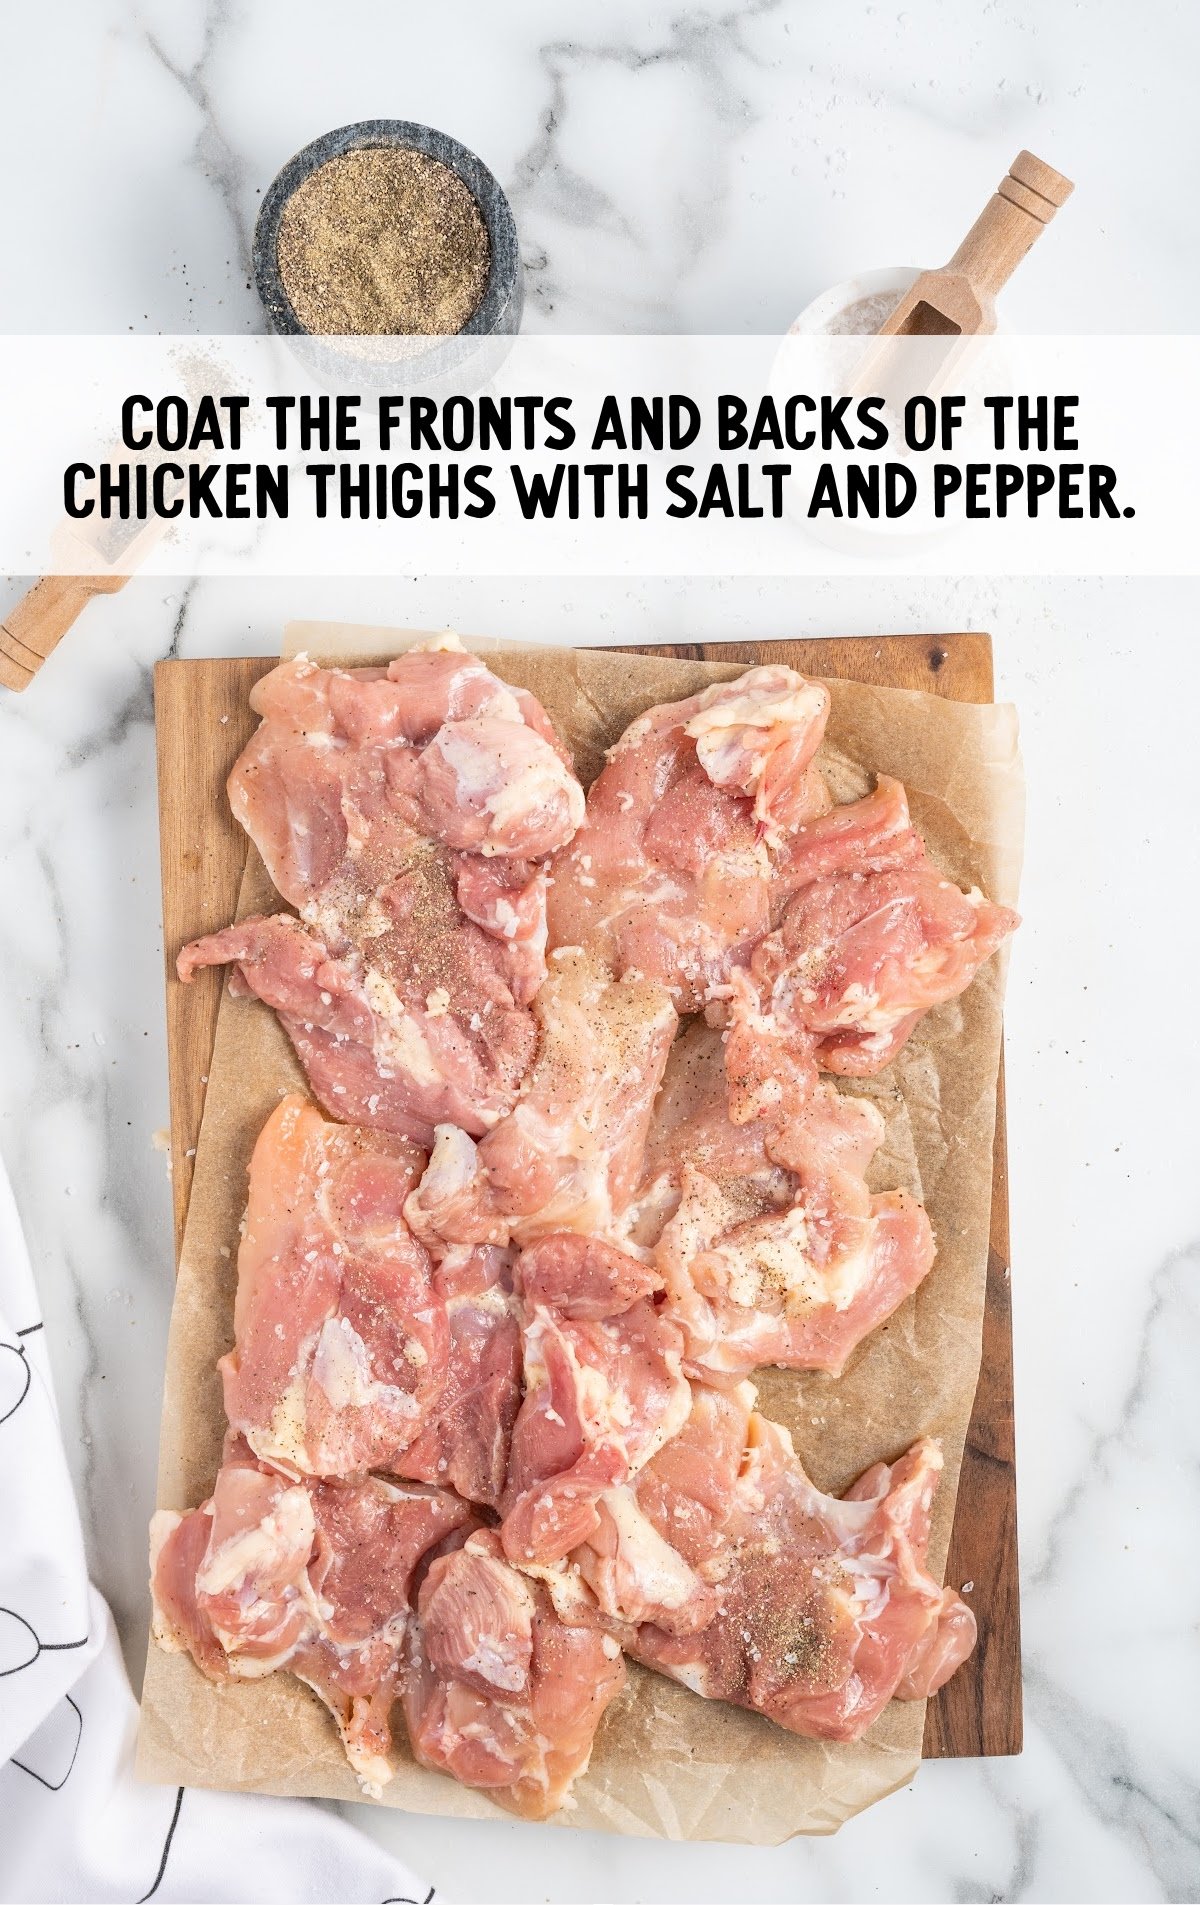
STEP ONE: Coat the fronts and backs of the boneless skinless chicken thighs with salt and black pepper. You can trim any excess fat from each piece if needed.
PRO TIP:
It’s important to remove the excess fat for a better texture and flavor. A sharp knife or even kitchen shears will make removing the fat quick and easy.
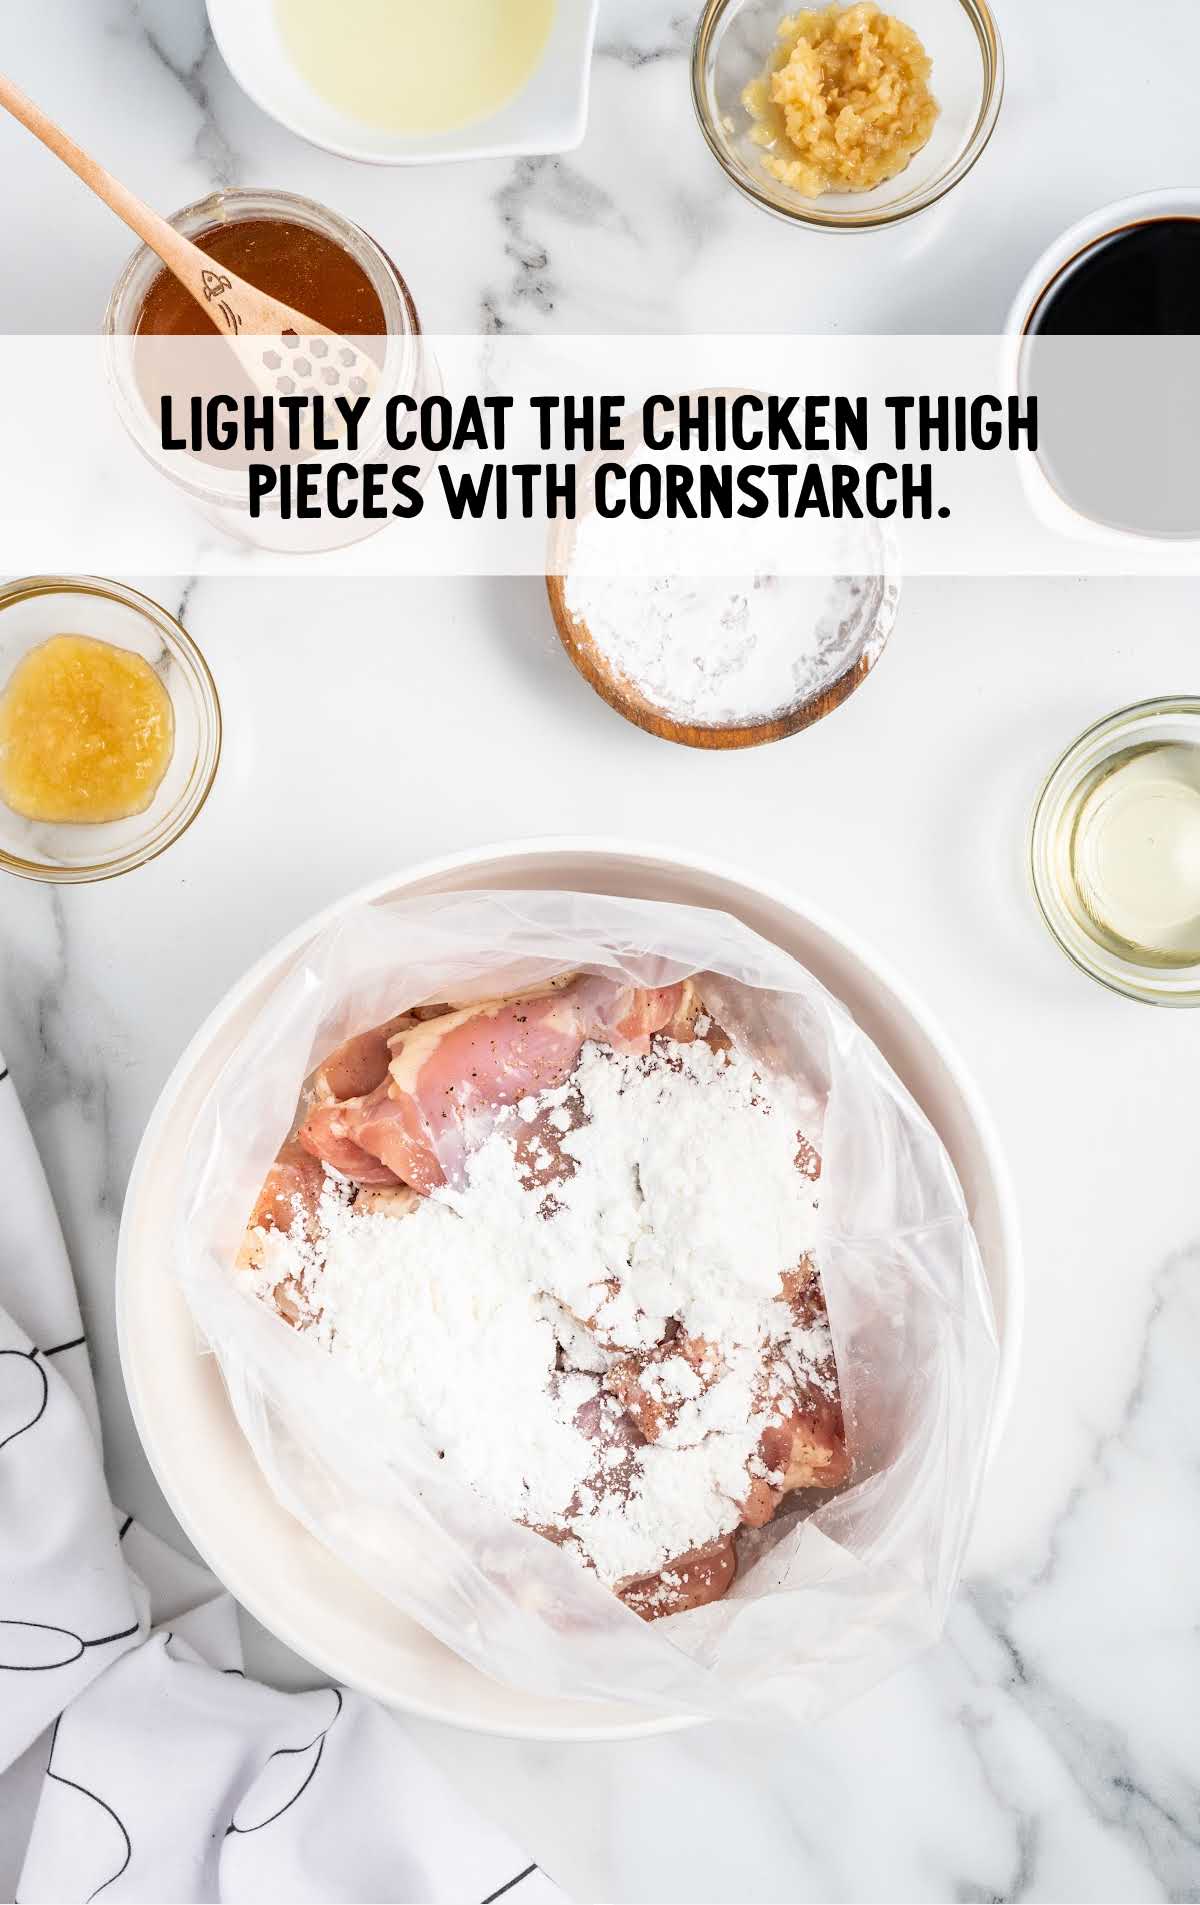
STEP TWO: Add the chicken thighs and cornstarch to a large zip-top bag. Close the bag and shake the chicken around in the cornstarch until all the chicken thigh pieces are lightly coated with cornstarch.
PRO TIP:
Coating the chicken thighs in the cornstarch before browning them gives them a light coating that the honey sauce sticks to beautifully.
The cornstarch also helps to thicken up the sauce when cooked. As it cools, it gives the honey sauce that beautiful thick glaze texture.
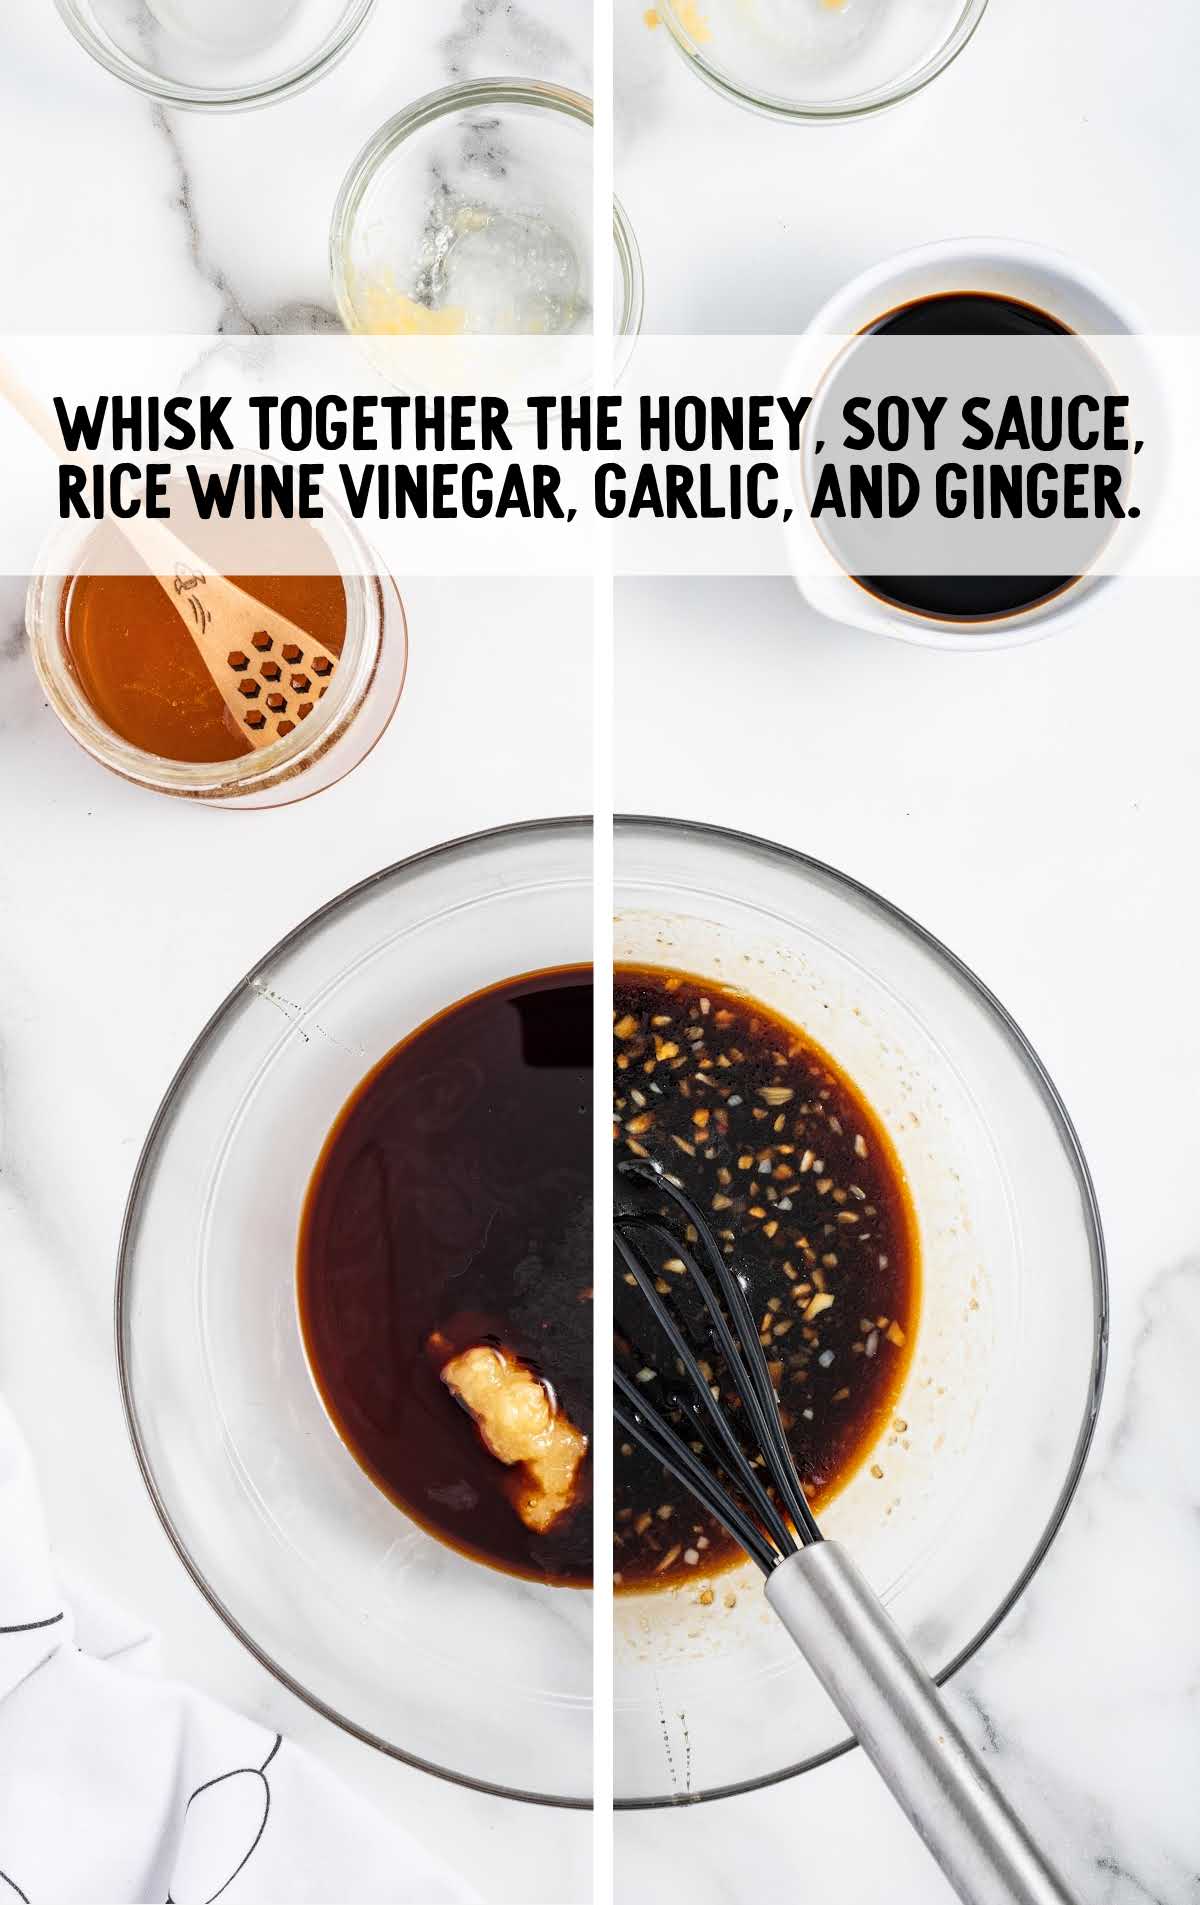
STEP THREE: In a small bowl, whisk together the honey, low-sodium soy sauce, seasoned rice wine vinegar, minced garlic, and grated ginger. Set aside.
STEP FOUR: Add the canola oil to an extra-large, heavy-duty skillet on medium-high heat.
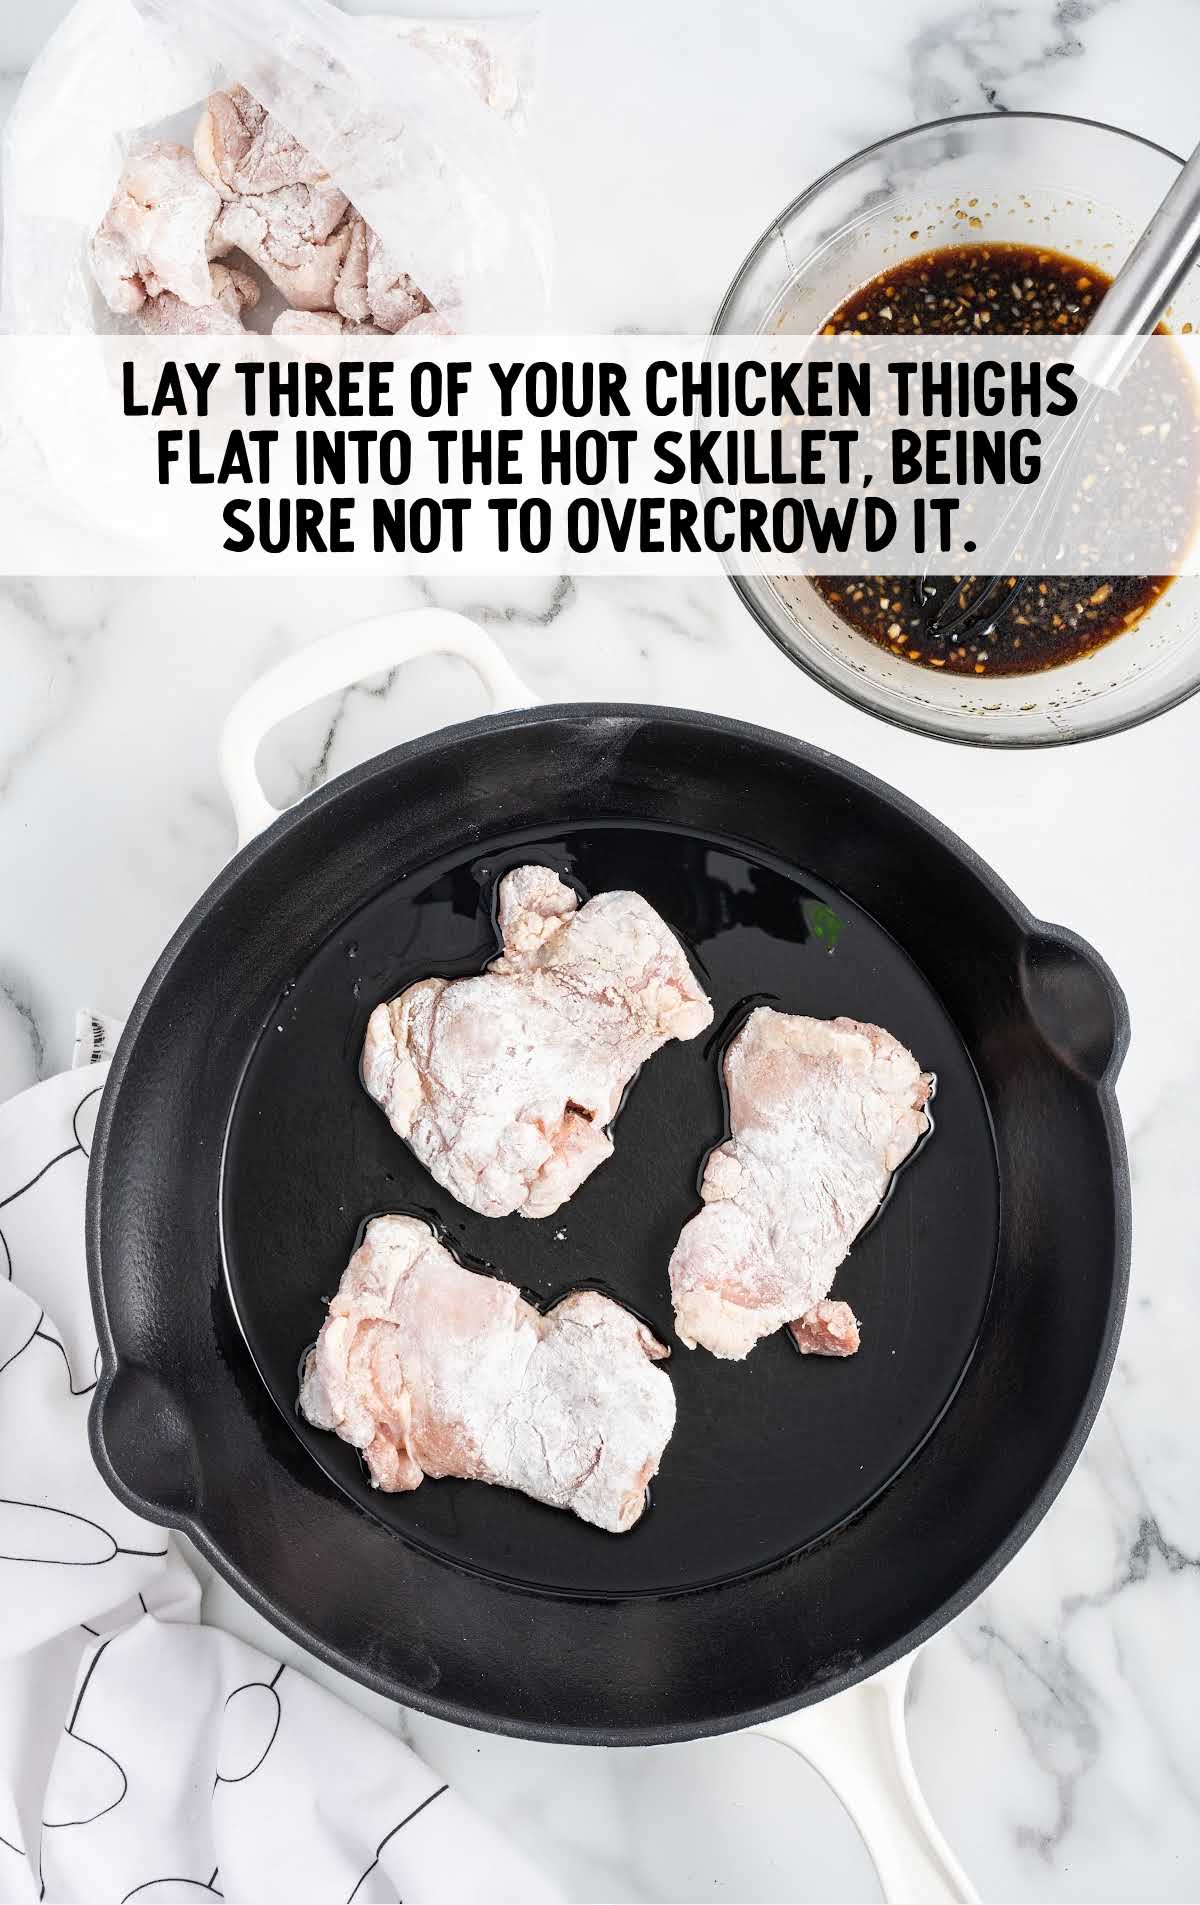
Once the oil is hot, lay three of your chicken thighs flat into the hot skillet, being sure not to overcrowd the skillet.
If your chicken pieces are smaller, you may not need to cook and brown your chicken thighs in two separate batches.
PRO TIP:
It’s really important not to overcrowd the skillet when browning the chicken thighs. Overcrowding can lead to steaming instead of achieving a nice golden crust.
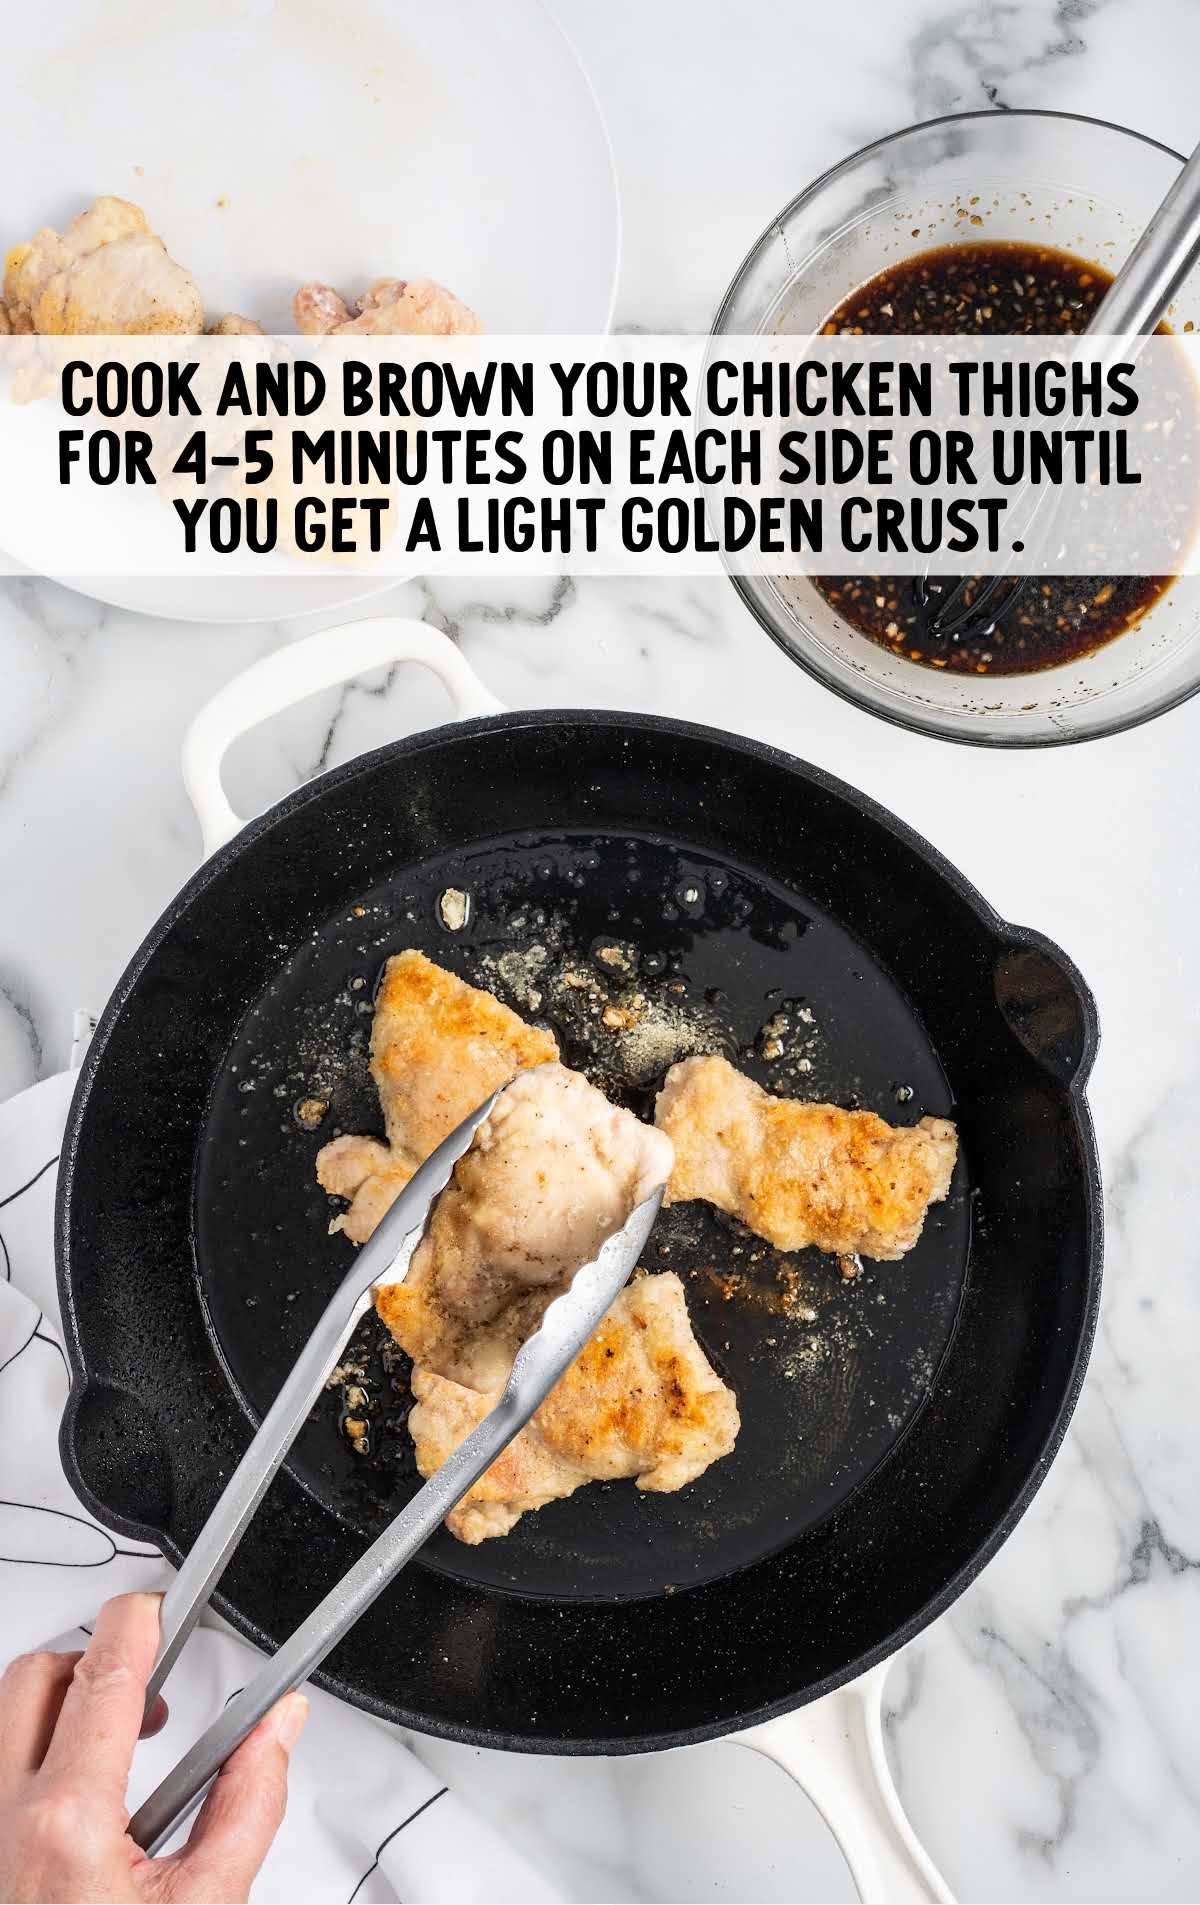
STEP FIVE: Cook and brown your chicken thighs for four to five minutes on each side or until you get a light golden crust.
Remove the browned chicken thighs to a plate and repeat steps 3 & 4 with the remaining pieces of chicken.
STEP SIX: Once all your chicken thighs have been browned, return the pieces from the plate back to the skillet.
Include any juices from the chicken (lots of flavors in those juices), and turn your heat down to medium.
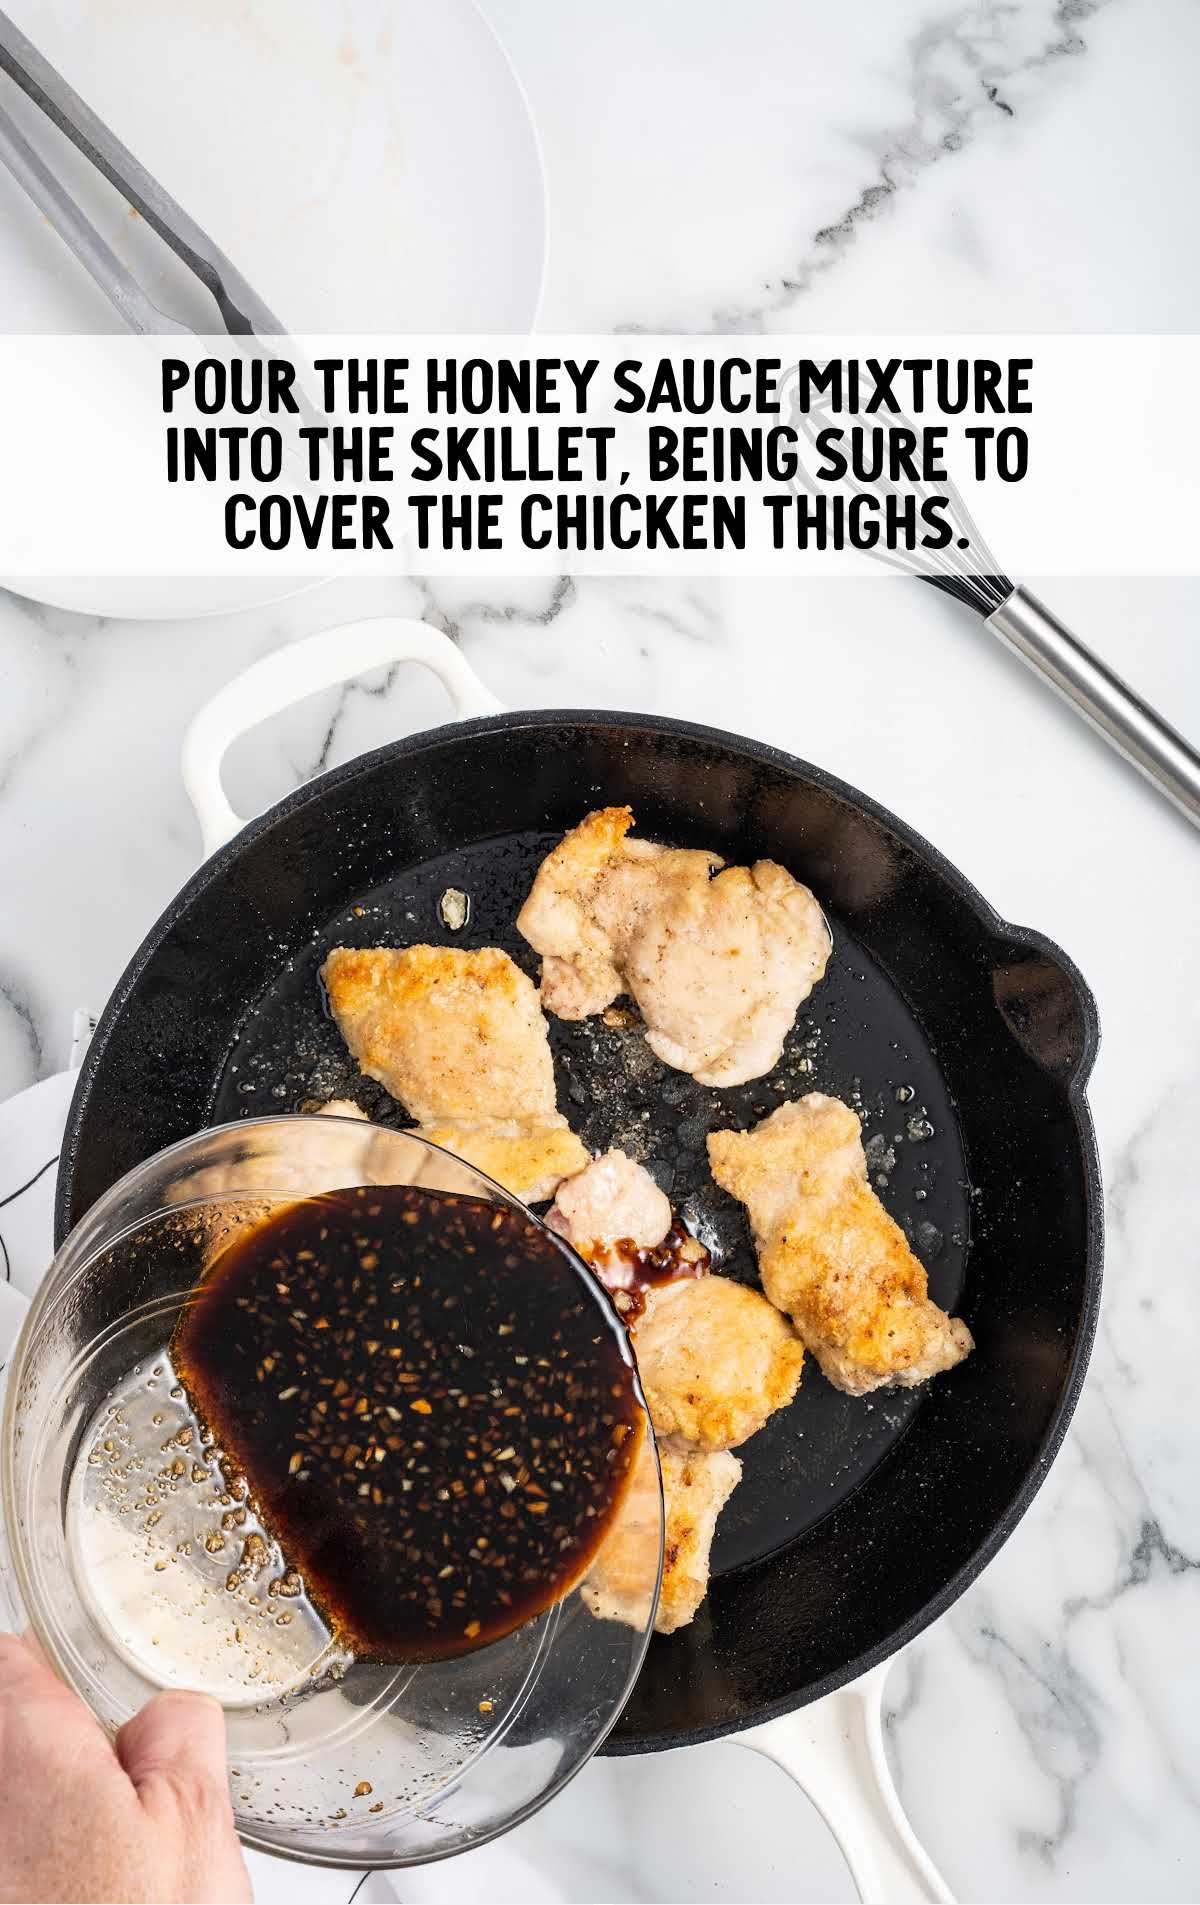
STEP SEVEN: Pour the reserved honey sauce mixture into the skillet, being sure to cover the chicken thighs, and cook the sauce for three to five minutes or until thickened.
Spoon the honey sauce over the chicken as it is bubbling and thickening to a glaze-like texture.
Ensure that your chicken thighs are fully covered and coated with the sauce.
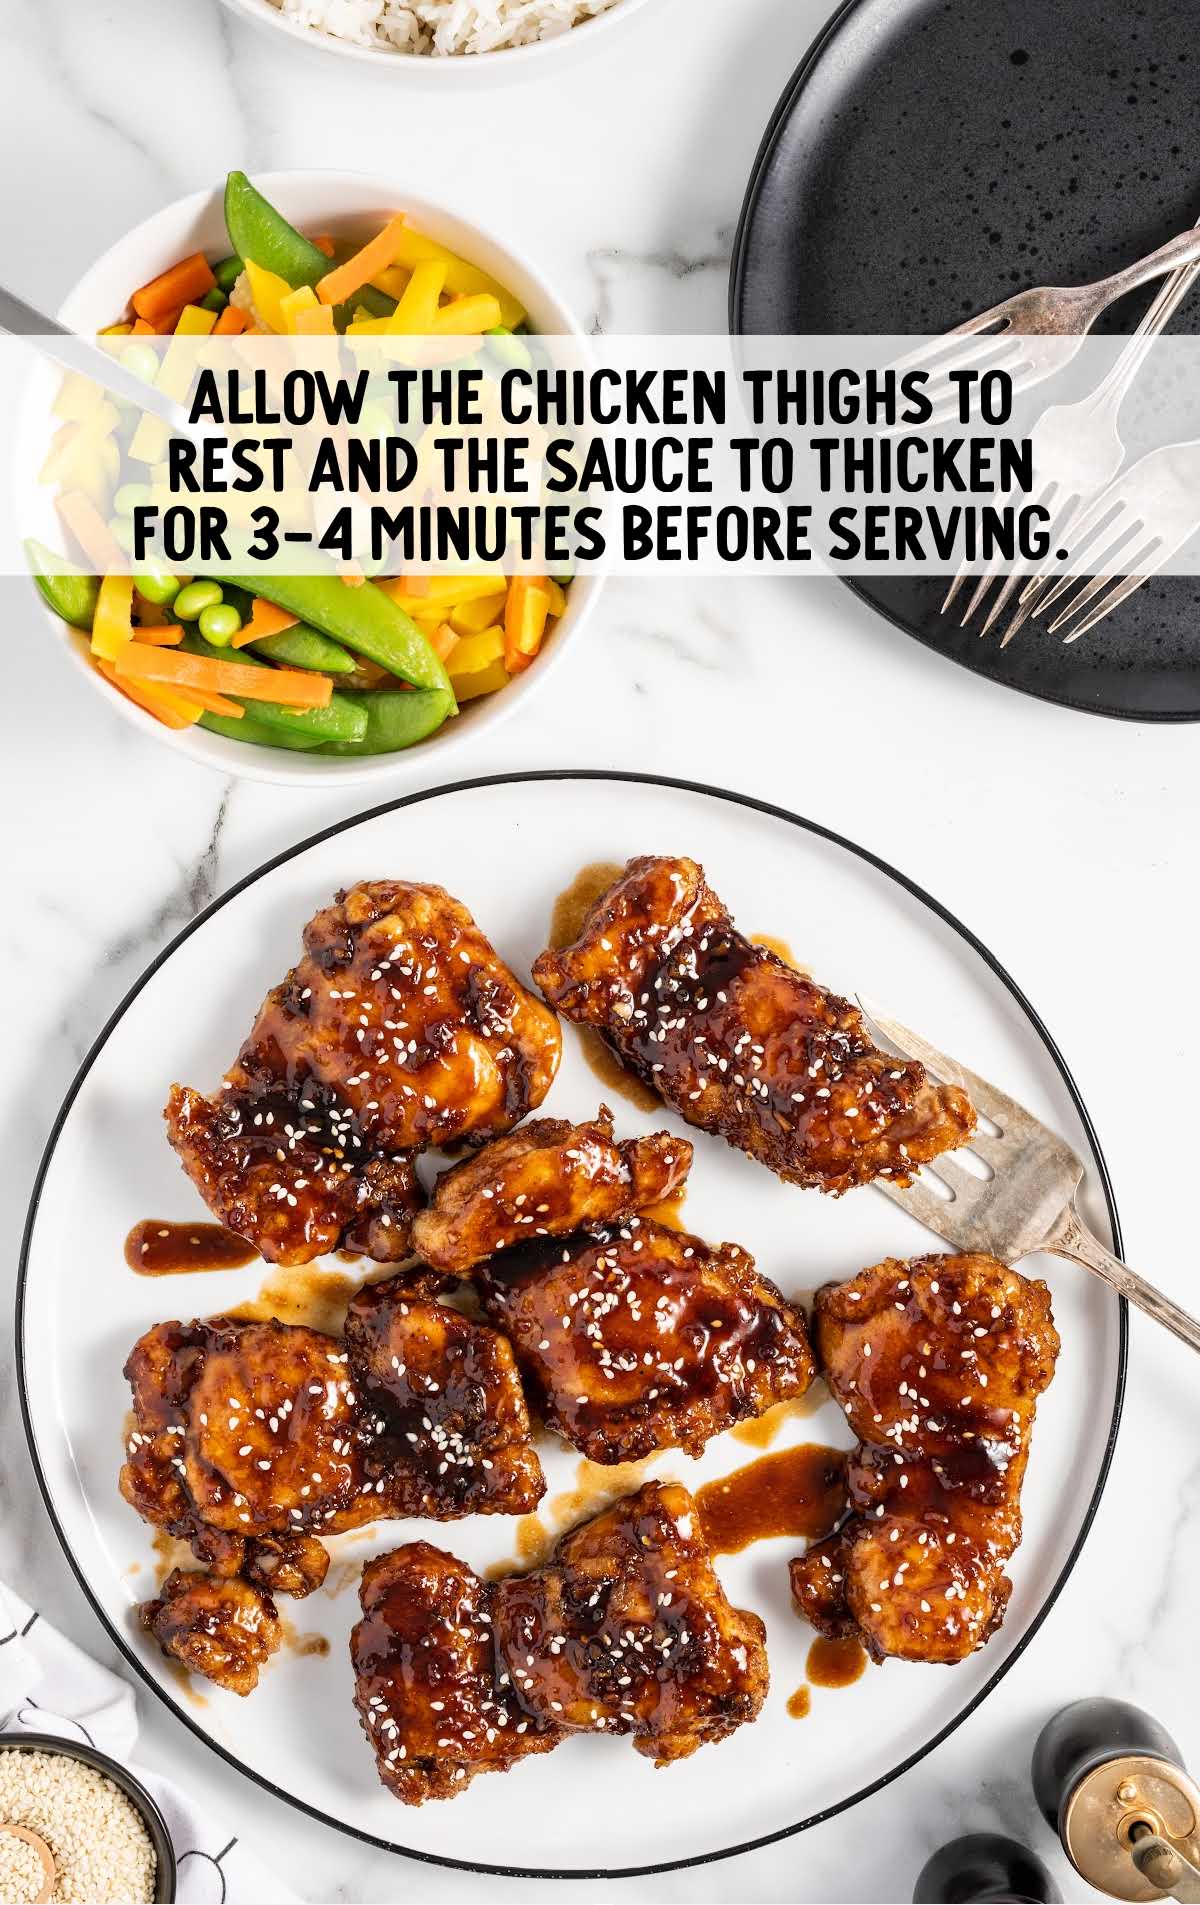
STEP EIGHT: Remove the skillet from the heat and allow the honey-glazed chicken thighs to rest and the sauce to continue to thicken for three to four minutes before plating the chicken and serving.
You can add a sprinkle of sesame seeds to the chicken once plated if desired.
PRO TIP:
Allowing the chicken to rest for three to four minutes will allow the sauce to thicken and enhance the flavors, as well as make sure the chicken is nice and juicy.
Save the excess honey garlic sauce from the skillet to add over the plated chicken for extra flavor.
How To Serve
Honey-glazed chicken is a versatile dish that can be served in a variety of ways.
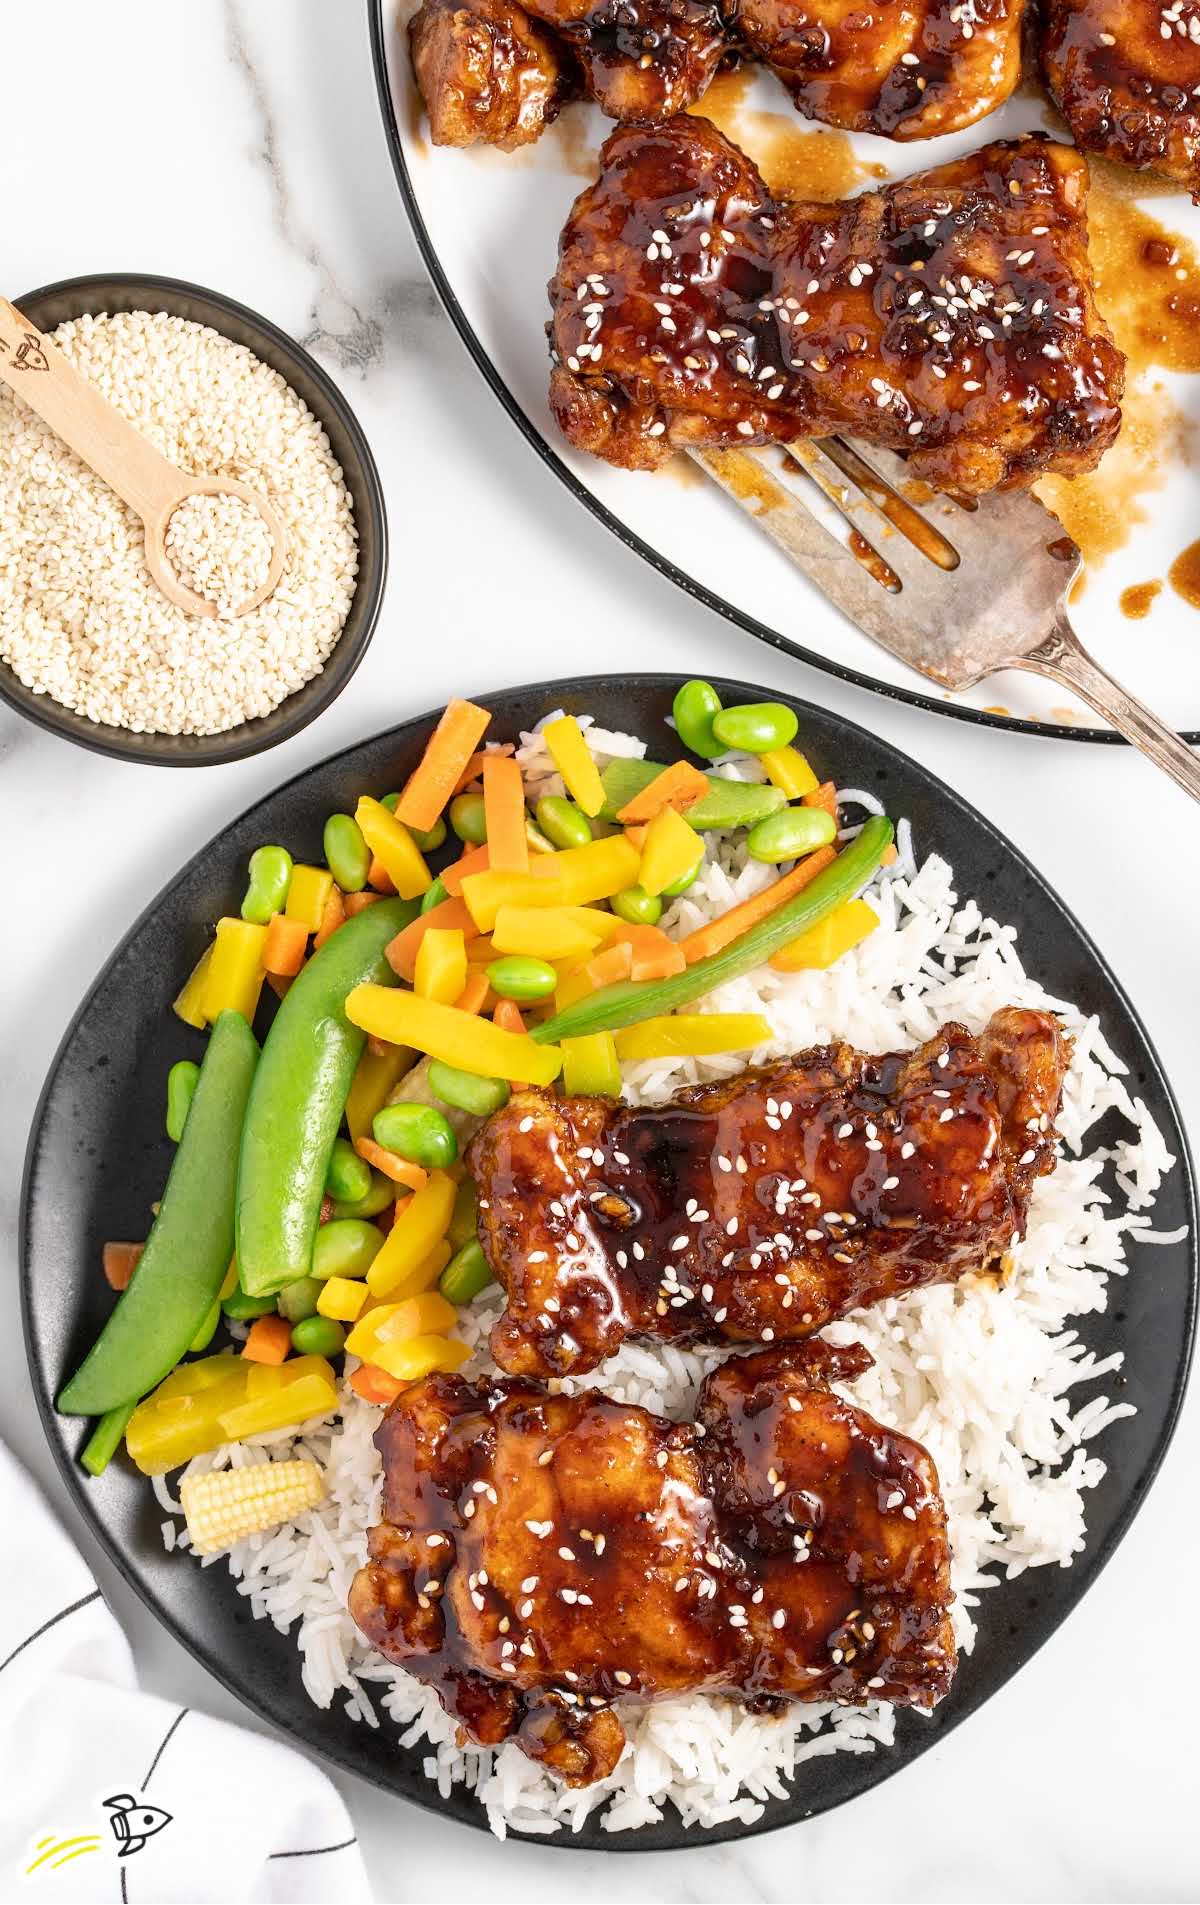
Given the Asian-inspired flavors in this recipe, pairing the honey-glazed chicken with steamed jasmine rice or fried rice is an excellent choice. The rice will help soak up the delicious honey glaze, ensuring that none of it goes to waste.
Instead of rice, you could also consider serving the chicken over a bed of soba or rice noodles. The noodles will complement the chicken and absorb the honey glaze beautifully.
Steamed or sauteed vegetables would also make an excellent side for this weeknight dinner recipe. Broccoli, bell peppers, snap peas, or bok choy would all pair well.
Another way to enjoy honey garlic chicken thighs is in a salad. You can chop up the chicken and add it to a bed of greens, along with other toppings like sliced almonds, mandarin oranges, and a sweet vinaigrette dressing.
If you have leftover honey-glazed chicken, you can use it to make a delicious sandwich as a great quick lunch. Simply slice the chicken and add it to a toasted bun, along with your favorite toppings like lettuce, tomato, and mayo.
Our cashew chicken and bourbon chicken are two more delicious chicken recipes that are loaded with flavor.
MORE CHICKEN RECIPES
Storing Honey Chicken
MAKE AHEAD: The honey-glazed chicken recipe is best when served immediately after cooking. However, if you need to make it ahead of time, you can prepare the chicken and the honey-soy glaze separately.
Keep the browned chicken and the sauce in separate containers in the refrigerator. When ready to serve, warm the chicken in a skillet and then add the sauce, allowing it to cook and thicken as directed.
IN THE FRIDGE: Transfer the honey-glazed chicken to an airtight container once it has cooled down completely. You can store it in the refrigerator for up to two days.
REHEATING: To reheat, place the chicken in a skillet over medium heat until it is warmed through; you can add a little water or chicken broth to the skillet to prevent the chicken from drying out.
If the sauce has thickened too much, a few spoons of water can help to loosen it up.
IN THE FREEZER: Due to the texture changes that can occur in the chicken after freezing and thawing, it is not recommended to freeze this dish.
The cornstarch coating on the chicken might have an odd texture upon thawing and reheating.
Why We Love This Recipe
QUICK AND EASY: With only five minutes of prep time and 25 minutes of cooking time, this recipe is perfect for busy weeknights. It requires minimal effort and delivers maximum flavor.
CROWD-PLEASER: This recipe yields six servings, making it perfect for feeding a whole family or a small group of friends. The sweet and savory flavors are sure to please everyone’s taste buds.
CUSTOMIZABLE: You can adjust the sweetness and saltiness of the glaze to your liking. You can also add other spices or herbs, such as red pepper flakes or cilantro, to give the dish a different flavor profile.
Honey-glazed chicken is a delectable and satisfying dish that perfectly balances sweet and savory flavors. Its succulent and tender meat, complemented by the rich, sticky sweetness of the honey glaze, never fails to please
Frequently Asked Questions
Marinating the chicken thighs in the sweet honey glaze overnight can add an extra depth of flavor to this honey soy-glazed chicken. The chicken will absorb the flavors of the marinade, resulting in a more intense taste.
However, since the marinade contains acidic ingredients like vinegar, it’s best to marinate the chicken for no more than 24 hours to prevent the texture of the meat from becoming too tenderized.
While the recipe suggests pan-frying the chicken thighs, you can adapt the cooking method to grilling or baking.
If grilling, preheat the grill to medium heat and cook the chicken thighs until they reach an internal temperature of 165°F (75°C).
If baking, preheat the oven to 400°F (200°C) and bake the chicken thighs on a lined baking sheet for approximately 25-30 minutes or until cooked through.
It is best to use thawed chicken thighs for this recipe to ensure even cooking and proper absorption of flavors.
If using frozen chicken thighs, thaw them completely in the refrigerator before starting the recipe. Thawing in the refrigerator is the safest method to prevent the growth of harmful bacteria.
If you prefer chicken drumsticks or chicken wings over chicken thighs, you can use them in this honey-glazed chicken recipe.
Adjust the cooking time accordingly, as drumsticks and wings may require more time to cook through. The flavorful honey glaze will work well with these alternative cuts, giving them a sticky and delicious coating.
More Recipes You’ll Love

Honey Glazed Chicken
Ingredients
- 6 pieces boneless skinless chicken thighs (approximately 2 pounds)
- ½ teaspoon salt
- ¼ teaspoon black pepper
- 2 tablespoons cornstarch
- ⅓ cup honey, clover or wildflower
- ½ cup low-sodium soy sauce
- 1 tablespoon seasoned rice wine vinegar
- 2 teaspoons minced garlic
- 2 teaspoons grated ginger
- 2 tablespoons canola oil
- ½ to 1 teaspoon sesame seeds, optional garnish
Instructions
- Coat the fronts and backs of the boneless skinless chicken thighs with salt and black pepper. You can trim any excess fat from each piece if needed.
- Add the chicken thighs and cornstarch to a large zip-top bag. Close the bag and shake the chicken around in the cornstarch until all the chicken thigh pieces are lightly coated with cornstarch.
- In a small bowl, whisk together the honey, low-sodium soy sauce, seasoned rice wine vinegar, minced garlic, and grated ginger. Set aside.
- To an extra large, heavy-duty skillet, on medium-high heat, add the canola oil. Once the oil is hot, lay three of your chicken thighs flat into the hot skillet, being sure not to overcrowd the skillet. If your chicken pieces are smaller, you may not need to cook and brown your chicken thighs in two separate batches. See tips.
- Cook and brown your chicken thighs for 4 to 5 minutes on each side or until you get a light golden crust. Remove the browned chicken thighs to a plate and repeat steps 3 & 4 with the remaining pieces of chicken.
- Once all your chicken thighs have been browned, return the pieces from the plate back to the skillet, along with any juices from the chicken (lots of flavors in those juices), and turn your heat down to medium.
- Pour the reserved honey sauce mixture into the skillet, being sure to cover the chicken thighs, and cook the sauce for 3 to 5 minutes or until thickened. Be sure to spoon the honey sauce over the chicken as it is bubbling and thickening so that your chicken thighs are fully covered and coated with the sauce.
- Remove the skillet from the heat and allow the honey-glazed chicken thighs to rest and the sauce to continue to thicken for 3 to 4 minutes before plating the chicken and serving. You can add a sprinkle of sesame seeds to the chicken once plated if desired.
Notes
- If you want to enhance the flavor of the dish, you can marinate the chicken thighs in the honey sauce for 30 minutes to an hour before cooking.
- It’s important to remove the excess fat for a better texture and flavor. A sharp knife or even kitchen shears will make removing the fat quick and easy.
- Coating the chicken thighs in the cornstarch before browning them gives them a light coating that the honey sauce sticks to beautifully. The cornstarch also helps to thicken up the sauce when cooked. As it cools, it gives the honey sauce that beautiful thick glaze texture.
- It’s really important not to overcrowd the skillet when browning the chicken thighs. Overcrowding can lead to steaming instead of achieving a nice golden crust.
- Allowing the chicken to rest for 3 to 4 minutes will allow the sauce to thicken and enhance the flavors, as well as make sure the chicken is nice and juicy. Save the excess honey garlic sauce from the skillet to add over the plated chicken for extra flavor.





Leave a Comment