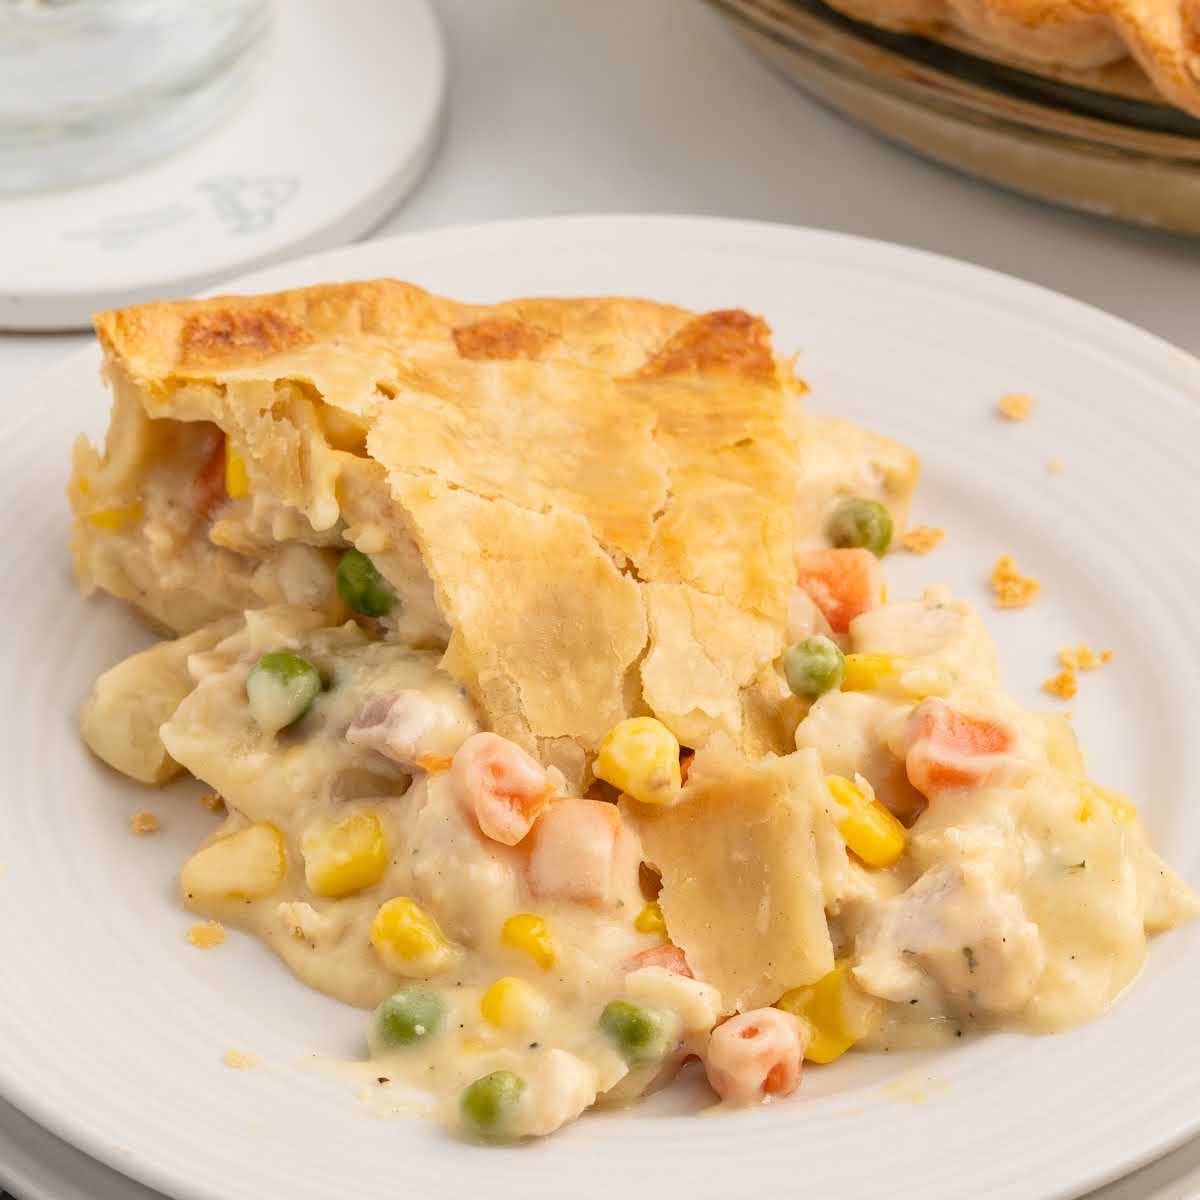
Flaky, golden crust. Creamy, savory filling. Every bite hits just right — warm, rich, and perfectly balanced. This chicken pot pie is hearty without being heavy, and comforting in all the best ways.

Here’s what most recipes don’t tell you 👉 That canned soup shortcut? It can work beautifully — but only if you know how to build proper flavor and body around it. That’s exactly what this version does.
This is an easy recipe. But we’re not just stirring chicken into soup and hoping for the best. We start with butter-sautéed onions, a hit of bouillon for depth, and fresh thyme to keep things bright. The cream rounds things out, and rotisserie chicken makes it weeknight-friendly.
Chicken Pot Pie Ingredients

Here’s what you’ll need to make this delicious Chicken Pot Pie:
- 3 tablespoons unsalted butter
- ¾ cup diced yellow onion
- 2 teaspoons chicken bouillon seasoning
- 1 teaspoon fresh thyme leaves
- ¾ teaspoon seasoned salt
- ¼ teaspoon black pepper
- 3 tablespoons all-purpose flour
- 1 ⅓ cups chicken stock
- 10.5 ounce can cream of chicken soup
- ⅓ cup heavy cream
- 1 cup frozen peas & carrots
- 1 cup frozen corn
- 3 cups rotisserie chicken breast
- box ready-made double pie crusts
- 1 large egg, room temperature
- 1 teaspoon water
Recommended Ingredient Substitutions
Chicken Bouillon Seasoning: Use 1½ teaspoons seasoned salt + a pinch each of garlic powder and onion powder, plus a dash of soy sauce or Worcestershire for savory depth.
Fresh Thyme: Dried thyme can be used if fresh is unavailable. Use about half the amount since dried herbs are more concentrated. Rosemary or sage can also be interesting alternatives.
Pie Crusts: Homemade pie crust can replace ready-made ones if you prefer. Just make sure to have enough for both the bottom and top crusts.
How to Make This Chicken Pot Pie Recipe
The cream of chicken soup gets elevated by the addition of proper stock, heavy cream and seasoning trio (bouillon + seasoned salt + thyme). It feels like a homemade velvety sauce, not at all like something off the grocery store shelf.
Prep Smart Tips
- Let the filling cool 10–15 minutes before adding to the crust — this is the difference between a crisp base and a weepy mess.
- Use a baking tray under your pie dish. It’s not just for spills — it helps conduct heat evenly so the bottom crust doesn’t lag behind.

What Makes This Chicken Pot Pie Better
Veggies stay vibrant, not mushy. A fast simmer plus resting time cools the filling just enough so your bottom crust doesn’t go soggy before it even hits the oven.
Flour is cooked off to avoid any pasty taste and build a smooth base.

No more patchy crusts: Egg wash on both the bottom and top crust makes the pie golden and crisp, never pale or limp.

Serving Suggestions
Serve the Chicken Pot Pie hot from the oven, sliced into generous wedges. Garnish each slice with a sprinkle of fresh thyme or parsley to add a touch of color and freshness.
Pair it with a simple green salad dressed in a light vinaigrette to balance the richness of the pie.
Make-Ahead Instructions
Make the Filling (Up To Three Days Ahead):
Prepare the filling completely, then cool and store it in an airtight container in the fridge. When ready to bake, reheat it slightly until just warm.
Assemble Ahead (One Day Ahead):
You can fully assemble the pot pie — crust and all — and store it unbaked in the fridge, covered tightly with plastic wrap. Brush with egg wash just before baking.
Freeze Before Baking:
Assemble the pot pie in a freezer-safe dish, wrap tightly, and freeze unbaked for up to two months. When ready, bake straight from frozen at 375°F, loosely covered with foil for 30–40 minutes, then uncover and continue baking.
Storage Instructions
Cool completely, then cover tightly or transfer to an airtight container. Store for up to three days. Reheat in the oven at 350°F until warmed through to keep the crust crisp. When reheating, avoid the microwave if you want to keep the crust flaky. The oven or toaster oven is best.

More Chicken Pot Pie Recipes
- Chicken Pot Pie Noodle Recipe
- Mini Chicken Pot Pie Recipe
- Chicken Pot Pie with Tater Tots Recipe
- Freezer Chicken Pot Pie Recipe
- Easy Chicken Pot Pie Recipe

Chicken Pot Pie
Ingredients
- 3 tablespoons unsalted butter
- ¾ cup diced yellow onion
- 2 teaspoons chicken bouillon seasoning
- 1 teaspoon fresh thyme leaves
- ¾ teaspoon seasoned salt, Lawry’s brand
- ¼ teaspoon black pepper
- 3 tablespoons all-purpose flour
- 1 ⅓ cups chicken stock
- 10.5 ounces cream of chicken soup
- ⅓ cup heavy cream
- 1 cup frozen peas & carrots
- 1 cup frozen corn
- 3 cups rotisserie chicken breast meat, roughly chopped into bite size pieces (approximately 1 pound)
- 14.1 ounces ready-made double pie crusts, Pillsbury brand
- 1 large egg, room temperature
- 1 teaspoon water
Instructions
- Preheat your oven to 350°F and get your pie dish ready. Place a 9-inch pie dish on a large rimmed baking tray. This setup isn’t just for baking; it also catches any spills, making clean-up easier.
- In a large deep-sided skillet, melt the butter over medium heat. Add onions, chicken bouillon, thyme, seasoned salt, and black pepper. Cook until the onions are soft and translucent, about 2-3 minutes. This creates a flavorful base that infuses every bite with savory notes.
- Sprinkle the flour over the cooked onions and stir until it’s fully absorbed, ensuring no dry flour remains. This step is crucial for a smooth, thick sauce that holds all the ingredients together.
- Gradually pour the chicken stock into the skillet, whisking constantly. Add the cream of chicken soup and heavy cream, whisking until smooth. Allow the mixture to thicken for 3-4 minutes on medium-high heat, then remove from heat. This creamy base is what sets this pot pie apart, providing a rich backdrop for the vegetables and chicken.
- Stir in the peas, carrots, corn, and chopped chicken. Let the mixture cool slightly while preparing the crust. This slight cooling prevents the bottom crust from getting soggy when you add the filling.
- Unroll the first pie crust and fit it into your pie pan. Brush it lightly with a mixture of beaten egg and water. This egg wash will help seal the crust and add a beautiful golden color as it bakes.
- Pour the slightly cooled filling into the crust. This is your chance to smooth it out and make sure the filling is evenly distributed.
- Place the second pie crust over the filling. Tuck the edges under the bottom crust and press to seal. Crimp the edges for a decorative look. Brush the top with egg wash and cut slits to allow steam to escape.
- Bake in the preheated oven for 40-45 minutes, or until the crust is golden brown. These final minutes transform your pie into a golden, flaky delight.
- Let the pie cool on the counter for 15-20 minutes before serving. This resting time helps the filling set, making your pot pie easier to slice and serve.
Notes
- Using a baking tray under your pie dish is a great way to keep your oven clean. If the filling bubbles over, the tray will catch it!
- Cooking the onions until they’re just translucent ensures they blend well without overpowering the other flavors.
- Make sure the flour is completely mixed with the butter to avoid any lumps in your sauce.
- Constant whisking when adding liquids helps prevent lumps and ensures a smooth, creamy filling.
- Allowing the filling to cool a bit before adding it to the crust can significantly improve the texture of the pie base.
- Brushing the bottom crust with egg wash helps seal it and prevent it from becoming soggy.
- Crimping the edges not only seals the pie but also gives your Chicken Pot Pie a classic, rustic look.
- Giving your pie some time to rest not only enhances its flavor but also prevents it from falling apart when you cut into it.


Comments
Layne Henderson says
I love how easy and tasty this recipe is!
Treena says
I love to make pot pie but the addition of leeks in the recipe puts this over the top!
Gloria says
Very easy. The filling is delicious!
Neva Kitts says
How (if at all) would this work with top & bottom crusts made with Crescent Roles?
Layne Kangas says
Hi, Neva – we haven’t tested this recipe doing that. Our taco bake does that and we baked at 400* for 20 minutes and it turned out great. I would assume this would be similar but since I haven’t tried it, I can’t say for 100% certain. Please let me know if you test it! Enjoy 🙂