This adorable Easter bunny cake is a dessert that will make the kids smile this year. This funny little rabbit only needs a box of cake mix, frosting, and a few decorations for a memorable Easter dessert that your family will request every year.
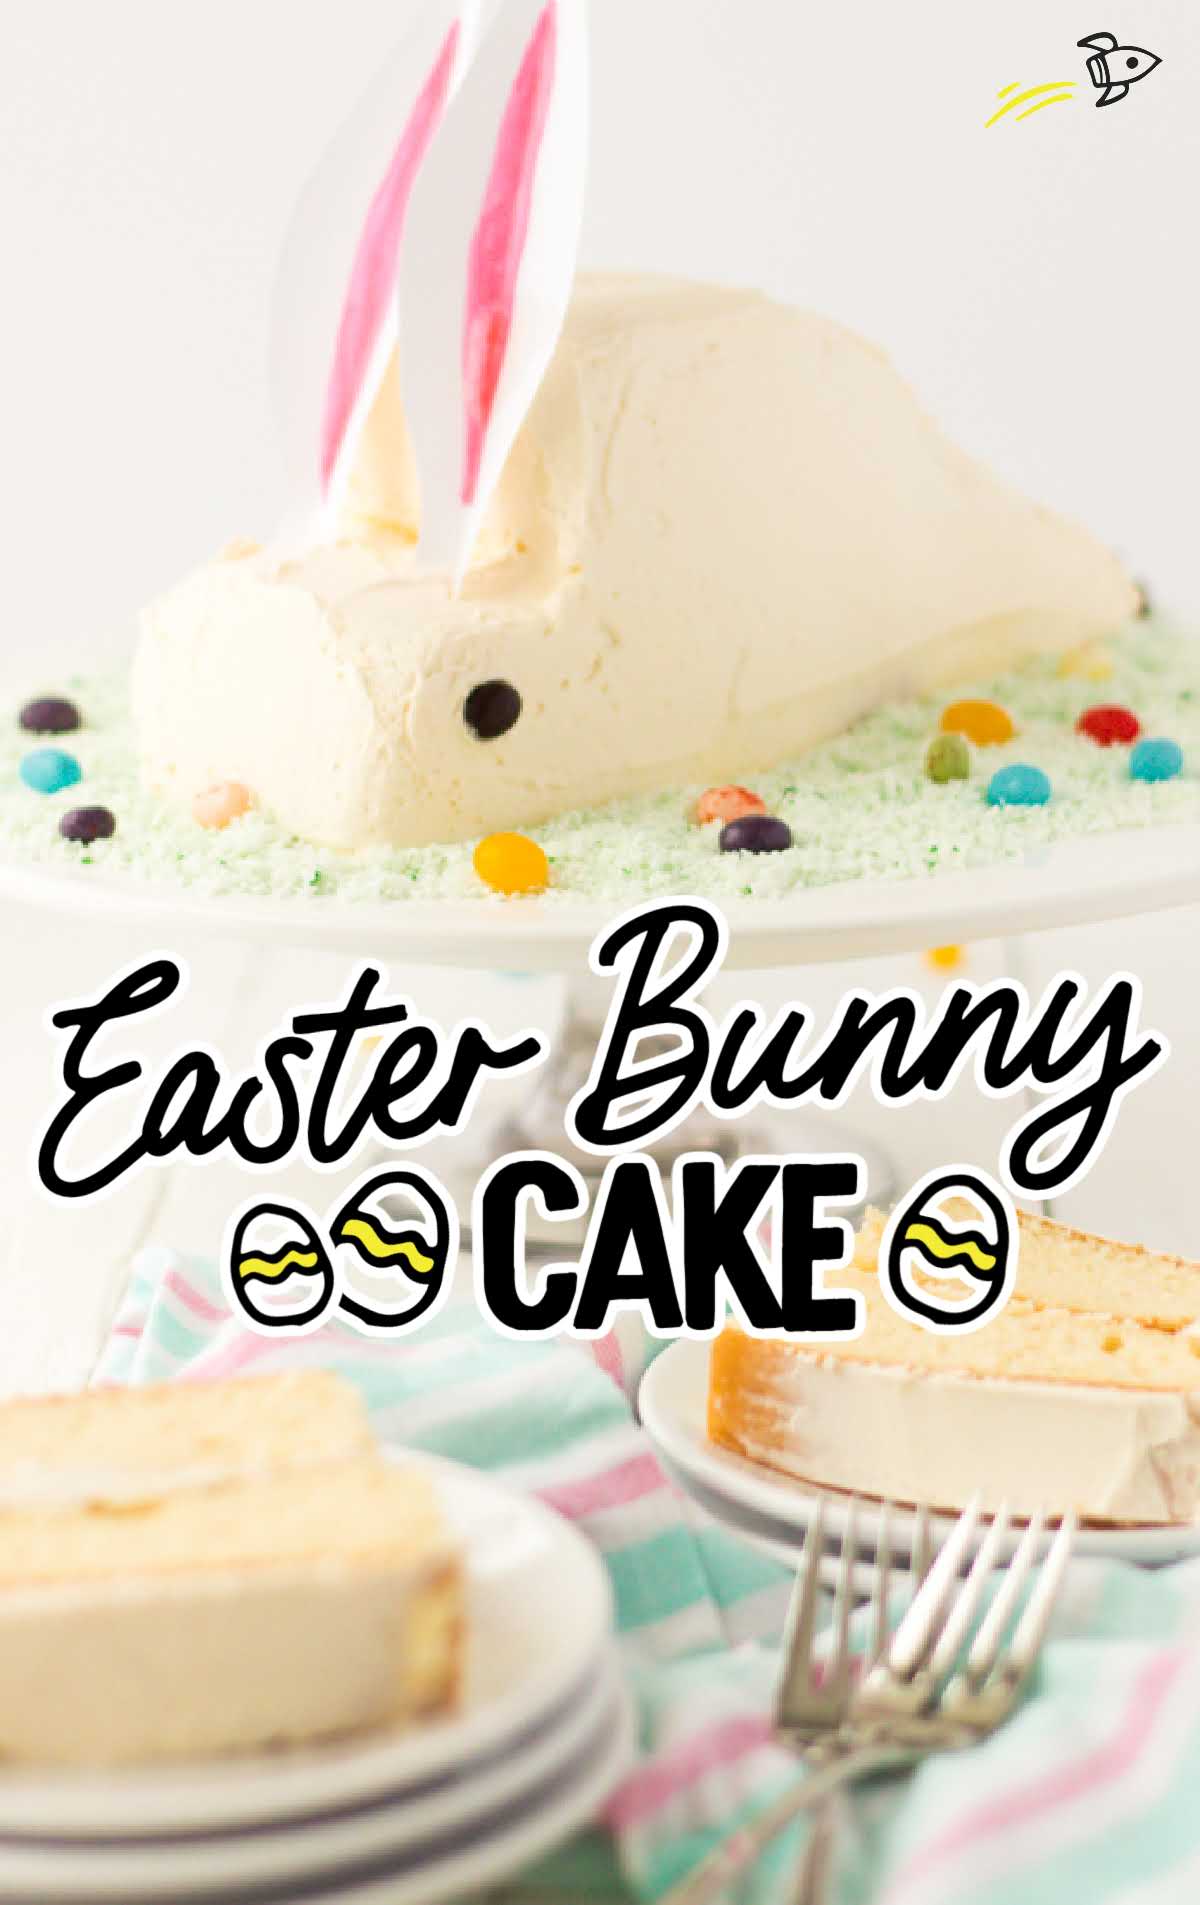
Easter Bunny Cake Ingredients
This cake is made with a moist and fluffy cake batter, which is then layered with a velvety frosting.
Once baked, the cake is shaped into a cute Easter bunny, sitting in a bed of crunchy coconut flakes, giving the cake a unique texture and mild flavor.
You’ll need:
- 1 boxed cake mix (any flavor), plus ingredients called for on the box
- 1 container of pre-made frosting
- Two dark M&M’s (for eyes)
- Shredded coconut
- Green food coloring
- Jelly beans
Easter Cake Substitutions And Additions
BOXED CAKE MIX: Any flavor of cake mix is a great choice for this cake recipe. Chocolate cake, vanilla cake, or white cake mix would taste equally good.
FROSTING: Any white or off-white frosting works fine to create this white bunny cake. Cream cheese frosting, lemon cream cheese frosting, or Cool Whip frosting would all work well.
DECORATIONS: You can use edible or non-edible decorations for this bunny cake.
There is plenty of flexibility, only limited by your creativity, in creating the bunny face and surrounding decorations.
We made the bunny ears out of a piece of paper, but you could make these edible as well.
COCONUT: While shredded coconut will look the most like grass if all you have available are coconut flakes, you can easily substitute them.
How To Make This Easter Bunny Cake Recipe
Once you bake the boxed cake mix, our directions below will walk you through the steps to create this bunny from the pieces of cake.
Finally, you will decorate the bunny for the perfect Easter centerpiece.
STEP ONE: Prepare the cake in a round cake pan according to the package directions.
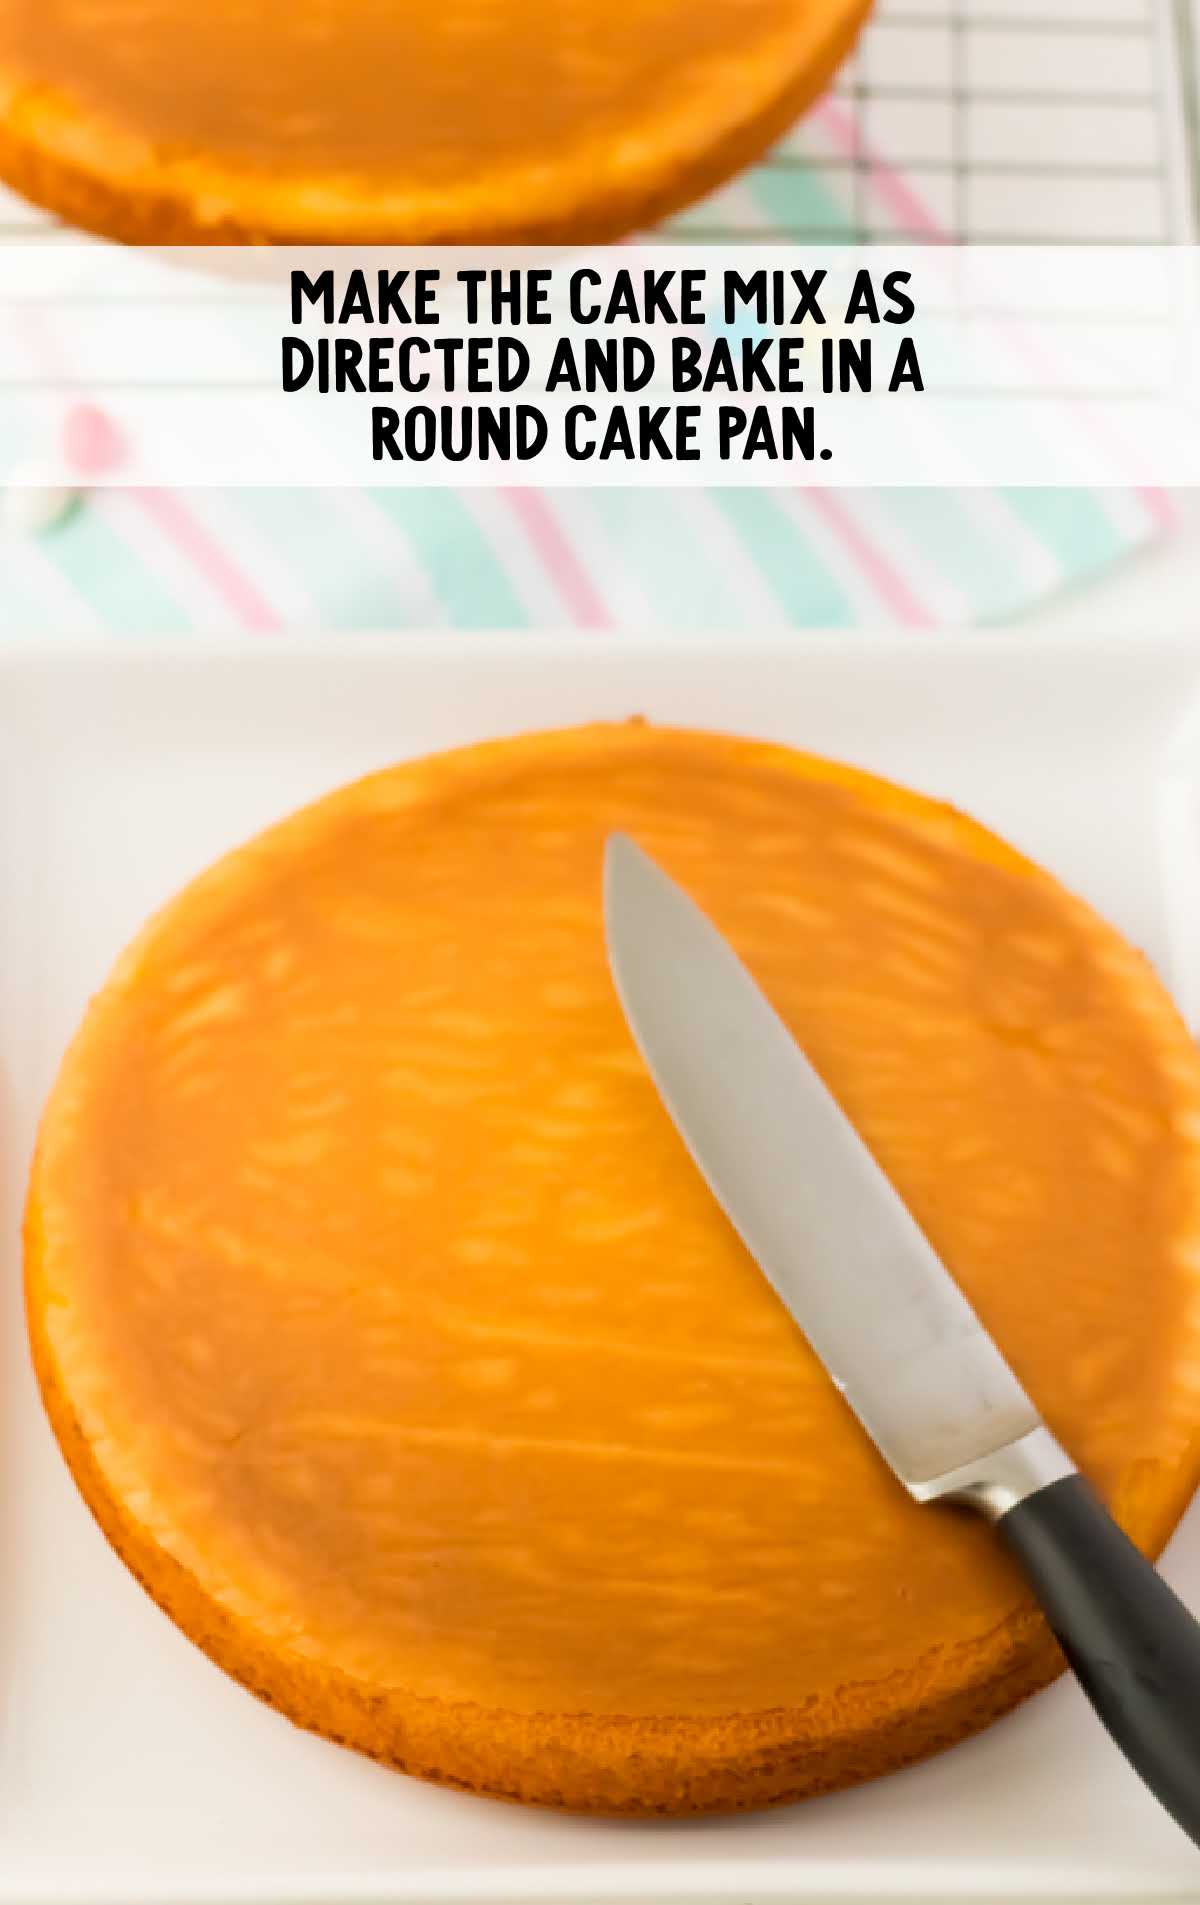
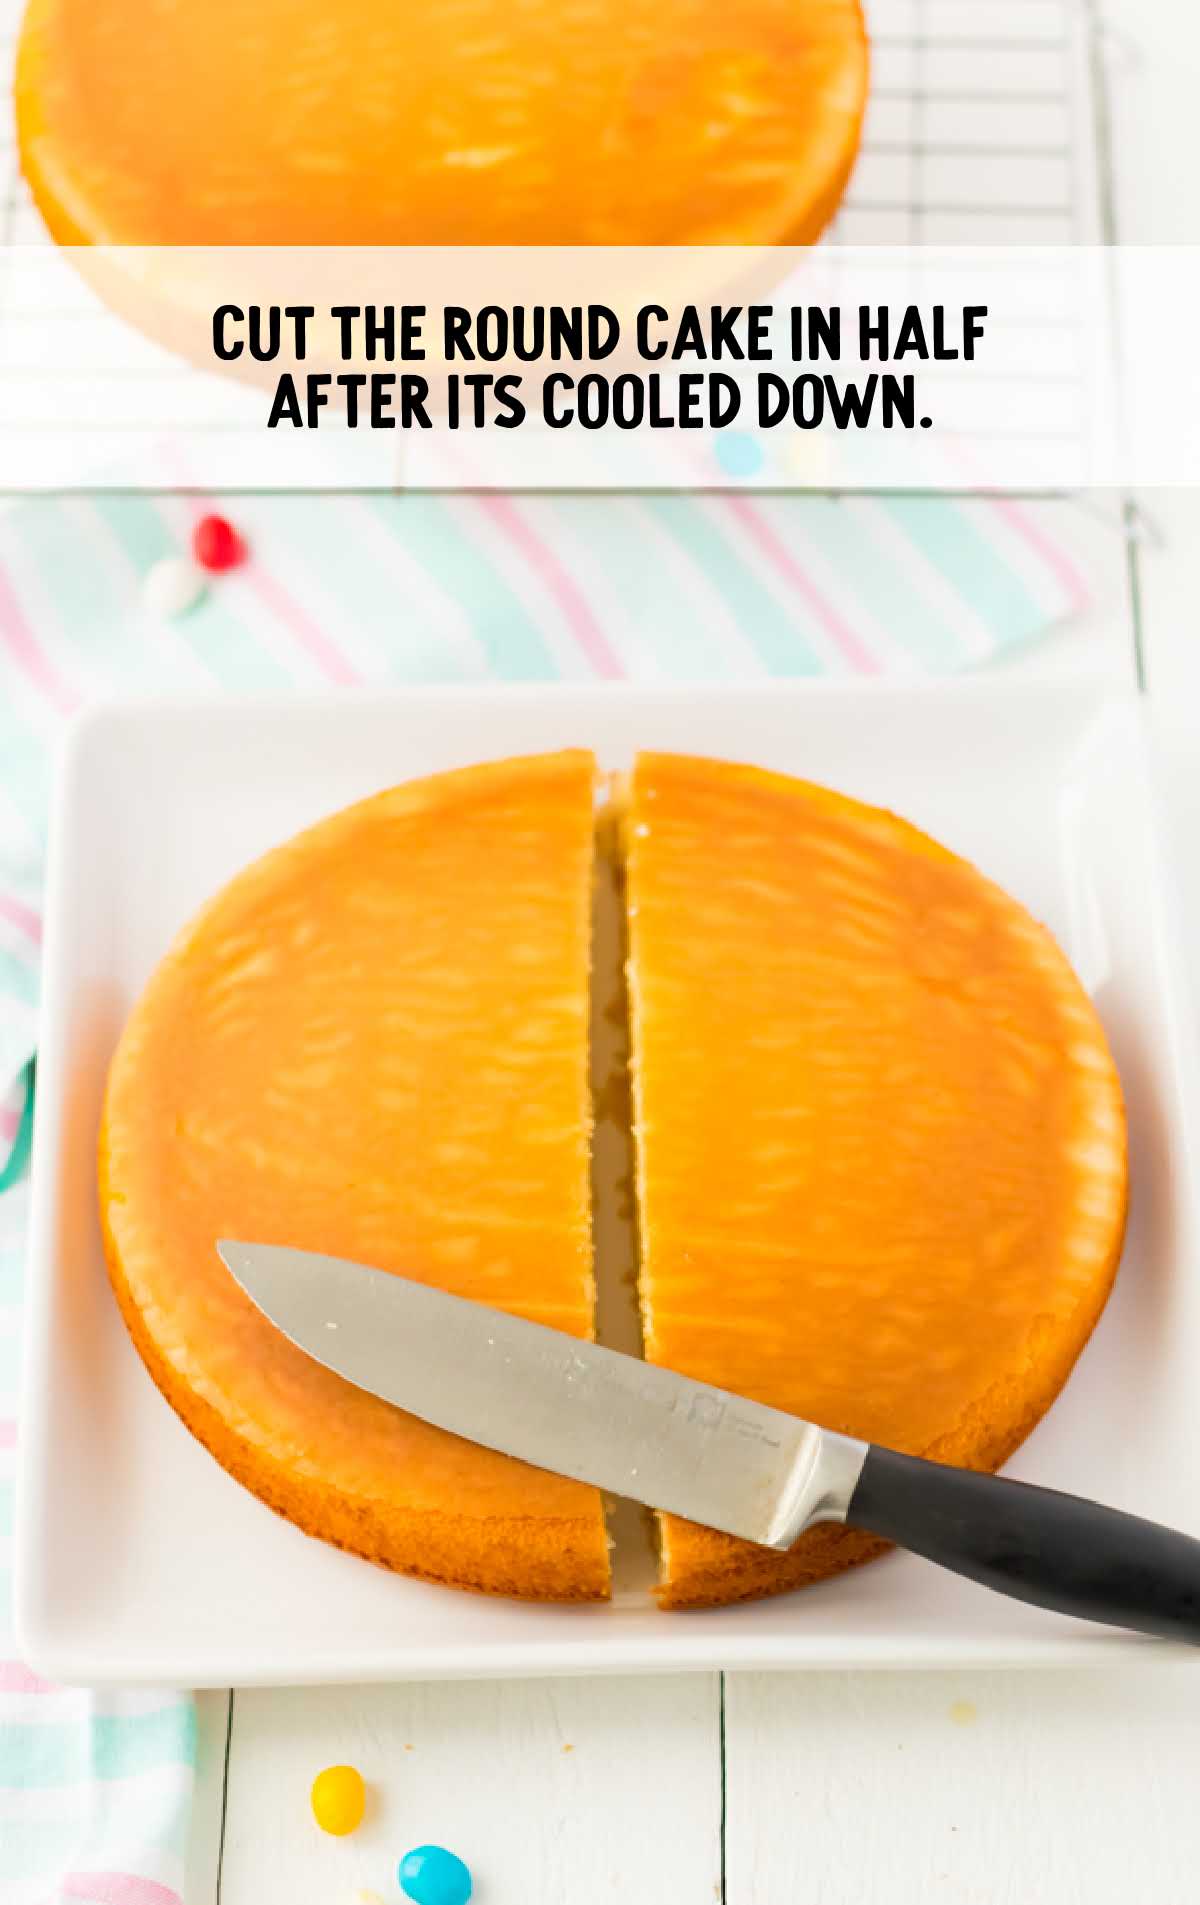
STEP TWO: Once cooled, cut the round cake in half.
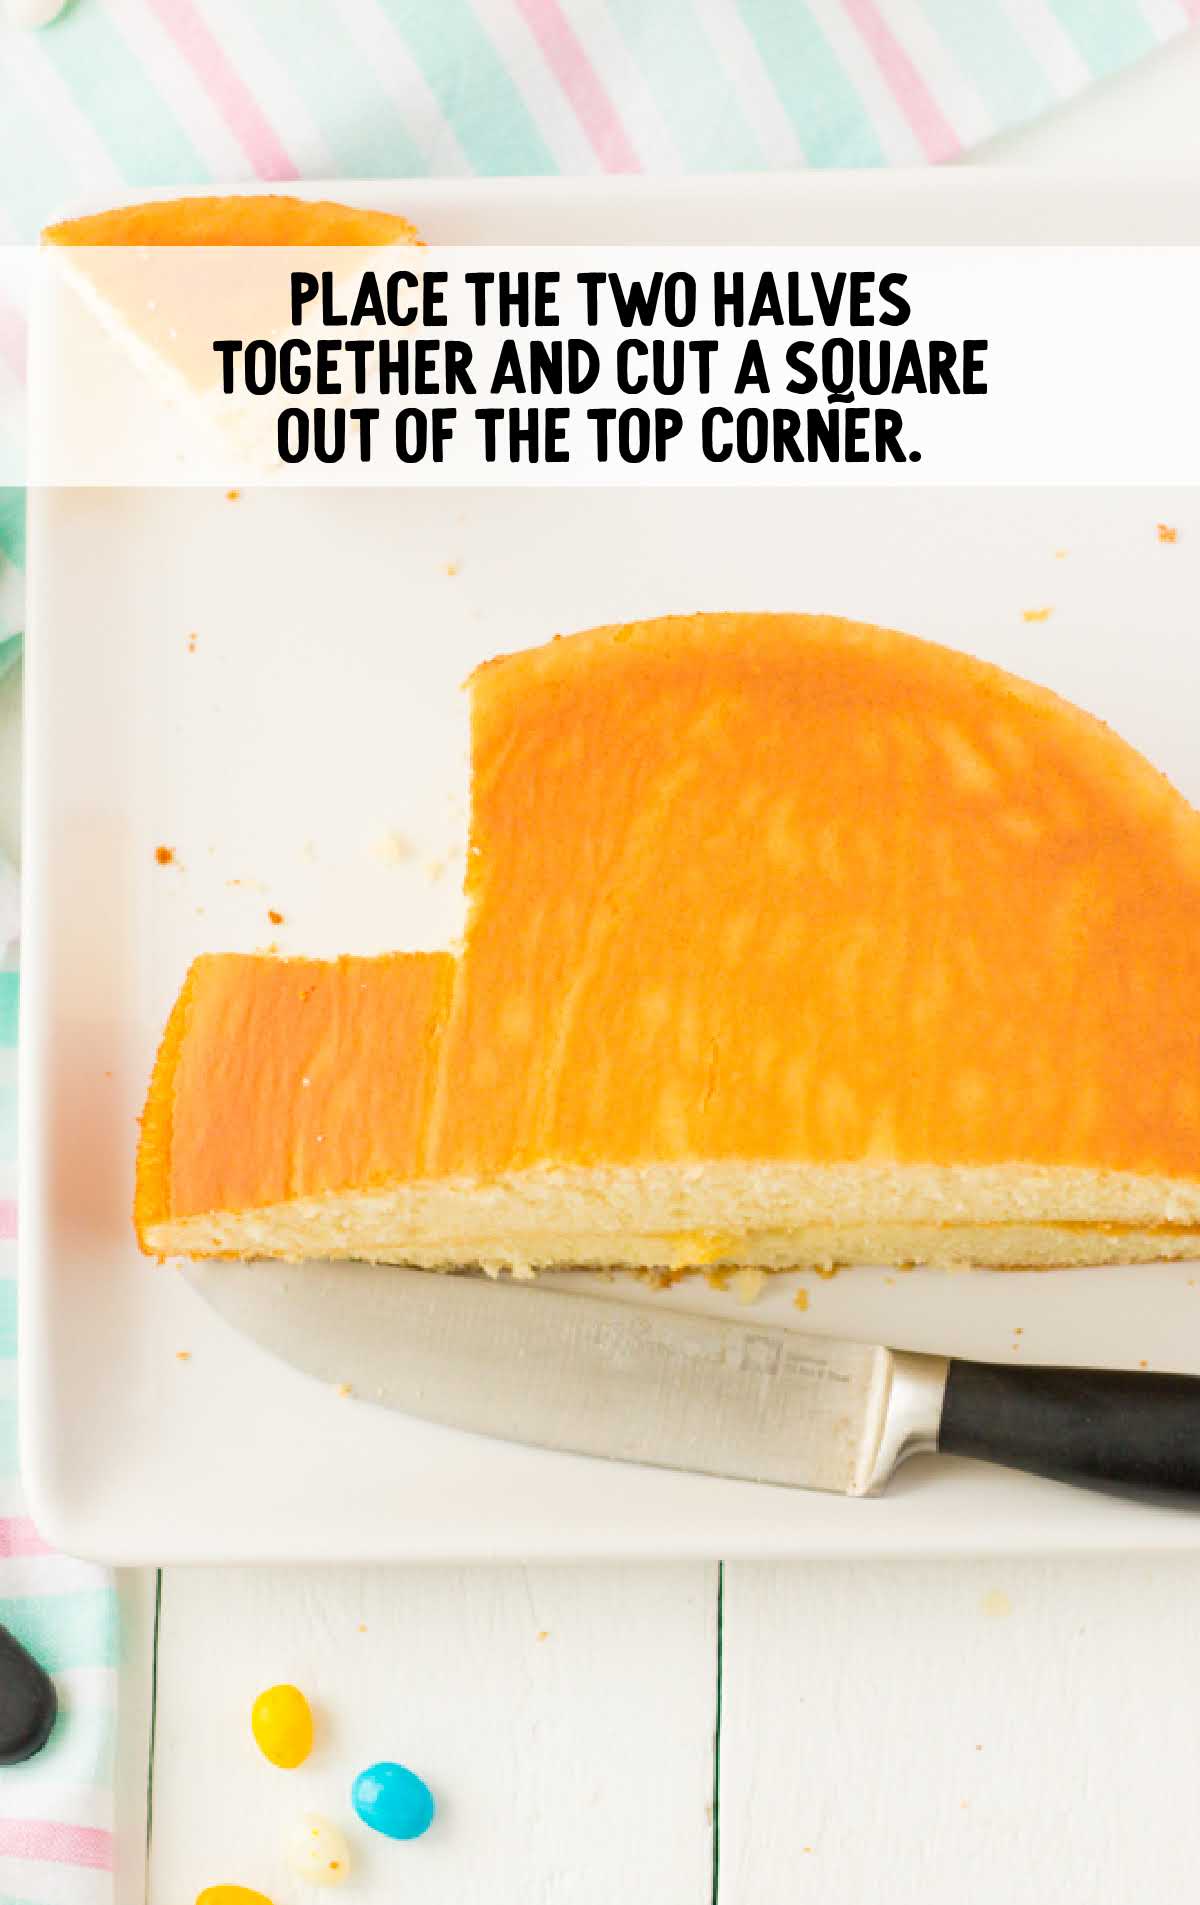
STEP THREE: Place the two halves of the cake together and cut a 90-degree angle from the very top corner on one end of the half-circle to create the bunny’s head.
STEP FOUR: Place the frosting in between the two cake layers and put it back together.
Turn the cake on its side, with the flat side becoming the bottom of the cake.
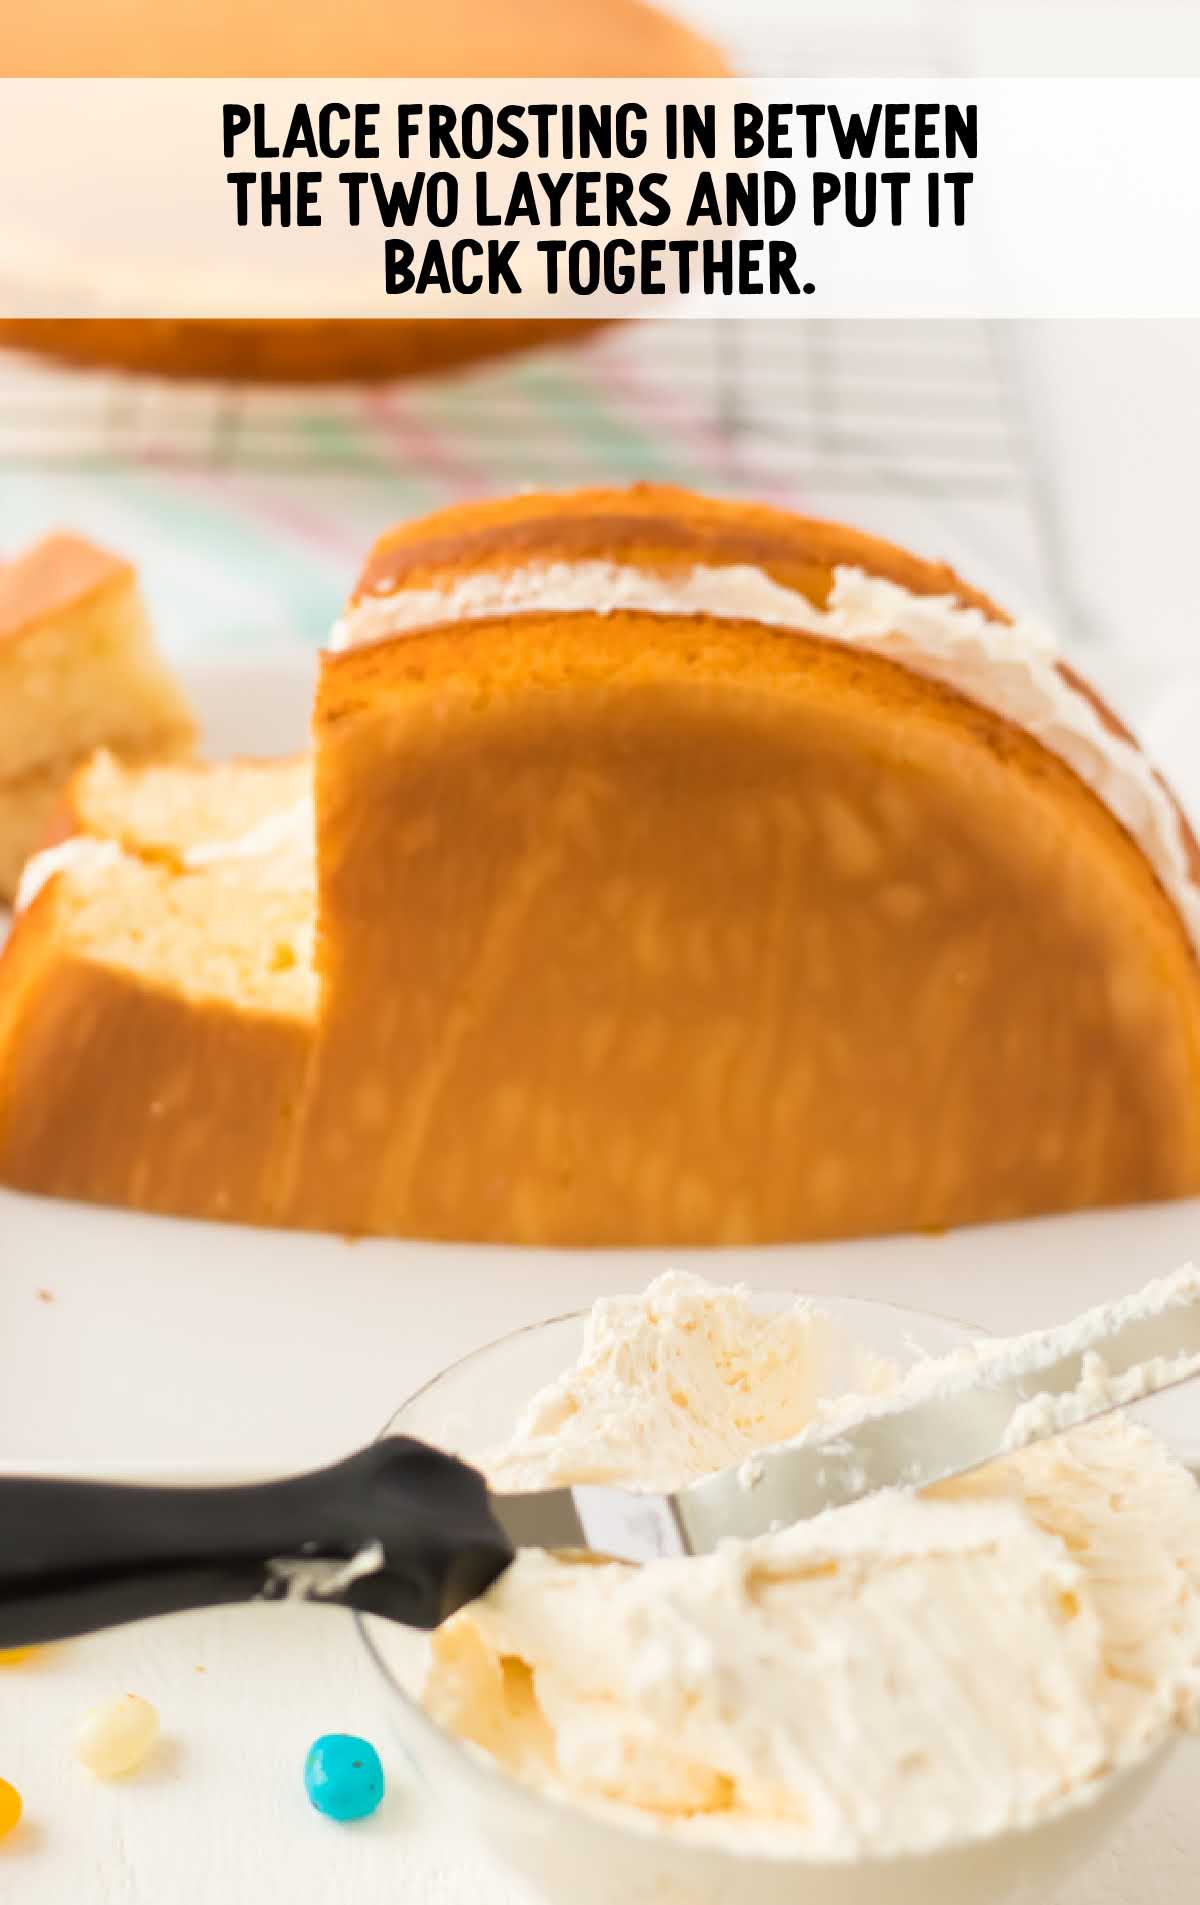
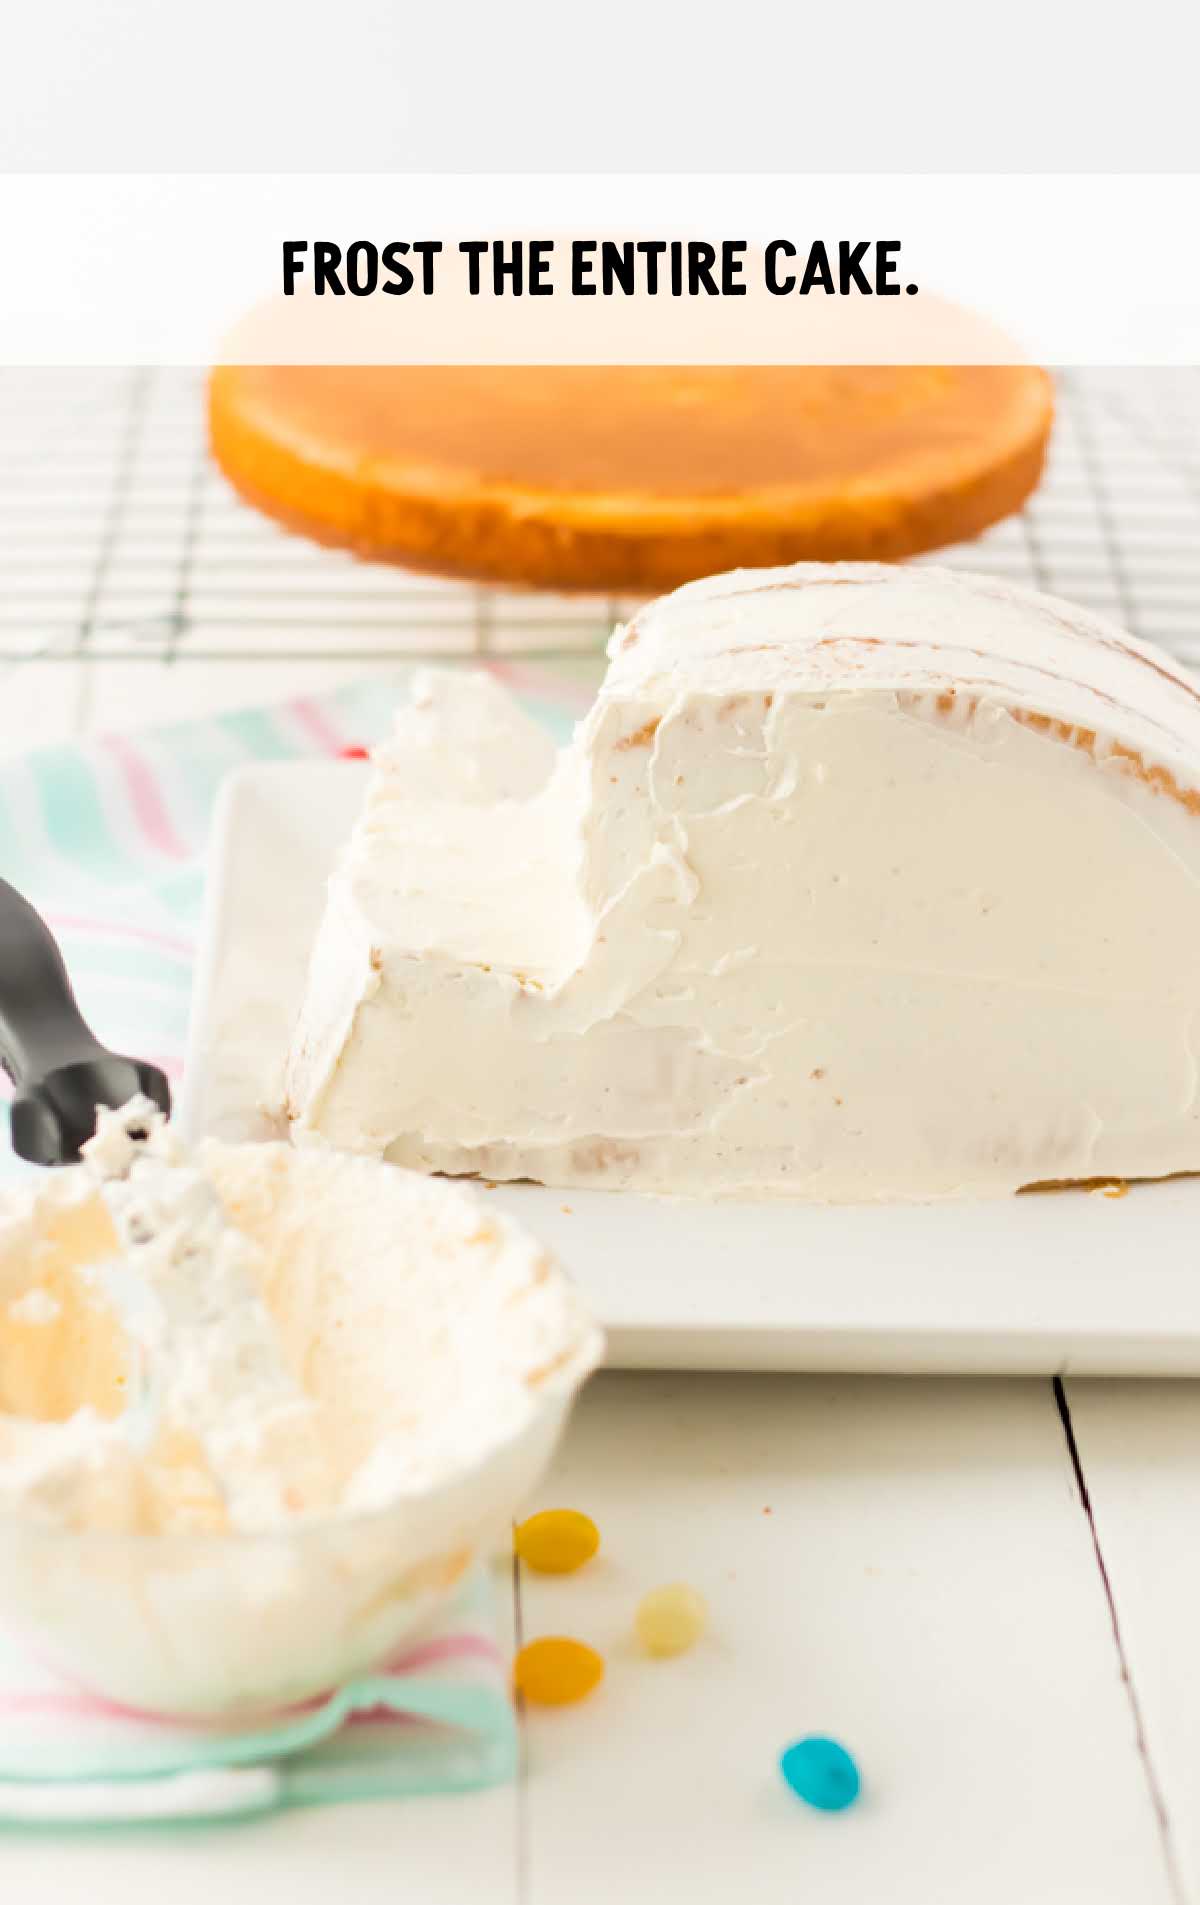
STEP FIVE: Frost the remainder of the cake.
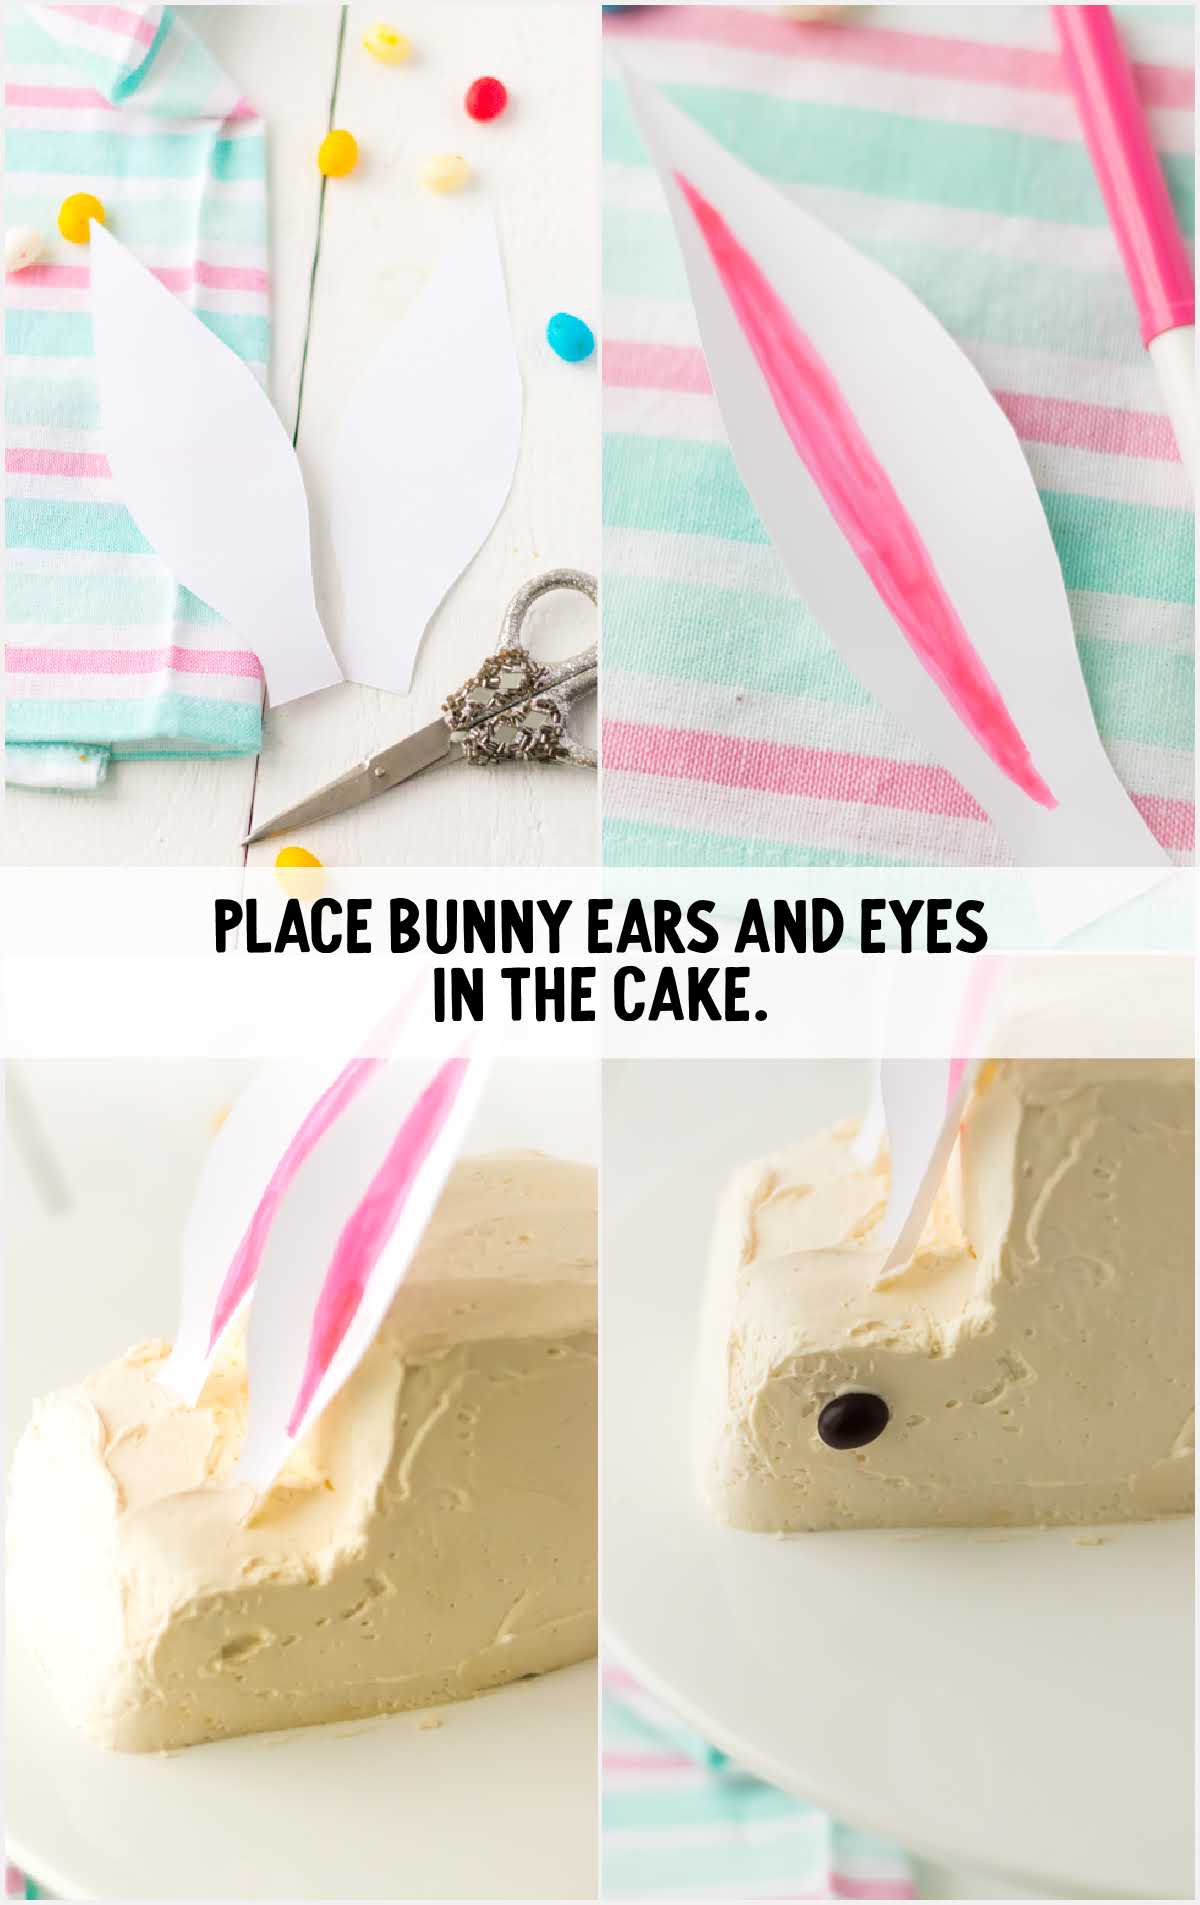
STEP SIX: Next, you get to use a bit of creativity and make your very own bunny ears. Using paper and markers, draw two bunny ears and cut them out.
Place one ear on each side of the frosted cake. Pop in the bunny’s ears and M&M bunny eyes onto the top of the head.
OUR RECIPE DEVELOPER SAYS
You can get creative with decorating your bunny’s face. You could even give him a bow tie, pink jelly bean nose, and whiskers if you’d like.
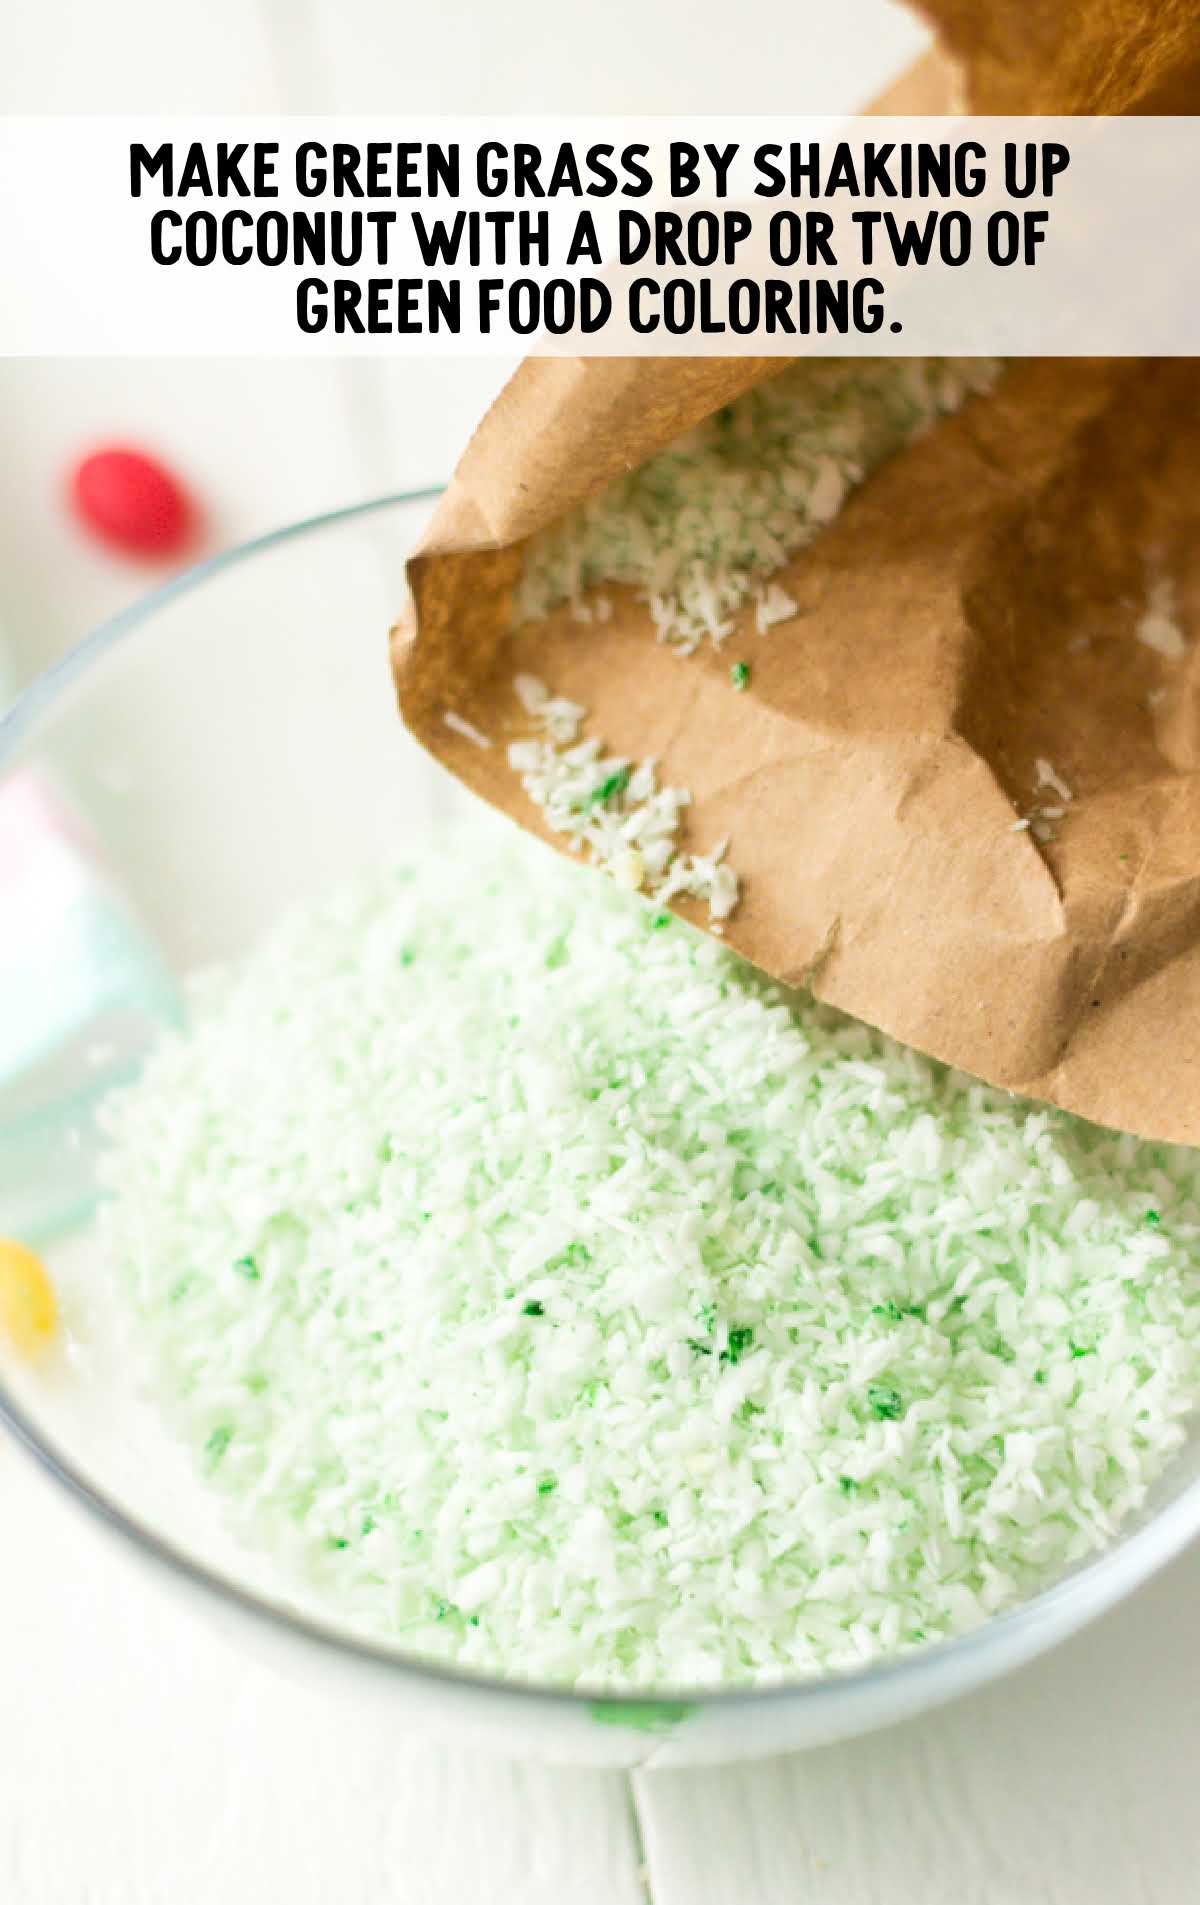
STEP SEVEN: In a paper bag, shake together the coconut and a drop or two of green food coloring to make green grass.
PRO TIP:
Add the shredded coconut to a brown lunch bag. Directly into the bag add a few drops of green food coloring.
Fold down the top to seal bag and toss the coconut in the green food coloring.
Be sure not to add too much food coloring, you still want the coconut to be fairly dry.
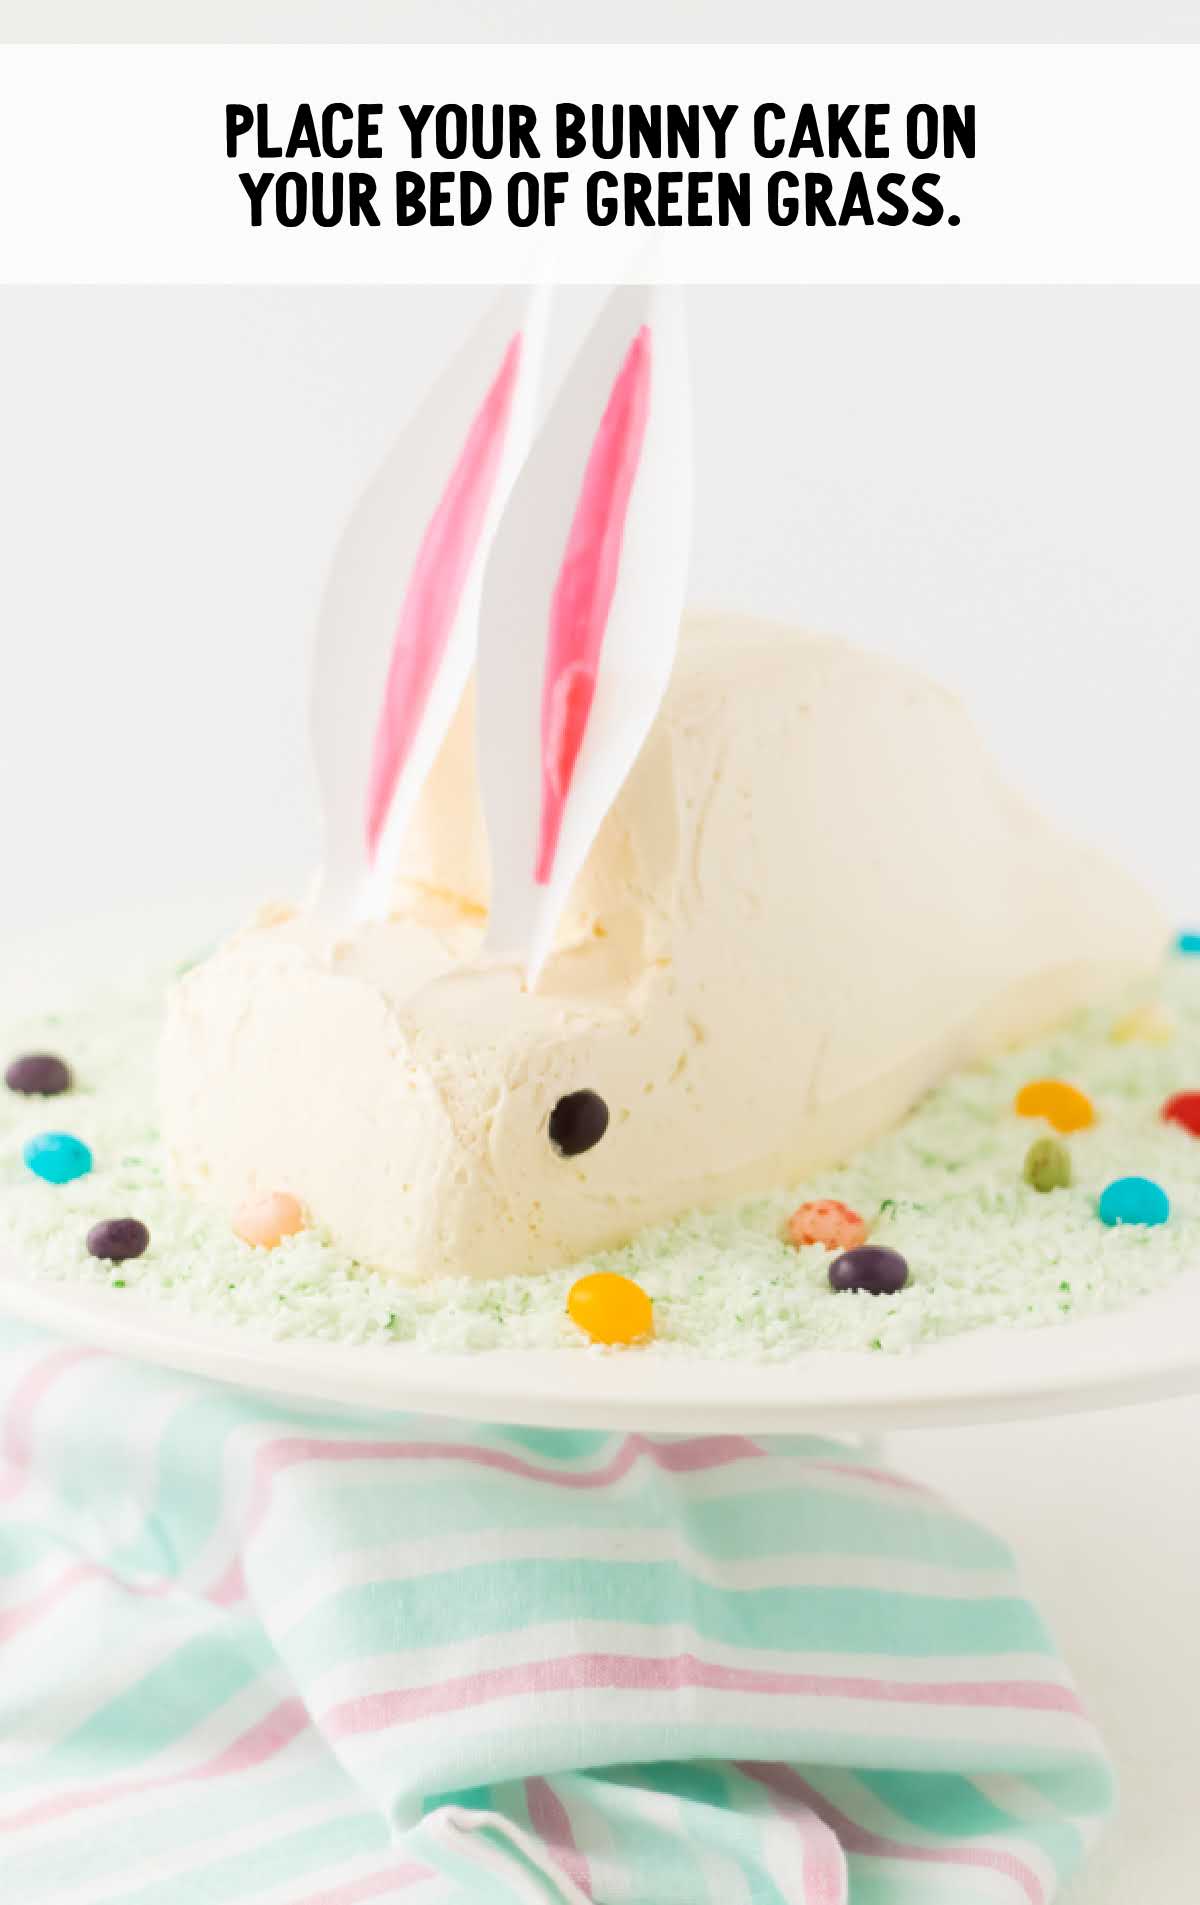
STEP EIGHT: Place your cake on a serving plate or cake board of green coconut grass and decorate as desired.
PRO TIP:
Spread out your “grass” on a serving platter and place the bunny cake on the top. Then, garnish with a few sprinkled jelly beans.
Every year my grandmother likes to add a few dark-colored jelly beans to the back of my bunny. It always gives everyone a chuckle.
Troubleshooting This Recipe
The cake is sticking to the pan.
Solution: If your cake sticks to the pans and doesn’t come out cleanly, grease and flour the pans thoroughly before pouring in the batter.
You can also use parchment paper rounds at the bottom of the pans to prevent sticking.
The cake cracked during baking.
Solution: If your cake layers crack while baking, it could be due to overmixing or overbaking.
To prevent this, mix the batter just until combined and avoid opening the oven door too often during baking.
The cake is dry.
Solution: To keep your cake layers moist, make sure not to overbake them.
Use a toothpick or cake tester to check for doneness; it should come out clean with a few moist crumbs.
If you’ve overbaked them, you can brush the layers with a simple syrup of sugar and water to add moisture.
How To Serve This Bunny Rabbit Cake
SERVE IT AFTER EASTER DINNER: Make this whimsical cake one of your new Easter traditions and serve it for dessert this year.
SERVE IT WITH ICE CREAM: Of course, we think that no cake is complete without a creamy scoop of vanilla ice cream.
ADD OTHER TREATS: Don’t forget to whip up a batch of peanut butter chocolate Easter eggs or coconut chocolate Easter eggs to add to the Easter baskets.
SERVE WITH A WARM DRINK: Add a hot cup of coffee or tea with your slice of cake for a cozy treat.
SERVE WITH A COLD DRINK: Add a colorful pink drink or refreshing raspberry iced tea with your bunny cake.
Pair this bunny with more Easter desserts, including our carrot cake or easy Easter cookies.
When To Serve This Bunny Cake
EASTER SUNDAY BRUNCH: This cake is an ideal centerpiece for a meal with family and friends.
EASTER DINNER: If you’re hosting an Easter dinner, consider serving the Easter cake as a show-stopping dessert.
EASTER EGG HUNT: Surprise the participants with this bunny-themed cake as a tasty reward for their efforts.
CHILDREN’S EASTER PARTY: If you’re hosting an Easter event for kids, the cake will be a hit.
MORE EASTER RECIPES
Storing Your Easter Rabbit Cake
If you are planning ahead and want to keep the cake for future use, we recommend freezing the baked cake without frosting or garnish.
MAKE AHEAD: You can make the frosted cake a day in advance, but we would recommend holding off on adding the bunny face and other decorations until you are ready to serve.
ON THE COUNTER: The cake can be stored at room temperature for a couple of days, covered in plastic wrap.
IN THE FREEZER: You can freeze the unfrosted cake for up to two months. We’d recommend waiting to frost and decorate the cake until you are ready to serve it.
Why This Easter Bunny Cake is the Best
FESTIVE AND ADORABLE: The cake is incredibly cute and adds a fun touch to any Easter celebration.
ENJOYABLE TO MAKE: It’s a great project to involve kids in the kitchen, making it a wonderful bonding experience for families during the Easter season.
CUSTOMIZABLE: You can personalize the Easter bunny cake by using your favorite cake flavors and frosting colors.
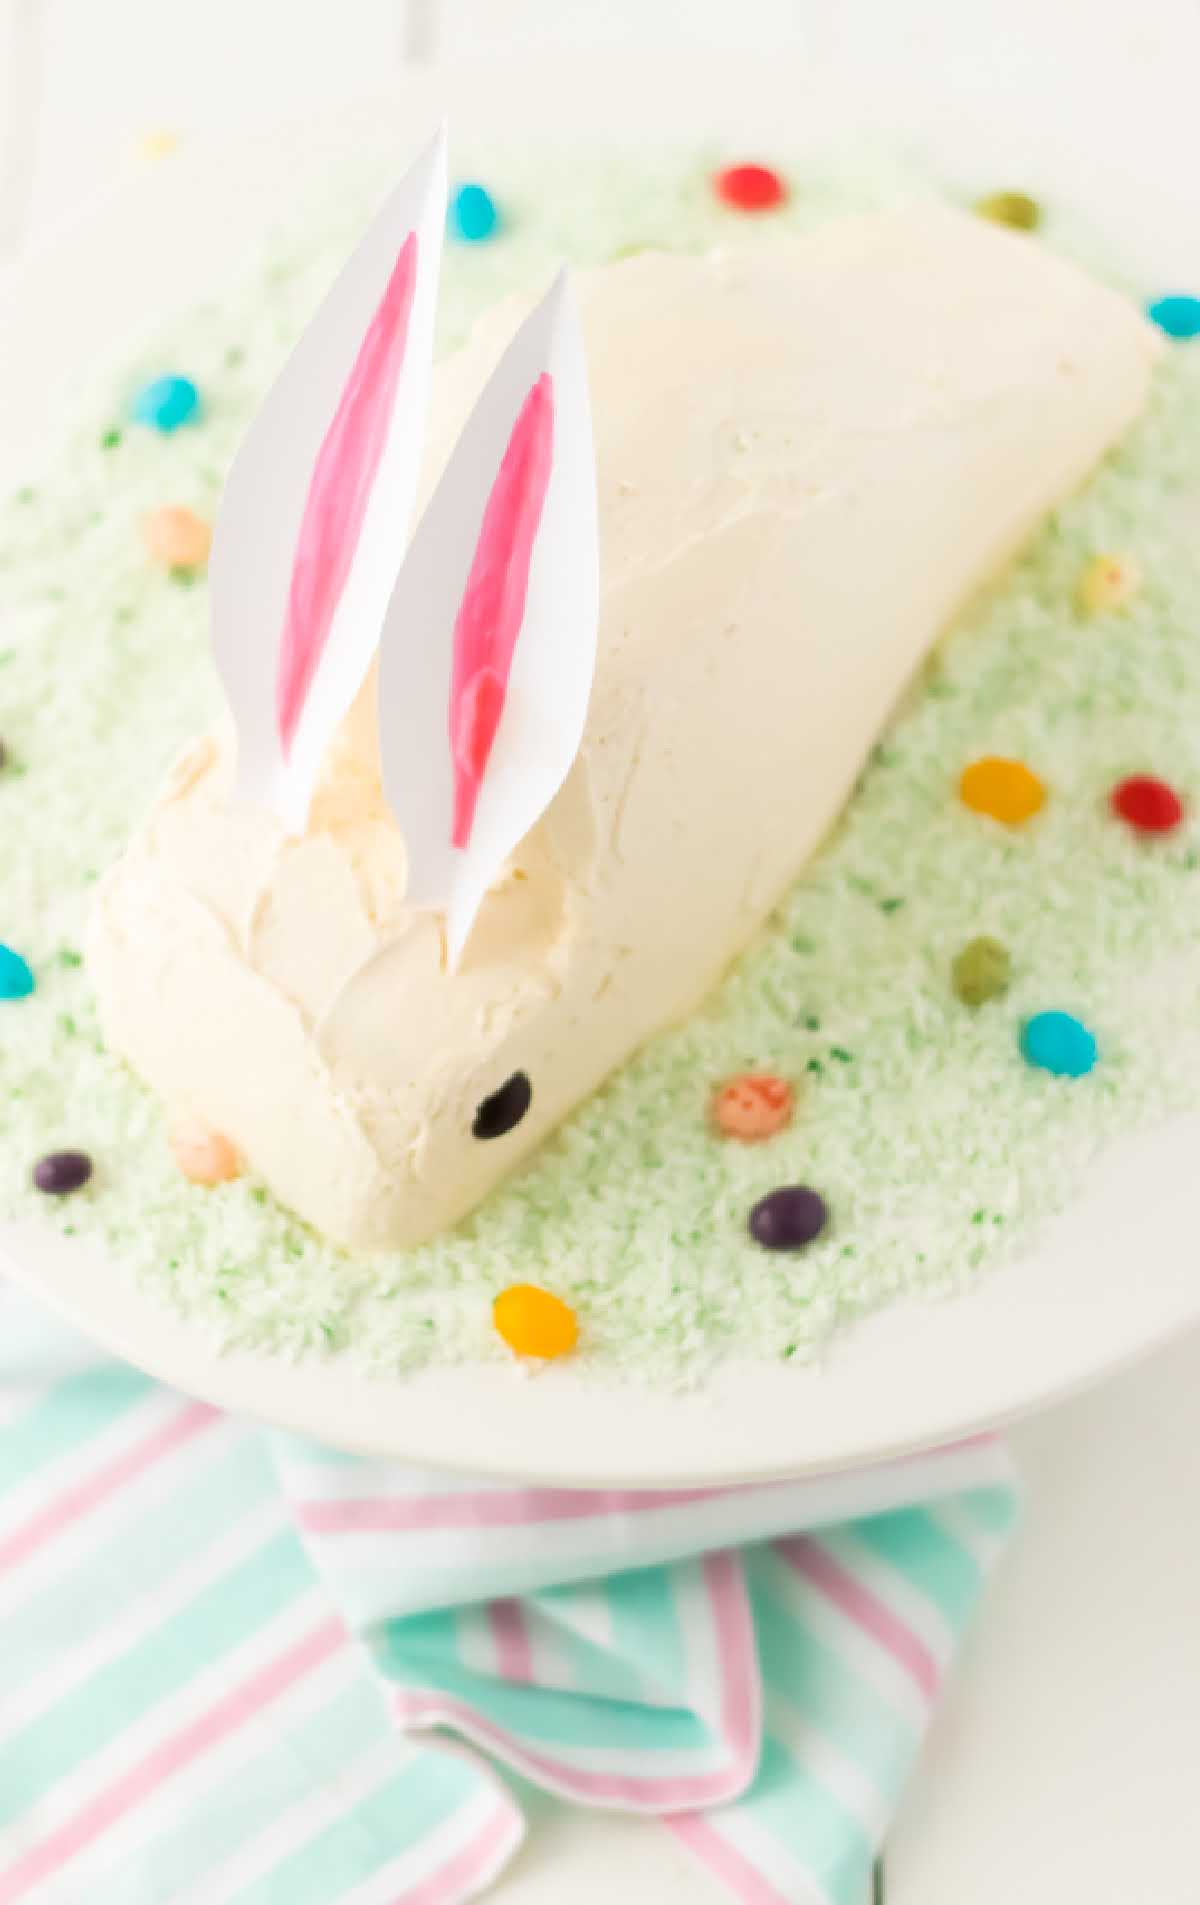
This Easter bunny cake is the perfect focal point on your Easter table. First, as a centerpiece and then as a yummy dessert. This cake is amazingly easy and will be a lovely addition to your spring celebrations.
FREQUENTLY ASKED QUESTIONS
If you have a favorite cake recipe you’d prefer to use instead of a boxed cake mix, you can use that instead.
If you prefer to make homemade frosting, you certainly can.
This cake is flexible as to the flavor you use, although we would recommend using white or off-white icing for the bunny.
You can freeze the cake unfrosted for up to two months. We’d recommend waiting to decorate the bunny until you are ready to serve it.
More Recipes You’ll Love
Easter Bunny Cake
Ingredients
- 1 box cake mix, plus ingredients called for on the box
- 1 container pre-made frosting
- 2 dark M&M's, for eyes
- shredded coconut
- green food coloring
- jelly beans
Instructions
- Prepare the cake in a round cake pan according to the package directions.
- Once cooled, cut the round cake in half.
- Place the two halves together, and cut a 90-degree angle from the very top corner.
- Place the frosting in between the two layers and put it back together. Turn the cake on its side, with the flat edge becoming the bottom of the cake.
- Frost the remainder of the cake.
- Cut out paper bunny ears and pop in the ears and M&M bunny eyes.
- In a paper bag, shake together coconut and a drop or two of green food coloring to make green grass.
- Place your cake on a plate of coconut grass and decorate as desired.
Video
Notes
- You can get creative with decorating your bunny’s face. You could even give him a cute bow tie, pink jelly bean nose, and whiskers if you’d like.
- Add the shredded coconut to a brown lunch bag. Directly into the bag add a few drops of green food coloring. Fold down the top to seal bag and toss the coconut in the green food coloring. Be sure not to add too much food coloring, you still want the coconut to be fairly dry.
- Spread out your “grass” on a serving platter and place the bunny cake on the top. Then, garnish with a few sprinkled jelly beans. Every year my grandmother likes to add a few dark-colored jelly beans to the back of my bunny. It always gives everyone a chuckle.





Comments
Toni Thomason says
So adorable and too cute! Perfect to bake with your kids!
Gloria says
SO cute!!
Joan Hunter says
This is my favorite site with the best recipes.