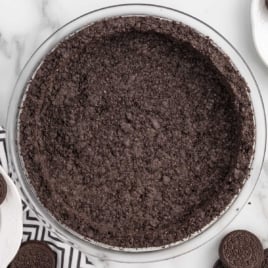
Oreo pie crust is a dessert dream come true, combining the deep, chocolatey goodness of crushed Oreo cookies with the luscious, buttery texture that melts in your mouth. With just two simple ingredients—whole Oreo cookies and melted butter—this easy recipe creates a perfectly crisp and flavorful base for all your favorite pies. From velvety cream pies to indulgent peanut butter creations, this homemade Oreo pie crust adds a rich, irresistible touch to your dessert.

What You Need To Know
- MAIN INGREDIENTS: Regular Oreo cookies, unsalted butter
- QUICK STEPS: Crush Oreo cookies. Mix crumbs with melted butter. Press into pie plate. Bake.
Just Two Simple Ingredients

Best Oreos For Oreo Pie Crust
Choosing the right type of Oreo is key to making a delicious and structurally sound Oreo pie crust.
✅ Classic Oreos – Yes. Perfect cookie-to-filling ratio for a sturdy crust.
🌈 Flavored Oreos – Only with the same cookie-to-filling ratio as Original Oreos.
🚫 Double Stuf Oreos – Skip. Too much filling makes the crust too soft.
❌ Oreo Thins – Skip. Not enough filling to hold the crust together.
Tips and Tricks For Forming The Best Pie Crust
Don’t Skip the Grease: Generously spray the nine-inch pie plate with nonstick cooking spray to make it easier to remove slices after the pie is filled.
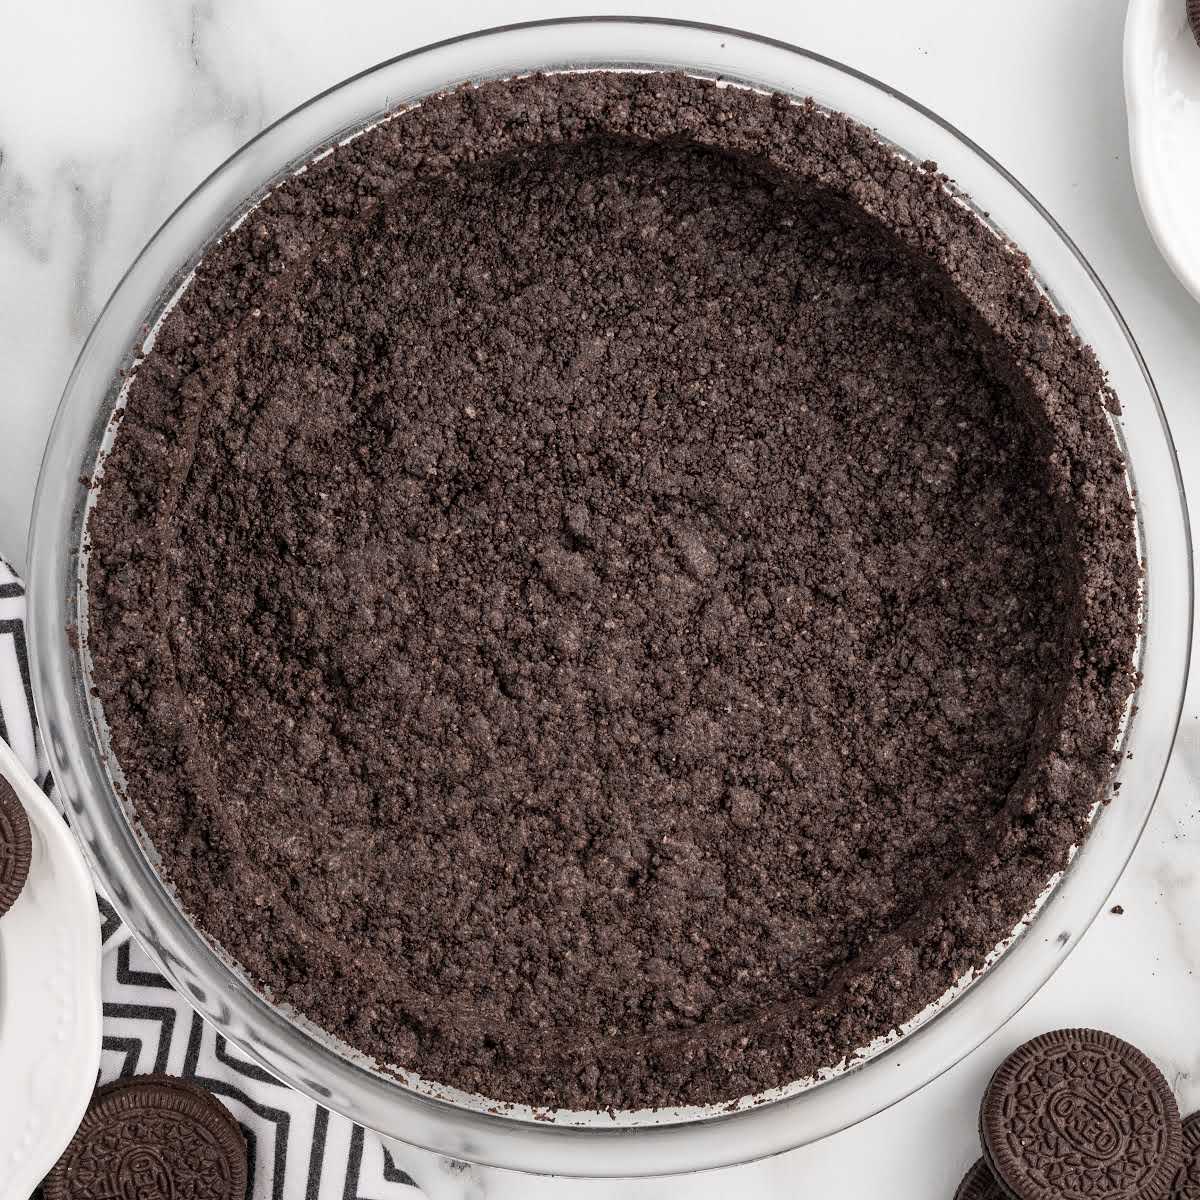
Use Fine Oreo Crumbs for Even Texture: Whether you use a food processor or a ziplock bag and rolling pin, make sure the Oreo cookies are crushed into fine crumbs. Larger chunks can make it harder for the crust to hold together.
Combine Thoroughly: Mix the melted butter and cookie crumbs well in a medium bowl to coat every crumb. This helps the crust stay firm and ensures an even layer in your pie dish.
Work Quickly with Warm Butter: The melted butter can cool and firm up quickly, so mix and press the crumbs while it’s still warm for easier shaping.
Pack It Firmly: Press the crumbs into the pie plate using the bottom of a measuring cup or the bottom of a glass. Start with the bottom, then work up the sides to create a smooth, compact crust.
Chill Before Baking (Optional): For extra firmness, refrigerate the formed crust for 10-15 minutes before baking. This step can help prevent crumbling during baking.
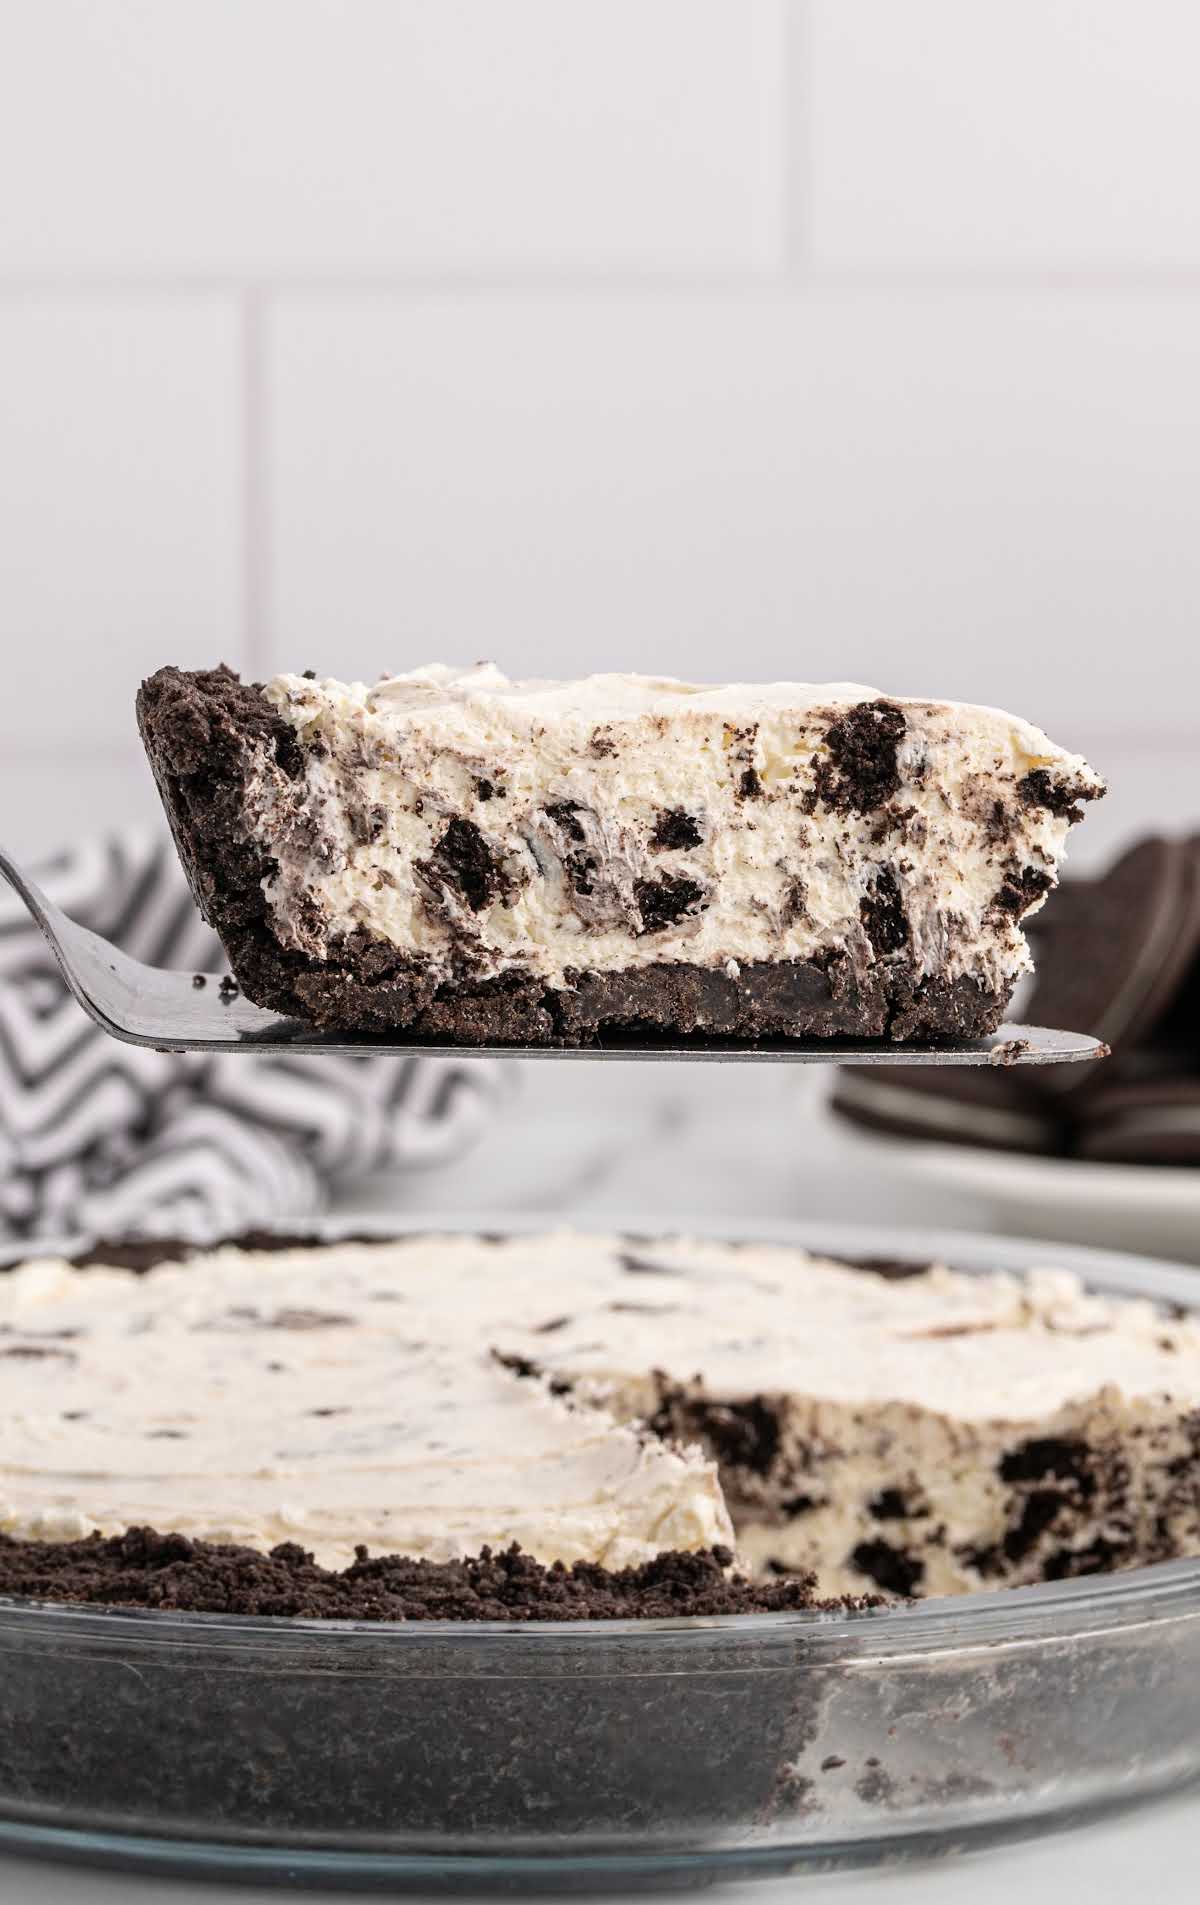
Let It Cool Completely: After baking, allow the crust to cool to room temperature before adding your filling. A warm crust can cause fillings like cream cheesecake or chocolate pie to melt or separate.
Do I Have To Pre-Bake This Oreo Crust?
Pre-baking this Oreo pie crust is recommended, especially if you’re using it for baked desserts like cheesecakes or pies with heavier fillings. Pre-baking helps the crust set and hold its shape, ensuring it stays firm and doesn’t crumble when you slice into your dessert.
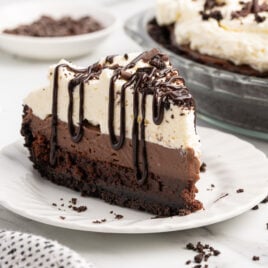
Pies To Make With This Homemade Crust
Make your desserts even better with our Oreo pie crust recipe—a simple, chocolatey base that works perfectly with many of our favorite pies.
- Chocolate Pudding Pie: This creamy pie becomes even more indulgent with an Oreo crust, adding a rich chocolate layer that complements the smooth pudding filling.
- Cherry Cream Cheese Pie: The combination of tangy cherries and creamy filling atop a chocolatey Oreo crust offers a delightful twist on a classic dessert.
- Butterscotch Cool Whip Pie: The sweet, buttery notes of butterscotch pair perfectly with the chocolatey crunch of an Oreo crust, creating a delicious blend of flavors.
- Salted Caramel No-Bake Pie: An Oreo crust adds a delightful contrast to the sweet and salty caramel filling, making each bite a balanced treat.
- French Silk Pie: This chocolate crust pairs perfectly with the rich, creamy filling of this French silk pie, adding a chocolatey base that complements every bite.
How To Store This Oreo Cookie Crust Recipe
This Oreo pie crust is easy to store, whether you want to prepare it ahead of time or keep it fresh for your next dessert. With proper storage methods, you can maintain its texture and flavor for days or even weeks, depending on your storage choice.
MAKE AHEAD:
You can make this Oreo pie crust up to two days in advance. Once baked and cooled, wrap it tightly in plastic wrap or aluminum foil to keep it fresh. Store it at room temperature or in the refrigerator until you’re ready to fill it.
IN THE FRIDGE:
If you need to store the crust in the fridge, cover it tightly with plastic wrap or place it in an airtight container. It will stay fresh for up to five days. This method works best for both baked and no-bake versions of the crust.
IN THE FREEZER:
To freeze the crust, allow it to cool completely after baking. Wrap it securely in plastic wrap and a layer of aluminum foil, or place it in a freezer-safe airtight container. It can be frozen for up to three months. When ready to use, thaw the crust in the fridge overnight before filling.
REHEATING:
If reheating the crust is necessary, place it in a 350°F oven for five to seven minutes to refresh its texture. Avoid using the microwave for reheating, as it can make the crust too soft and affect its structure.
Oreo Pie Crust Frequently Asked Questions
Yes, you can double the recipe for a thicker crust, especially if you’re using a deeper pie dish like a deep dish pie pan or making a dessert that needs extra support.
No, you do not need to remove the cream filling. It helps bind the crust together when mixed with the melted butter.
Yes, you can use different flavored Oreos to customize your Oreo pie crust. Flavors like mint Oreos or peanut butter Oreos can add a fun twist to your dessert. Just make sure to use the same amount of cookies and follow the same steps for the best results.
This Oreo pie crust is designed to fit a standard nine-inch pie plate.
For a cheesecake, especially if you’re using a springform pan or a deep dish pie pan, you’ll need about 1.5 times the recipe. This means using around 38 regular Oreos and seven to eight tablespoons of melted butter to ensure the crust covers the bottom and sides evenly and provides enough support for the heavier filling.
This Oreo pie crust is a quick, perfect base that pairs perfectly with so many desserts, offering just the right amount of chocolate flavor and buttery texture. Whether you’re making a cheesecake, cream pie, or no-bake treat, this recipe is easy to prepare and delivers great results every time.


Oreo Pie Crust
Ingredients
- 25 regular Oreo cookies, with filling
- 5 tablespoons unsalted butter, melted
Instructions
- Preheat the oven to 350°F. Generously spray a 9 inch pie plate with nonstick cooking spray.
- Using a food processor makes it faster, but a gallon size ziploc and a rolling pin work just as well. Pulse the cookies 5 or 6 times before crushing on the shred speed for a couple of minutes or until the cookies are fine crumbs. Same goes for the ziploc bag and rolling pin, crush until the cookies are fine crumbs. 25 cookies should give you about 2 cups of cookie crumbs.
- Add the cookie crumbs to a medium size mixing bowl. Stir in the melted butter until the crumbs are completely coated and well incorporated,
- Pour the coated crumbs into the prepared pie plate. Use the bottom of a mixing cup to evenly press the coated crumbs up the sides and on the bottom of the pie plate.
- Bake for 10 minutes and then allow the crust to completely cool before filling.
Notes
- You can freeze the unbaked pie crust for use with ice cream pies, or other frozen desserts.
- Store brand chocolate sandwich cookies can be substituted for the name brand Oreo cookies.
- Salted butter can be used in place of the unsalted butter.
Nutrition


Leave a Comment