Crispy, cheesy, and packed with bold flavors, sheet pan quesadillas are the ultimate fuss-free way to feed a crowd. Forget flipping individual quesadillas in a pan—using your oven delivers golden, crunchy tortillas loaded with cheese, seasoned meat, and all your favorite fillings. Slice ‘em up, serve ‘em hot, and watch them disappear in minutes.
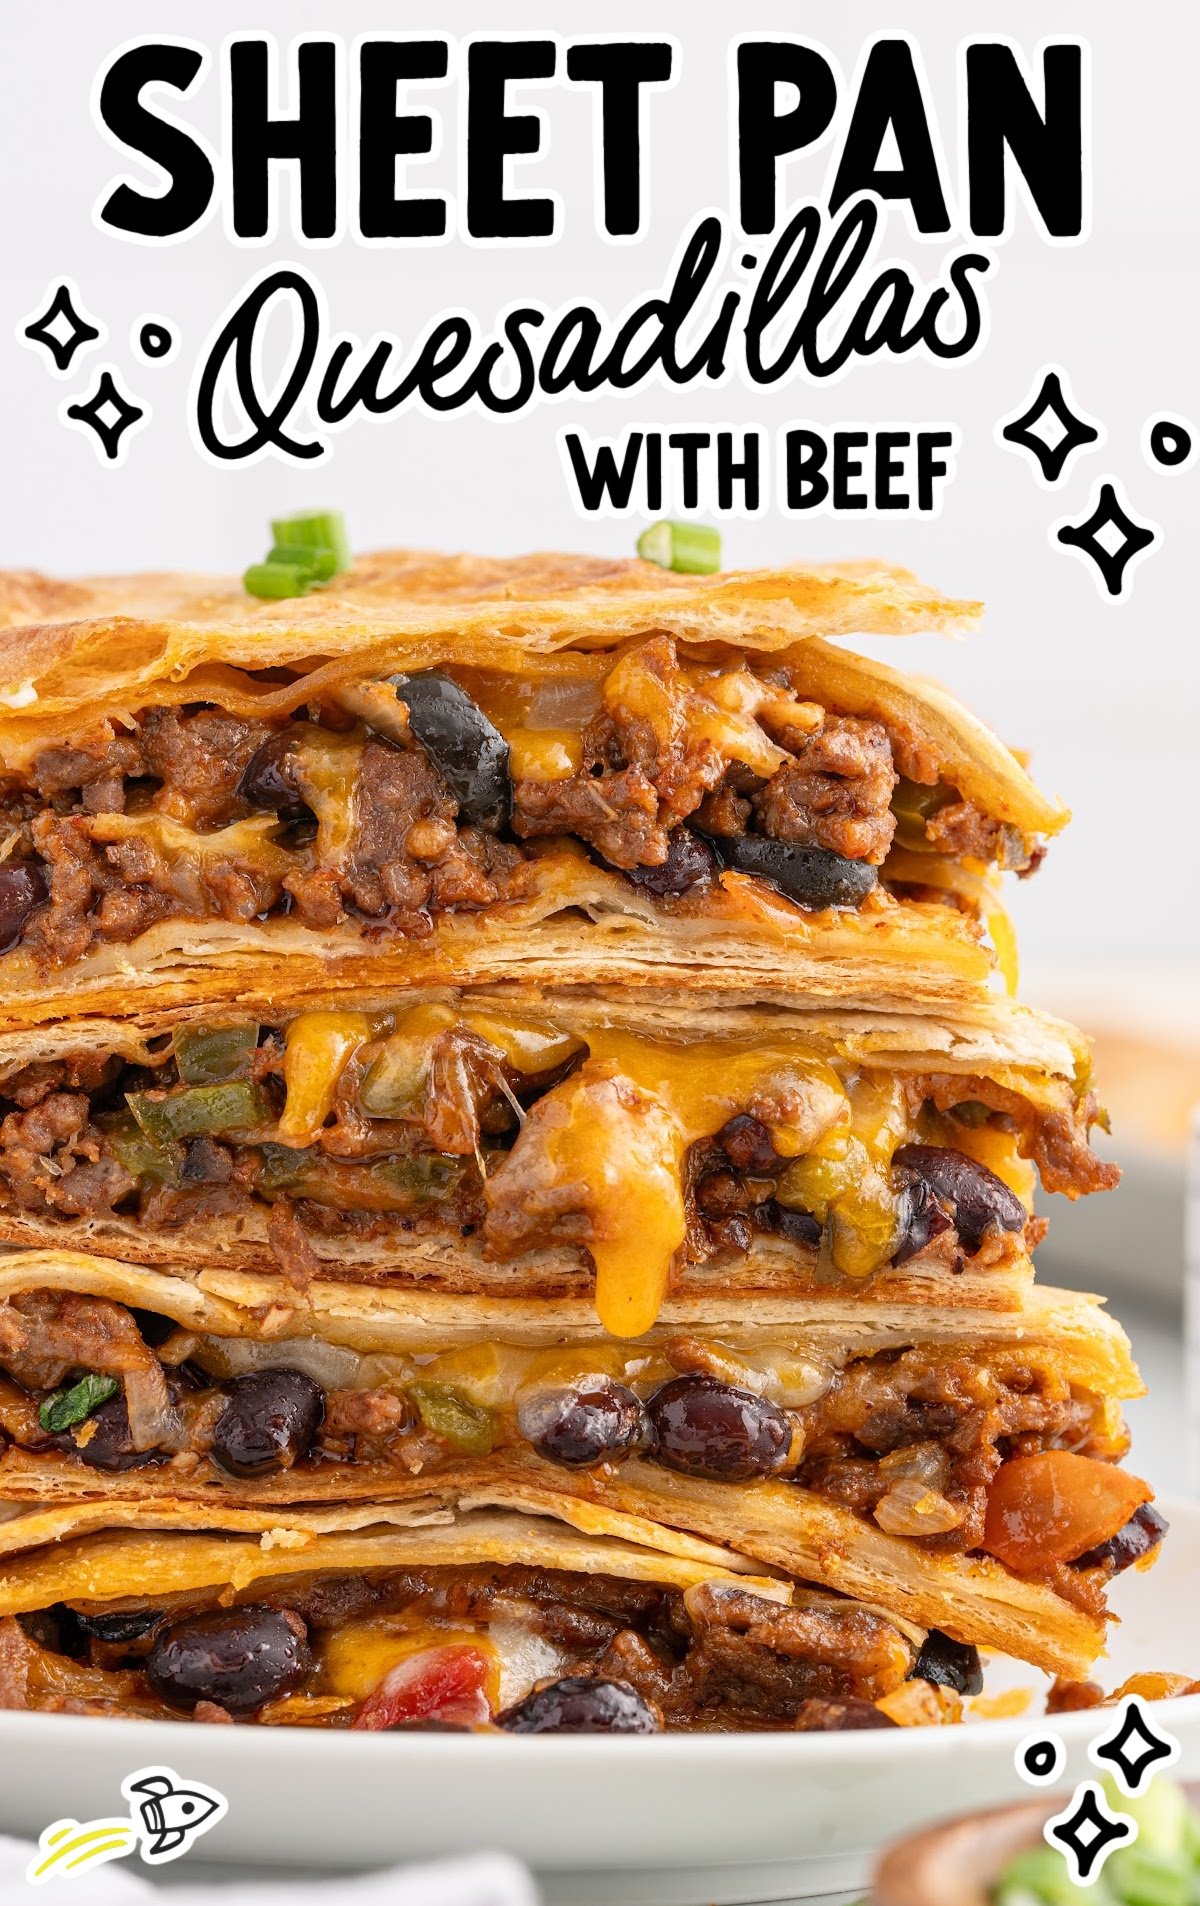
Sheet Pan Dinners
Sheet pan dinners are perfect for meal prep, game nights and weeknights when you don’t have time to babysit a meal.
The sheet pan approach lets the oven do all the work while you sit back and relax.
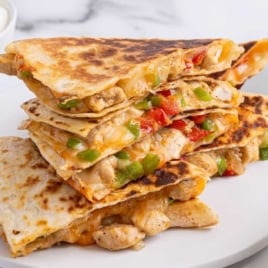
Want an alternative to our easy beef quesadilla recipe? Try our sheet pan chicken quesadillas.
Sheet Pan Quesadillas Ingredients
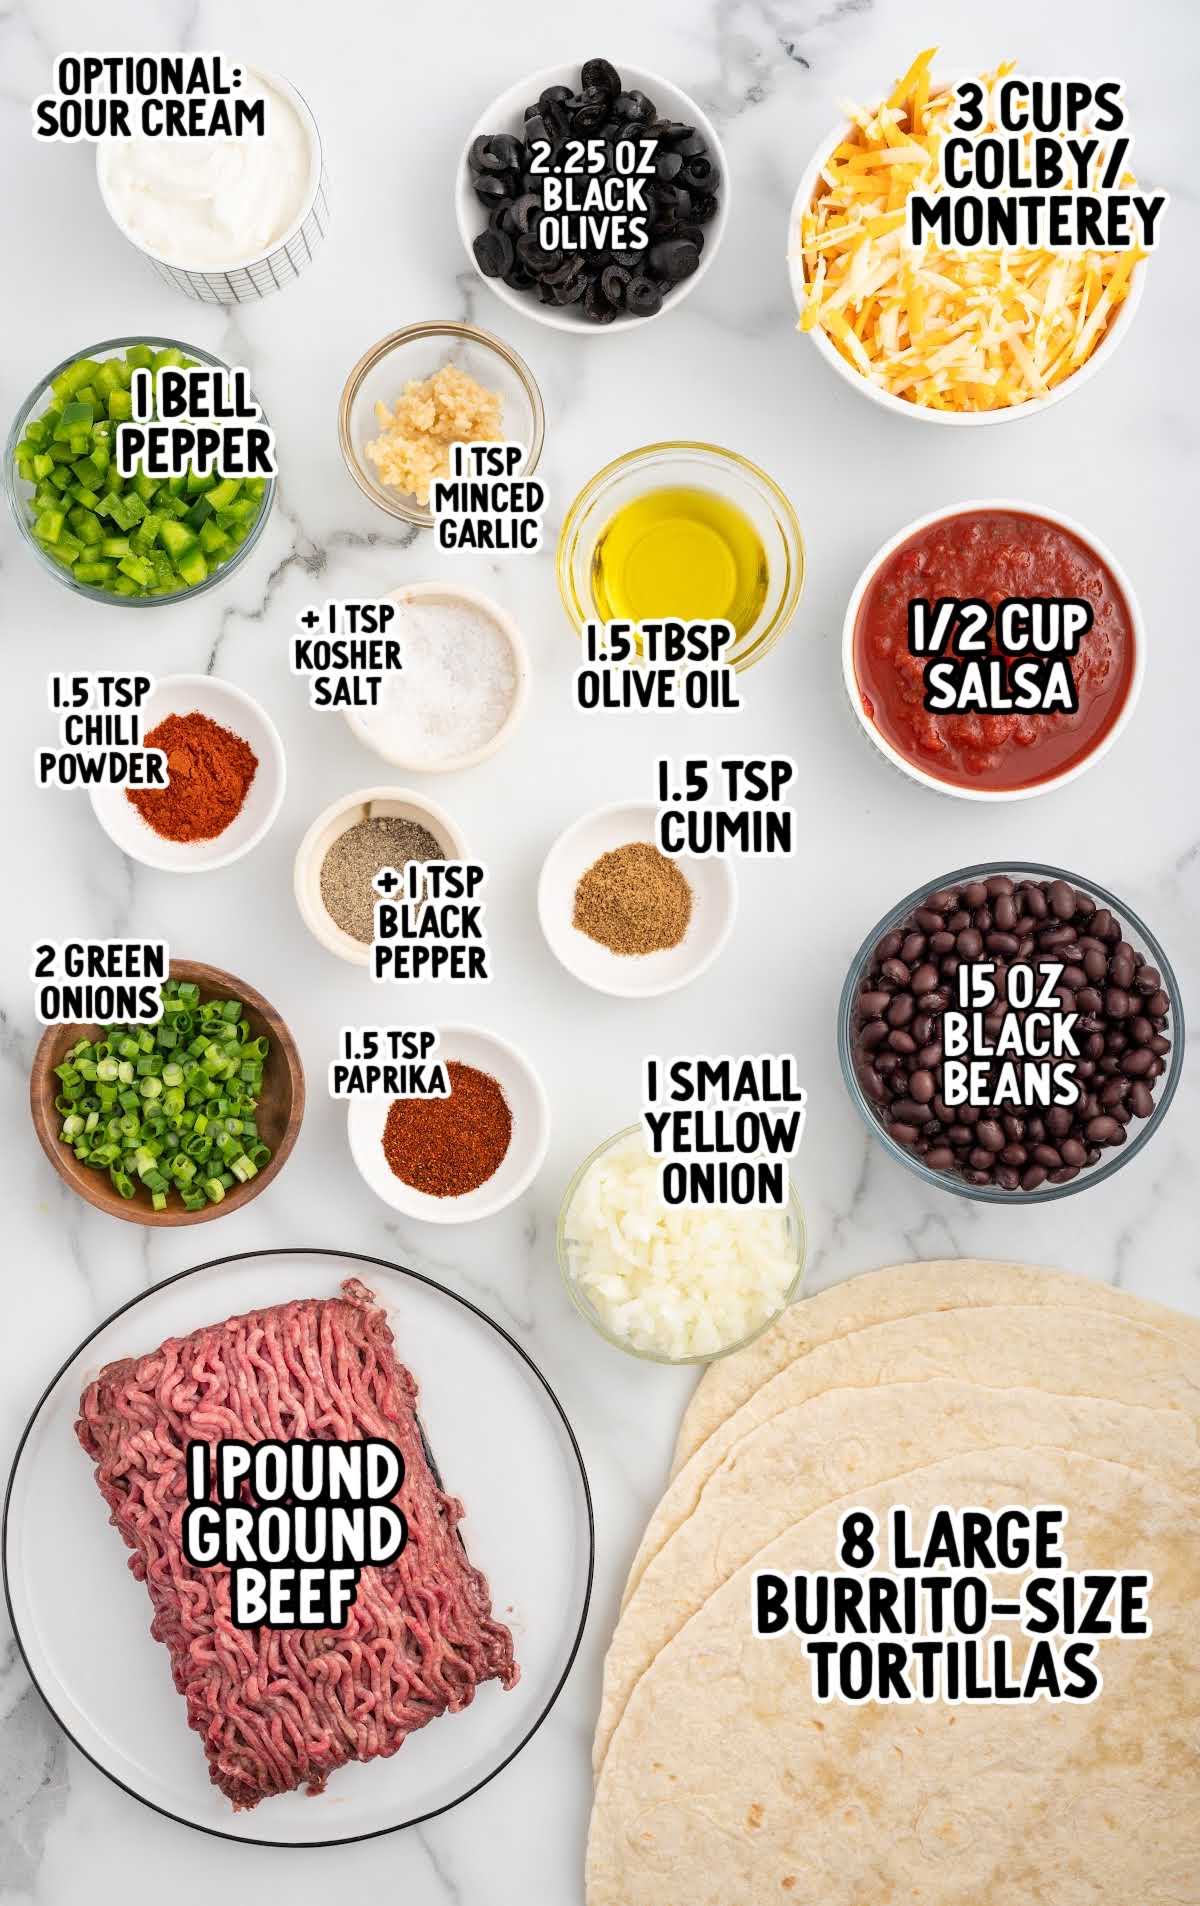
Full Ingredients List
- 1½ tablespoons olive oil
- 1 bell pepper, seeded and diced
- 1 small yellow onion, diced
- 1 pound ground beef
- 1 teaspoon minced garlic
- 1½ teaspoons chili powder
- 1½ teaspoons cumin
- 1½ teaspoon smoked paprika
- 1 teaspoon kosher salt
- 1 teaspoon black pepper
- 15 ounces black beans, drained and rinsed
- 2.25 ounces sliced black olives, drained and rinsed
- ½ cup your favorite salsa
- 8 large flour tortillas (burrito size)
- 3 cups Colby and Monterey jack cheese, shredded
- 2 green onions, sliced thin
- sour cream, to top quesadillas
The Best Tortillas To Use For Baking Quesadillas In The Oven
The type of tortilla you choose can make or break your sheet pan quesadillas.
🏆 Flour Tortillas
- Soft and pliable, making them easy to layer and fold without cracking.
- Crisp up beautifully in the oven without drying out.
- 10-inch burrito-style tortillas work great as their size will create a seamless base and top layer.
⚠️ Whole Wheat or Low-Carb Tortillas
- Added fiber.
- Won’t crisp up quite as much as white flour tortillas but still work well.
⛔ Corn Tortillas
- More fragile and prone to breaking when folded.
- Don’t get as crispy and can become chewy instead.
- Best for individual pan-fried quesadillas rather than sheet pan versions.
TL:DR = For the best results, opt for flour tortillas that are large, pliable, and sturdy enough to hold the filling without tearing.
How To Make Ground Beef Quesadillas Easy, Easy Easy!
Folding the tortillas is essential to creating sheet pan quesadillas that stay intact while baking. Follow these easy steps on how to do it:
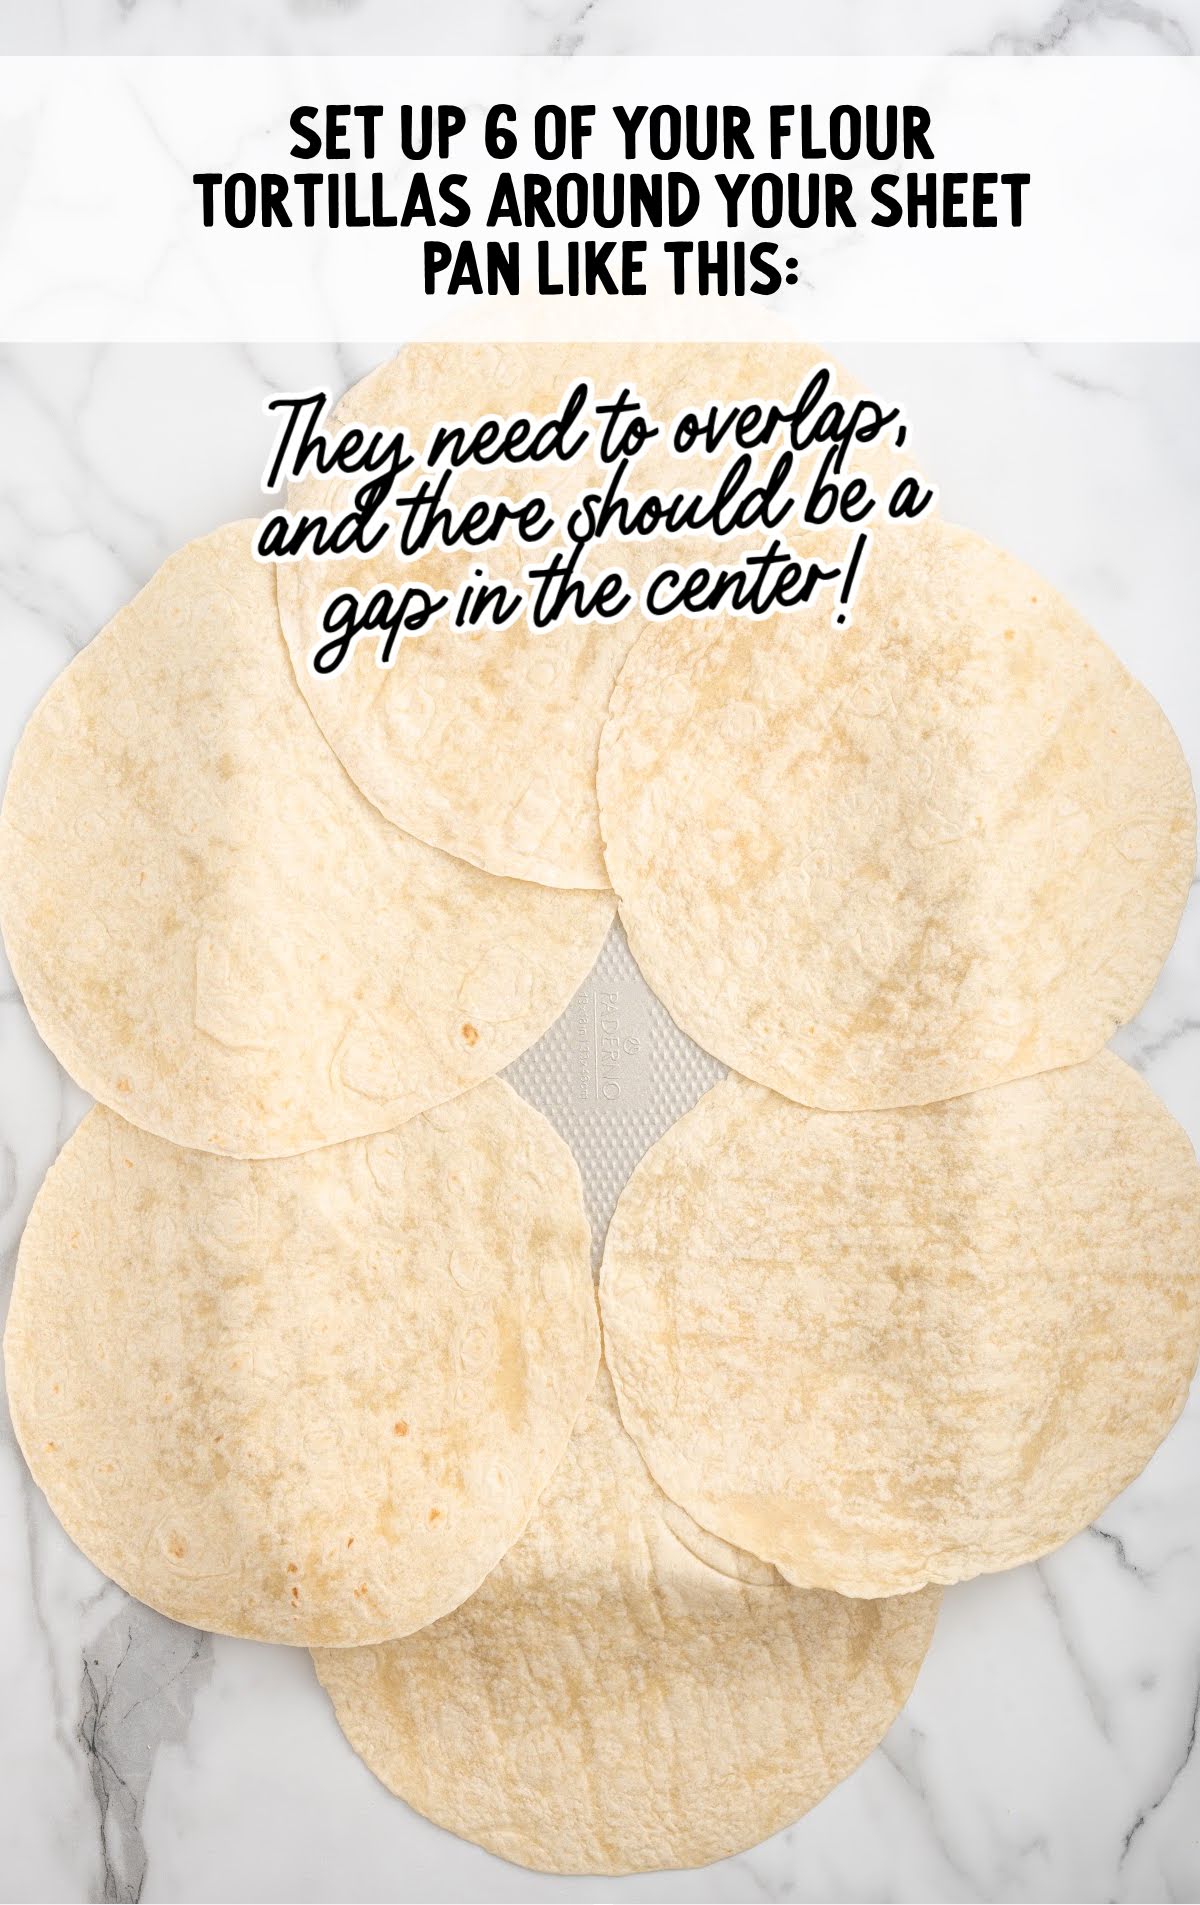
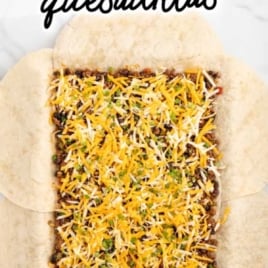
Start with a base layer. Arrange six flour tortillas around the edge of the pan, letting half of each tortilla hang over the sides of the pan. Place one tortilla in the center to cover the gap. This creates a solid base to hold the filling.
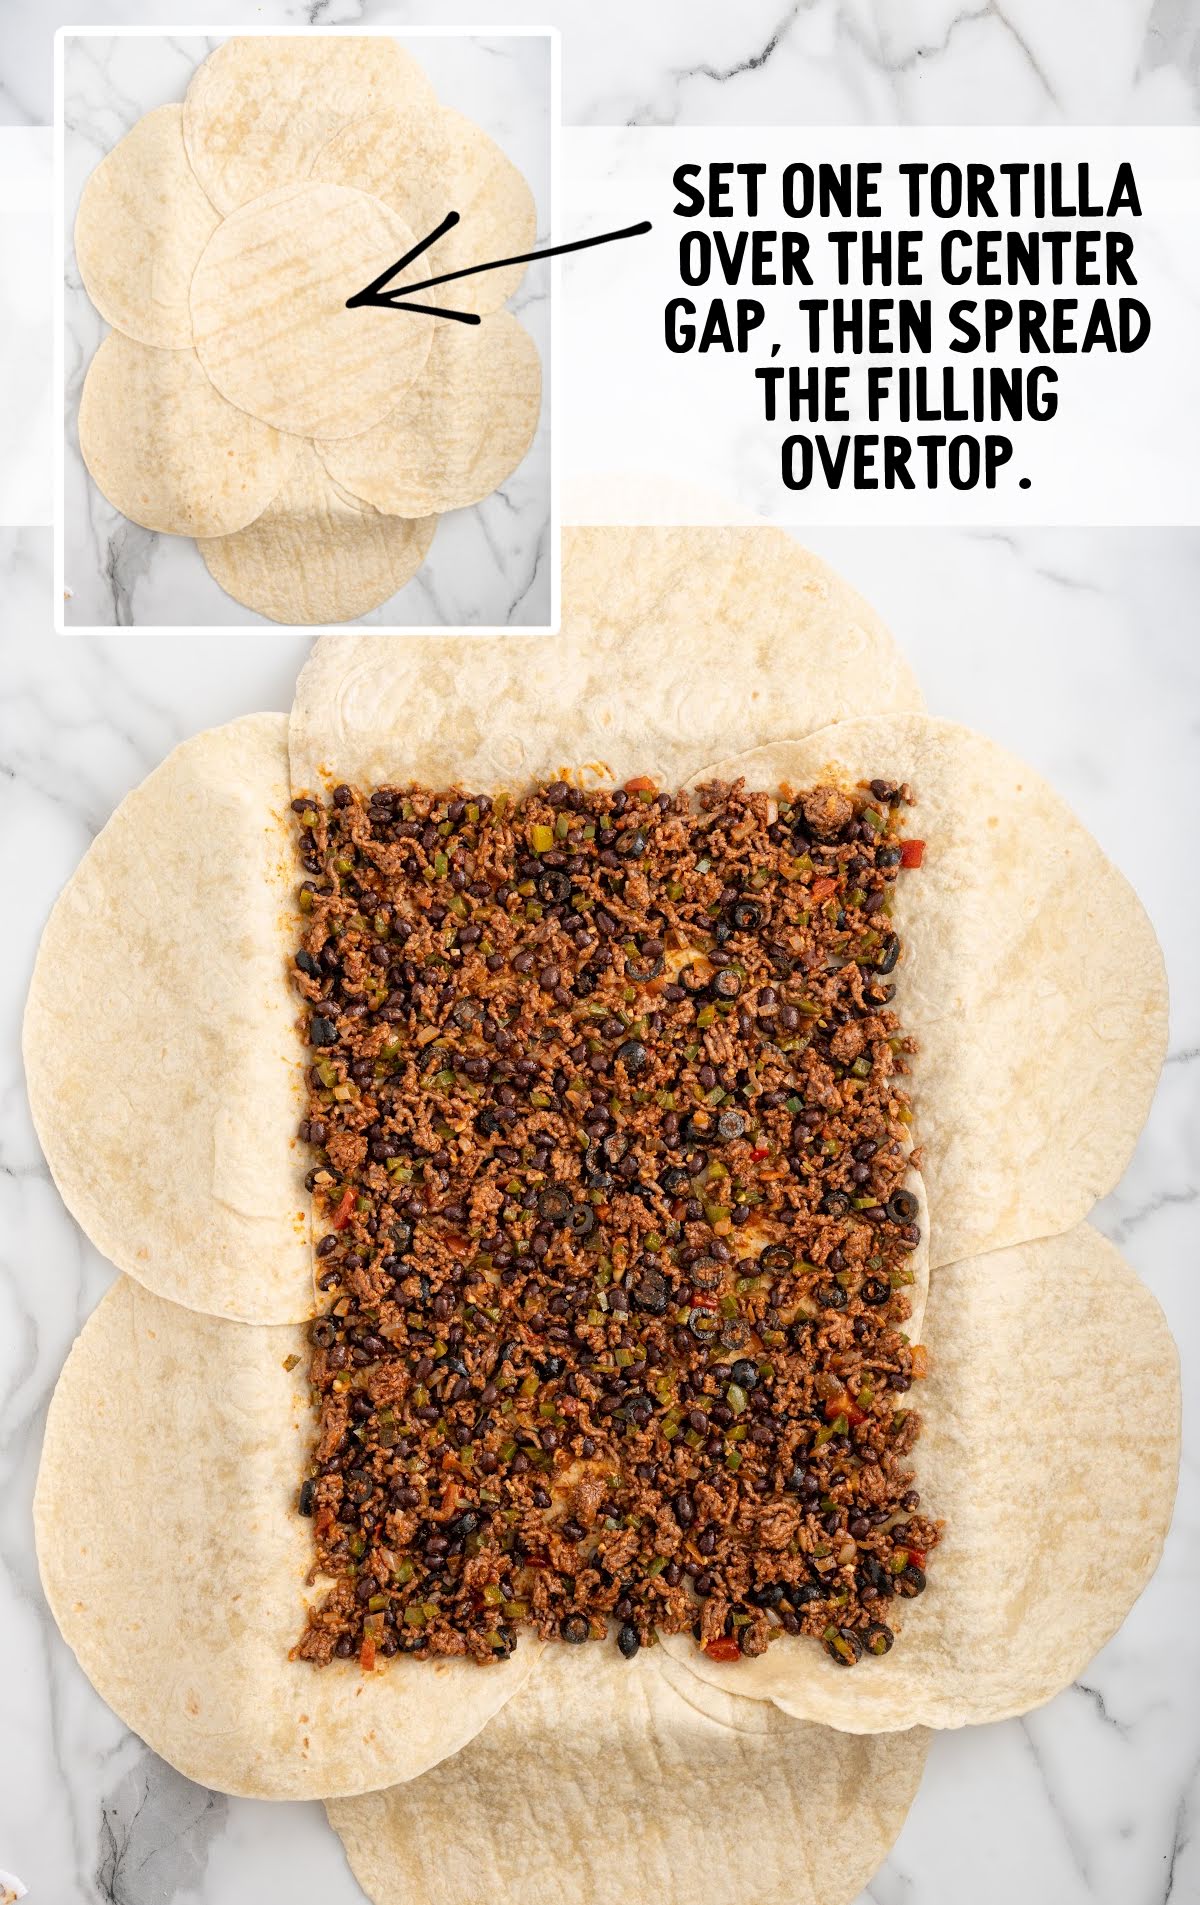
Add the filling. Spread the seasoned ground beef, black beans, and veggie mixture evenly across the base layer of tortillas. Make sure the filling reaches the edges but doesn’t overflow. Sprinkle the remaining cheese and sliced green onions on top of the filling for that gooey, cheesy goodness.
Cover the filling. Place one tortilla over the center of the filling to cover any exposed areas. This will create a stable middle layer for folding.
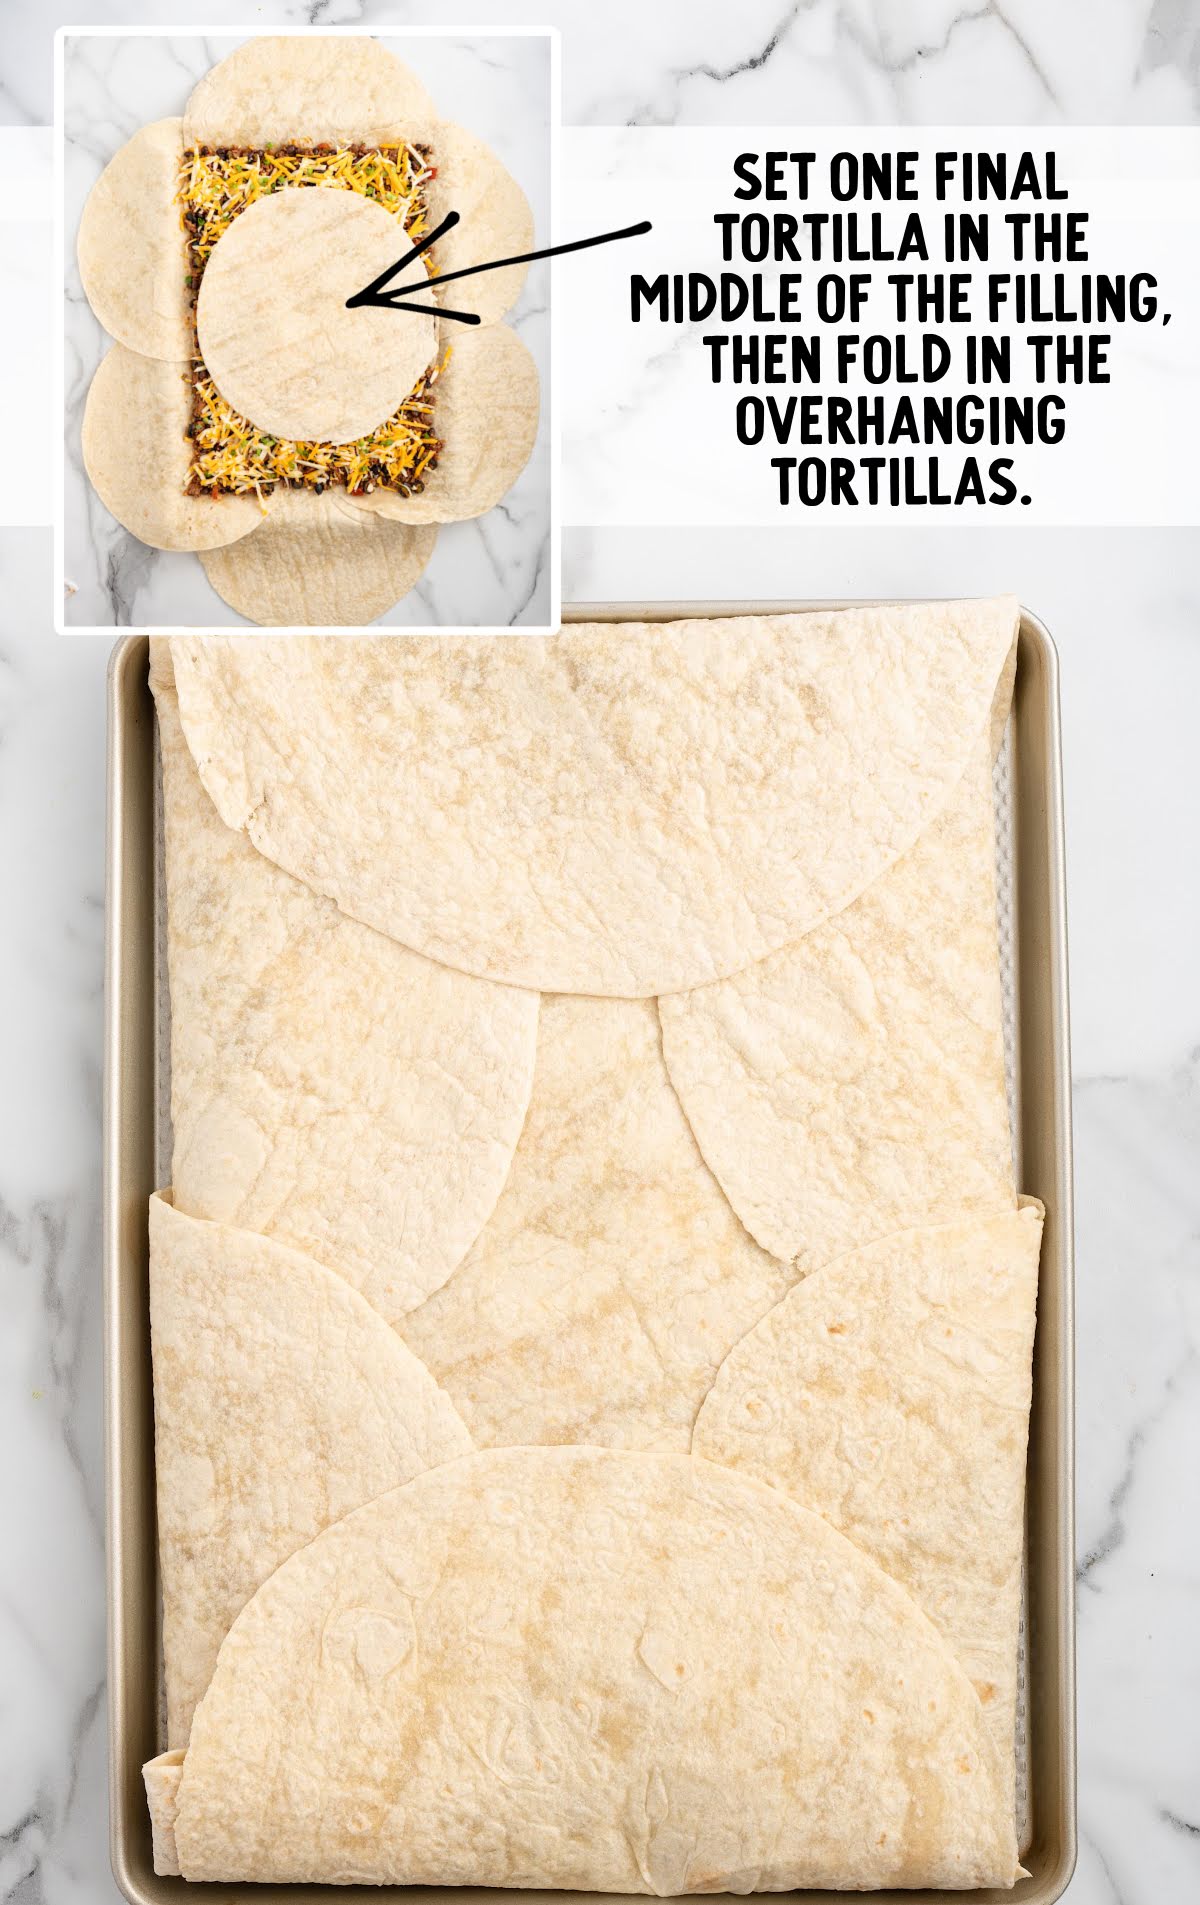
Fold over the edges. Starting at one end of the pan, fold the overhanging tortillas toward the middle, one at a time, overlapping them as you go. Make sure the tortillas are snug to keep the filling in place.
Secure the top. To prevent the edges from popping open while baking, place a second baking sheet on top of the tortillas. This applies light pressure and helps keep everything intact while baking.
Make These Oven Quesadillas Ahead of Time
Prep Baked Quesadillas Up to Two Days Ahead
You can prep the filling ahead of time to make assembly quick and easy.
Cook the ground beef with the spices and vegetables. Then let it cool and store it in an airtight container in the fridge for up to two days.
When you’re ready to bake, simply layer the tortillas and filling on the sheet pan, then bake as directed.
⏰ Time-Saving Tip 👉 Shred your cheese ahead of time and store it in a zip-top bag or airtight container in the fridge for up to a week.
Assemble A Few Hours Before Baking
You can assemble the quesadillas up to three hours ahead and refrigerate them before baking—just follow these steps to prevent sogginess:
- Drain excess liquid from cooked meats or sautéed veggies before layering.
- Use a light hand with sauces and spread a thin layer of cheese directly on the tortillas to create a moisture barrier.
- Bake straight from the fridge—no need to bring it to room temperature. Simply add a few extra minutes to the baking time to ensure everything is heated through and crispy.
With these simple steps, you can enjoy freshly baked, crispy quesadillas with minimal effort!
How To Store
Since these quesadillas are baked on a sheet pan as one large piece, here’s the best way to store them:
Cool Completely – Let the quesadilla cool so it doesn’t get soggy from trapped steam.
Slice Into Portions – Cut into squares or rectangles for easy storage.
Refrigerate – Store slices in an airtight container with parchment paper between layers to prevent sticking. They’ll last up to three days in the fridge.
Freeze – Wrap each piece in plastic wrap, then store them in a freezer-safe bag or container for up to two months.
Reheat for Best Texture –
- Oven: Bake at 350°F for 10-15 minutes to get them crispy again.
- Skillet: Heat over medium heat for a few minutes per side.
- Microwave: Not ideal for crispiness, but works in 30-second bursts.
How To Serve Cheesy Beef Quesadillas
Once your Sheet Pan Quesadillas are golden, crispy, and fresh out of the oven, it’s time to serve them up! Here’s how to make them even better:
Slice and Serve Immediately
Sheet Pan Quesadillas are best right out of the oven, when they’re hot and crispy. If serving for a party, keep them warm in a low oven 200°F until ready to serve.
- Let the quesadilla cool for a few minutes to help the cheese set.
- Use a sharp knife or pizza cutter to slice it into squares or rectangles.

Elevate Easy Quesadillas With Toppings & Sides
✅ Dips & Sauces – Serve with salsa, guacamole, sour cream, queso, or chipotle mayo.
✅ Fresh Garnishes – Sprinkle with chopped cilantro, sliced jalapeños, diced tomatoes, or avocado.
✅ Sides – Pair with Spanish rice, Mexican Street Corn, refried beans, corn salad, or a fresh side salad.
Quesadillas For A Crowd
Sheet pan quesadillas are a fantastic way to prepare quesadillas for a crowd.
Cut them into squares or triangles and arrange them on a large platter. Set up a DIY toppings bar with extras like diced tomatoes, shredded lettuce, pickled onions, and black olives for customization.
Sheet Pan Quesadilla Frequently Asked Questions
No second sheet pan? No problem! You can still get crispy, golden Sheet Pan Quesadillas with a few simple tricks:
1) Use a large casserole dish, cast iron skillet or another heavy oven-safe pan to press it down while baking.
2) Another option is to bake the quesadilla for 10 minutes, then press it down with a spatula or pan before finishing.
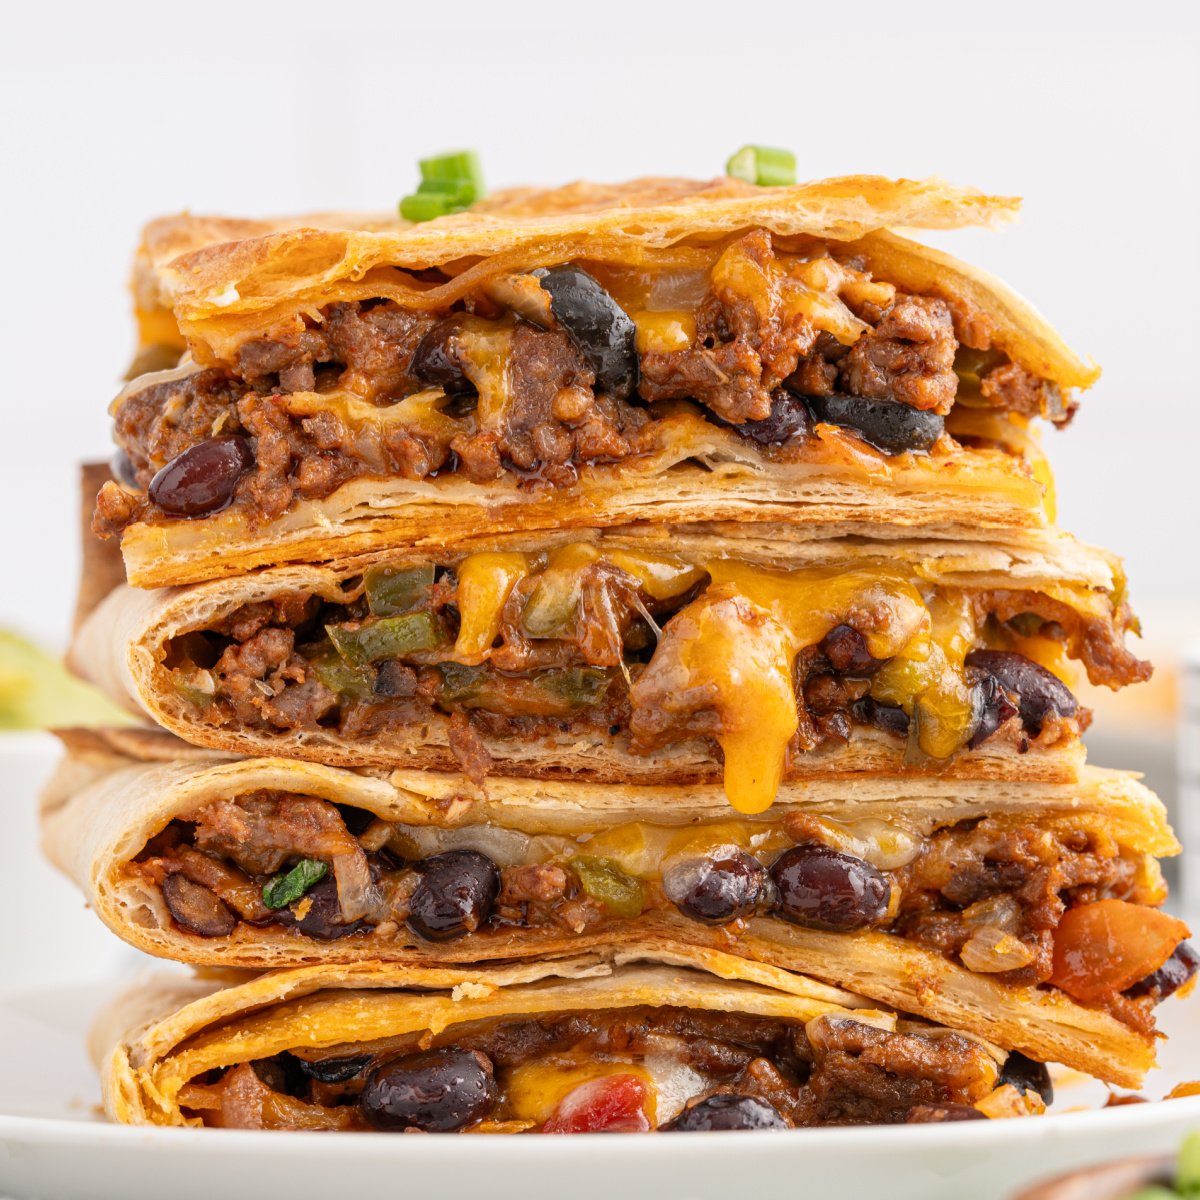
The best way to cut sheet pan quesadillas is with a sharp pizza cutter or a large chef’s knife. Let them cool slightly before cutting to avoid spilling the filling.
To keep your quesadillas crispy, serve them immediately after baking. If they’ve cooled, reheat them in a skillet or oven instead of the microwave for the best texture.
Sheet pan quesadillas are the ultimate solution for feeding large crowds without the hassle of flipping individual servings on the stovetop. This recipe delivers perfectly crisp tortillas, a hearty filling of ground beef, black beans, and gooey melted cheese, all baked together for an easy dinner that’s ready in under an hour.
More One Pan Dinners
For a complete Tex-Mex feast, try pairing these crispy sheet pan quesadillas with other easy, crowd-pleasing meals including:
- Our sheet pan fajitas are packed with bold flavors, tender chicken, and roasted peppers, making them a perfect complement.
- If you’re looking for a fun appetizer or game-day snack, sheet pan nachos are loaded with all your favorite toppings.
- For a creamy, comforting twist, our white chicken enchilada skillet brings all the flavors of classic enchiladas into a simple, one-pan meal.
- And if you love pasta, our one pot chicken fajita pasta is a delicious way to enjoy Tex-Mex flavors with minimal cleanup.
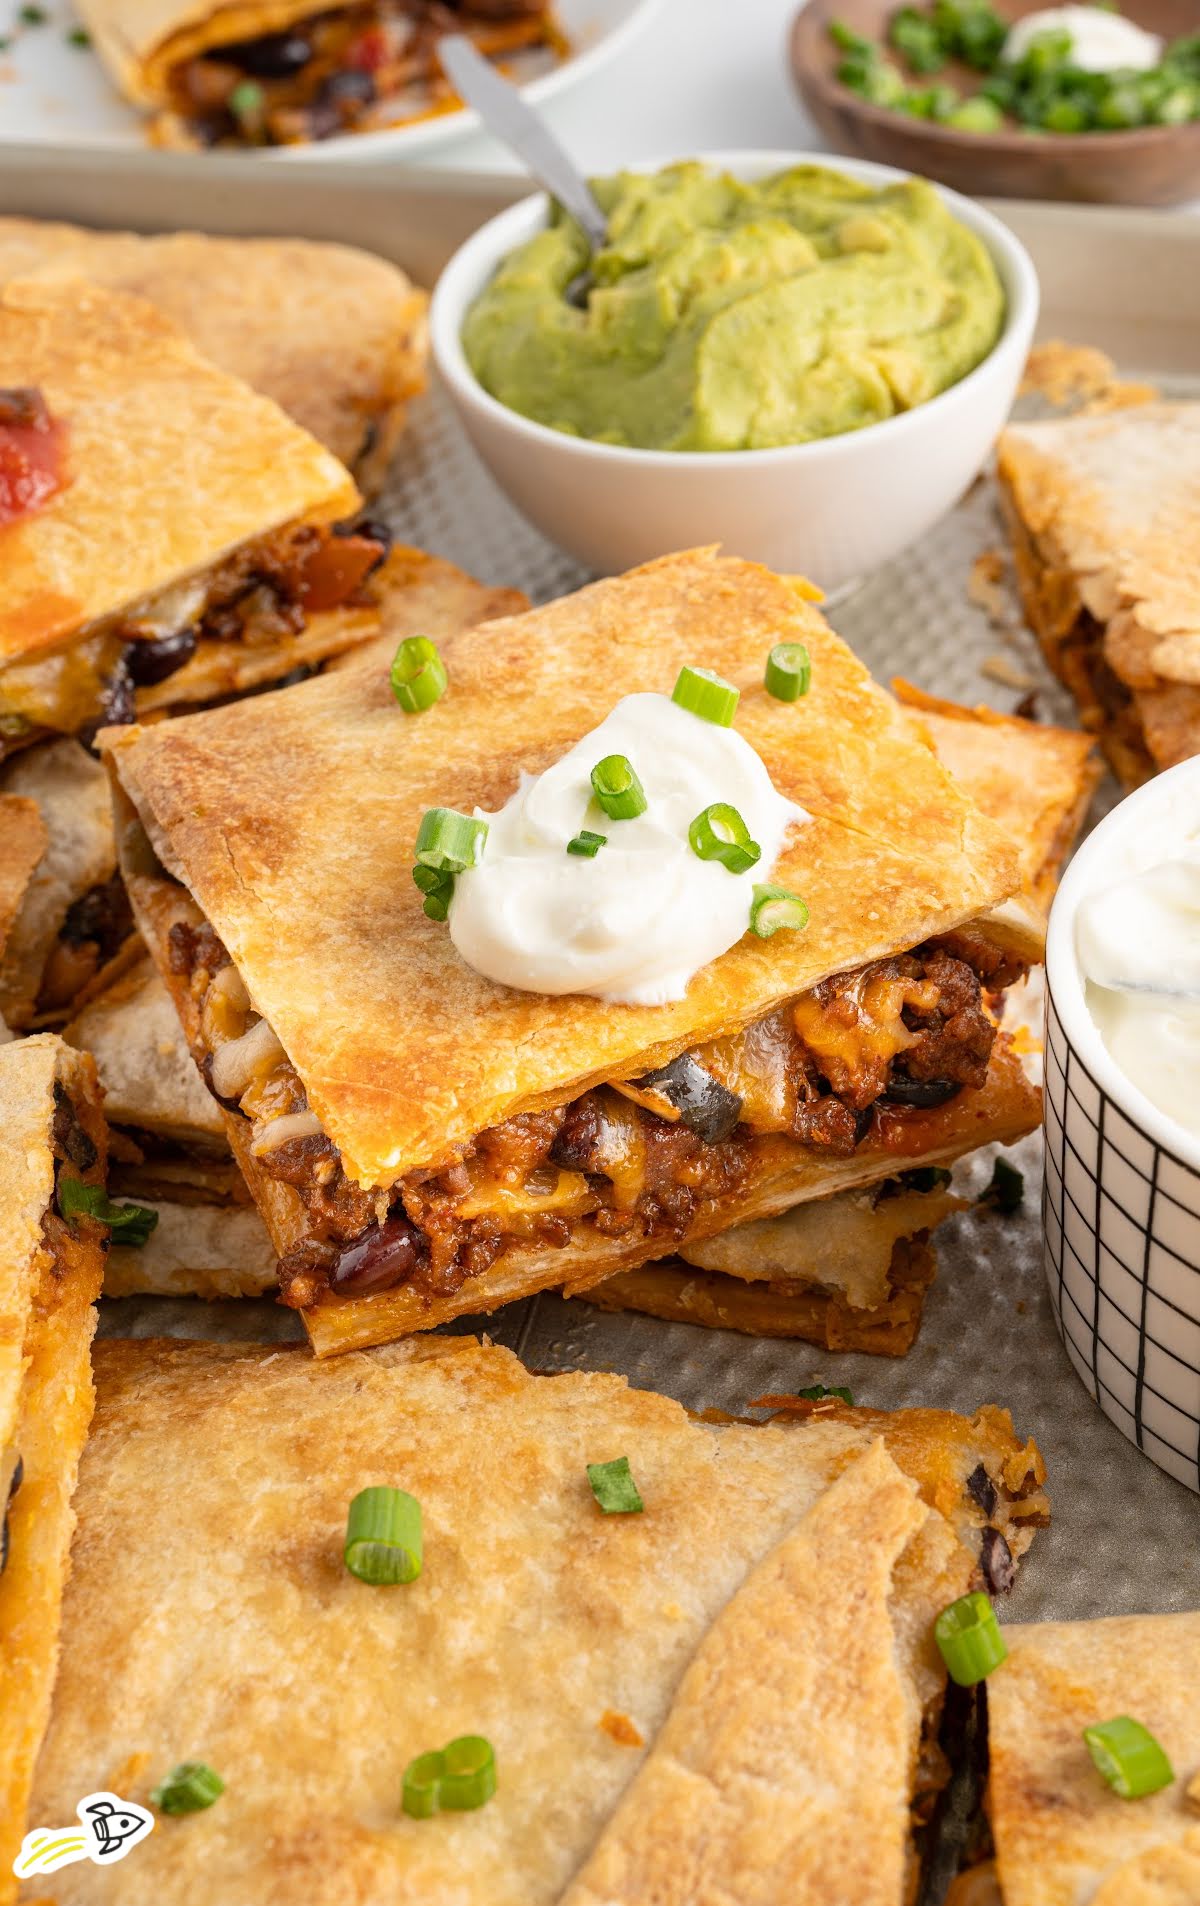
Sheet Pan Quesadillas
Ingredients
- 1½ tablespoons olive oil
- 1 bell pepper, seeded and diced
- 1 small yellow onion, diced
- 1 pound ground beef
- 1 teaspoon minced garlic
- 1½ teaspoons chili powder
- 1½ teaspoons cumin
- 1½ teaspoon smoked paprika
- 1 teaspoon kosher salt
- 1 teaspoon black pepper
- 15 ounces black beans, drained and rinsed
- 2.25 ounces sliced black olives, drained and rinsed
- ½ cup your favorite salsa
- 8 large flour tortillas (burrito size)
- 3 cups Colby and Monterey jack cheese, shredded
- 2 green onions, sliced thin
- sour cream, to top quesadillas (optional)
Instructions
- Preheat oven to 425°F.
- Get out two 18×13-inch sheet pans and very lightly spray just one of them with nonstick cooking spray.
- In a large skillet, over medium heat, add olive oil, bell peppers and yellow onion. Cook for 5 minutes. Stirring often to ensure evenly cooked vegetables.
- Add ground beef and minced garlic to the bell peppers and onions. Cook until completely browned.
- Remove from the heat and drain the excess fat.
- Return the meat mixture to the skillet. Add chili powder, cumin, paprika, kosher salt, black pepper, black beans, black olives and salsa. Stir well after adding each ingredient.
- Place 6 of the flour tortillas around the edges of the lightly sprayed sheet pan. Make sure the tortillas overlap and are hanging halfway over the edge of the pan, leaving a gap in the center.
- Place 1 tortilla over the bottom center gap of the sheet pan.
- Evenly spread the meat mixture over the tortillas.
- Sprinkle cheese on top of meat, then top with sliced green onions.
- Place the final tortilla over the top center of the mixture.
- Starting at either side of the sheet pan, carefully but tightly begin folding the tortillas towards the middle.
- When all sides are folded, place the second sheet pan on top of the folded tortillas. This is to ensure edges do not come apart during baking.
- Bake for 20 minutes.
- Remove pans from the oven. Remove the top sheet pan and cook for an additional 5 minutes.
- Remove from the oven and allow the quesadilla to slightly cool before cutting into servings.
- Serve with sour cream, if desired.
Video
Notes
- The ground beef and veggies could be cooked ahead of time and stored in the fridge until you are ready to assemble your quesadillas.
- A pizza cutter makes cutting the quesadillas into individual portions easy.




Comments
Christina says
Really good quesadilla recipe! Easy to make too! I changed the beef to chicken just because of personal preferences. Will definitely make again!
Janet Franklin says
Why leave a hole in the middle? That section of the quesadilla will only have a top and not a bottom. What purpose does the hole provide?
Layne Kangas says
Hi, Janet – there is not a hole in the middle. If you take a peek at the step-by-step photos, you’ll see how the tortillas are laid/layered. Enjoy!
Gloria says
Easy and yummy dinner idea. Great for snacks/appetizers too on a game day.
Michelle says
I made this last night and it was so simple and so yummy!! My family requested it be put in the rotation. I used shredded chicken and made Mexican rice for a side. So good and crispy!
Michele Schaaf says
This is one of my go to recipes. I always use a rotisserie chicken. Easy peasy. Today I didn’t have a bell pepper so an added a can of mexi corn. Can always make it work. And great leftovers
Carey says
I was nervous to make this because it seemed like a lot of work, but it was incredibly easy. It wasn’t time-consuming and was really flavorful, although I subbed a homemade taco seasoning blend for the individual spices listed so that may affect my perception of the taste. Regardless, I’ll definitely be making this again in the future!
Lisa says
I made this for supper tonight. It looks harder than what it really is! I had my pepper, onion and green onions chopped ahead of time and also shredded my cheese ahead of time. When you have all those ready to go before you start frying your hamburg, it’s really quick and easy to make! I fried the pepper and onion the same time with the hamburg. I cut it into 6 equal pieces when it was finished baking. It’s just my husband and I so we have 2 pieces for leftovers. When we have the leftovers, I’ll just make some spanish rice to go with it and it’s another meal for us. This turned out really good! Thanks much for the recipe, we’ll definitely be having it again!