
Lunch Lady Peanut Butter Bars are one of those recipes people spend years trying to find again. They’re not just everyday peanut butter bars. They’re the kind that showed up in school cafeterias and church cookbooks.
After researching dozens of versions and the comments from people trying to recreate them, the same frustrations kept appearing. The bars turned out dry. The peanut butter layer disappeared. The frosting was too thick or too sweet.
This version was developed to solve those problems while keeping the look and texture that made these bars memorable in the first place.
Get more school cafeteria nostalgia with our rich lunch lady brownies and rectangle school pizza.
Watch This Closely
The biggest mistake with this recipe is overbaking the cookie layer. Because the dough is spread thinly across the pan, it doesn’t need much time in the oven.
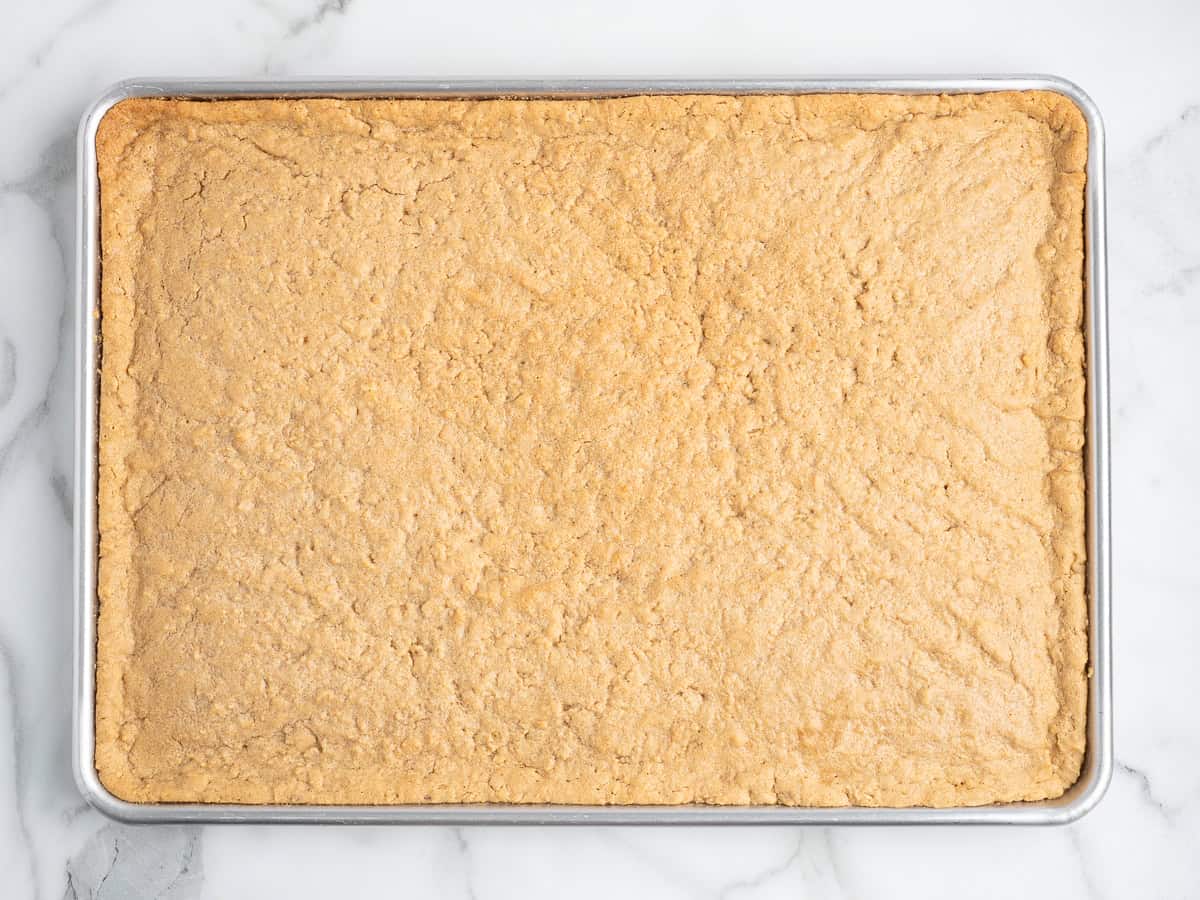
Take it out when the center no longer looks glossy and the edges are lightly golden. The bars will continue to set as they cool.
I updated the recipe by adding a little more peanut butter to the cookie base than most versions. It helps keep the bars soft and chewy. However, even that won’t save you if it’s left in the oven too long.
If you don’t want to turn on your oven, it’s my no bake peanut butter bar recipe you’re after.
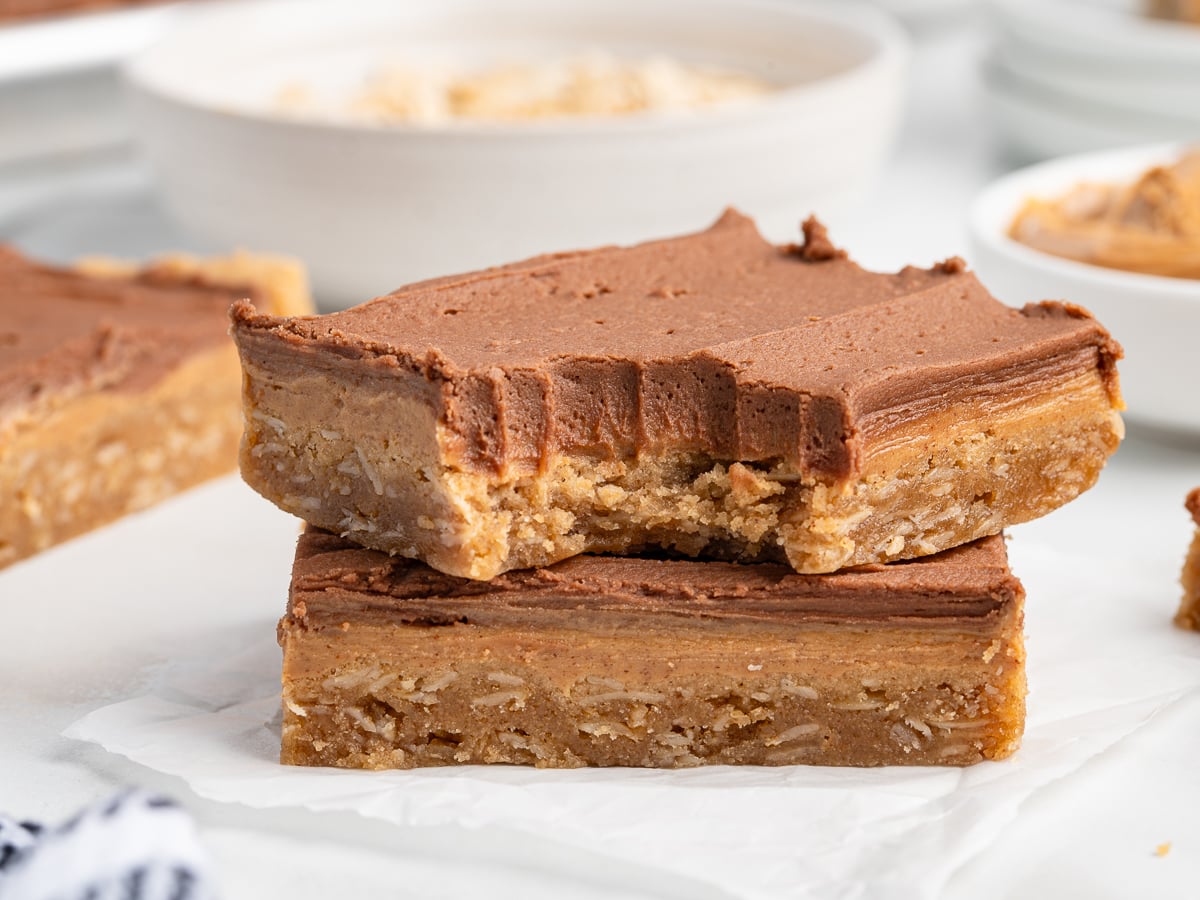
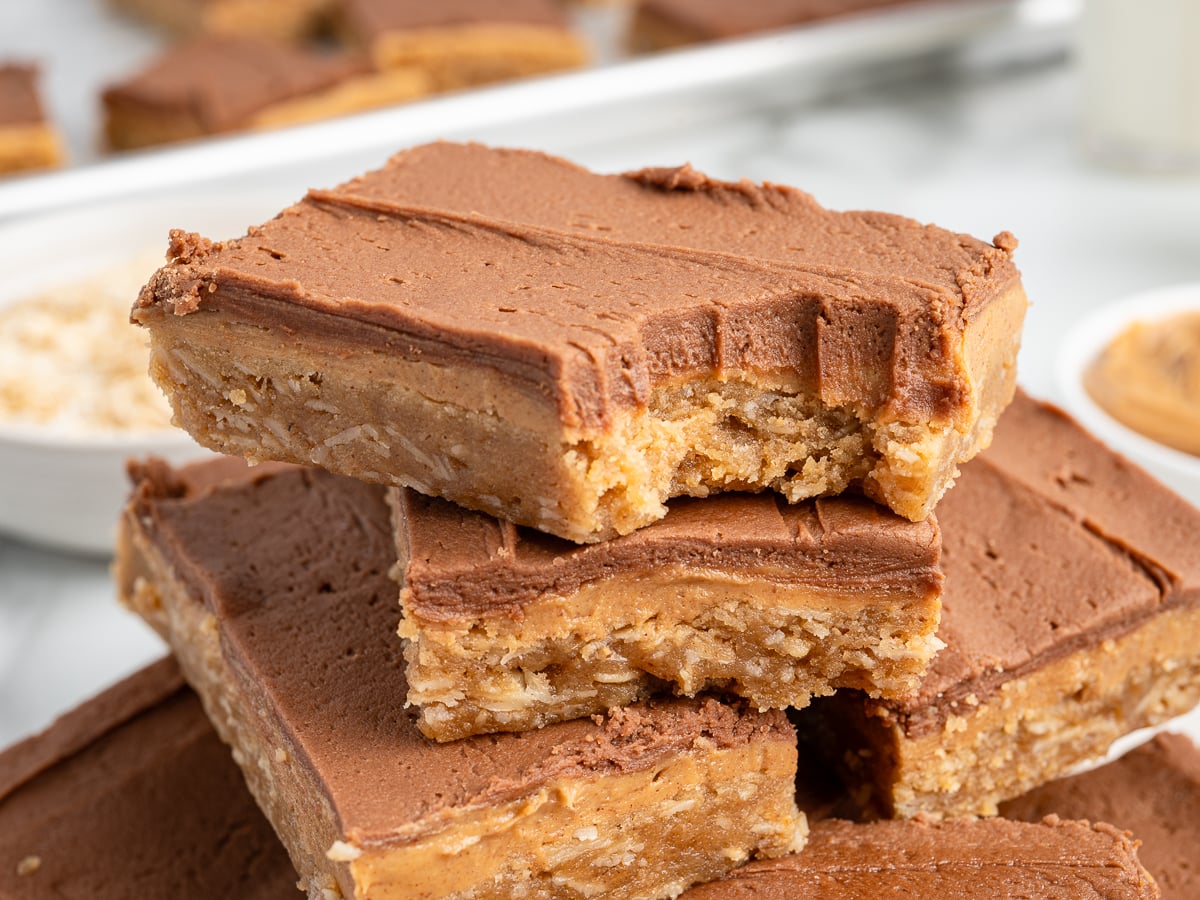
The Layer That Makes Or Breaks The Recipe
The thin peanut butter layer in the middle is what gives these bars their signature look. It’s also where many versions go wrong.
The instinct is to melt the peanut butter and pour it over the base, but fully melted peanut butter tends to soak into the cookie layer. On the other hand, peanut butter straight from the jar is thick enough to pull and tear the warm base as you spread it.
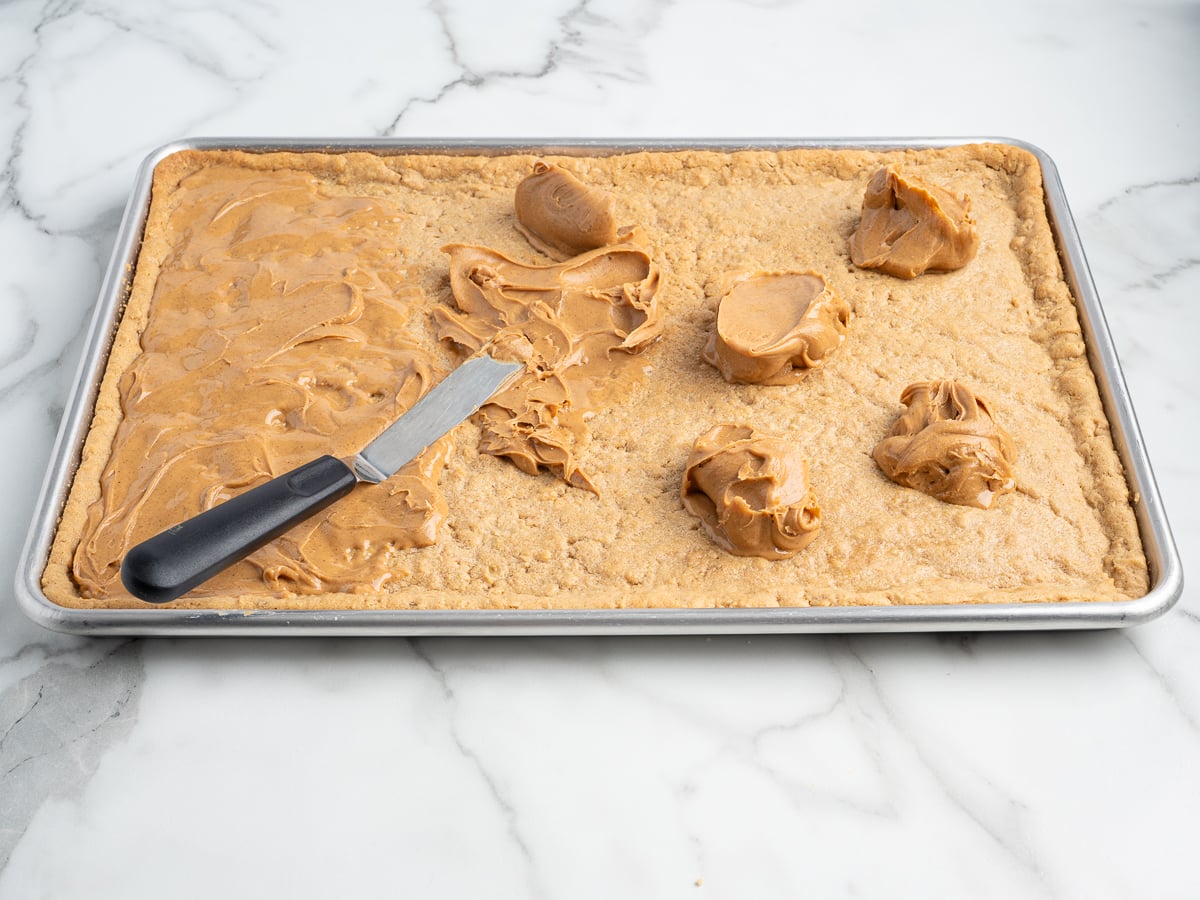
During testing, the best results came from dropping small spoonfuls of peanut butter over the hot bars and letting them sit for a few minutes before spreading.
The peanut butter softens enough to move easily but stays thick enough to hold its place as a distinct layer once the bars cool.
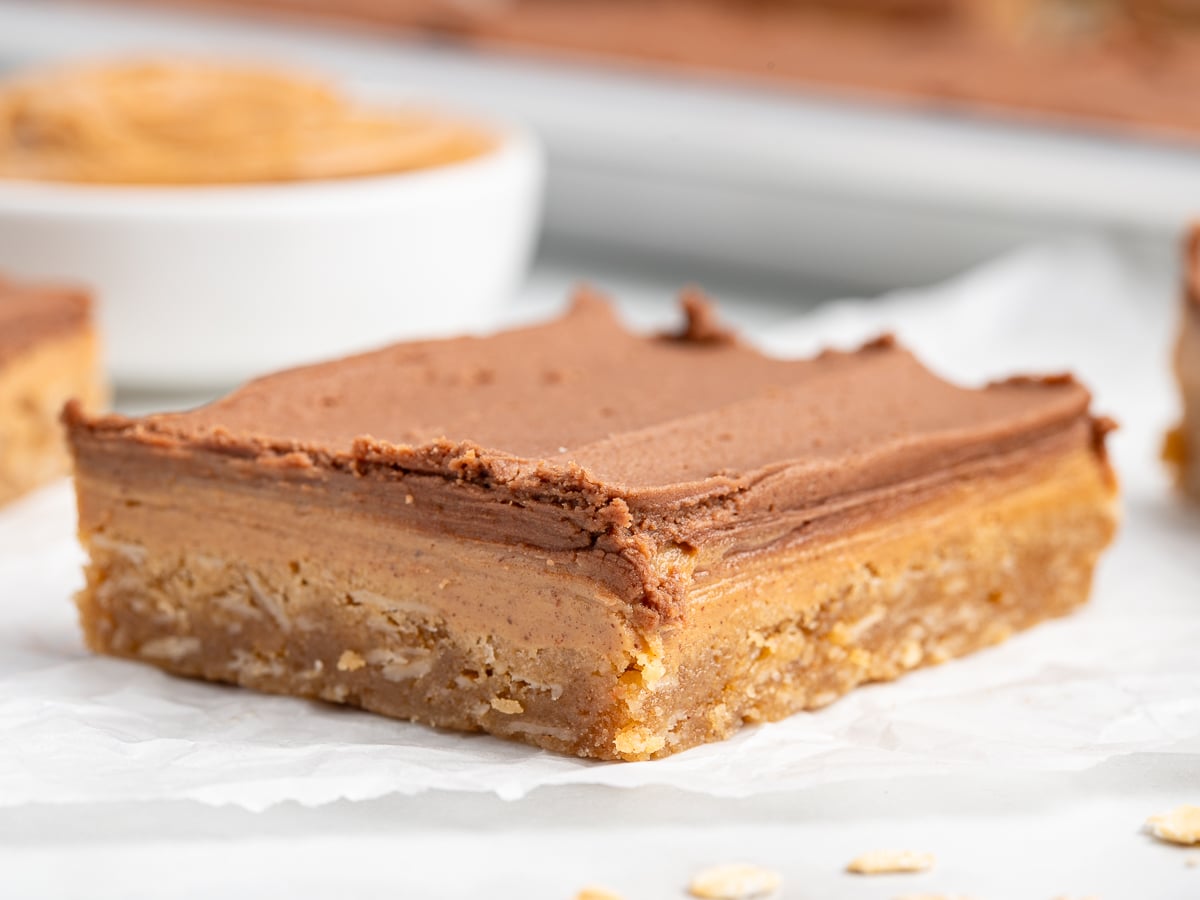
Keep The Frosting Thin
The frosting is meant to complement the peanut butter, not compete with it. I switched to Dutch-processed cocoa, which tastes deeper, so the frosting gets its flavor from the cocoa instead of the sugar.
And I keep the frosting layer thin, stopping once the surface is covered. A thick layer of frosting can make the bars much sweeter than intended and hide the peanut butter flavor that makes them special.
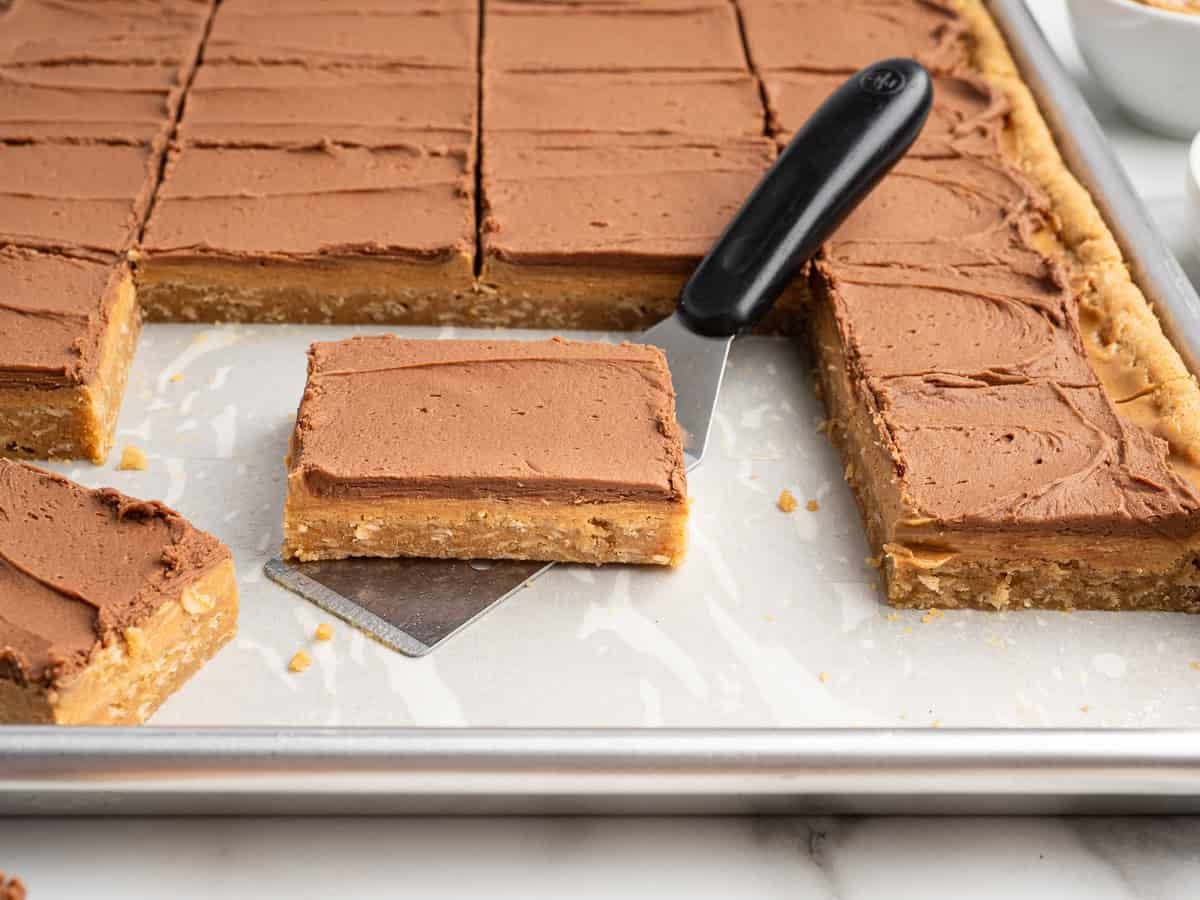
Pan Size Matters
The pan causes confusion because every recipe names it differently.
I tested this recipe in an 18×13-inch half-sheet pan. The bars come out relatively thin, giving them that classic lunchroom look and texture.
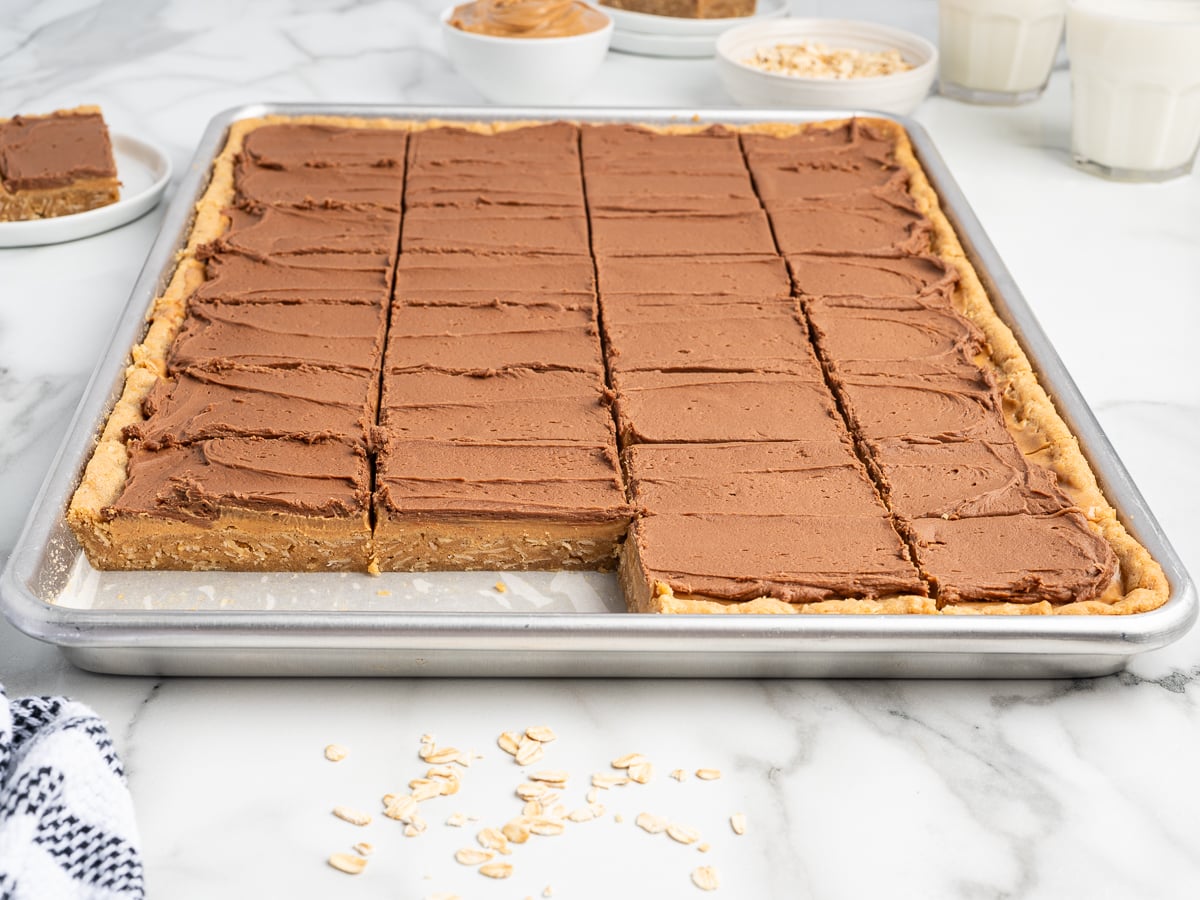
If a full pan is more than you want, halve everything into a 9×13 and you’ll get the same bar, just fewer.
What I wouldn’t do is pour the full batch into a smaller pan to make them thicker, because the middle stays underdone while the edges dry out.
Ingredient Notes
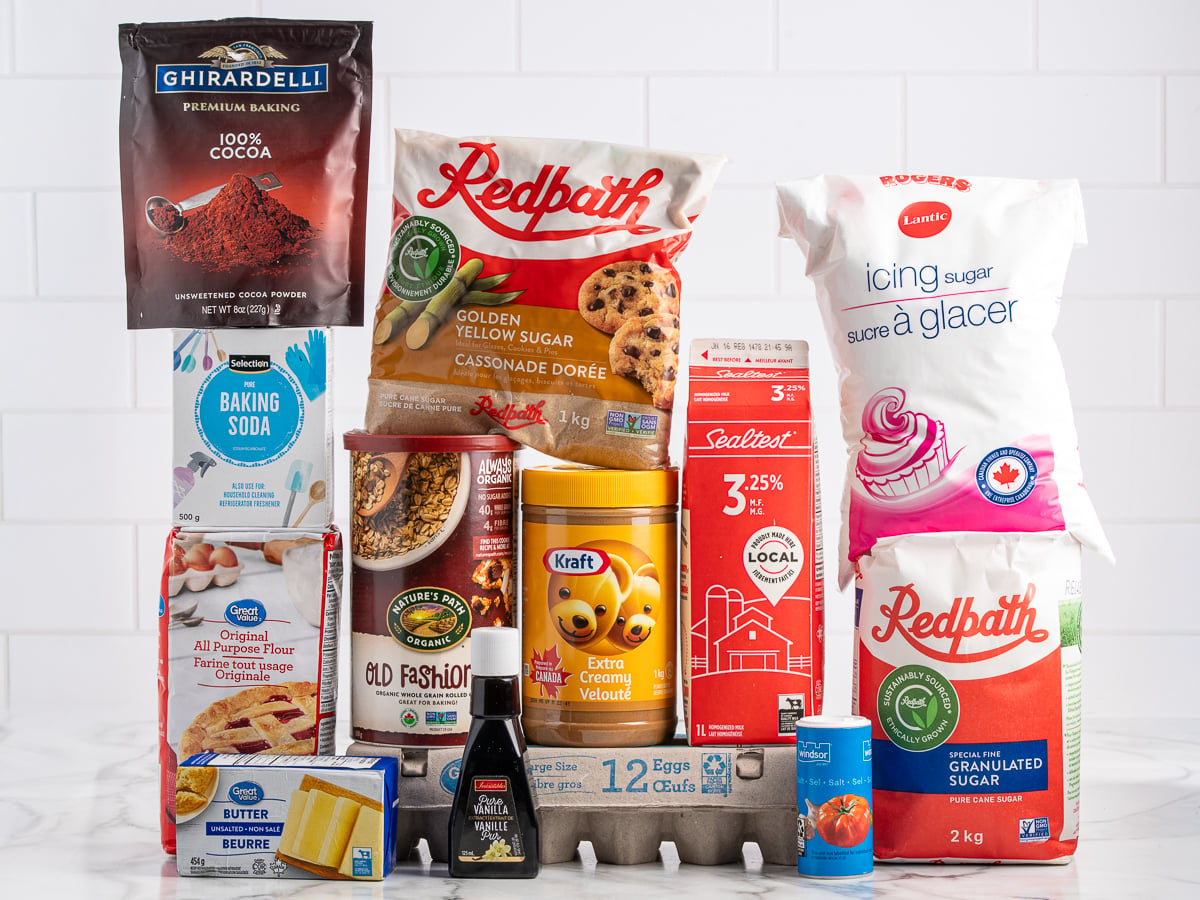
Peanut Butter: Use a standard commercial creamy peanut butter such as Jif, Skippy, or Peter Pan. Natural peanut butter contains more oil and does not behave the same way in either the base or the middle layer.
Old-Fashioned Oats: They give the bars their chewy texture. Quick oats will bake differently and create a softer, less substantial base.
Dutch-Processed Cocoa: It gives the frosting a deeper chocolate flavor than many versions of this recipe while helping balance the sweetness of the powdered sugar.
If this is your kind of dessert, I have a few more in the same vein: Disneyland peanut butter sandwich bars for another take on the layered bar, and chocolate peanut butter no-bake cookies for the nights you don’t want to bake.
This post was originally published in May 2023. It was tested and updated in June 2025.

Lunch Lady Peanut Butter Bars
Ingredients
Peanut Butter Base
- 1 cup unsalted butter, room temperature
- 1 cup granulated sugar
- 1 cup light brown sugar packed
- 3 cups creamy peanut butter, divided into 1½ cups in the dough and 1½ cups spread on top
- 2 large eggs, room temperature
- 1½ teaspoons vanilla extract
- 2 cups all-purpose flour
- 2 cups old-fashioned rolled oats
- 1 teaspoon baking soda
- ½ teaspoon salt
Chocolate Frosting
- ½ cup unsalted butter, room temperature
- 3 cups powdered sugar, sifted
- 5 tablespoons unsweetened dutch-processed cocoa powder, sifted
- ⅛ teaspoon salt
- 1½ teaspoons vanilla extract
- 4 to 5 tablespoons whole milk (start with 4 tablespoons and only add the additional 1 tablespoon if needed for consistency)
Instructions
Peanut Butter Base
- Preheat the oven to 350°F. Line an 18×13-inch half sheet pan with parchment paper and set aside.
- In a large bowl, or the bowl of a stand mixer fitted with the paddle attachment, cream together the butter, granulated sugar, and brown sugar for 1-2 minutes or until light and fluffy.
- Add 1½ cups peanut butter, eggs, and vanilla extract, mixing on low speed just until well combined.
- In a separate bowl, stir together the all-purpose flour, old-fashioned oats, baking soda, and salt. Add the dry ingredients into the peanut butter mixture, mix on low just until all the ingredients are evenly distributed and no dry pockets of flour remain.
- Transfer the peanut butter batter to the prepared sheet pan and press out into an even layer. The batter will be quite sticky. Use a separate piece of parchment paper, or lightly dampened hands (with cool water), to press the batter to all the edges of the pan without too much batter sticking to your hands.
- Bake for 15 minutes or until the center no longer looks glossy and the edges are lightly golden. Do not overbake the peanut butter base or your bars will turn out dry and crumbly when cooled.
- Remove the sheet pan from the oven. Add small dollops of the remaining 1 ½ cups peanut butter to the warm base. Allow the peanut butter to sit for 2-3 minutes or until starting to melt. Using a small offset spatula, gently spread the melted peanut butter into a thin even layer, leaving a ¼ to ½-inch border around the edges to make lifting and slicing easier once cooled.
- Allow the peanut butter base to cool completely, and the melted peanut butter layer to fully firm, before preparing the chocolate frosting. This can take 1 to 1½ hours depending on the temperature in your kitchen.
Chocolate Frosting
- In a large bowl, using a handheld mixer on medium speed, beat the unsalted butter for 1-2 minutes or until light, fluffy, and no lumps remain.
- Add the powdered sugar, unsweetened dutch-processed cocoa powder, salt, vanilla extract, and 4 tablespoons whole milk to the bowl and mix on low speed just until all the powdered sugar is incorporated.
- Increase the speed to medium-high and mix for another 1-2 minutes or until the frosting is light and smooth. You can add the additional 1 tablespoon whole milk if needed to lighten up the frosting to an easily spreadable consistency. The frosting will be slightly denser than if frosting a cake or cupcakes but it should spread easily when frosting the peanut butter base.
- Once the peanut butter base has cooled completely, and the peanut butter layer has firmed, use a small offset spatula to carefully spread the frosting into a thin even layer over the peanut butter layer, leaving a ¼ to ½-inch border around the edges.
- Allow the frosting to set for 20-30 minutes at room temperature to allow the frosting to dry slightly making slicing and stacking easier for serving.
Notes
- Do not use freshly ground or natural peanut butter for this recipe. Those options contain excess natural oils and can affect the texture of the bars. It is best to use a commercial brand of creamy peanut butter such as JIF, Skippy, or Peter Pan for best results.
- Quick-cook or instant oats will not yield the same results as the old-fashioned oats called for in the ingredients list. The old-fashioned oats will yield a chewier texture.
- Do not substitute low-fat or skim milk in the frosting as it will alter the consistency needed for the frosting to properly set. Dairy alternatives have not been tested for this recipe.
Nutrition


Leave a Comment