

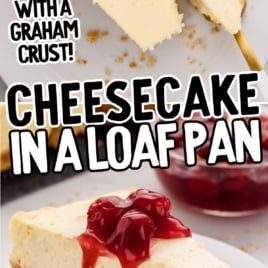
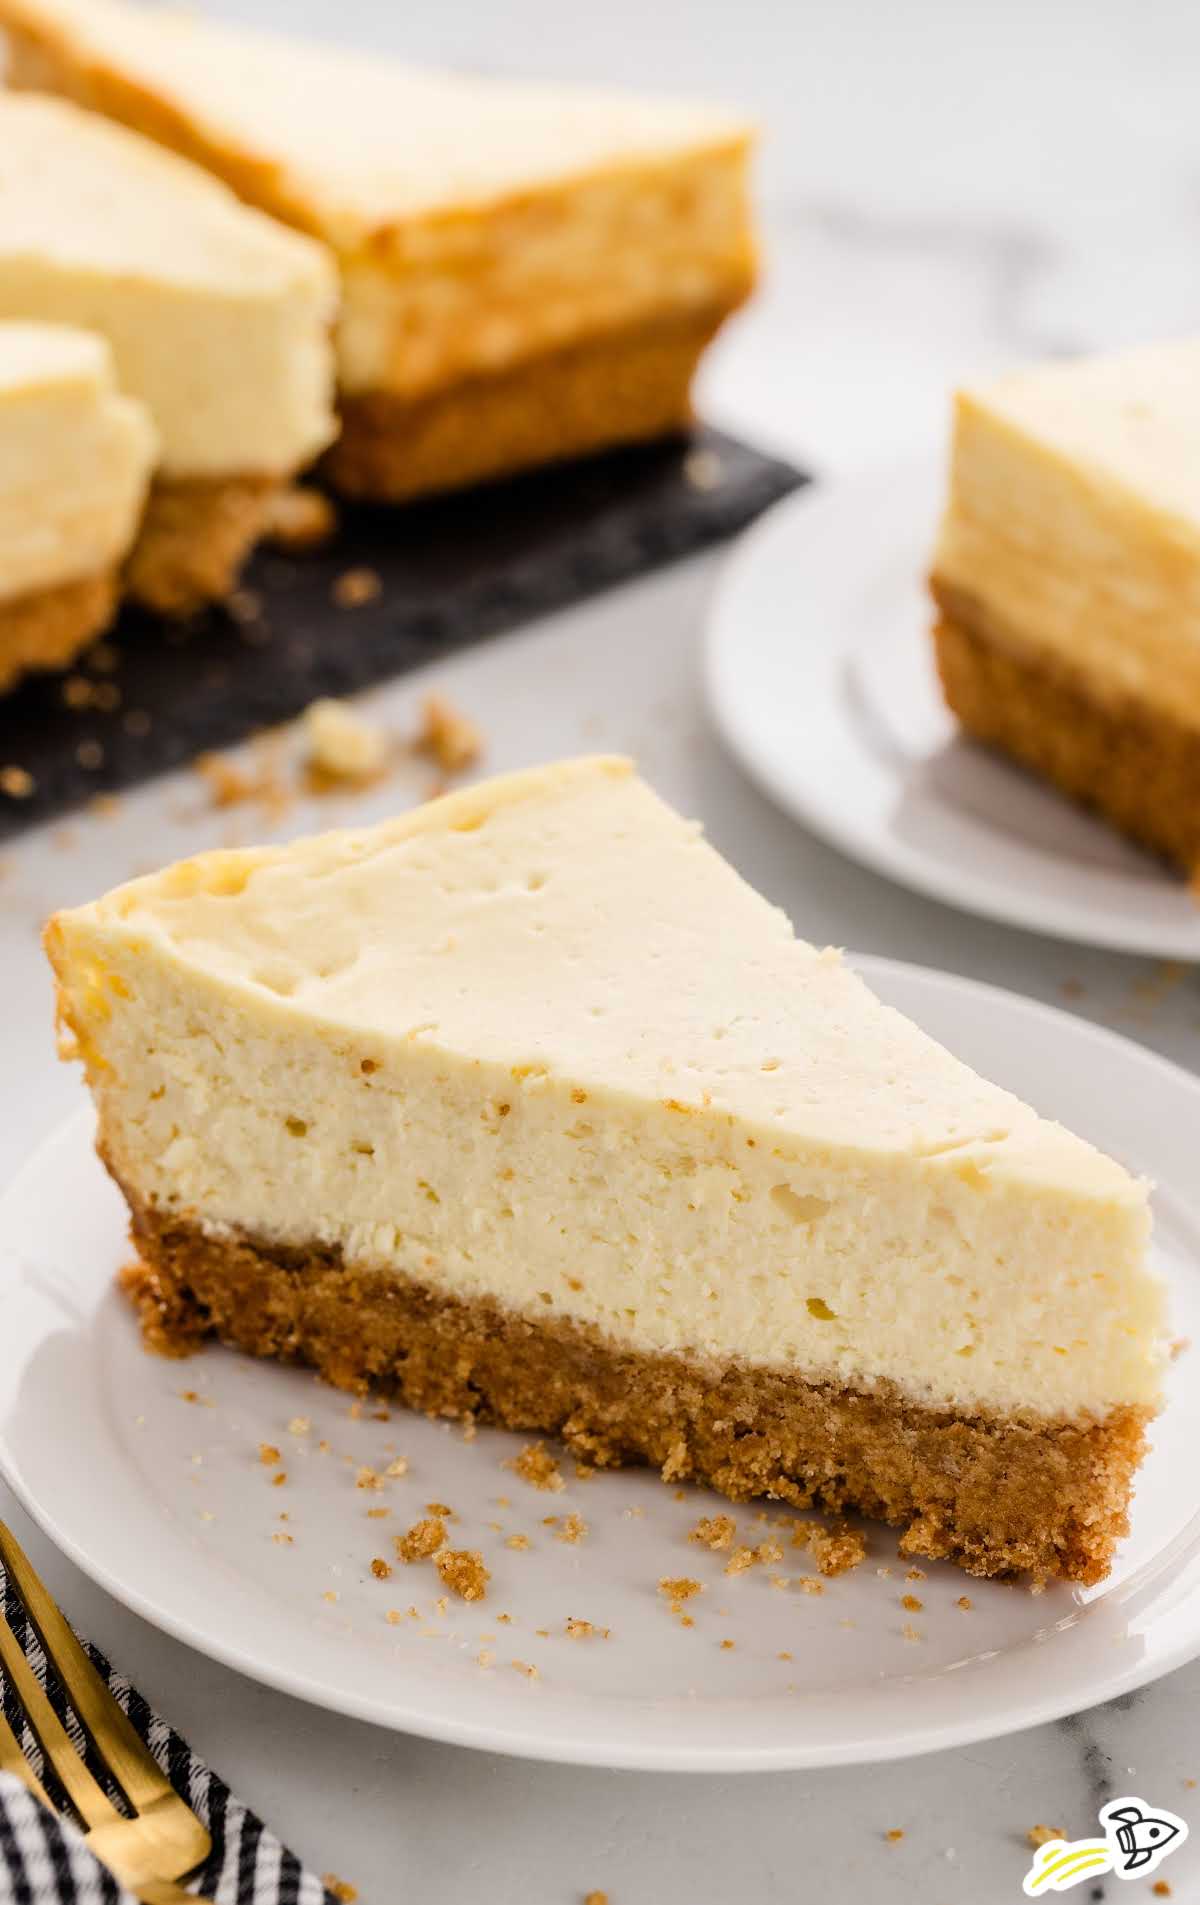
Making a Cheesecake in Loaf Pan recipe combines the creamy texture of traditional cheesecake with the convenience of using a loaf pan. But, does it really taste as good as traditional cheesecake recipes? Our talented team of recipe developers created a unique cheesecake batter that bakes up perfectly, no springform pan required!
With a buttery graham cracker crust and smooth filling, this creamy dessert is sure to impress. With clear instructions and plenty of practical tips, we make baking restaurant-quality desserts simple and straightforward. And have no fear—this recipe has been thoroughly tested, and our photographs show an authentic and attainable finished product.
At Spaceships and Laser Beams, our commitment to quality and attention to detail set us apart. With over ten years in the culinary field, we combine our knowledge of ingredients, techniques, and flavors and use them to create dreamy recipes for home cooks just like you.
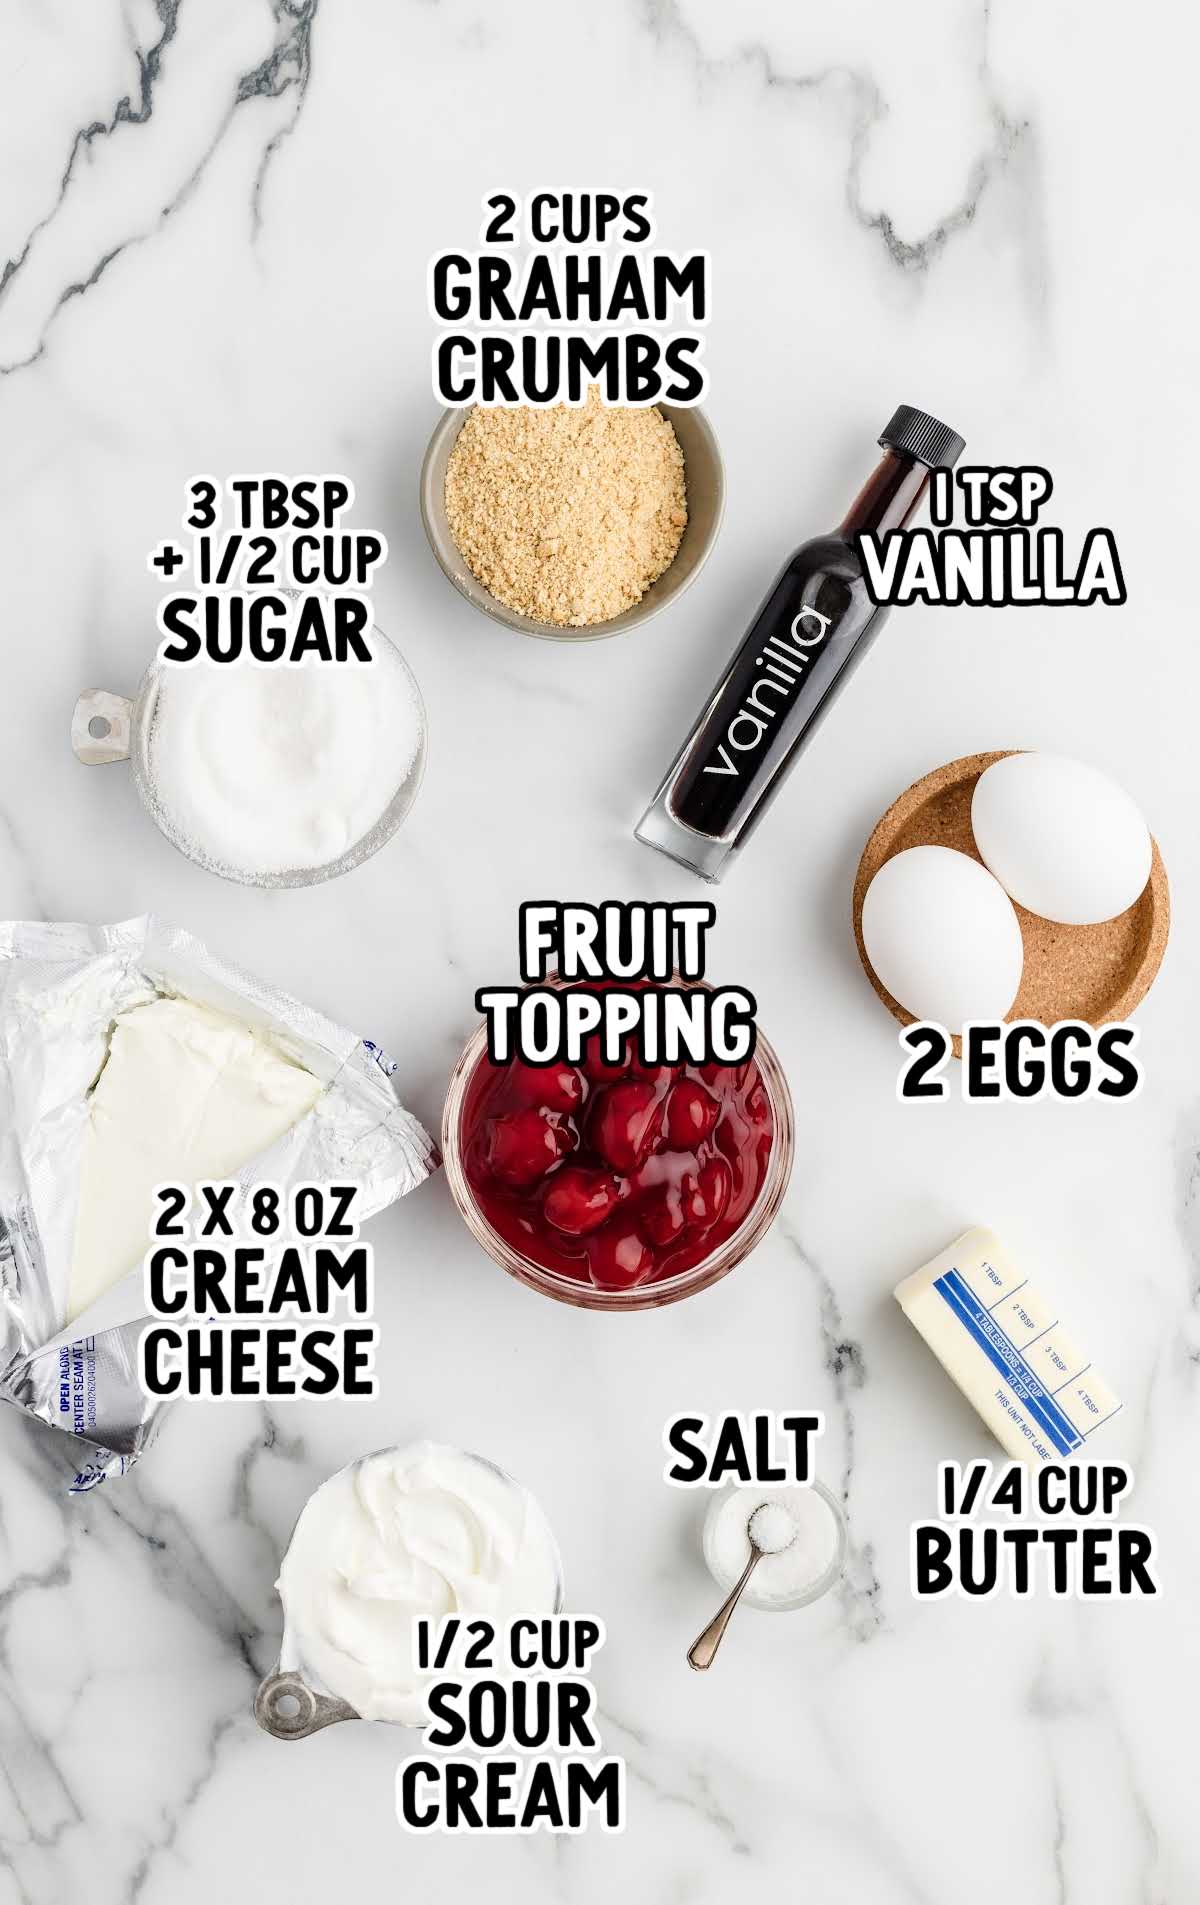
Ingredients For Cheesecake In A Loaf Pan
Making Cheesecake in a Loaf Pan is ultra convenient, plus this expertly developed recipe brings out a rich and creamy texture that’s hard to resist.
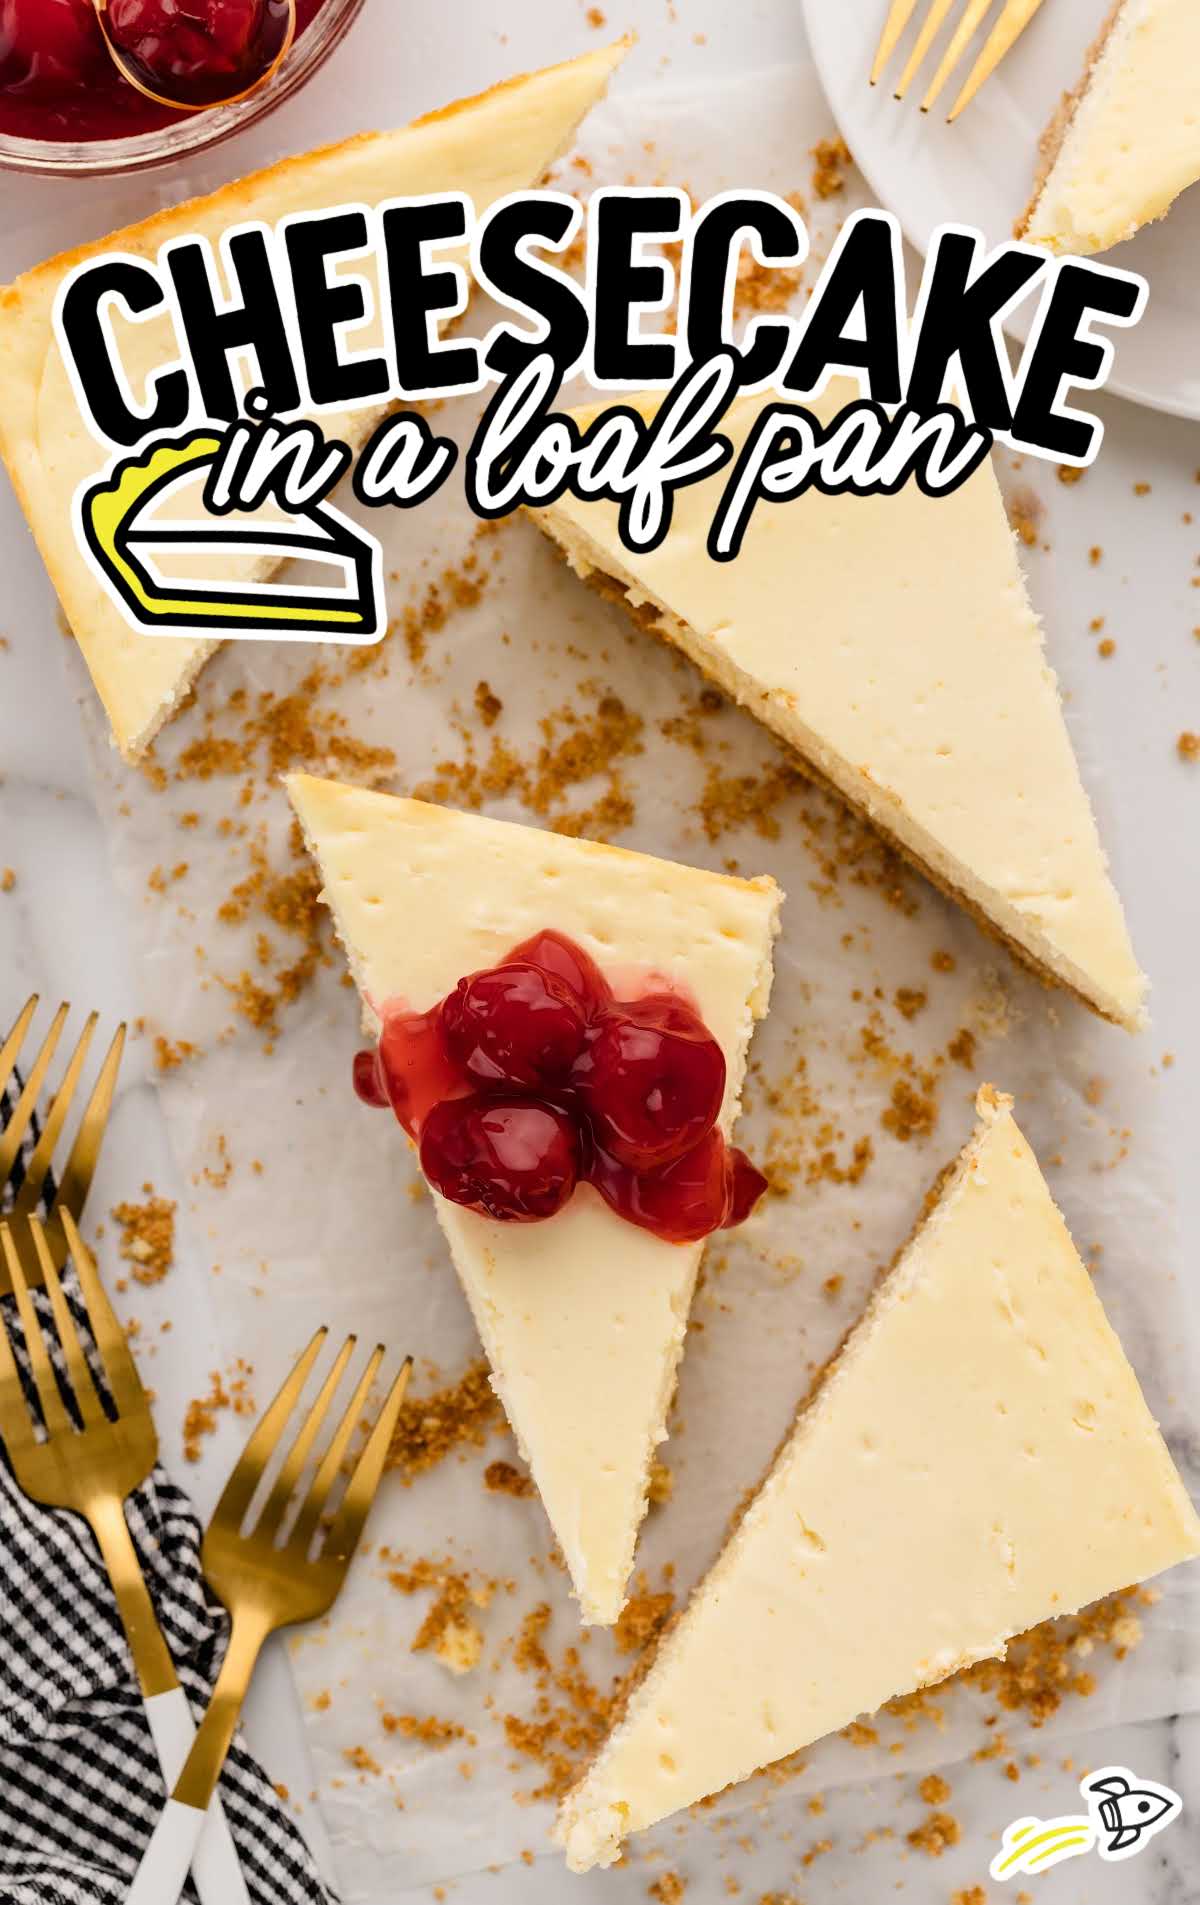
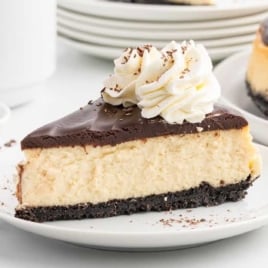
With a creamy filling and classic graham crumb crust, this simple cheesecake recipe makes six perfect slices of creamy, dreamy deliciousness.
You’ll need:
For the Crust:
- 2 cups graham cracker crumbs
- ¼ cup salted butter, melted
- 3 tablespoons granulated sugar
For the Cheesecake Filling:
- 2 (8-ounce each or 453-gram) packages of cream cheese, softened
- ½ cup granulated sugar
- 1 teaspoon vanilla extract
- 2 large eggs
- ½ cup sour cream
- Pinch of salt
- Your choice of fruit topping for garnish
Substitutions and Additions for Loaf Pan Cheesecake
We’ve tested this recipe as written, but you should be able to make some substitutions to the ingredients list without running into problems. Experiment carefully, keeping in mind that changes may affect the taste and texture of your finished cheesecake.
Graham Cracker Crumbs: If you don’t have graham cracker crumbs, you can use crushed Biscoff cookies or vanilla wafers. You can even try making a shortbread crust by crushing shortbread cookies.
Salted Butter: Unsalted butter works just as well. If using unsalted butter, add a pinch more salt to the crust mixture to balance the flavors.
Granulated Sugar: You can substitute granulated sugar with an equal amount of light brown sugar for a slightly caramel-like flavor. For a sugar-free option, use a granulated sugar substitute like stevia.
Cream Cheese: For a lower-fat option, use reduced-fat cream cheese or Neufchâtel cheese. The texture might be slightly less creamy.
Vanilla Extract: If you’re out of vanilla extract, try almond extract or a splash of your favorite liqueur for a different flavor.
Sour Cream: Greek yogurt can be used as a direct substitute for sour cream.
Eggs: Try replacing the 2 eggs with ½ cup silken tofu mixed with ½ tsp cornstarch. You can also try substituting the eggs with ½ cup sweetened condensed milk.
Additions:
- Fruit Topping: Fresh fruit makes a perfect topping for this cheesecake.
- Fruit Preserves: Spread preserves over the top of the cheesecake for color and plenty of flavor.
- Drizzle Sauce: Serve your cheesecake with a drizzle of caramel sauce or chocolate fudge.
- Lemon Curd: Spoon a dollop of lemon curd over your slices for a delectably tangy topping.
How To Make This Cheesecake In Loaf Pan Recipe
Making cheesecake in a cake pan like this one is ideal when you only need a few slices, or if you don’t have a springform pan. Making a small batch cheesecake lets you use fewer ingredients and saves time and money if you’re hosting a small dinner party or just want a treat for your family.
Here are the steps to follow along with plenty of photos to guide you:
PRO TIP: Start by gathering all the ingredients you need. Take time to melt the butter and allow it to cool slightly. Make sure the cream cheese is softened to room temperature before you begin.
STEP ONE: Preheat your oven to 325°F. Line an 8 ½ x 4 ½ inch loaf pan with parchment paper, leaving some overhang on the sides for easy removal later. Grease the parchment paper lightly to prevent sticking.
STEP TWO: In a small bowl, combine the graham cracker crumbs, melted salted butter, and 3 tablespoons of granulated sugar. Mix until the crumbs are fully coated with butter and the mixture resembles wet sand.
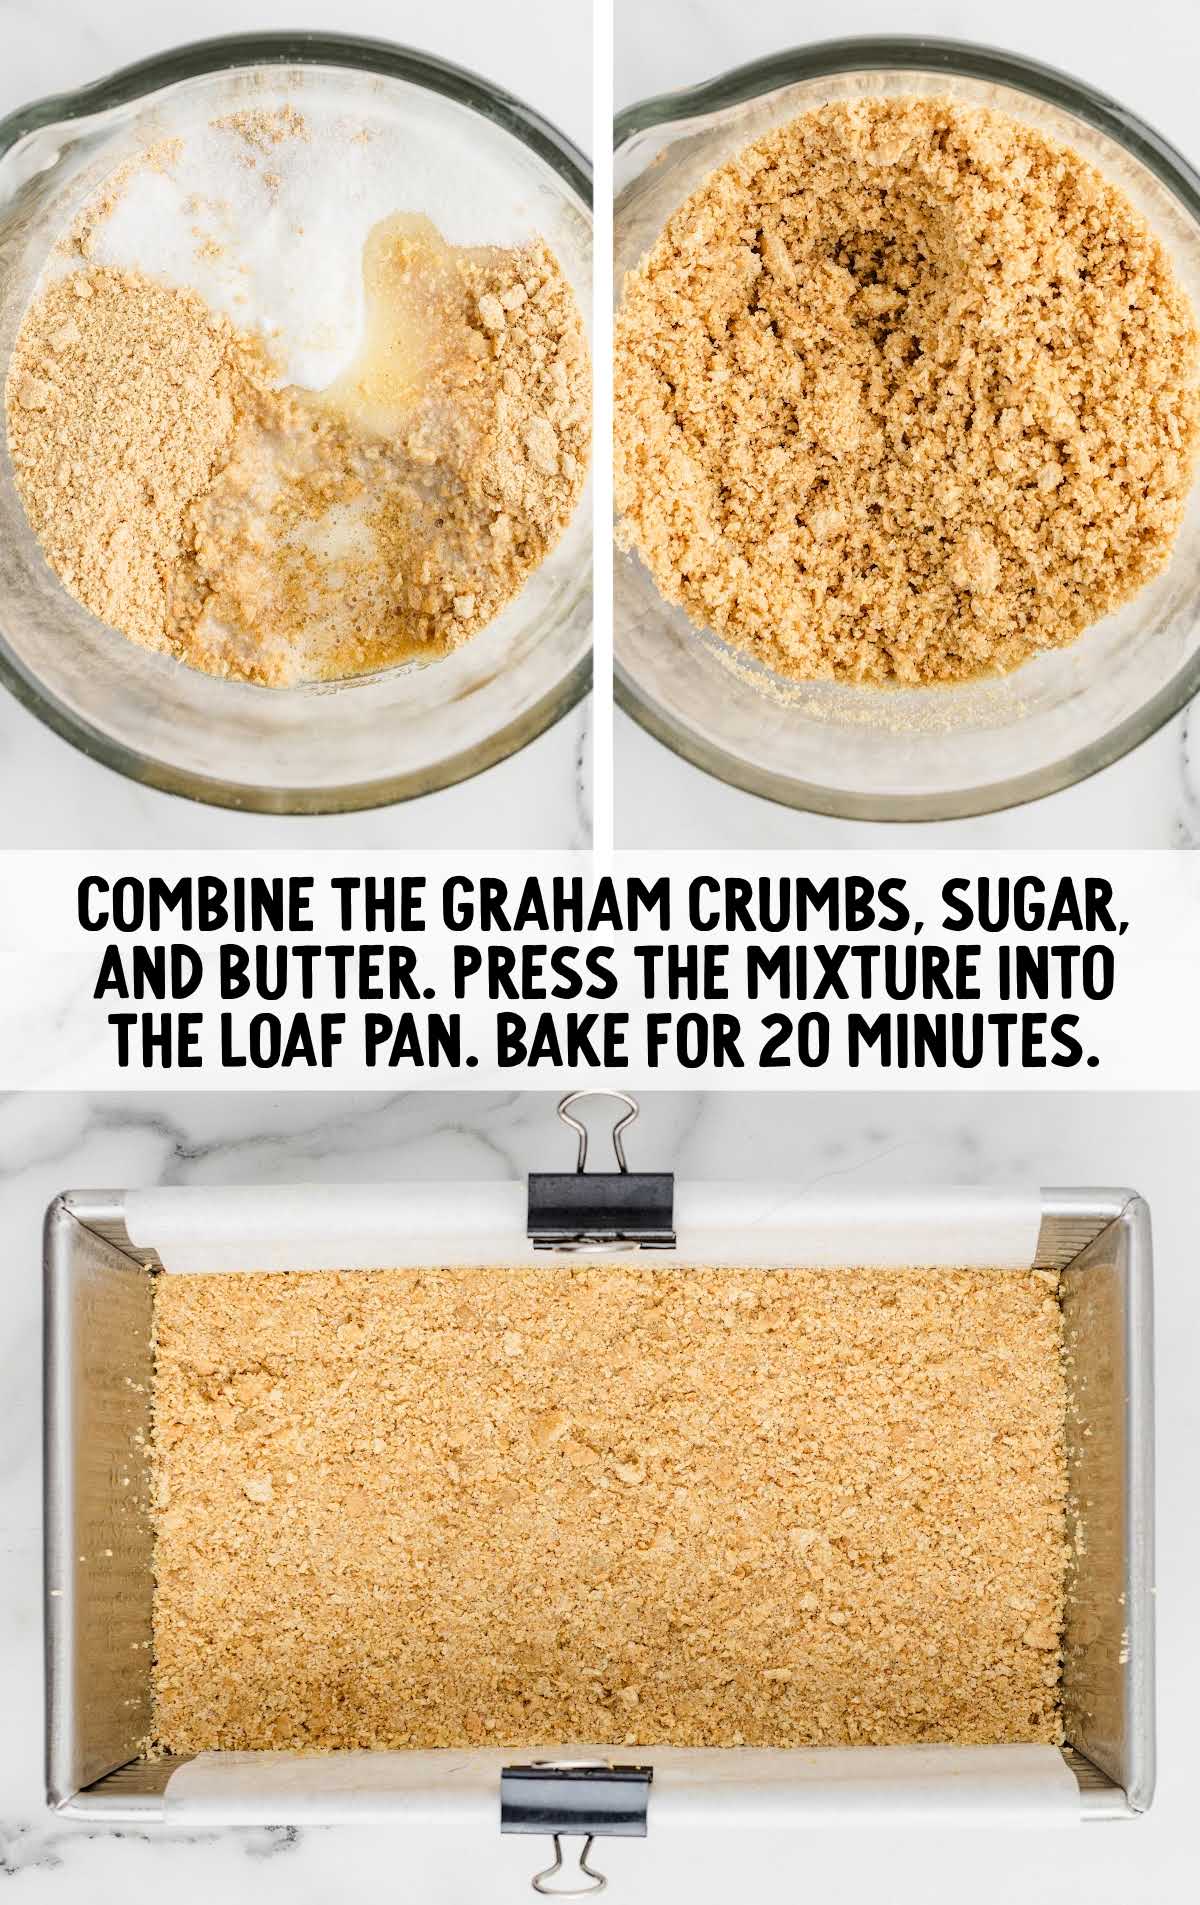
STEP THREE: Press the mixture firmly into the bottom of the prepared loaf pan to form an even crust. Bake in the preheated oven for 20 minutes until it sets and becomes slightly golden brown.
STEP FOUR: While the crust is baking, prepare the cheesecake filling. In a medium-sized mixing bowl, beat the softened cream cheese at medium-low speed until smooth. Gradually add the remaining granulated sugar and continue to beat until well combined and creamy.
STEP FIVE: Add the vanilla extract to the cream cheese mixture and mix well. Then, add the eggs one at a time, beating well after each addition to ensure a smooth mixture. This step is crucial for achieving a silky texture.
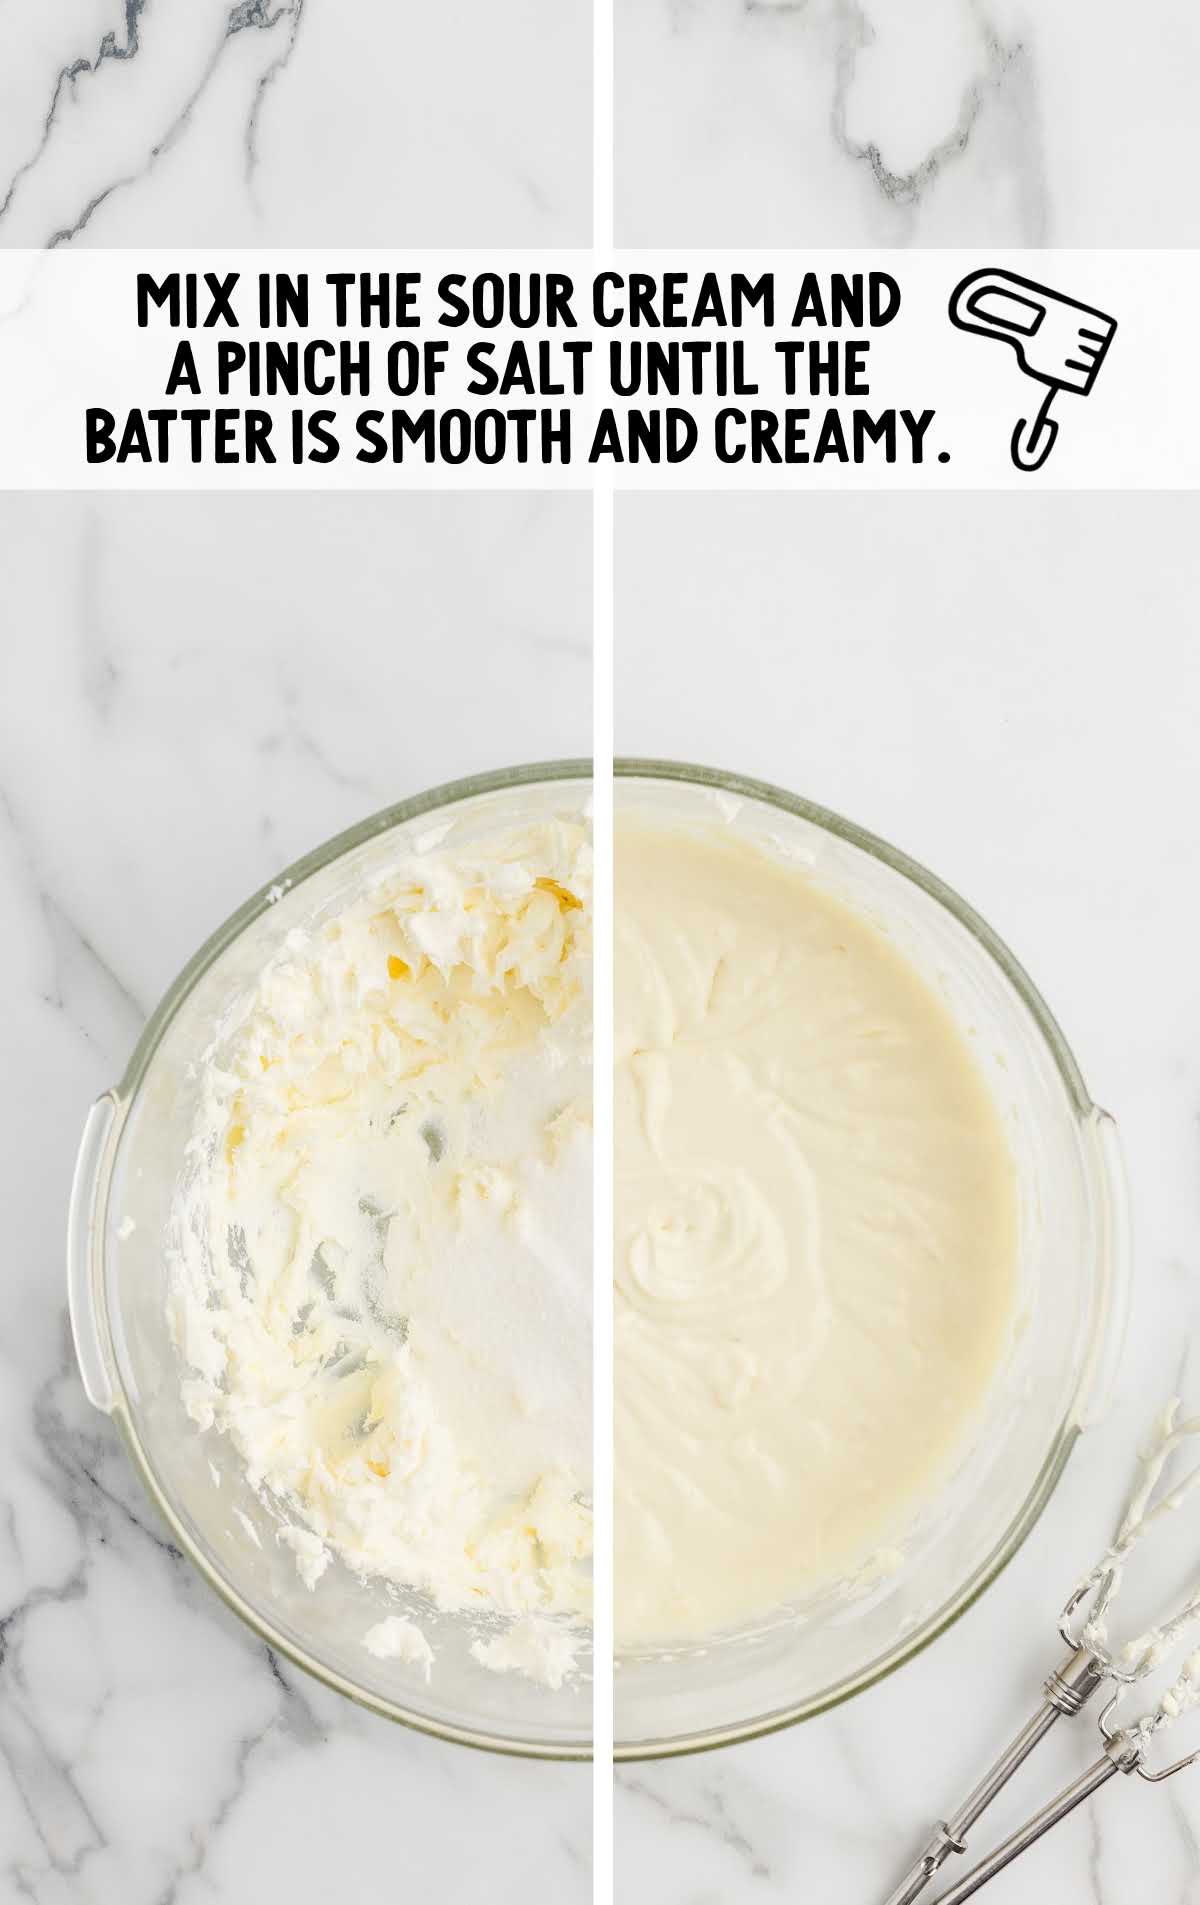
STEP SIX: Mix in the sour cream and a pinch of salt until the batter is smooth and creamy. Make sure there are no lumps in the batter for a perfect texture.
PRO TIP: Continue to scrape down the sides and bottom of the bowl with a rubber spatula throughout the process of making the batter.
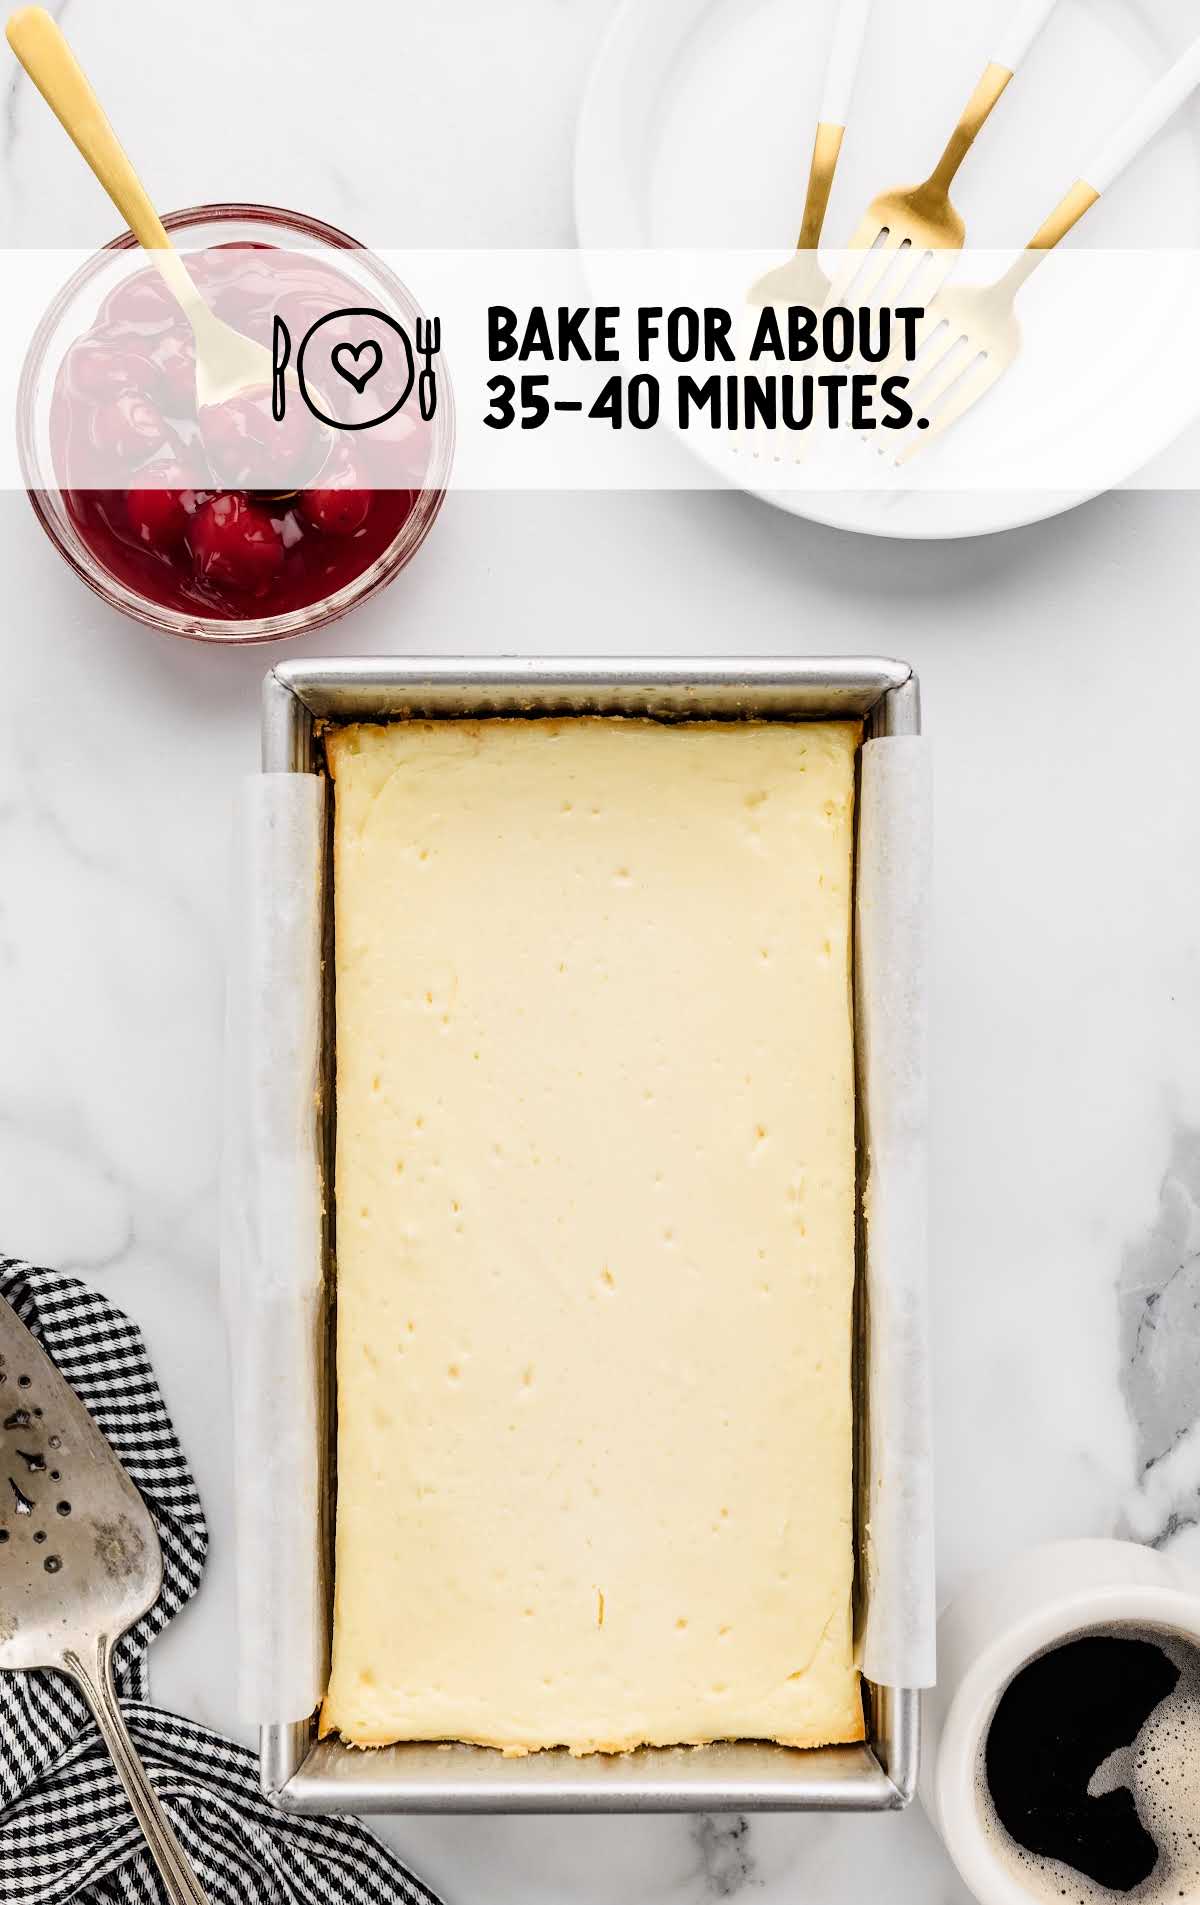
STEP SEVEN: Pour the cheesecake batter over the top of the warm crust in the loaf pan. Smooth the top with a spatula.
STEP EIGHT: Bake in the oven for about 35-40 minutes. The edges should be set while the center will have a slight jiggle.
STEP NINE: Once baking is complete, turn off the oven. Prop the oven door slightly open and allow the cheesecake to rest inside for 30 minutes. This gradual cooling helps prevent cracks on the surface.
STEP TEN: After the initial rest in the oven, remove the cheesecake and let it sit at room temperature for another 30 minutes. This further helps in setting the cheesecake evenly.
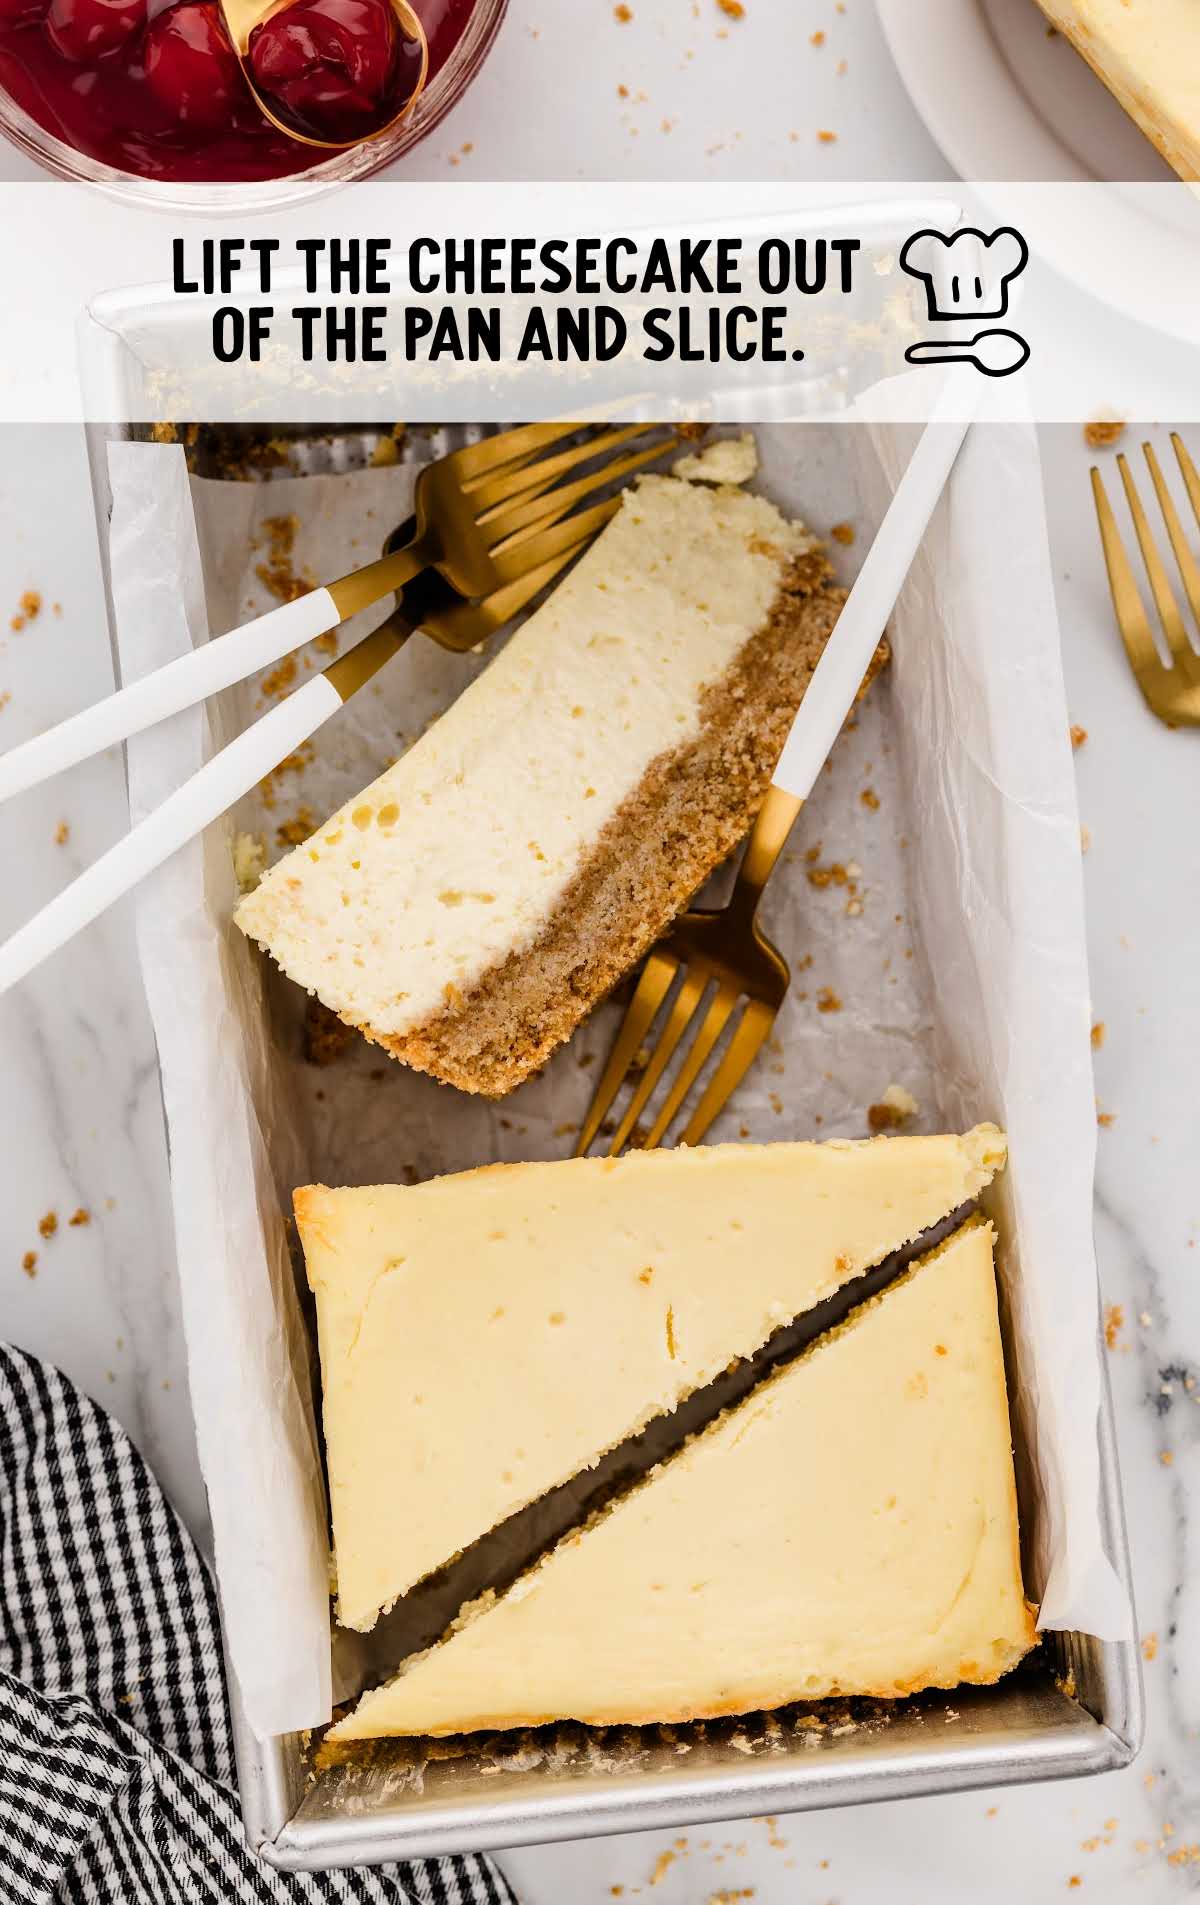
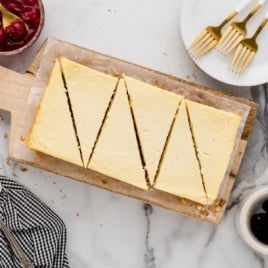
STEP ELEVEN: Transfer the cheesecake to the refrigerator and chill for at least 4 hours or overnight. This chilling period helps the cheesecake to firm up properly and develop its flavors. Remove the cheesecake from the pan by lifting up on the parchment paper, and slice.
Troubleshooting
Here are some expert tips, prepared with love from our test kitchen, to help ensure that your cheesecake comes out of the oven as creamy and delicious as you hope!
- It’s absolutely critical that your cream cheese is fully softened before you start making your batter. Otherwise, your batter will be lumpy and won’t get airy and fluffy, and your cheesecake will be dense and flat.
- Mix the ingredients at a low to medium speed to avoid incorporating too much air into the batter. Over-mixing can lead to cracks on the surface of the cheesecake.
- When lining the loaf pan with parchment paper, make sure to leave enough overhang on the sides. This makes it easier to lift the cheesecake out of the pan once it’s fully set.
- If your cheesecake begins to get too brown, you can lay a piece of foil over the top of the cheesecake. No need to wrap it tightly around the pan.
- The rest time in the oven isn’t critical, and you can skip it if you need to, however, it’s more likely your cheesecake will develop cracks.
How To Serve Loaf Pan Cheesecake
This may not be a regular-sized cheesecake, but it’s every bit as delicious! Serving it is easy, with its crumbly crust and rich, creamy texture.
Here are some ideas to embellish this tasty dessert:
Classic Presentation: Serve the cheesecake as is, topped with your choice of pie filling, fresh fruit, or a drizzle of caramel sauce. The simple, classic presentation is all you need!
Fruit Topping: Freshly cut fruit such as strawberries, blueberries, or mango slices complement the cheesecake perfectly.
Whipped Cream: A dollop of freshly whipped cream adds a light, airy contrast to the rich cheesecake. For an extra touch, try chocolate whipped cream instead!
Ice Cream: Serve a slice of cheesecake with a scoop of vanilla or peach ice cream on the side.
This cheesecake is a great addition to just about any occasion. It’s lovely as part of a brunch spread with fresh fruit and pastries. It’s wonderful for a small dinner party or Valentine’s Day date night, and fits in well at holiday celebrations.
MORE CHEESECAKE RECIPES
How To Store Loaf Pan Cheesecake
Storing your cheesecake properly will keep it fresh and delicious for days to come. Whether you plan to make it ahead or store leftovers, these tips will help maintain its creamy texture and rich flavor.
MAKE AHEAD: This cheesecake can be made ahead of time, making it perfect for planning. Prepare the cheesecake as instructed, allow it to cool completely, and then cover it tightly with plastic wrap or aluminum foil before storing it in the fridge. It can be made up to two days in advance, or frozen (see below for more instructions).
IN THE FRIDGE: Store your leftover cheesecake in the fridge for up to five days. Make sure it’s tightly covered with plastic wrap or aluminum foil to prevent it from drying out. For the best taste and texture, let it sit at room temperature for about 15-20 minutes before serving again.
IN THE FREEZER: To freeze, wrap the cheesecake tightly in plastic wrap, then in aluminum foil, or place it in an airtight container. It can be stored in the freezer for up to two months. When ready to enjoy, thaw it in the fridge overnight.
Why This Cheesecake In A Loaf Pan Recipe Is The Best
There’s something undeniably charming about this loaf pan cheesecake, and we’re sure you and your guests are going to love it.
Here are the reasons why this recipe has become a favorite:
Ease of Preparation: This cheesecake recipe is straightforward and doesn’t require any fancy equipment. No water bath necessary!
Perfect for Small Gatherings: Just the right number of slices without the need for a large springform pan.
Rich and Creamy Texture: The combination of cream cheese, sour cream, and a touch of vanilla results in a smooth, creamy texture that melts in your mouth.
Economical: Spend less on fewer ingredients for occasions when you don’t need a large dessert.
No-Fail Recipe: The detailed instructions and simple ingredients make this recipe foolproof, even if you’re new to baking.
Frequently Asked Questions
Absolutely! You can mix in a swirl of fruit puree, chocolate chips, or even a bit of your favorite liqueur to customize the flavor.
The edges should be set, and the center should have a slight jiggle. It will firm up as it cools.
Yes, you can make the cheesecake up to two days in advance. Store it in the fridge tightly covered until you’re ready to serve.
A loaf pan or small cake pan makes an ideal pan for cheesecake. A larger cake pan may result in a center that isn’t fully set.
This Cheesecake in a Loaf Pan recipe is an easy and delicious way to enjoy a classic dessert with minimal effort. Perfect for any occasion, it’s sure to be a hit with everyone who tries it.
Our Favorite Cheesecake-Inspired Recipes
- Cherry Cheesecake Tacos
- Cherry Cheesecake Egg Rolls
- Snickerdoodle Cheesecake Bars
- Strawberry Crunch Cheesecake Cones


Cheesecake in a Loaf Pan
Ingredients
For the Crust
- 2 cups graham cracker crumbs
- ¼ cup salted butter, melted
- 3 tablespoons granulated sugar
For the Cheesecake Filling
- 16 ounces cream cheese, softened (two 453-gram packages)
- ½ cup granulated sugar
- 1 teaspoon vanilla extract
- 2 large eggs
- ½ cup sour cream
- 1 pinch salt
- your choice of fruit topping, for garnish
Instructions
- Preheat your oven to 325°F (163°C). Line and grease an 8 ½ x 4 ½ loaf pan with parchment paper, leaving some overhang for easy removal.
- In a small bowl, combine the graham cracker crumbs, granulated sugar, and melted butter. Press the mixture into the bottom of the loaf pan to form the crust. Bake for 20 minutes.
- In a medium-sized mixing bowl, beat the cream cheese at medium-low speed until smooth. Add the sugar and continue to beat until well combined.
- Add the vanilla extract and eggs one at a time, beating well after each addition.
- Mix in the sour cream and a pinch of salt until the batter is smooth and creamy.
- Pour the batter over the crust in the loaf pan.
- Bake for about 35-40 minutes or until the edges are set and the center has a slight jiggle. Turn the oven off. Prop the oven door slightly open and allow the cheesecake to rest in the oven for 30 minutes. Remove the cheesecake from the oven and let it rest at room temperature for 30 minutes. Chill the cheesecake in the refrigerator for 4 hours or overnight.
- Once chilled, use the parchment overhang to lift the cheesecake out of the pan and slice.
Notes
- It’s absolutely critical that your cream cheese is fully softened before you start making your batter. Otherwise, your batter will be lumpy and won’t get airy and fluffy, and your cheesecake will be dense and flat.
- Mix the ingredients at a low to medium speed to avoid incorporating too much air into the batter. Over-mixing can lead to cracks on the surface of the cheesecake.
- When lining the loaf pan with parchment paper, make sure to leave enough overhang on the sides. This makes it easier to lift the cheesecake out of the pan once it’s fully set.
- If your cheesecake begins to get too brown, you can lay a piece of foil over the top of the cheesecake. No need to wrap it tightly around the pan.
- The rest time in the oven isn’t critical, and you can skip it if you need to, however, it’s more likely your cheesecake will develop cracks.
Nutrition


Leave a Comment