Pop Tart pie is the ultimate mashup of childhood memories and classic pie-making. This pie mimics the charm of homemade pop tarts with a sweet strawberry jam filling layered inside a perfectly flaky crust and topped with a drizzle of sugary glaze. This recipe offers a homemade version of the iconic toaster pastry, but elevated into a dessert that’s easy to make and even easier to love. Our step-by-step guide walks you through every detail, from crafting the glossy strawberry filling to achieving that beautifully crisp golden brown crust.
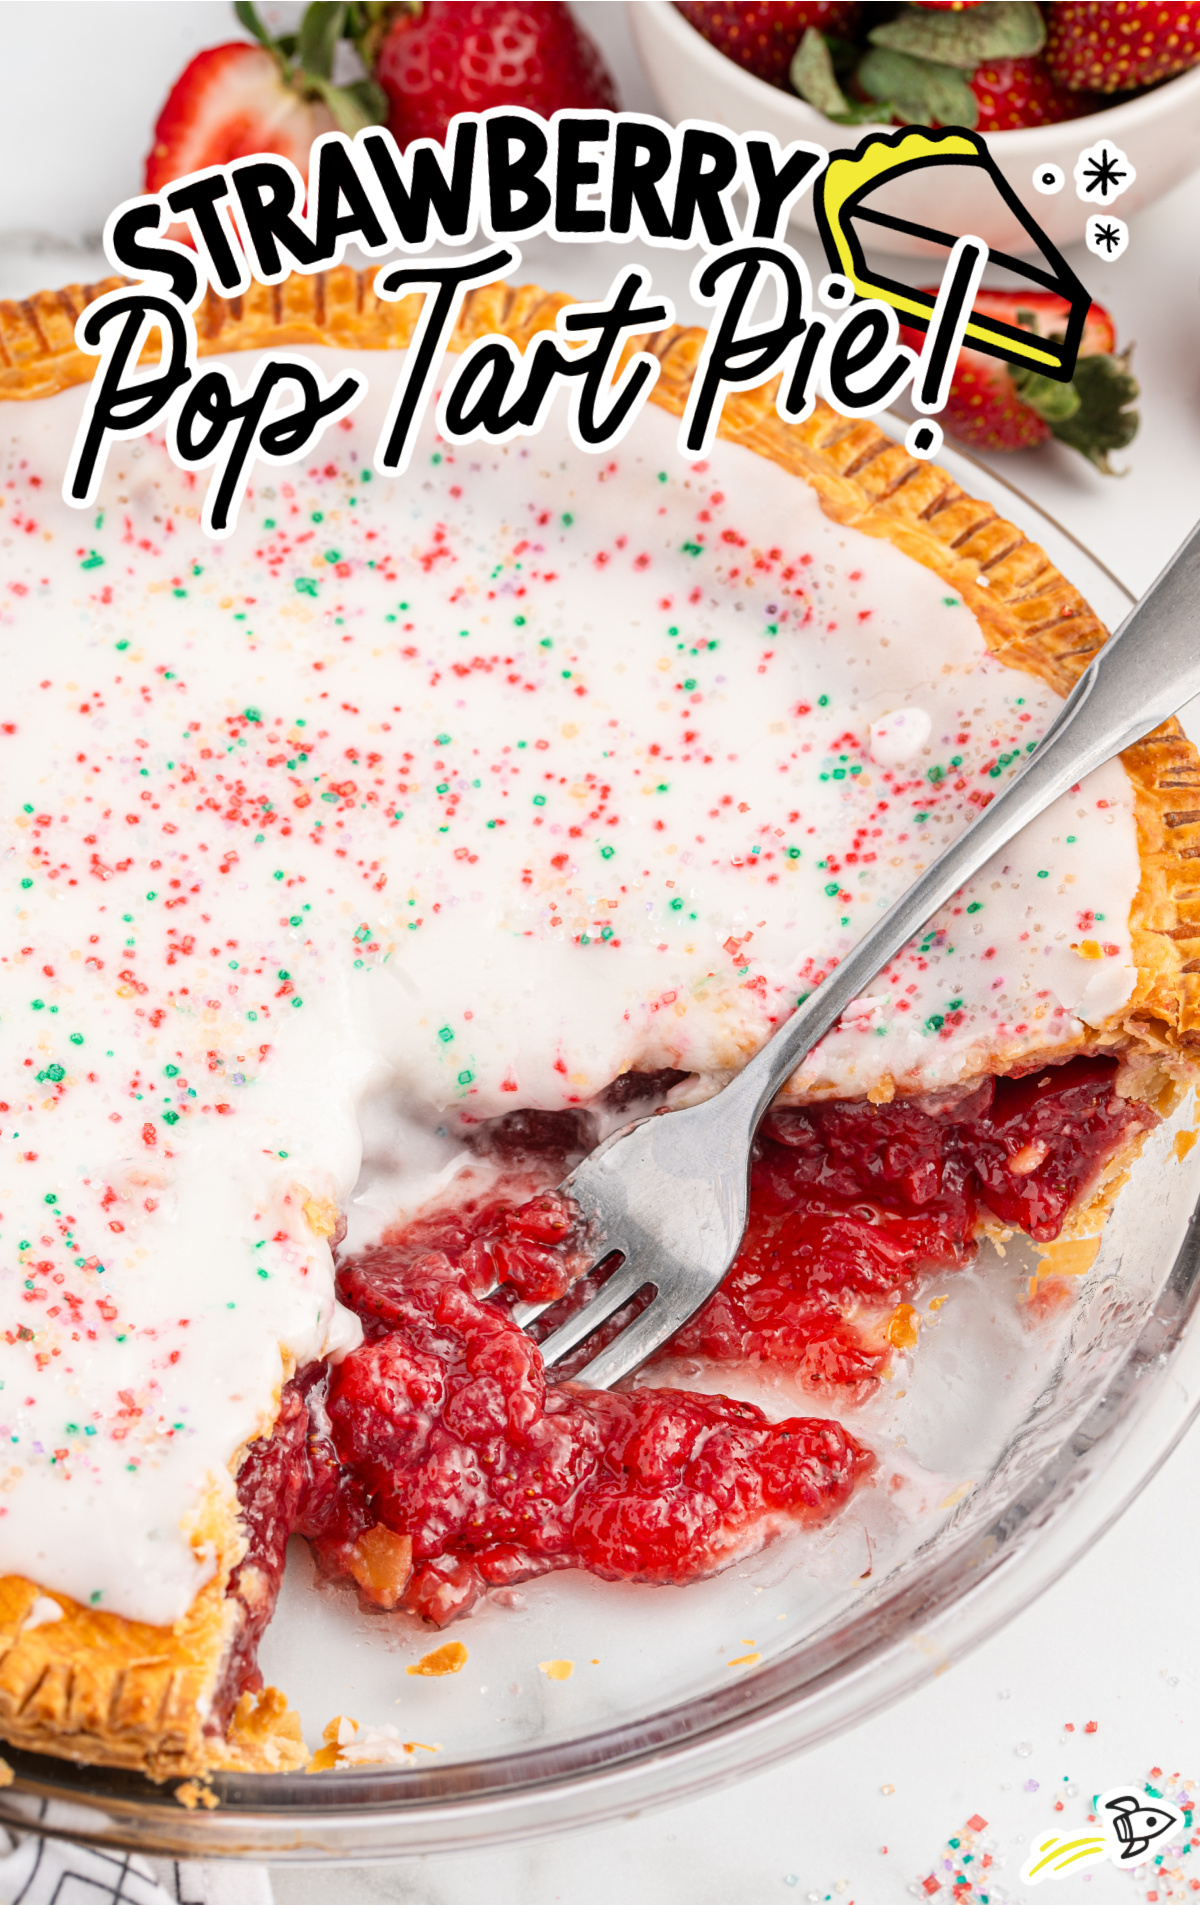
What You Need To Know
- MAIN INGREDIENTS: Fresh strawberries, granulated sugar, cornstarch, fresh lemon juice, vanilla extract, refrigerated pie crusts, large egg, powdered sugar, whole milk, rainbow sprinkles.
- QUICK STEPS: Cook strawberry filling, prepare pie crust, fill crust with cooled strawberry mixture, seal and brush with egg wash, bake until golden brown, cool completely, glaze and decorate with sprinkles.
- TOTAL TIME AND YIELD: 6 hours 30 minutes, 8-10 servings
Pop Tart Pie Ingredients
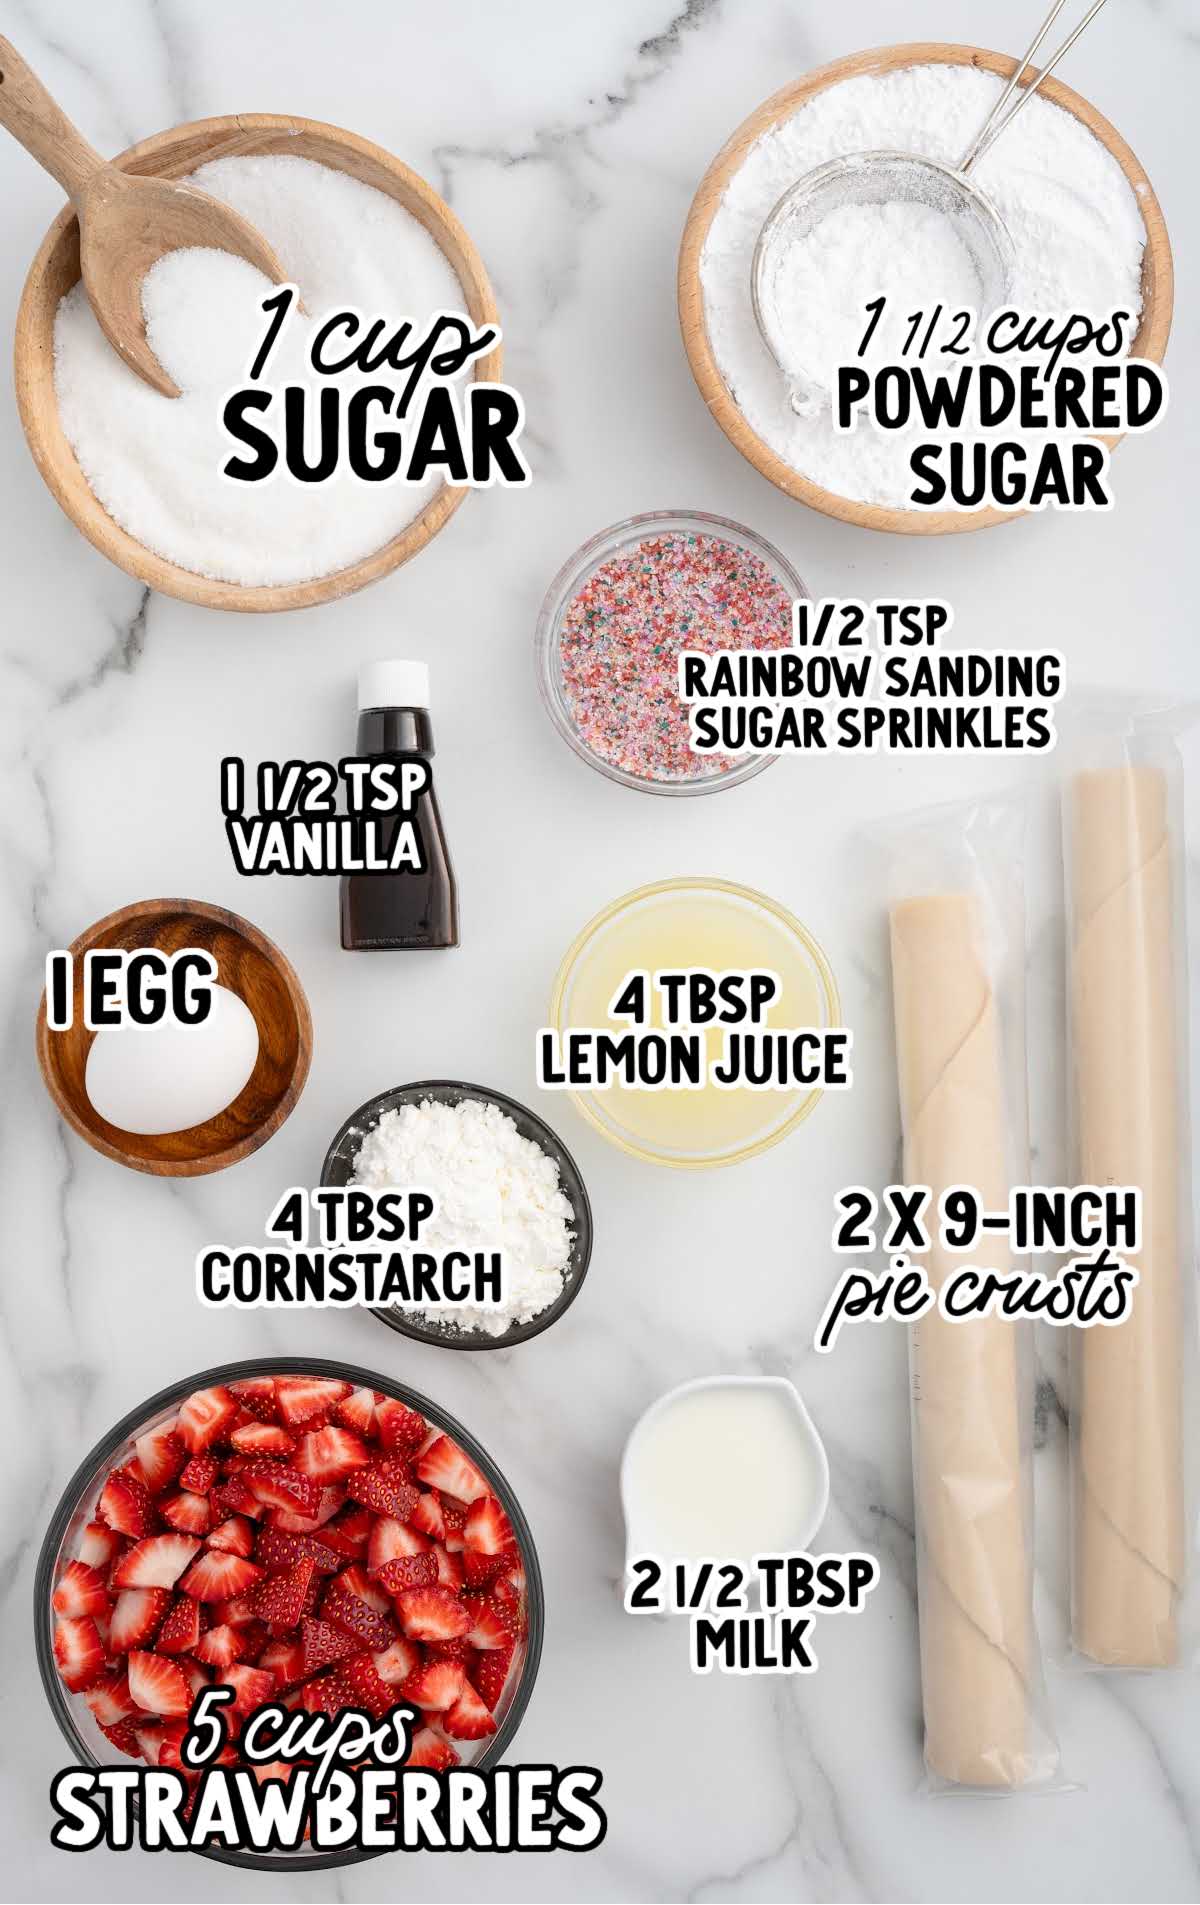
Here’s everything you’ll need to make this dessert:
- Fresh strawberries: Hulled and diced for a fresh, juicy filling.
- Granulated sugar: Sweetens the strawberry mixture to perfection.
- Cornstarch: Thickens the filling for a glossy, jam-like texture.
- Fresh lemon juice: Adds brightness and balances the sweetness.
- Vanilla extract: Enhances the flavor of the strawberry filling.
- Refrigerated pie crusts: Provides convenience while still delivering a flaky, tender base.
- Egg: Used for the egg wash to help seal the crust and create a golden finish.
- Powdered sugar: Sifted for a smooth and creamy glaze.
- Milk: Adjust for the desired glaze consistency.
- Rainbow sanding sugar sprinkles: For a fun and colorful finishing touch.
Frosted Strawberry Pop-Tart Pie Substitutions
Pre-Made Pie Crust: Swap refrigerated pie dough with homemade pie crust for a more traditional option
Powdered Sugar: If confectioner’s sugar isn’t available, you can blend granulated sugar in a food processor until fine.
Vanilla Extract: Almond extract adds a subtle nutty flavor that pairs beautifully with the strawberry filling. Use half the amount to avoid overpowering the dish.
Rainbow Sprinkles: Customize the topping with crushed nuts, toasted coconut, or chocolate shavings for a different texture and flavor.
How To Make Strawberry Pop Tart Pie
STEP ONE: Prepare the Strawberry Filling
In a large sauce pot over medium heat, combine the fresh strawberries and granulated sugar. Stir frequently as the strawberries cook for about ten to twelve minutes. Look for the juices to release and the mixture to begin boiling rapidly. This step is key to building the pie’s bright, sweet filling.
To prevent the filling from sticking or burning, stir continuously, especially as it starts to boil.
STEP TWO: Make the Cornstarch Slurry
In a small bowl, whisk together the fresh lemon juice and cornstarch until fully dissolved. This slurry will thicken the filling, giving it a glossy texture.
Slowly pour the slurry into the boiling strawberries while whisking constantly. Continue cooking for one to two minutes until the filling thickens.
Pro Tip: Avoid lumps by whisking the slurry thoroughly before adding it to the hot mixture.
STEP THREE: Cool the Filling
Transfer the thickened strawberry filling to a large shallow bowl, stir in the vanilla extract, and allow it to cool for approximately 30 minutes. The filling should be warm but not hot when added to the pie crust.
STEP FOUR: Preheat the Oven and Prepare the Pie Dish
Adjust the oven rack to the lower two-thirds position and preheat the oven to 375°F. Place a nine inch pie plate onto a large rimmed baking sheet to catch any potential spills during baking.
STEP FIVE: Prepare the Pie Crusts
Unroll the refrigerated pie crusts according to the package instructions. Line the pie dish with one crust, pressing it gently against the bottom and sides of the dish. Reserve the second crust for the top.
Pro Tip: Let the crusts come to room temperature before unrolling to prevent cracking.
STEP SIX: Brush the Bottom Crust with Egg Wash
Whisk the egg in a small bowl to create the egg wash. Using a pastry brush, coat the entire surface of the bottom crust. This helps seal the crust and prevents the filling from making it soggy. Save the remaining egg wash for the top crust.
STEP SEVEN: Add the Strawberry Filling
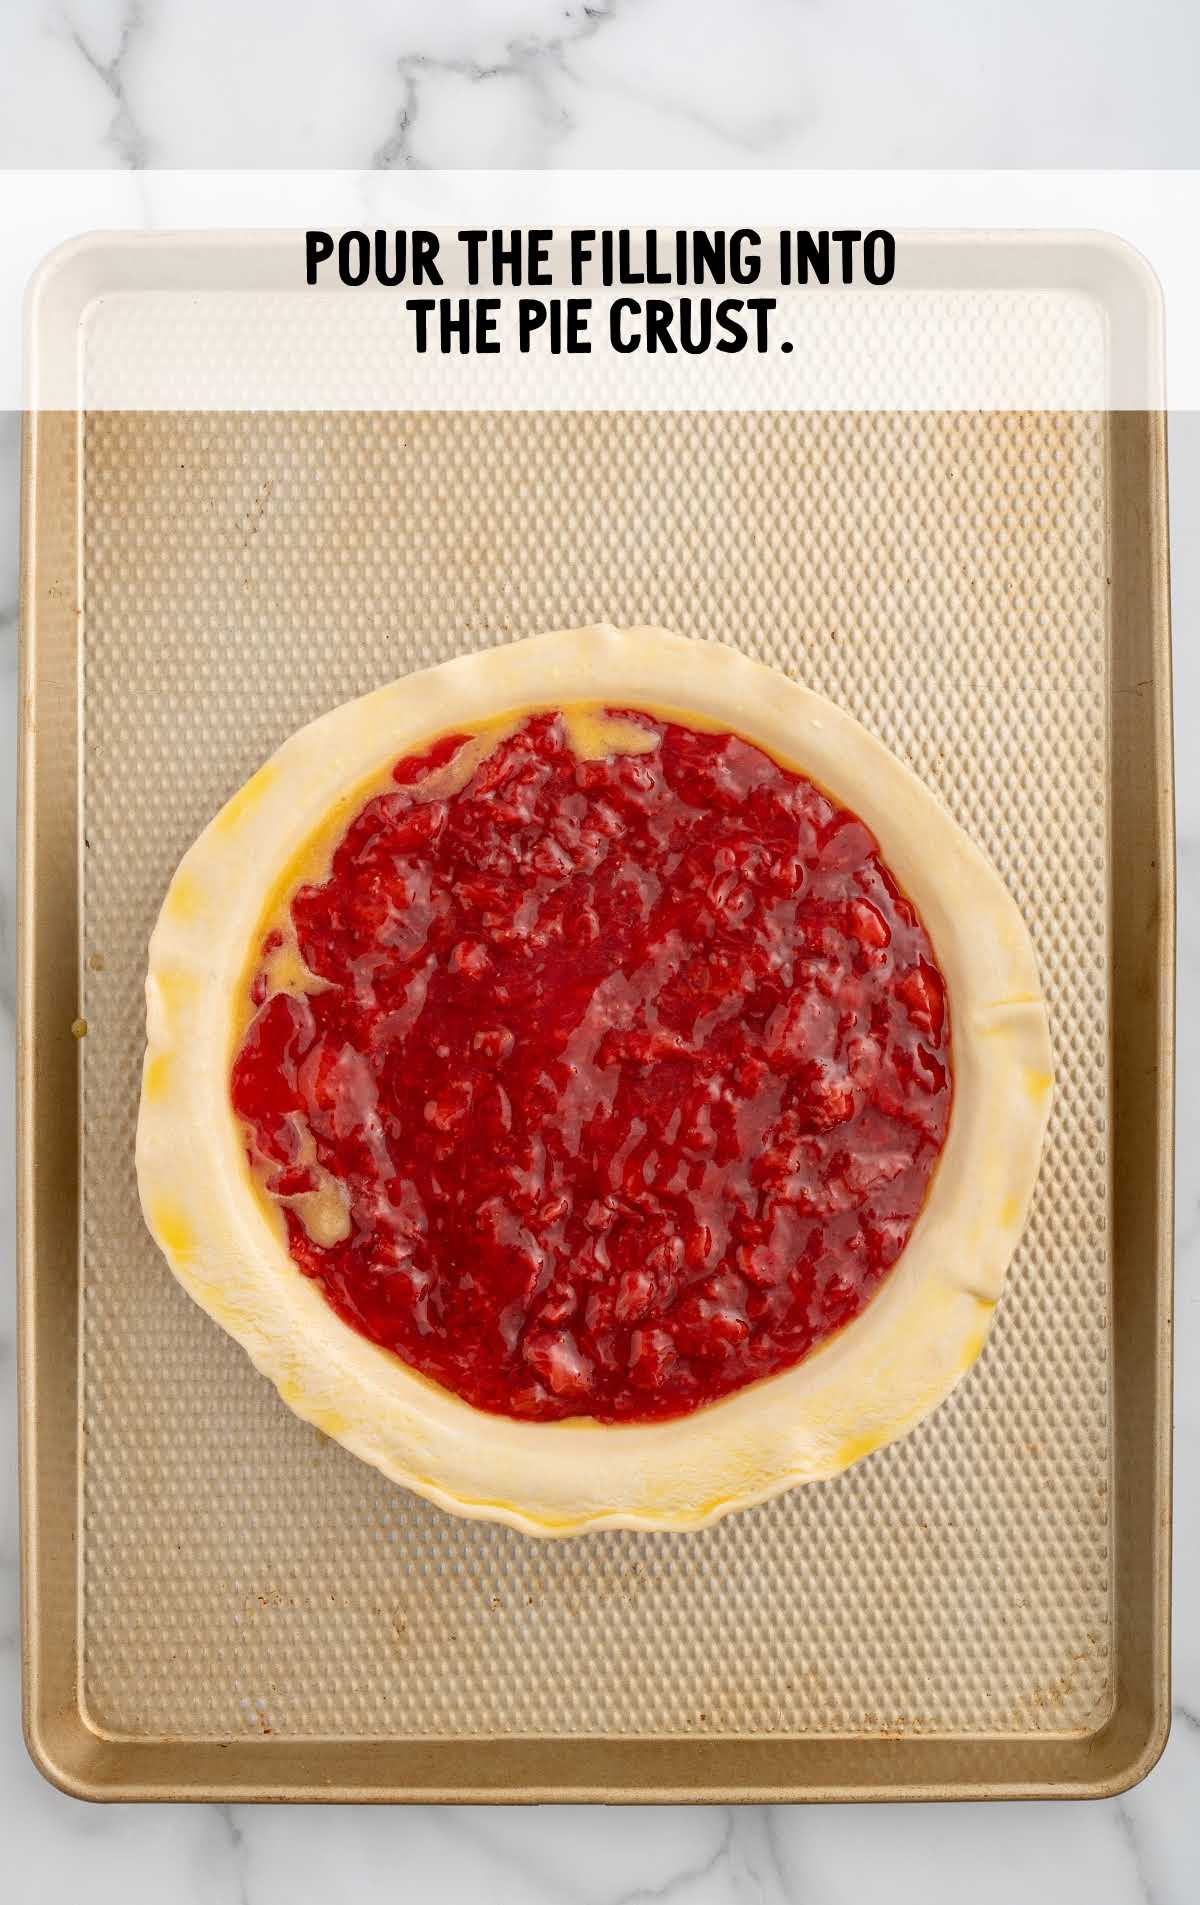
Pour the cooled strawberry filling into the prepared pie crust, spreading it out evenly.
STEP EIGHT: Add the Top Crust
Lay the second pie crust over the filling. Use a sharp knife to trim any excess dough, leaving about ½ inch of overhang. Crimp the edges together using the tines of a large fork to seal the crusts.
STEP NINE: Finish the Top Crust
Brush the top crust with the remaining egg wash, ensuring an even coat for a golden brown finish. Cut four 1-inch slits into the top crust to allow steam to escape during baking.
STEP TEN: Bake the Pie
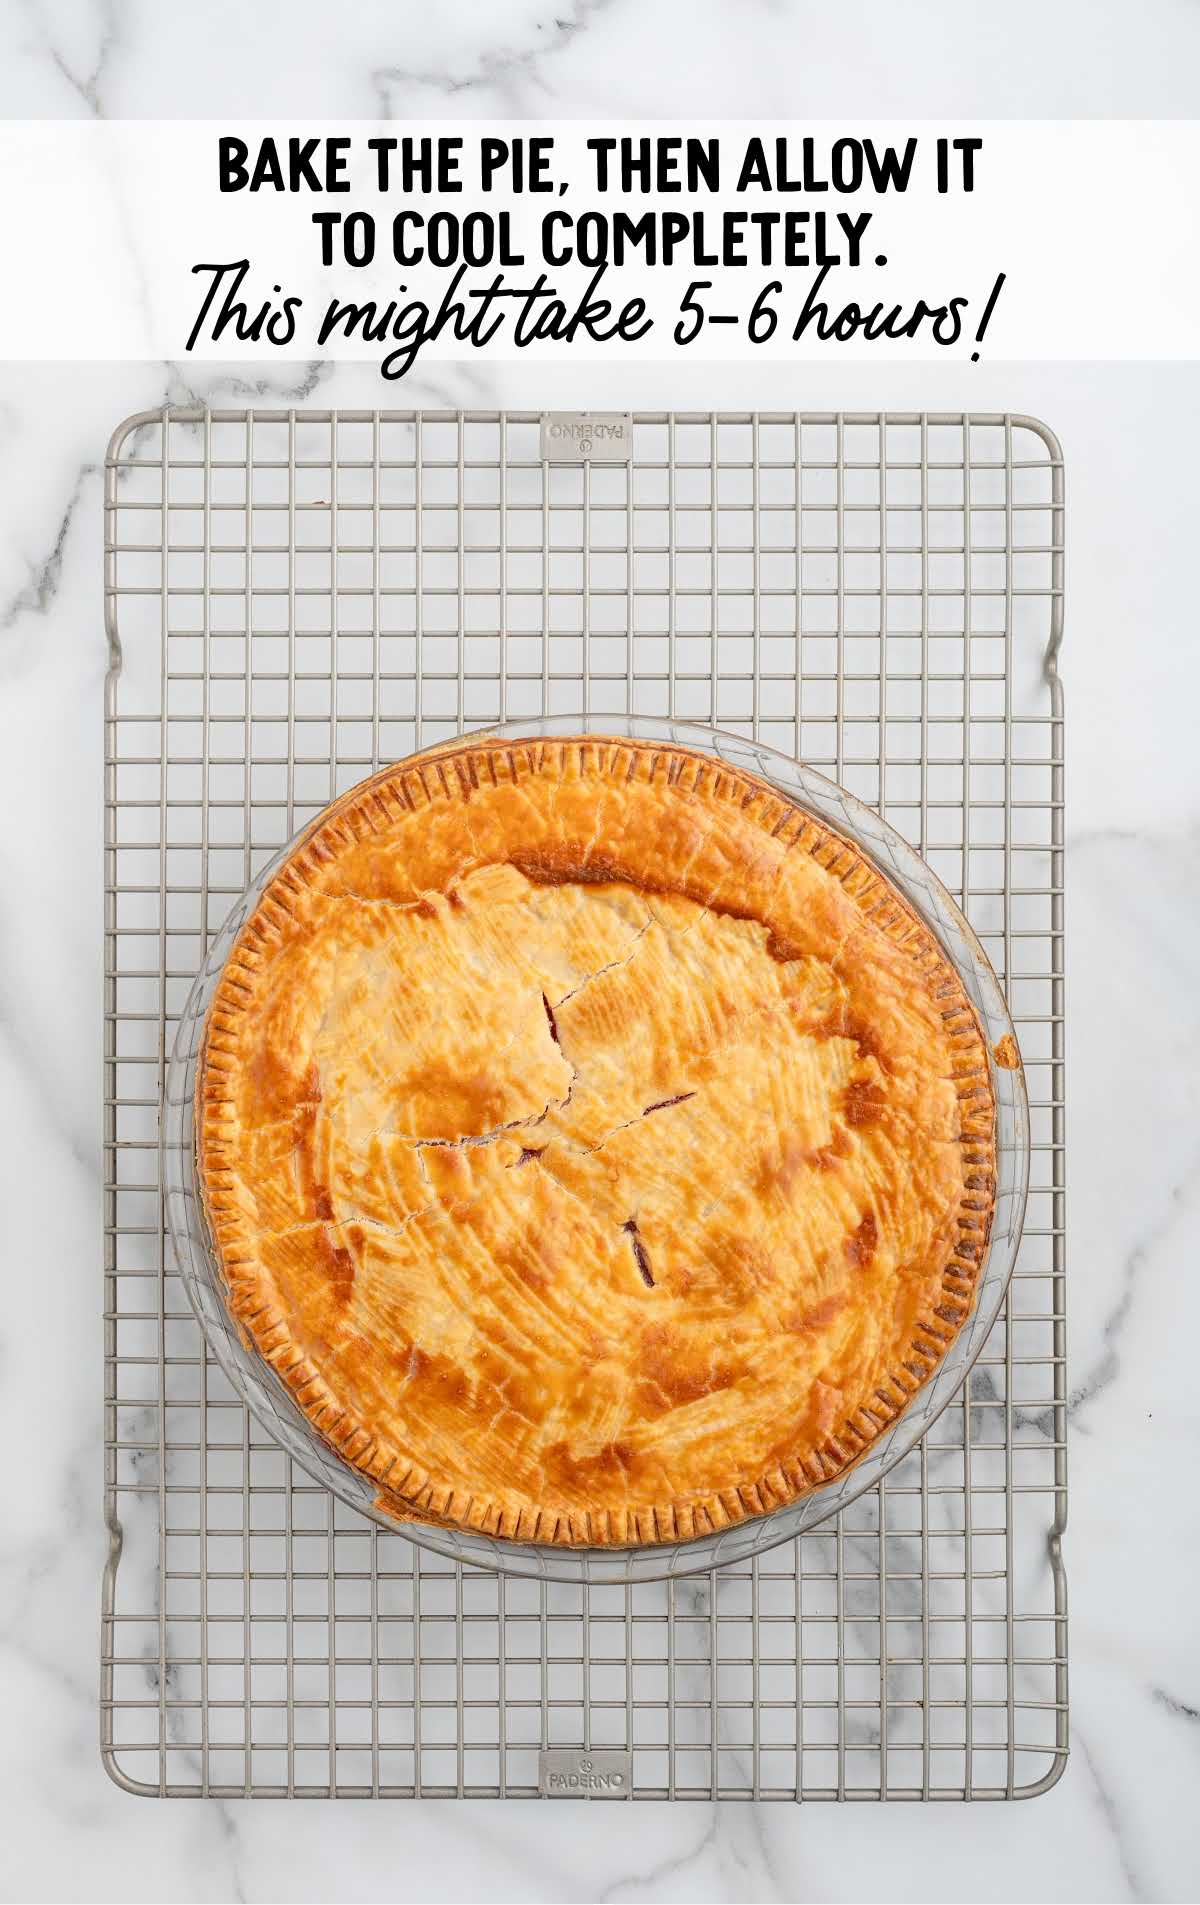
Bake the pie in the preheated oven for 40-45 minutes, or until the crust is golden and firm. Let the pie cool on a cooling rack for five to six hours, or until it’s completely cool to the touch.
STEP ELEVEN: Prepare and Add the Glaze
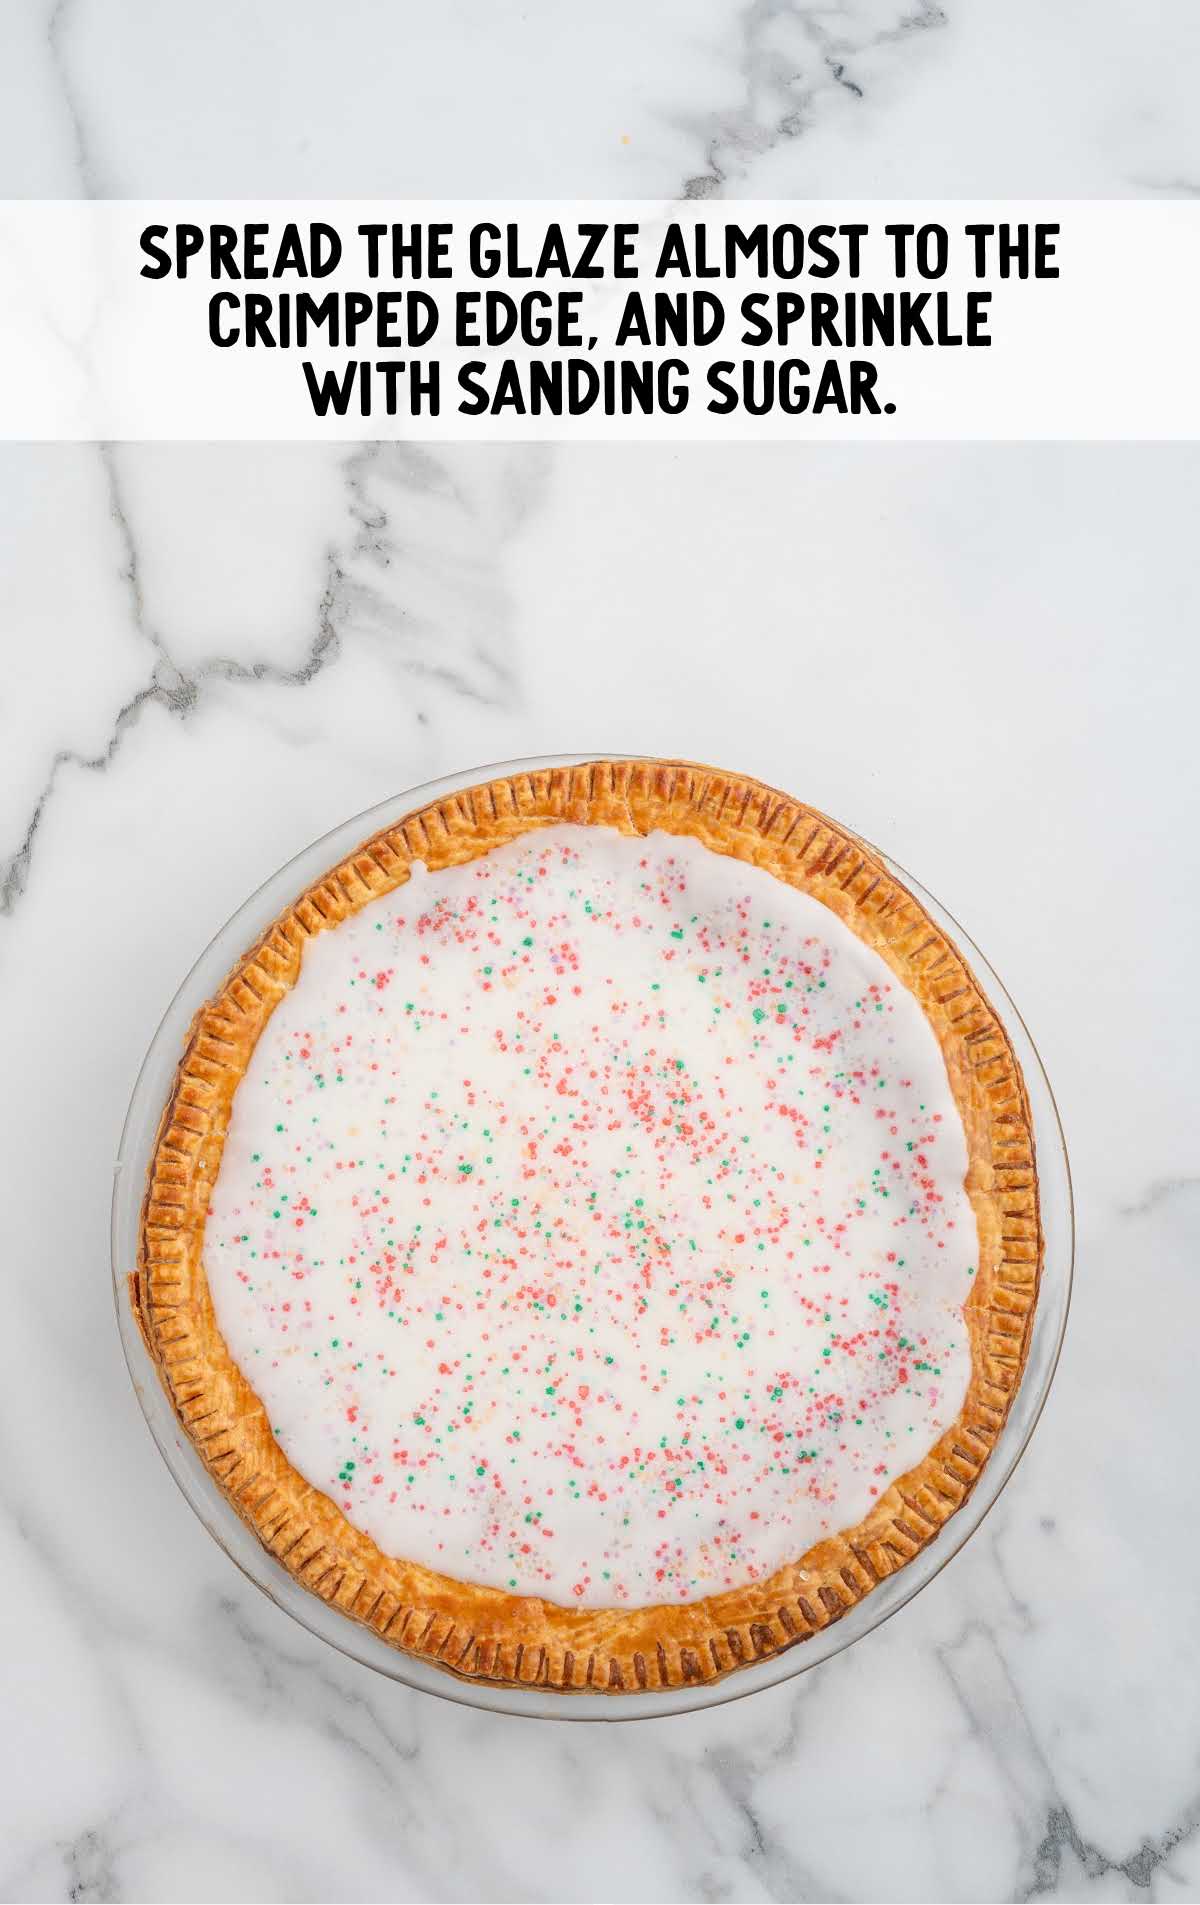
In a medium bowl, whisk together powdered sugar, milk, and vanilla extract until smooth. Spread the glaze evenly over the cooled pie, leaving the crimped edges visible.
Sprinkle with rainbow sanding sugar for a fun, colorful finish. Allow the glaze to set for at least 30 minutes before slicing.
Common Issues and Solutions
Problem: The filling is too runny after cooking.
Solution: Make sure to cook the filling until it thickens and turns glossy. Whisk the cornstarch slurry thoroughly before adding it, and cook for an additional minute if needed.
Problem: The pie crust cracks when unrolled.
Solution: Let the refrigerated pie crust come to room temperature before unrolling to prevent cracking. If it does crack, press the edges back together gently.
Problem: The bottom crust becomes soggy after baking.
Solution: Brush the bottom crust with egg wash before adding the filling. This creates a barrier that helps keep it crisp during baking.
Problem: The filling leaks out of the edges of the pie during baking.
Solution: Crimp the edges of the crust securely with a large fork and avoid overfilling the pie. Cutting steam vents in the top crust will also help prevent leaks.
Problem: The glaze is too runny or too thick.
Solution: Adjust the glaze consistency by adding milk one teaspoon at a time if it’s too thick or more powdered sugar if it’s too runny.
Problem: The pie burns on the edges before the center is cooked.
Solution: Use a baking sheet lines with parchment paper and cover the edges of the pie with foil halfway through baking to prevent over-browning.
Problem: The glaze doesn’t harden properly.
Solution: Let the pie cool completely on a wire rack before adding the glaze, and give it at least 30 minutes to set at room temperature.
How To Serve
Here are some serving suggestions to pair with your pop tart pie that can round out your dessert table or add variety to the occasion:
- Vanilla Ice Cream: A scoop of creamy vanilla ice cream complements the sweet and fruity flavors of the pie while adding a cool and smooth texture.
- Whipped Cream: Add a dollop of freshly whipped cream for a light and airy topping that balances the sweetness of the glaze.
- Fresh Berries: Serve alongside a mix of fresh berries like blueberries or raspberries for a colorful and tart contrast to the pie’s strawberry filling.
How To Store This Pop-Tart Pie
Properly storing your pop tart pie ensures it stays fresh and maintains its delicious texture. Whether you’re making it ahead for an event or saving leftovers, follow these guidelines to keep the pie tasting great.
MAKE AHEAD: This pie can be made a day in advance. Bake and cool it completely, then store it at room temperature or in the fridge without the glaze. Add the glaze and sprinkles just before serving for the best texture and presentation.
IN THE FRIDGE: Store the pie in an airtight container or cover it tightly with plastic wrap. It will keep well in the refrigerator for up to three days. Be sure to let the pie cool completely before storing it to prevent condensation from softening the crust.
IN THE FREEZER: To freeze, wrap the fully cooled pie in several layers of plastic wrap and then in aluminum foil, or place it in a freezer-safe container. Freeze for up to two months. Thaw overnight in the refrigerator before serving. For best results, add the glaze and sprinkles after thawing.
REHEATING: To reheat individual slices, use a microwave in ten second increments until warm, though this may slightly soften the crust. For a crisper crust, warm the pie in an oven preheated to 350°F for ten minutes. If reheating from frozen, let the pie thaw completely first for even heating.
Pop Tart Pie Frequently Asked Questions
If you don’t have a pastry brush, you can use a clean paper towel dipped in the egg wash or the back of a spoon to spread it evenly over the crust.
No, the crust doesn’t need to be prebaked for this recipe. The filling is thick enough that it won’t make the crust soggy during baking.
Rainbow sanding sugar is ideal, but you can also use other small, colorful sprinkles. Avoid large or heavy sprinkles, as they may not stick well to the glaze.
Use a sharp knife dipped in hot water and wiped clean between each slice. This helps cut through the crust and filling smoothly for neat slices.
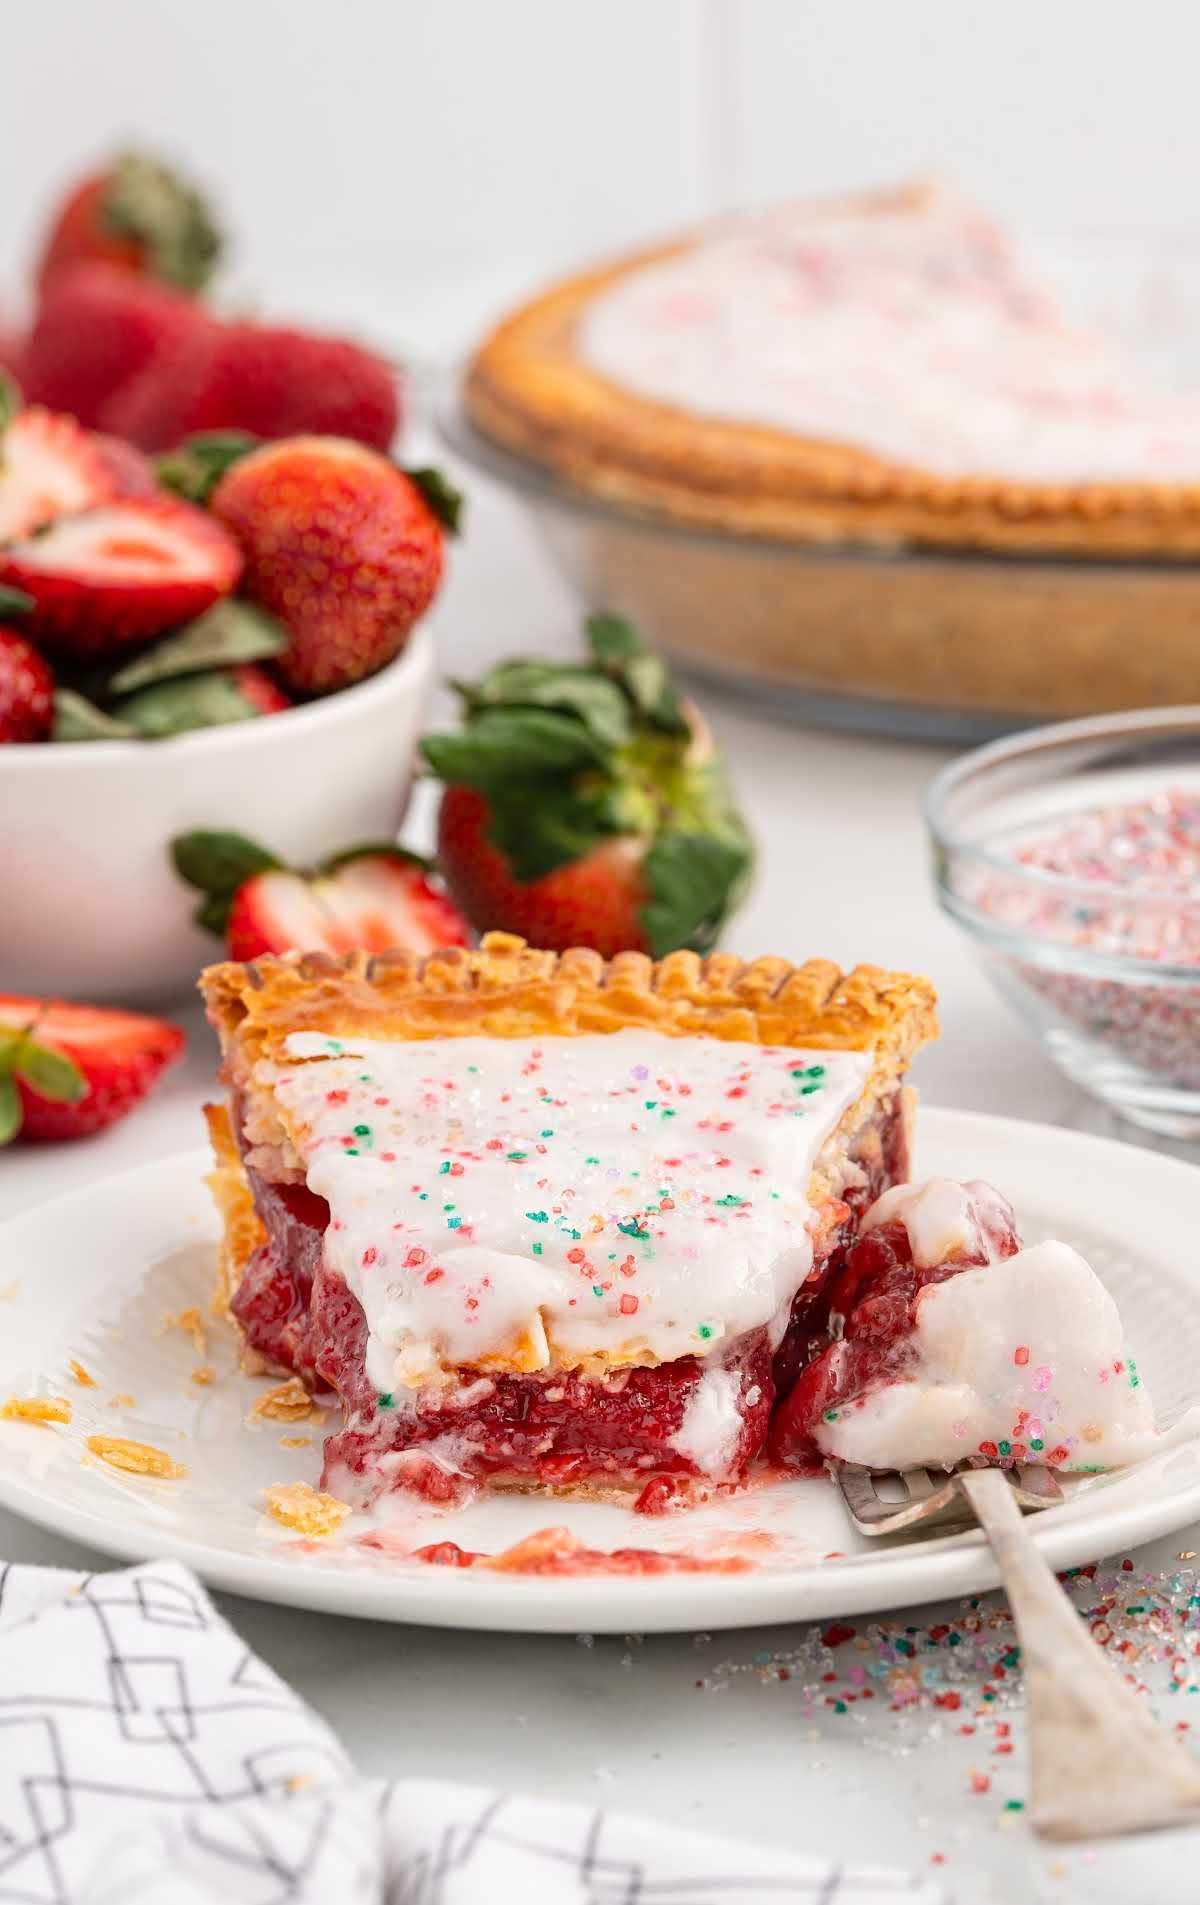
This pop tart pie is the perfect mix of nostalgic charm for strawberry pop-tarts and homemade simplicity, with a buttery crust, vibrant strawberry filling, and sweet glaze that’s easy to love. Whether it’s for a special occasion or just a fun dessert to share, this recipe brings fresh, approachable flavor to your table.
Pop Tart Pie
Ingredients
Pie
- 5 cups fresh strawberries, hulled and cut into small dice pieces (approximately 1 ½ pounds)
- 1 cup granulated sugar
- 4 tablespoons cornstarch
- 4 tablespoons fresh lemon juice
- 1 teaspoon vanilla extract
- 14.1 ounces refrigerated pie crusts, thawed according to package directions (Pillsbury brand – 2 (9 inch) crusts per box)
- 1 large egg, room temperature
Glaze
- 1 ½ cups powdered sugar, sifted
- 2 to 2 ½ tablespoons whole milk, start with 2 tablespoons then add more if needed to achieve desired consistency
- ½ teaspoon vanilla extract
- ½ teaspoon rainbow sanding sugar sprinkles
Instructions
- To a large sauce pot (4 quart), over medium heat, add the fresh diced strawberries and granulated sugar. Cook the strawberries for 10-12 minutes or until most of their juices have been released and the liquids start to rapidly boil. Be sure to stir often to avoid the liquids from burning or bubbling over.
- To a small bowl, whisk together the fresh lemon juice and cornstarch until smooth and all the cornstarch has dissolved completely. This will create a slurry to thicken the strawberry filling even more.
- While whisking constantly, slowly pour in the cornstarch slurry to the boiling strawberries and cook for another 1-2 minutes or until the strawberry filling is thick and glossy. Do not stop whisking to ensure that no lumps form from the added cornstarch slurry. Remove the cooked strawberry filling from the heat, stir in the vanilla extract, then transfer the strawberry filling to a large shallow bowl to allow the filling to cool for approximately 30 minutes before adding to the prepared pie crust. It should be warm to the touch (not too hot) when added to the pie crust.
- Adjust the racks in your oven to allow the pie to be baked in the lower two-thirds of the oven and preheat the oven to 375°F.
- Place a 9 inch pie dish onto a large rimmed baking sheet. The baking sheet will catch any strawberry syrup that may bubble over and will make transporting the pie to, and from, the oven easier.
- Remove the refrigerated pie crusts from their packaging and unroll the pie crusts according to the package instructions. Place one pie crust into the bottom of the 9 inch pie dish pressing the bottom and sides up against the pie dish. The second crust will be used for the top of the pie.
- Whisk the egg in a small bowl to create an egg wash for the pie crust.
- Using a pastry brush, lightly brush the bottom and sides of the pie crust inside the pie dish. Be sure to cover the entire surface of the pie crust as this will help to ensure the strawberry pie filling does not make the crust soggy when baked and will also make sure the top and bottom crust seal well when crimped together. Set aside the remaining egg wash for brushing the top crust.
- Pour the slightly warm strawberry filling into the prepared pie crust.
- Top the pie with the second pie crust. Using a sharp paring knife, trim the excess crust from the outer edges of the pie dish. Using the tines of a fork, crimp the edges of the pie crust to seal the top and bottom crusts together.
- Lightly brush the entire top surface of the strawberry pop tart pie with the egg wash. You can discard any excess egg wash you may have when done.
- Using a sharp paring knife again, cut 4 – 1 inch slits into the top crust to allow steam to escape as the pie bakes. This will help prevent the liquids from bursting out the edges of the crust and bubbling over.
- Bake the strawberry pop tart pie in the lower two-thirds of your oven for 40-45 minutes or until the crust is golden brown. Remove the pie, and the rimmed baking sheet, from the oven and allow the strawberry pop tart pie to cool completely (for a minimum of 5-6 hours), or until it feels fully cool to the touch, at room temperature before adding the glaze.
- Once the pie has cooled completely, make the glaze by adding the sifted powdered sugar, 2 tablespoons whole milk and vanilla extract to a medium bowl and whisk until smooth. The consistency of the glaze should be thick yet still easily spreadable. If needed, you can add more whole milk, 1 teaspoon at a time, until it reaches a thick yet spreadable consistency, similar to melted white chocolate.
- Using a large spoon, slowly add the glaze over the surface of the cooled pie, spreading to an even coating, being careful not to go as far as the outer crimped edges. This is reminiscent of the classic pop tart pastries. Evenly sprinkle the rainbow sanding sugar over the glaze.
- Allow the glaze to harden and set (minimum of 30 minutes) before slicing and serving this strawberry pop tart pie.
Notes
- You can refrigerate your strawberry pop tart pie for 15-20 minutes before slicing to get cleaner cuts.
- Fresh berries are best for this strawberry pop tart pie recipe as frozen berries tend to release more juice into the filling making the baked, and cooled, pie more soupy in texture when sliced and served.
- Be sure that you are measuring your fresh strawberries after they have been hulled and cut into a small dice size to ensure accurate measurements for this recipe.
- You can also substitute 2 tablespoons of the lemon juice with water if you prefer less tartness in the pie filling. The lemon juice adds a nice tart balance to the sweetness of the granulated sugar and strawberries, however if you prefer a little less lemon juice, water works just as well to make the cornstarch slurry.
- The rainbow sanding sugar sprinkles closely mimic the look of the strawberry frosted pop tart pastries we all know and love. However, you can substitute with rainbow nonpareils, rainbow jimmie sprinkles or your favorite style sprinkle as a garnish for the glaze of your strawberry pop tart pie.





Leave a Comment