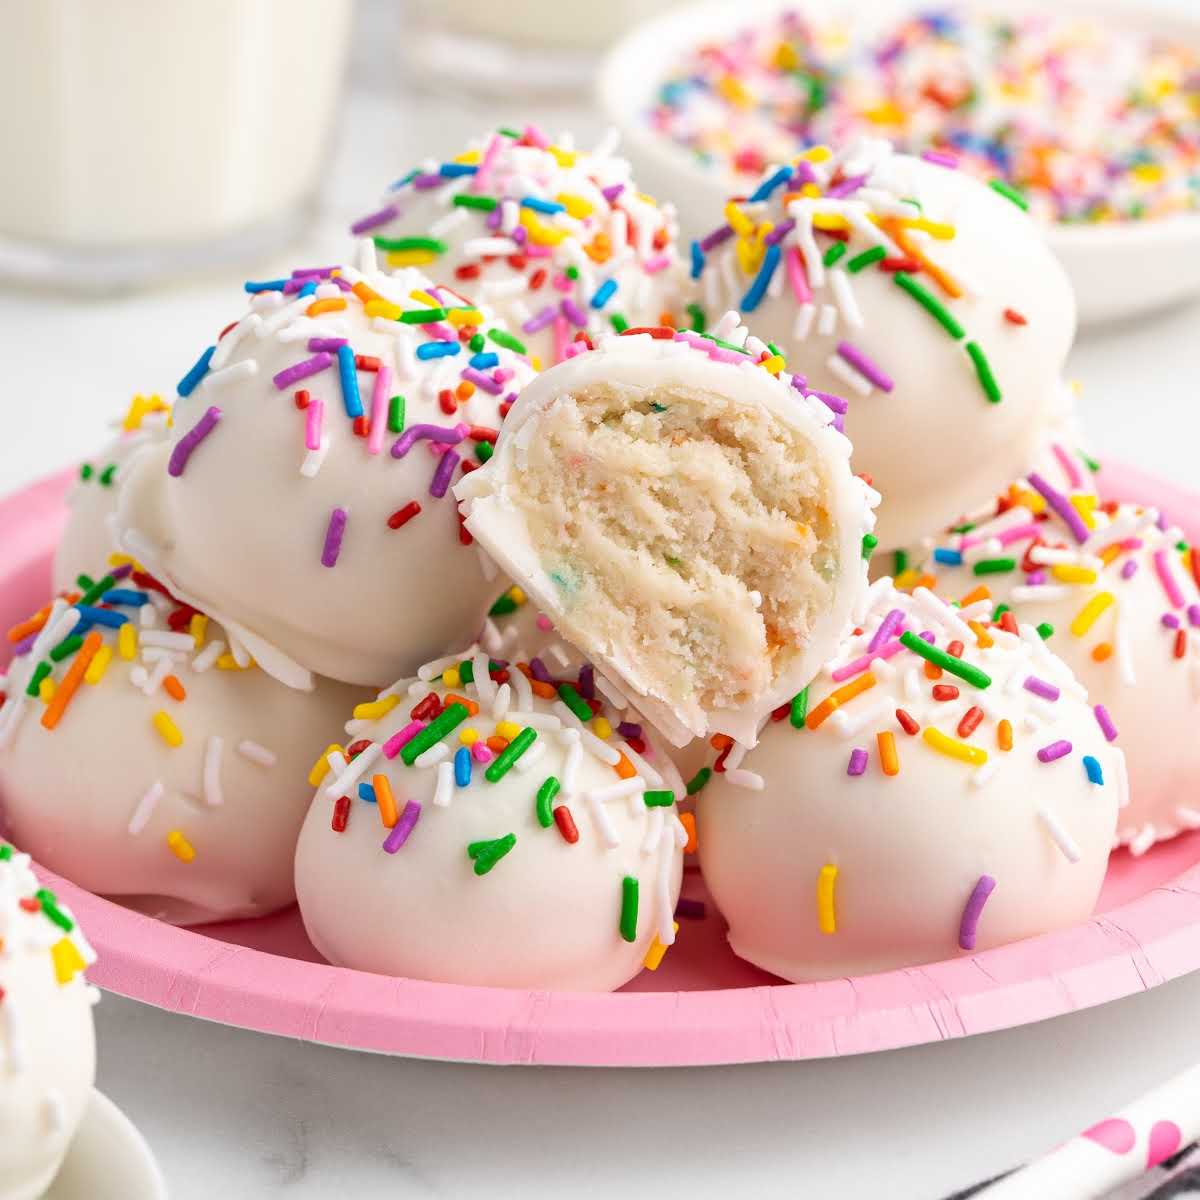


These easy cheesecake truffles are one of those desserts that disappear faster than I can make them. The first time I tested this recipe, I brought a tray out of the fridge, and within 20 minutes, half of them were gone.
The ultimate no bake truffles, this recipe takes all the best parts of cheesecake — creamy filling, sweet flavor, and a little tang — and turn them into perfectly poppable bites.
Ingredients You’ll Need

Ingredient Notes
- We found that almond bark (or melting wafers) gives a smoother, more reliable finish than white chocolate chips, which tend to seize or bloom.
- Using softened cream cheese gives the truffles their signature cheesecake tang and creamy texture. Cold or partially softened cream cheese can result in lumps, making it harder to achieve a smooth filling.
Lessons Learned From Making These Truffles Dozens Of Times
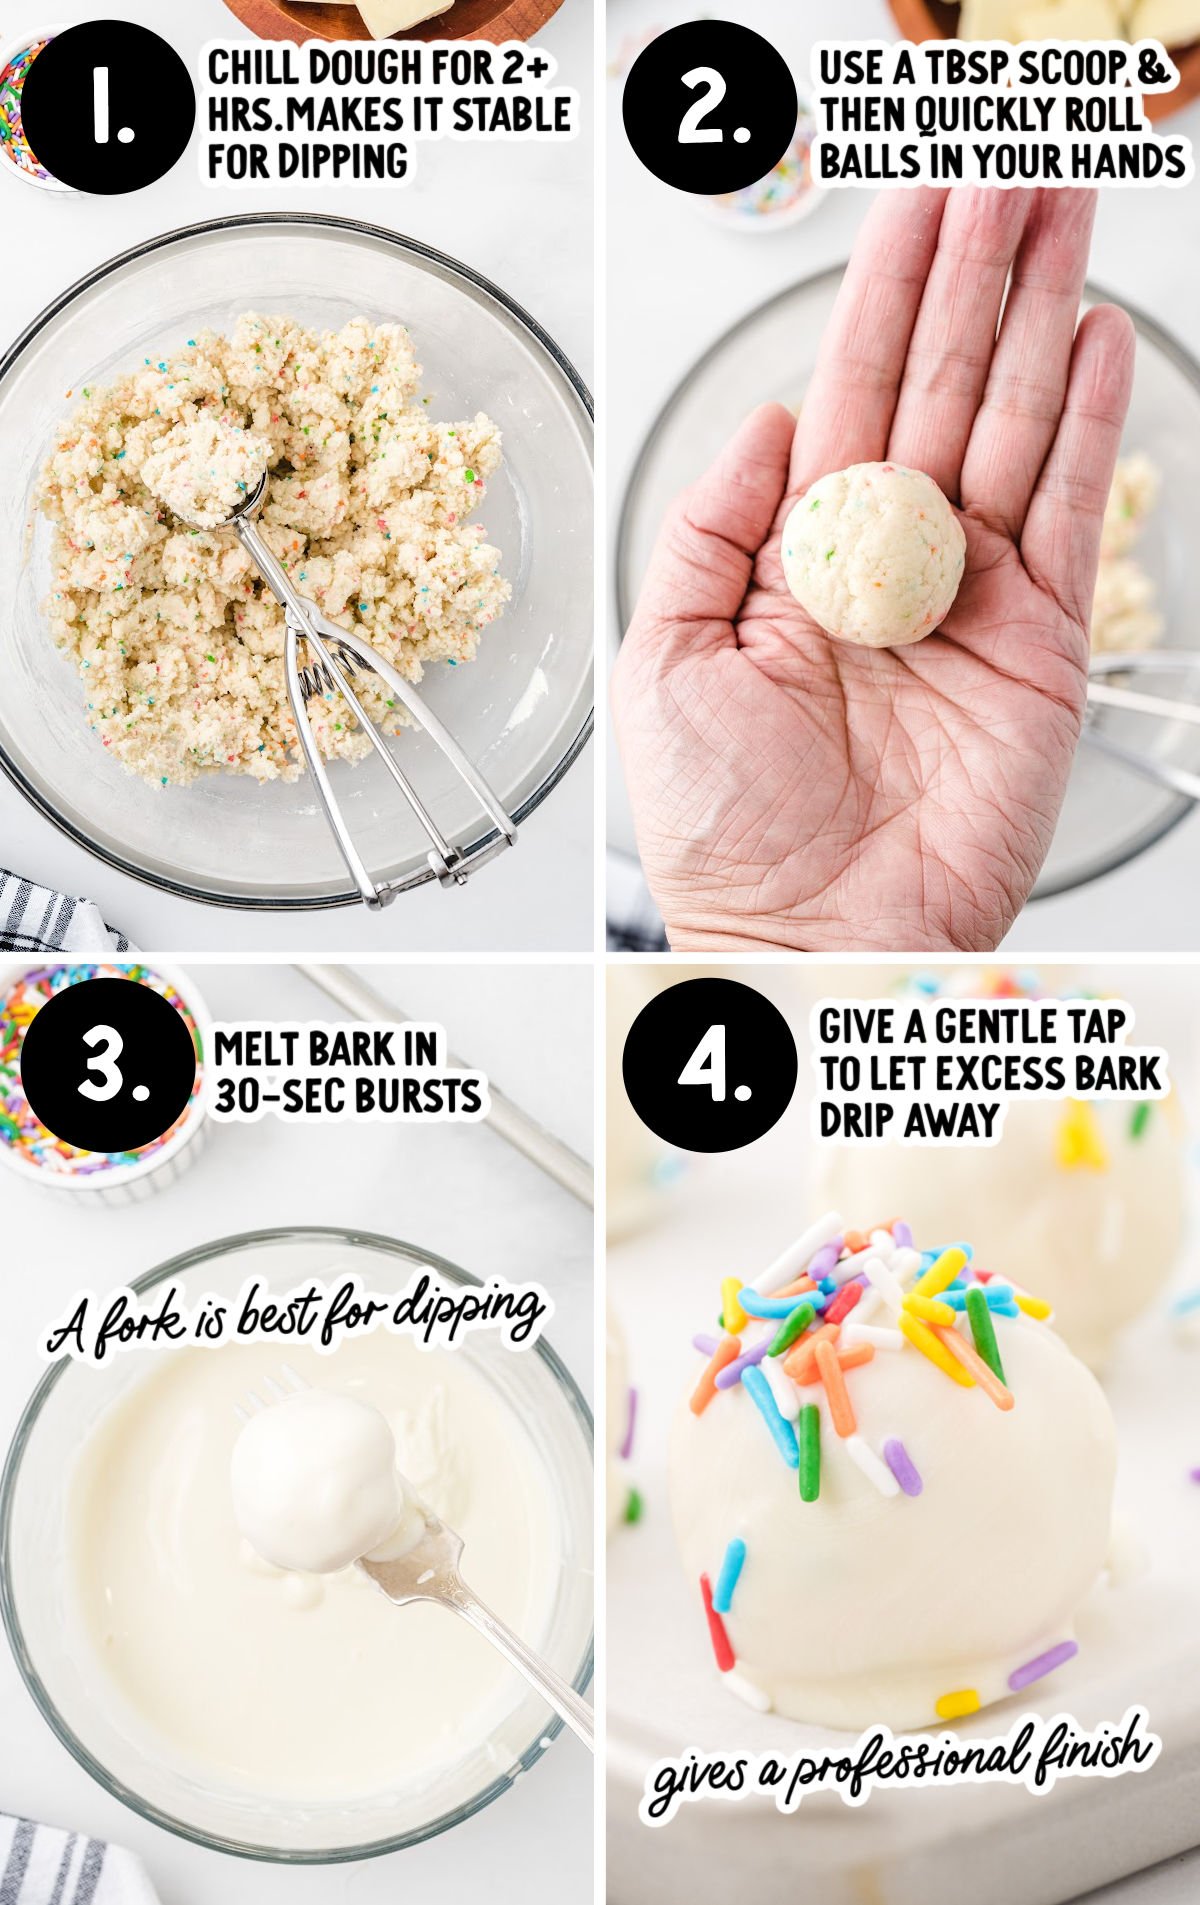
- The biggest lesson? Patience with the chill time. It’s tempting to rush, but soft filling leads to truffles that collapse when they hit the warm coating. Letting the mixture chill for two full hours — or overnight if you can — makes rolling effortless and ensures they dip without falling apart.
- One of my favorite shortcuts is using a one-tablespoon cookie scoop. It’s a total timesaver. The mixture releases cleanly, giving you evenly sized portions that only need a quick roll in your hands before they’re ready to coat.
- When it comes to dipping, I’ve learned the key is to melt almond bark slowly. Short 30-second bursts in the microwave, with stirring in between, keep it smooth and glossy. Overheating leads to clumps or streaks — something I had to figure out the hard way in my early batches.
- Finally, coating is all about technique. I set each truffle on a fork, dip, and give a gentle tap to let the excess drip away. This step is what creates that smooth, professional finish instead of a thick, uneven shell. And if I notice bare spots? A quick spoonful of warm almond bark over the top fixes them in seconds.

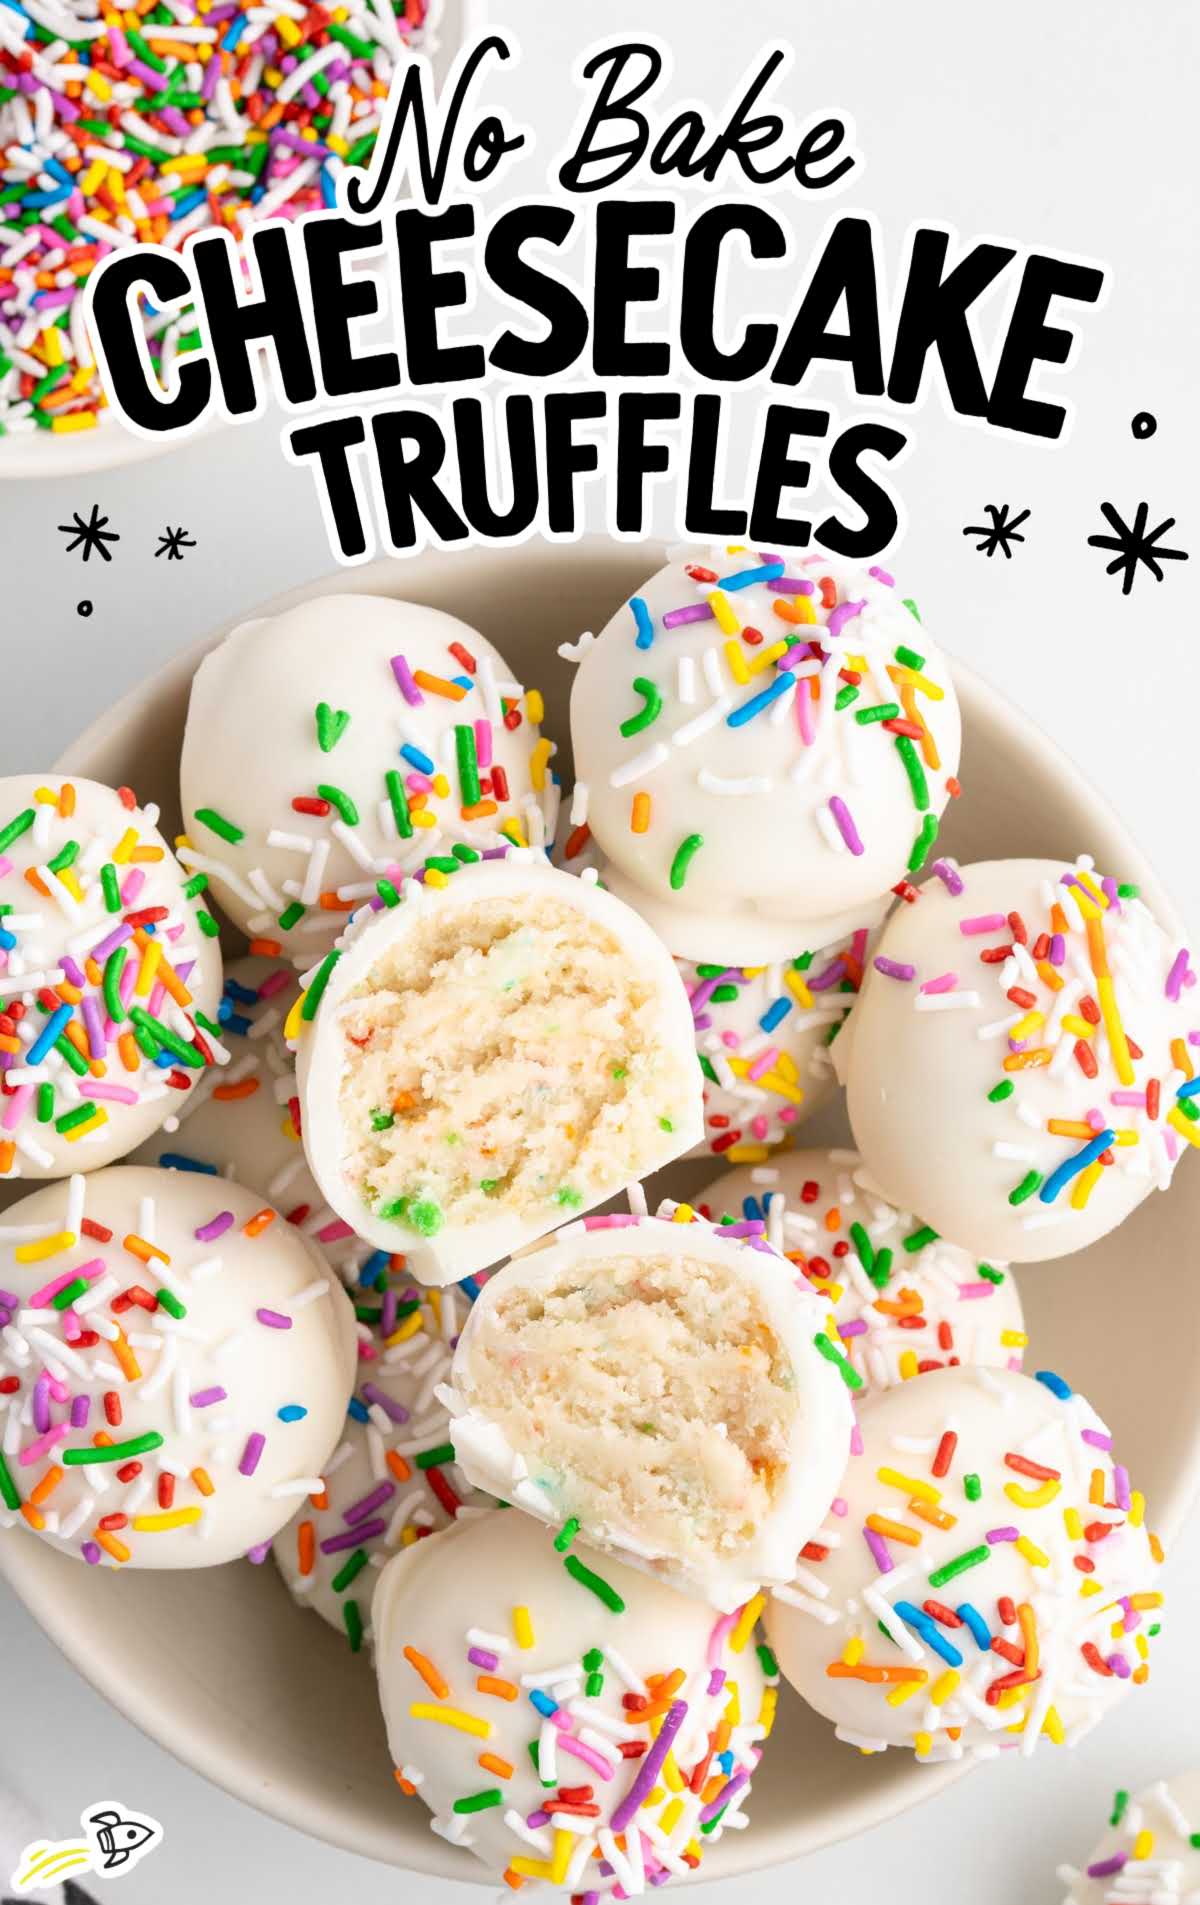
No Bake Cheesecake Bites
Ingredients
- 15.25 ounce Funfetti cake mix
- 8 ounce cream cheese, softened
- 8 ounces white almond bark, optional coating
- colorful sprinkles, optional topping
Instructions
- Before adding the cake mix, it is important to heat treat the dry cake mix. Pour the dry cake mix into a medium-sized heat-safe bowl. Microwave the cake mix in two 30-second intervals, stirring after each interval. Allow the cake mix to cool completely before mixing into the cream cheese.
- Using a medium-sized mixing bowl and a handheld mixer on medium-high speed, beat the cream cheese for 2 to 2½ minutes until completely smooth.
- Sprinkle the dry cake mix over the top of the cream cheese. Continue to mix just until the dry cake mix is well incorporated.
- Tightly cover the cream cheese mixture and chill in the refrigerator for 2 hours.
- Line a baking sheet with parchment paper. Set it aside.
- Using a 1 tablespoon cookie scoop, scoop the cheesecake dough. Roll into a ball and set the cheesecake bites onto the prepared baking sheet. Repeat the steps.
- Using a heat-safe medium-sized mixing bowl, heat the almond bark in the microwave in 30-second intervals until the almond bark is completely melted and smooth.
- Roll the cheesecake bites in the melted almond bark. Place the coated cheesecake bites on the fork and gently tap any excess coating off. You can also use the spoon to pour the almond bark over any bare spots on the cheesecake bites.
- Return the coated cheesecake bites on the prepared baking sheet, and sprinkle ½ to 1 teaspoon of the colorful sprinkles on top.
- Once all the cheesecake bites are completely coated and sprinkled, return them to the refrigerator until ready to serve.
Notes
- Make sure you are using room-temperature cream cheese so that you don’t end up with lumps in your mini cheesecake bites.
- You can allow the uncoated cheesecake bites to sit overnight in the refrigerator before the next step. The cake mix will expand, and the almond bark may crack if you coat the bites too soon.
- If you would prefer to use white or milk chocolate to coat the bites, you can melt them the same way in the microwave in place of the almond bark.
Nutrition
Serving Ideas
These cheesecake truffles are the kind of dessert that can be dressed up or kept casual, depending on the occasion. I’ve served them straight from the fridge for family movie nights, and I’ve also plated them on tiered stands for showers and holiday parties — they shine either way.
For the best texture, I recommend serving them slightly chilled but not rock-hard. Take them out of the refrigerator about 10–15 minutes before serving so the centers soften just a touch while still holding their shape.
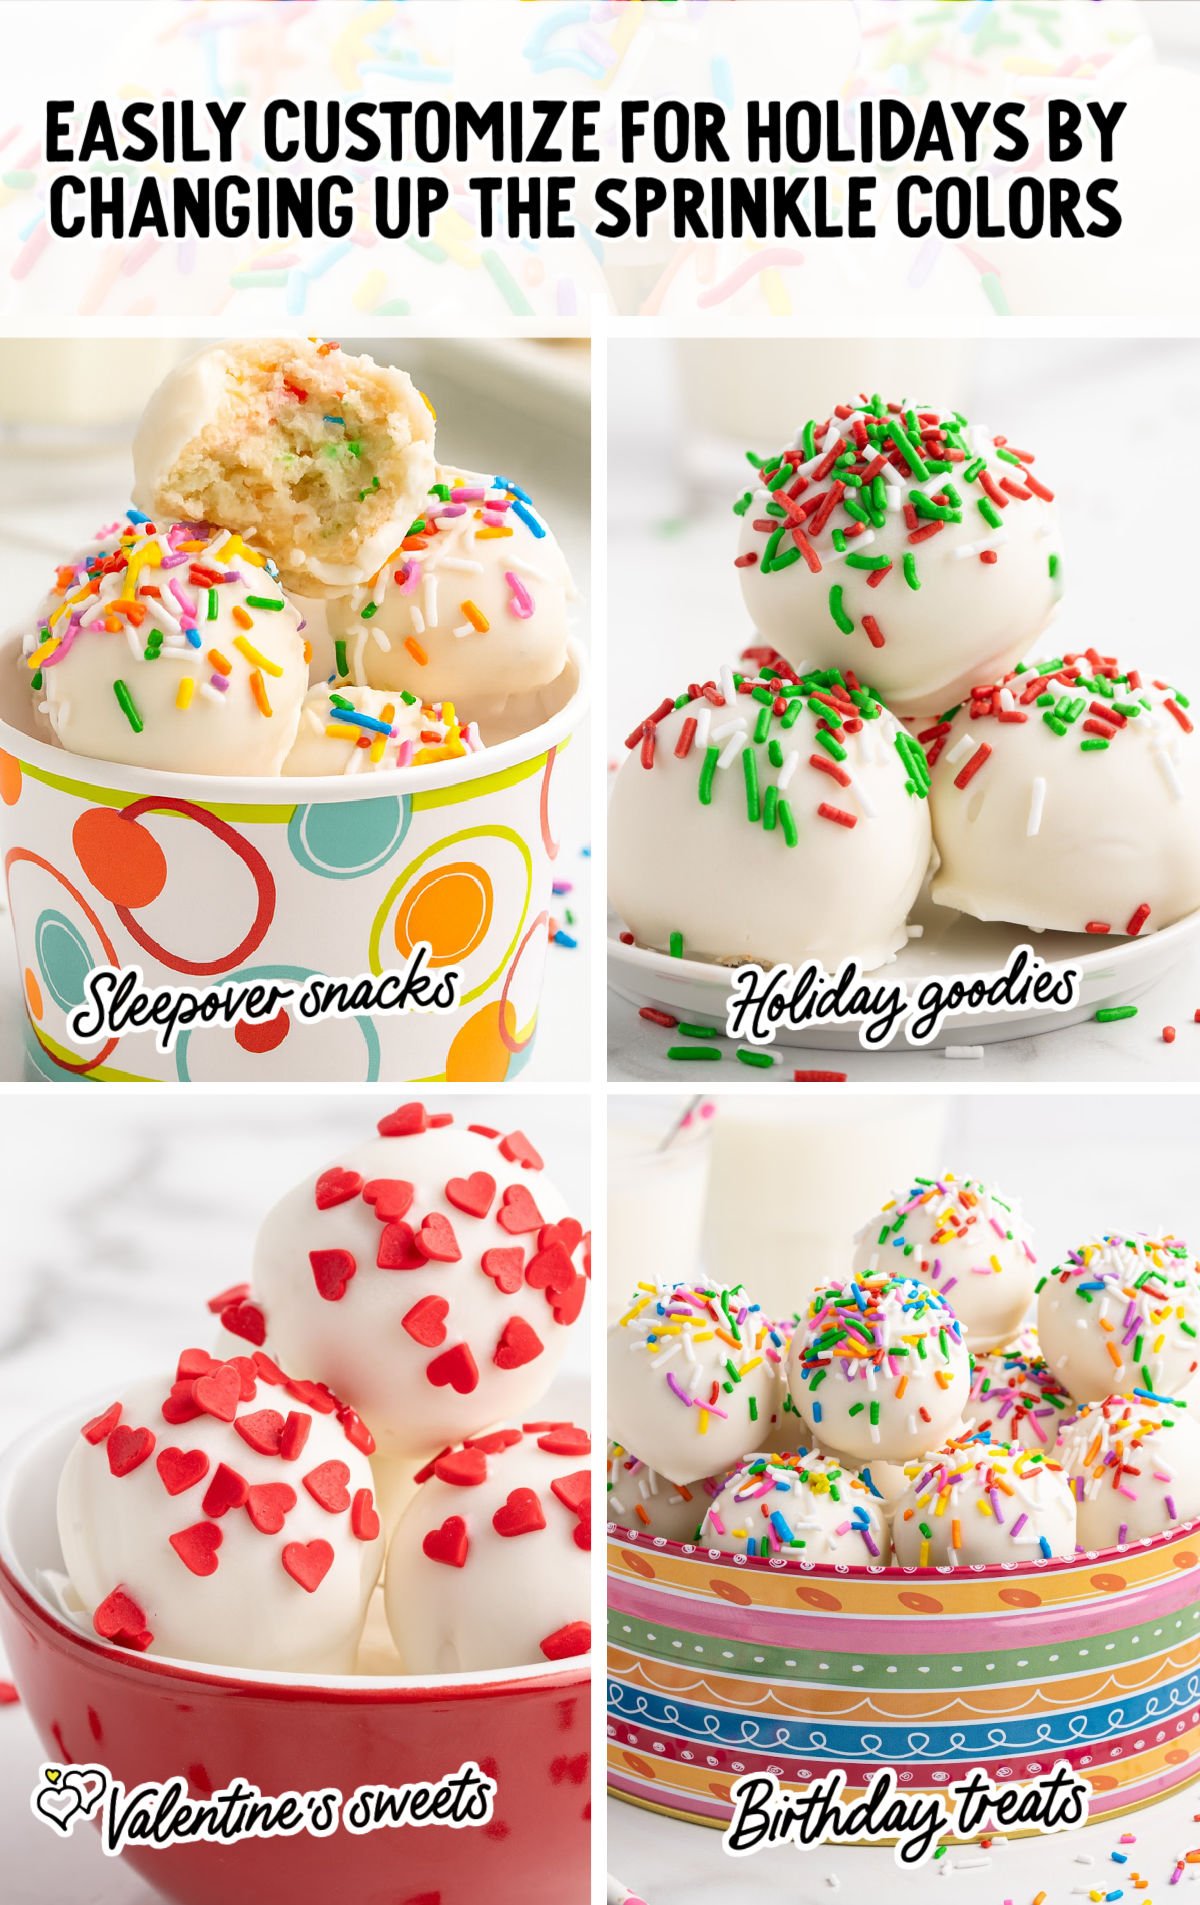
Sleepover Snacks: Pack them in colorful cups for an easy grab-and-go treat during movie nights or sleepovers.
Holiday Goodies: Use red and green sprinkles to make them a cheerful addition to Christmas dessert trays.
Valentine’s Sweets: Decorate with red heart sprinkles and serve in a pretty bowl for a sweet and festive holiday dessert.
Birthday Treats: Pile them high in a festive dish with rainbow sprinkles—perfect for kids’ parties or celebrations.
Storing These No Bake Mini Cheesecake Truffles
These truffles store beautifully in the fridge or freezer, making them an easy party prep dessert. They will keep in the fridge for up to five days or freeze for up to two months.
To maintain texture, store the truffles in an airtight container. This prevents condensation and keeps the almond bark coating from softening.

More Truffle Recipes


Comments
Gloria says
Totally delicious!
les says
why do you have to pre heat the cake mix in microwave.
Layne Kangas says
It’s recommended to heat raw flour/cake mix before consuming.
Audrey says
If you are using a gluten free cake mix, do you need to microwave it first?
Lorie says
Amazing flavor,,love them all